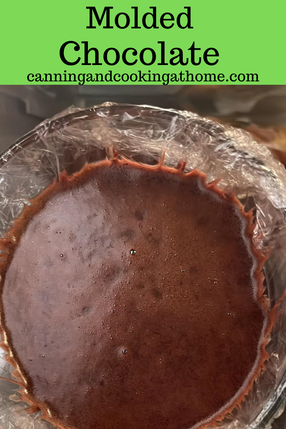
 Taste testers claim this is the most delicious, smoothest chocolate thing they’ve ever eaten. Bakers can use this for desserts, tarts and candy making - Enjoy! (Guest Post) JD Provence Formed (Molded) Chocolate Ingredients: 1/4 Pound Chocolate Chips, ground to powder 3/8 Cup Boiling Water 1 Tablespoon Powdered Milk 1 Tablespoon Unflavored Gelatin Powder Directions:
0 Comments
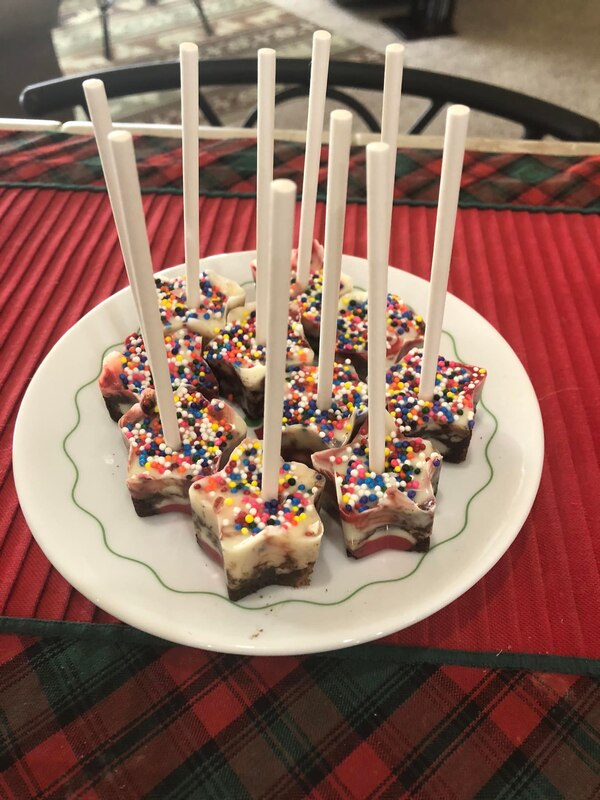
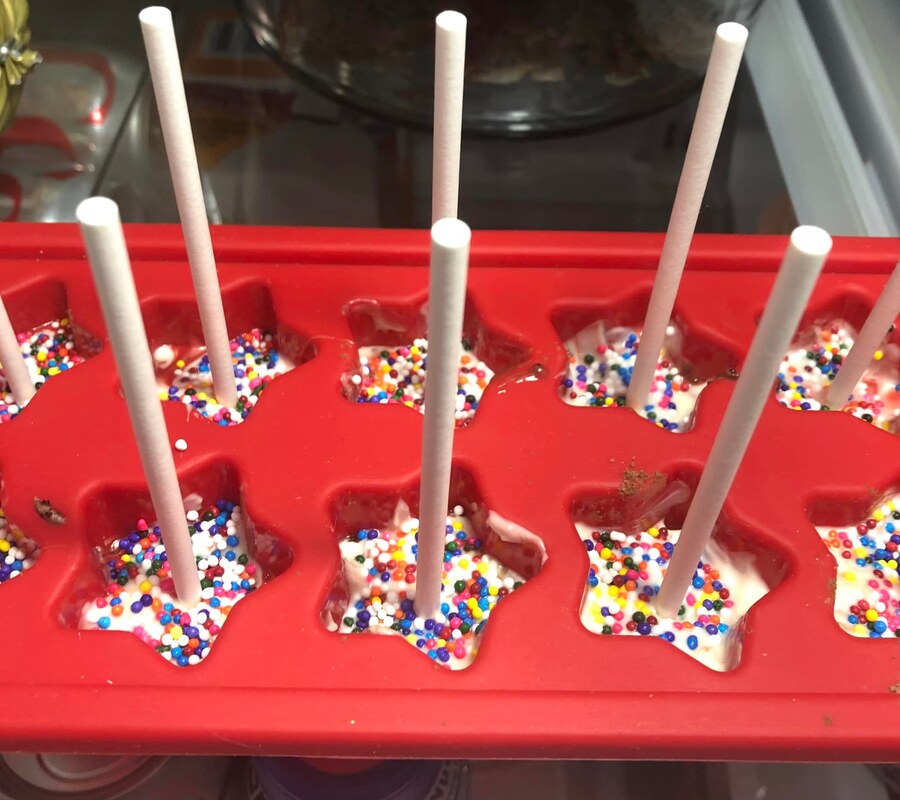
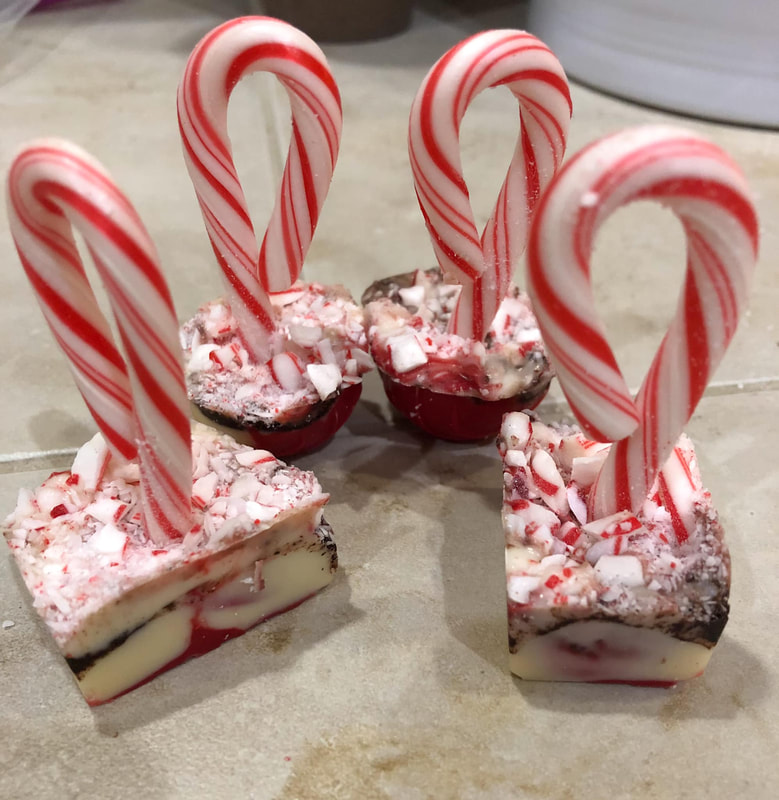
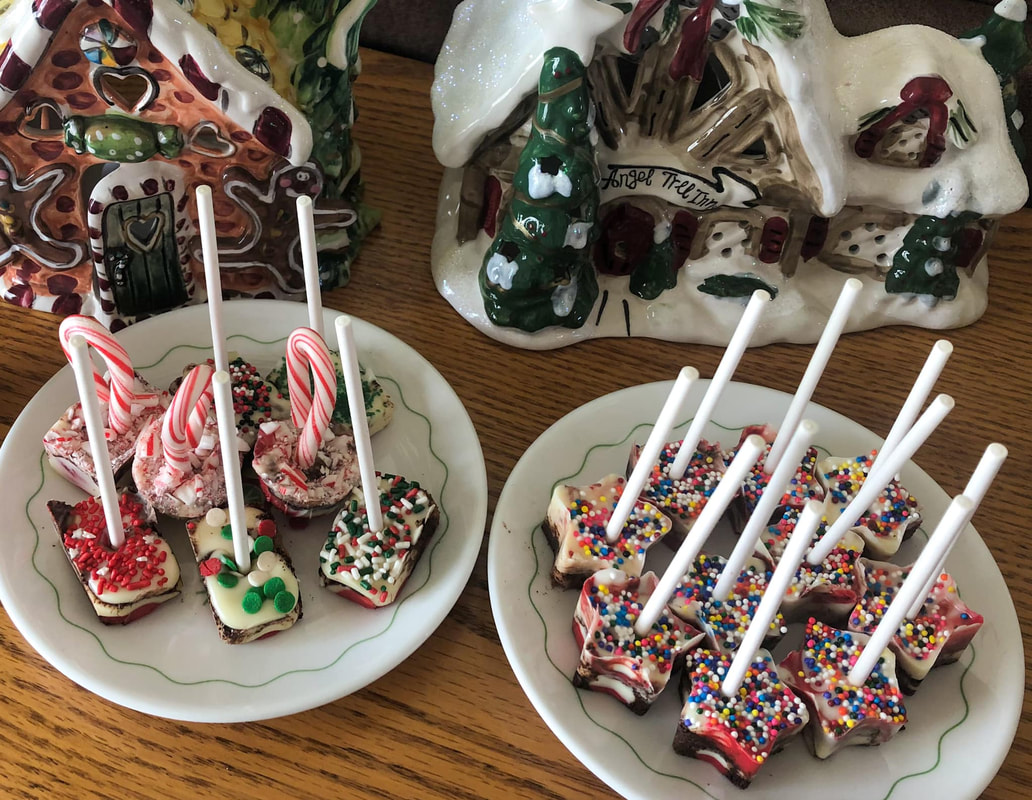
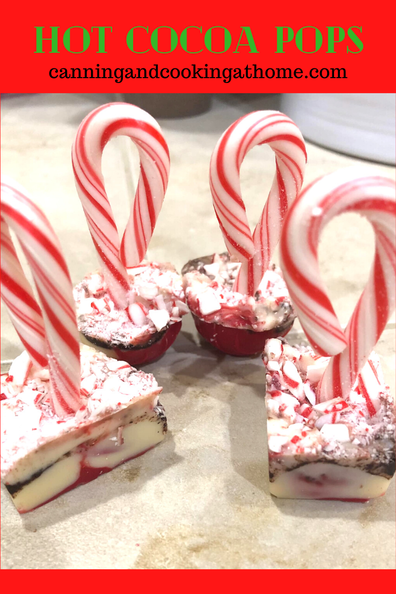 I was trying to figure out an easy recipe for a hot cocoa treat that used my candy molds. This recipe worked great. If you don't have candy molds you can use bathroom sized dixie cups, or even smaller muffin tins (make sure to spray with non-stick so they release once chilled) Remember too that your choice of "pan" can change the final yield. Enjoy! Diane Hot Cocoa Pops *just stir one pop into 8 ounces of hot milk and Voila! Hot Cocoa... Ingredients
Instructions
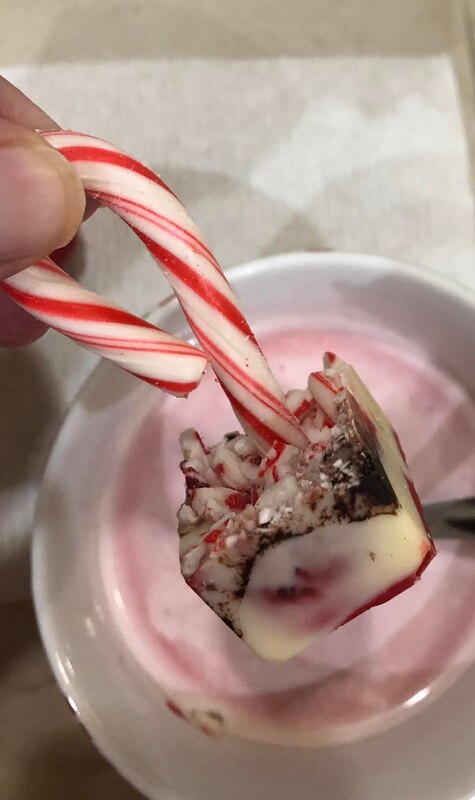
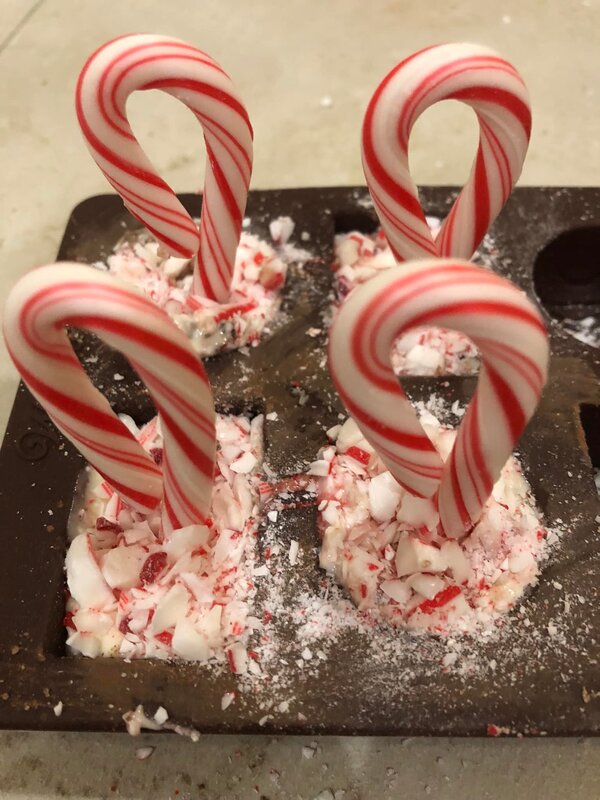
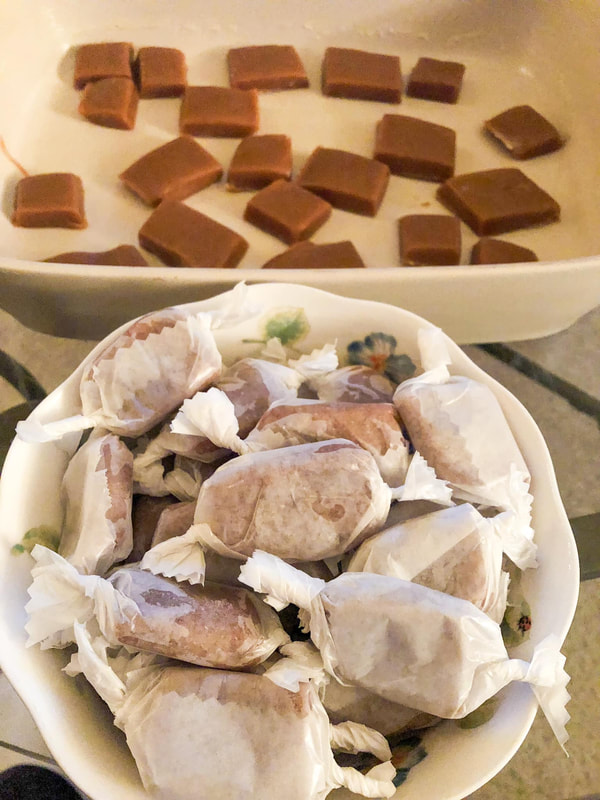
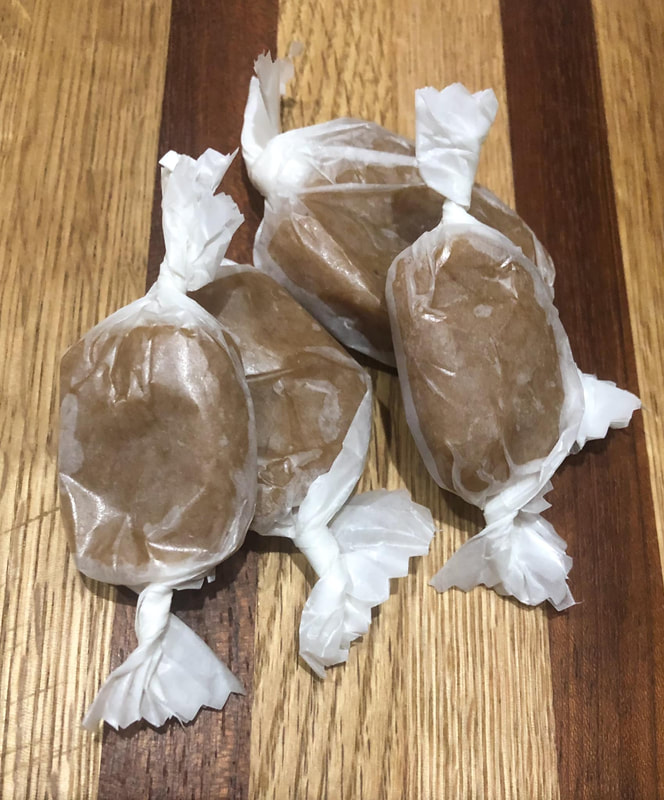
Kitchen TIPS: Do not store your finished pops in the fridge - they don't like condensation. The finished pops will be good for up to three weeks wrapped on counter. I add layers of just white chocolate but, if doing so, let your first pour chill first before adding the white chocolate layer. Add your toppings last and use them to help secure the stirer sticks/candy canes. For the Holidays made the above recipe and then I also I took some melted red candy melts and layered white chocolate in and a little of the hot cocoa mixture in between layers. 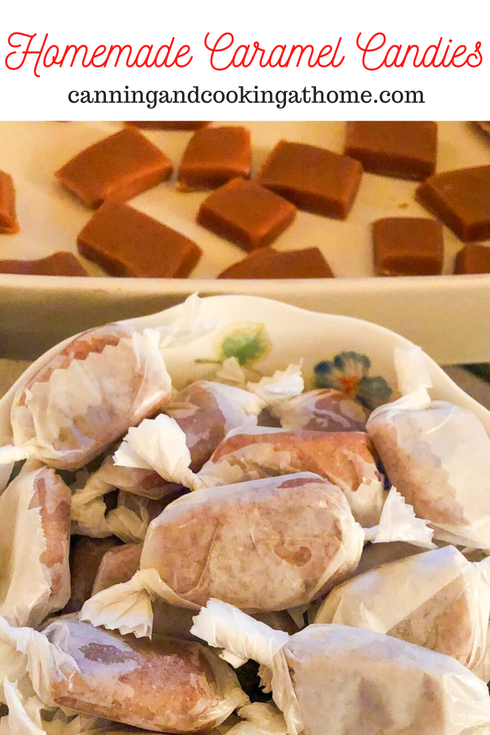 This was my first time making homemade caramels. I've made toffee and made various caramel sauces but, never candy. My friend gave me her recipe for "non-sticky" caramel and I thought I'd give it a go. This recipe was not only easy - its tasty!! It's great for hostess gifts and treat bags! Enjoy! Diane Homemade Caramel Candies Needed: *Candy Thermometer or Instant Read *9x13 buttered Pan *Wax paper or candy wrappers (3x3) Stirred in on heat: 1 Cup unsalted butter 1 can sweetened condensed milk, 14oz. 1 cup light corn syrup 2 cups brown sugar Stirred in off heat: 2 teaspoons vanilla extract 1/4 teaspoon salt Directions: Lightly coat a 9x13 pan with butter and set aside. In a large saucepan over medium heat on stovetop melt together the butter, condensed milk, corn syrup and brown sugar. Make sure to use a rubber:silicon spoon as your making candy and the mixture will get very hot. Once your mixture has melted down, increase to a simmer and stir constantly until your mixture reaches "softball stage" on your instant read or candy thermometer ((between 235 - 245 F)) You will aim for the lower end range if you are at a higher altitude and aim for the higher end of range if you are a lower altitude. Once you hit "soft-ball stage" remove your mixture from heat and stir in the vanilla extract and salt. Pour mixture into the buttered 9x13 pan. Let cool on countertop completely before cutting into squares. Wrap in individual pieces of wax paper if preferred. I cut my wax paper into 3x3 squares to wrap caramels and twist ends. You can buy cellophane caramel candy wrappers online, which seem to be preferred as they won't tear when twisting. I varied the sizes of my caramels and my yield was approx 70 caramels. If you cut all yours into 1 inch squares, you'll get approx 115 in total. 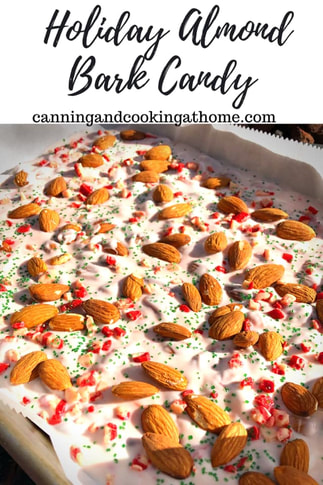 You know what's nice? this recipe is easy! As easy as candy making gets! All you need is some Vanilla Almond Bark from the baking aisle of your local grocery store (it comes in a 24oz brick of large cubes) it also comes in Chocolate (as in looks and tastes like milk chocolate) and the Vanilla looks and tastes like white chocolate. Bark doesn't use cocoa butter as chocolate does, Barks use vegetable fats. Barks are right up there with 'Candy Melts' in the workability of the product once melted. I prefer microwaving the Bark. Follow the directions on the package but, basically you melt for 1 minute at high, stir and then heat in 12 second intervals, stirring in-between until completely melted. Melting is usually 2 minutes total cooking time. You can also add colorings and flavorings. You cannot (must not) use water based liquids or the Bark chocolate will seize. Oil based food colorings are best for this application. Wilton "Candy Colors Food Colorings" work great for candy making! When making a batch of Vanilla, white chocolate almond bark for this recipe today, I added in some peppermint white chocolate chips I had on hand - and then added some on top along with green sprinkles for the Christmas Holiday. Again, you don't want to flavor or color with any non-oil based product or the candy will seize. Enjoy! Diane Almond Bark Candy Ingredients: 1/2 pound whole almonds 6 bricks/cubes of Vanilla Bark (12 oz. white almond bark) Sprinkles of your choice Directions: Toast your almonds in the oven at 350 for 10 minutes. Toasting deepens the flavor of the nuts and a step that shouldn't be skipped. Let the almonds cool while you prepare/melt the bark. Once the bark is melted, stir in three-fourths of your toasted almonds and any oil based food colorings you prefer. (optional) Pour the mixture out onto an 8x8 or 9x12 baking sheet, lined with parchment paper. Sprinkle top of bark with remaining almonds and any decorations you prefer. Press the almonds down slightly so they set into the bark and won't pop off easily. Let the entire mixture cool on your counter for 20 minutes and then place in refrigerator for a half hour. Once fully cooled and solidified, break the bark into chunks as you prefer, I break into larger pieces first and then break those in half. (Almond Bark typically comes in 12 segmented bricks per 24 ounce bag) My Holiday White & Peppermint Almond Bark pictured below: 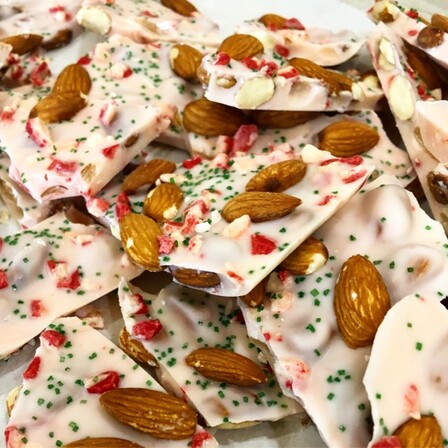 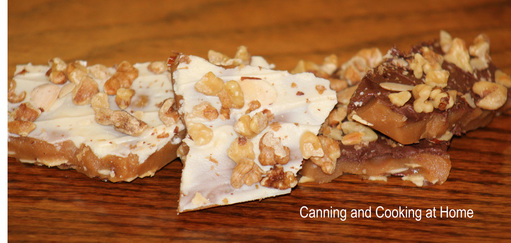 Canning has taught me the BEST Life Lesson, without me seeing it happening... I think the main lesson I learned is Patience. In my working career, everything was rush-rush, deadlines and auditors requiring strict adherence to Government and Commercial rules. I wore so many hats at work that I often felt like a clown juggling everything in the air just to keep the balls in motion... when I started Canning I was frustrated at how long every step could take: growing or buying the produce, cleaning and preparing all the items for canning and making sure to remember that Canning is a Science, not COOKING and CANNOT BE RUSHED. I always considered myself a horrible baker too! Why? because all these things need precise and quiet hands. Something I wasn't used to. I am one of "those" people that hates taking vacation because of all the work I knew I'd face upon my return, I very rarely un-clench my jaw. To this day, I detest talking on a phone. Yes, an 'Super Type A' that had earned her Masters Certs and was on my way adding another facet to my burgeoning career... and then - 'Continuing Resolution' happened. Basically, my work and the work of so many came to a screeching halt. I knew it was coming and felt lucky to have - at least - a super supportive family and husband. I remember the call, 6pm when out for dinner, it came from my Boss/President and dear friend of my company (an ex-Naval Commander) telling me no one will be returning to work the next morning. The company could not survive the 'CR' that President Obama invoked. All those years of hard work by 35 employees - flushed down the drain and left to the wind. WHO would have guessed that this horrible moment would bring calm to my life a few years later (yes, it has taken me that long to un-clench my jaw!) LOL Which brings me to in a HUGE roundabout way to making toffee!! I know, you are tired of reading this and just want the recipe but, I am making you wait and read this first to see if you have the patience to make candy? Toffee making takes time, and a watchful eye and of course, patience!! so, if you want to attempt to create the most beautiful butter toffee - you are ready for the recipe! ~Enjoy, Diane Ingredients: 2 1/3 cups sugar 2 cups Butter 1/4 cup plus 2 tablespoons water 2 tablespoons light corn syrup 1 tsp vanilla or almond extract 1 cup almond slices, toasted 1 1/2 cups chopped walnuts, toasted 1 cup semi-sweet or milk real chocolate chips 1 cup white chocolate chips *made best using a Candy thermometer Directions: Butter 15x10x1-inch baking pan; set aside. If your pan is larger, use tin foil to create a foil 'damn' to shrink the pan to the proper size so that your toffee doesn't spread too thin... Spread nuts in a single layer on a baking sheet lined with parchment paper and toast for 13-15 minutes at 350. Once toasted, remove from oven and set aside. Combine all ingredients except nuts and chocolate chips in heavy 3-quart saucepan, I used my enameled cast iron pot. Cook over medium heat, stirring constantly, until butter is melted. Reduce heat to medium-low. Cook 25-40 minutes, stirring occasionally, until candy thermometer reaches 300F or small amount of mixture dropped into cold water forms hard brittle strands. Keep in mind that your altitude will change what temperature you will need to cook to (called the Hard Crack Stage for Candy making) I am at 5250Ft. above sea level, thus my temp needs to cook to 290F. ((basic rule is to subtract 1 degree for every 500 feet above sea level that you are)) Spread toasted almonds in a single layer over your buttered, prepared baking pan. Pour mixture into prepared pan; spread to desired thickness. Sprinkle chocolate chips over hot candy, I used one side dark chocolate and one side white chocolate; let stand 5 minutes. Spread melted chocolate evenly over candy. Sprinkle with nuts. Cool at least 3 hours. Break into pieces. Store in container with tight-fitting lid, in cool dry place, up to 3 weeks. NOTE: If your toffee separates during cooking, carefully and slowly add 1/4 to 1/2 cup hot water, 1 tablespoon at a time. Stir constantly until mixture goes back together. Recipe Adapted from: LandOLakes Photos by: Diane Baker for Canning and Cooking at Home 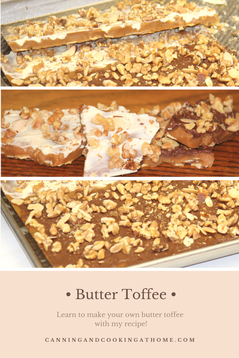 |