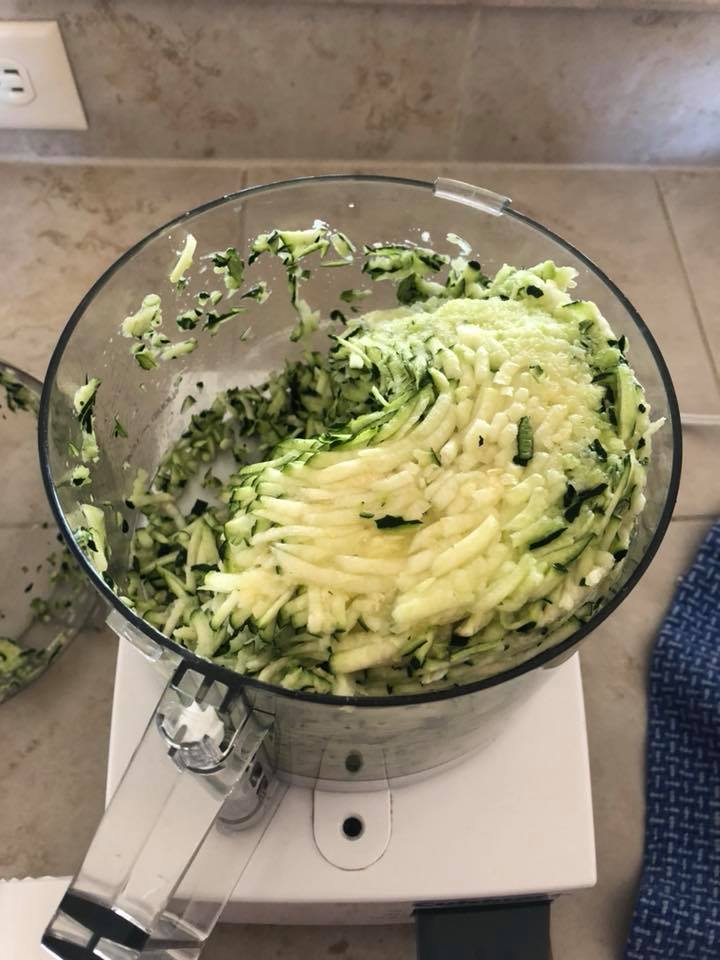
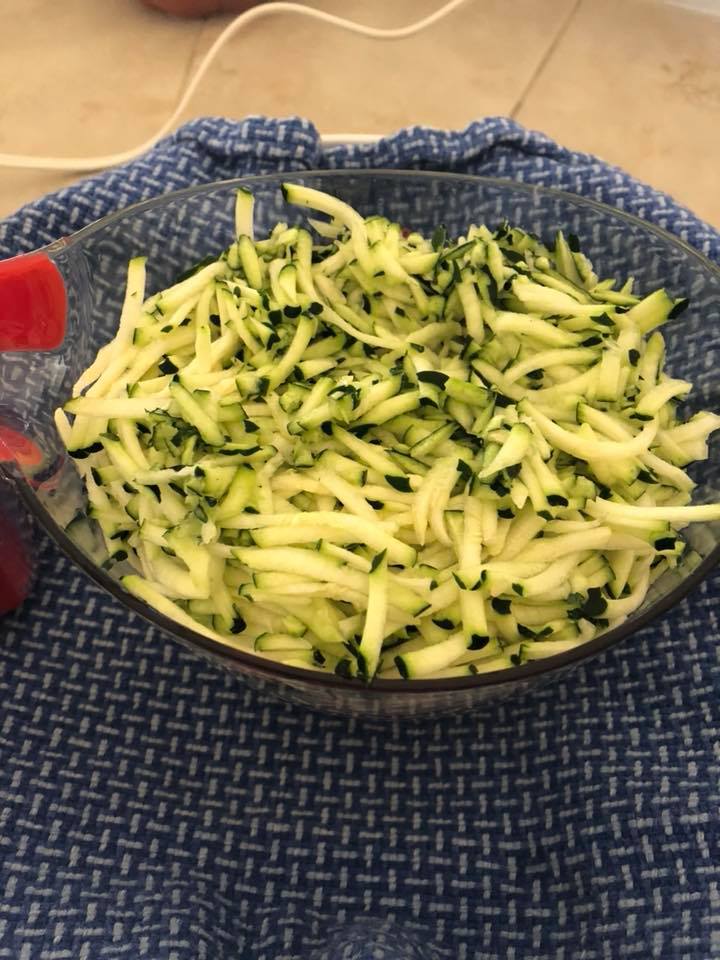
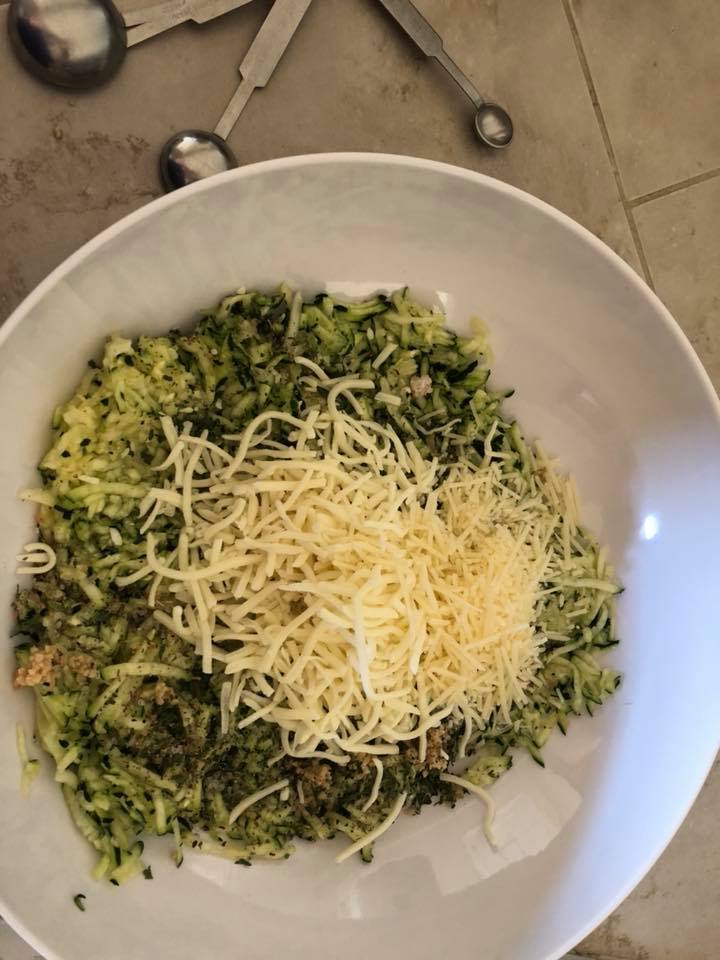
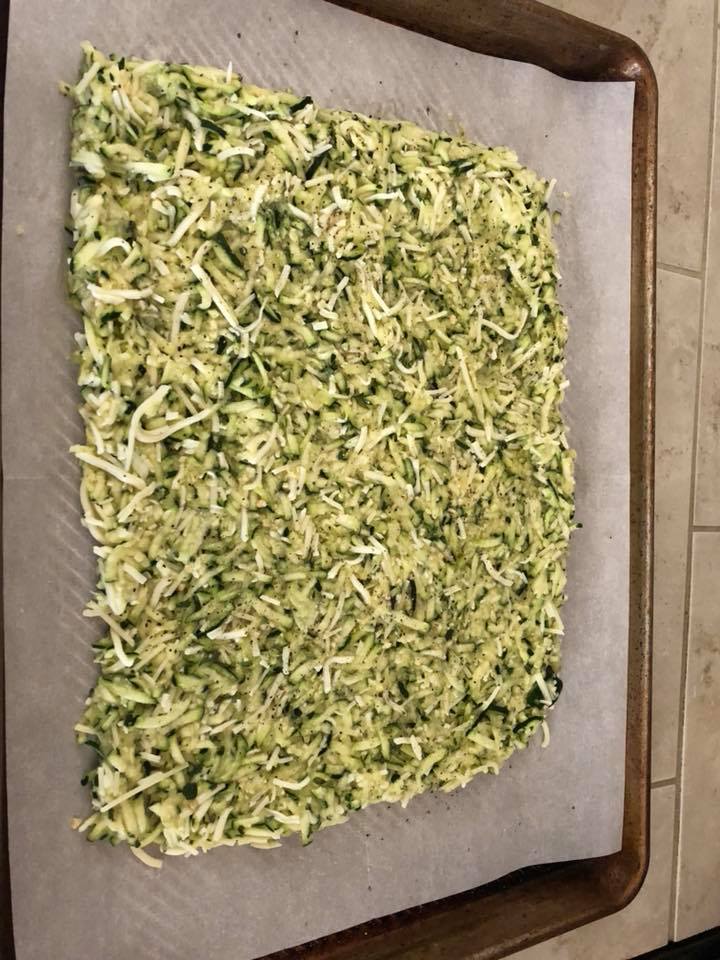
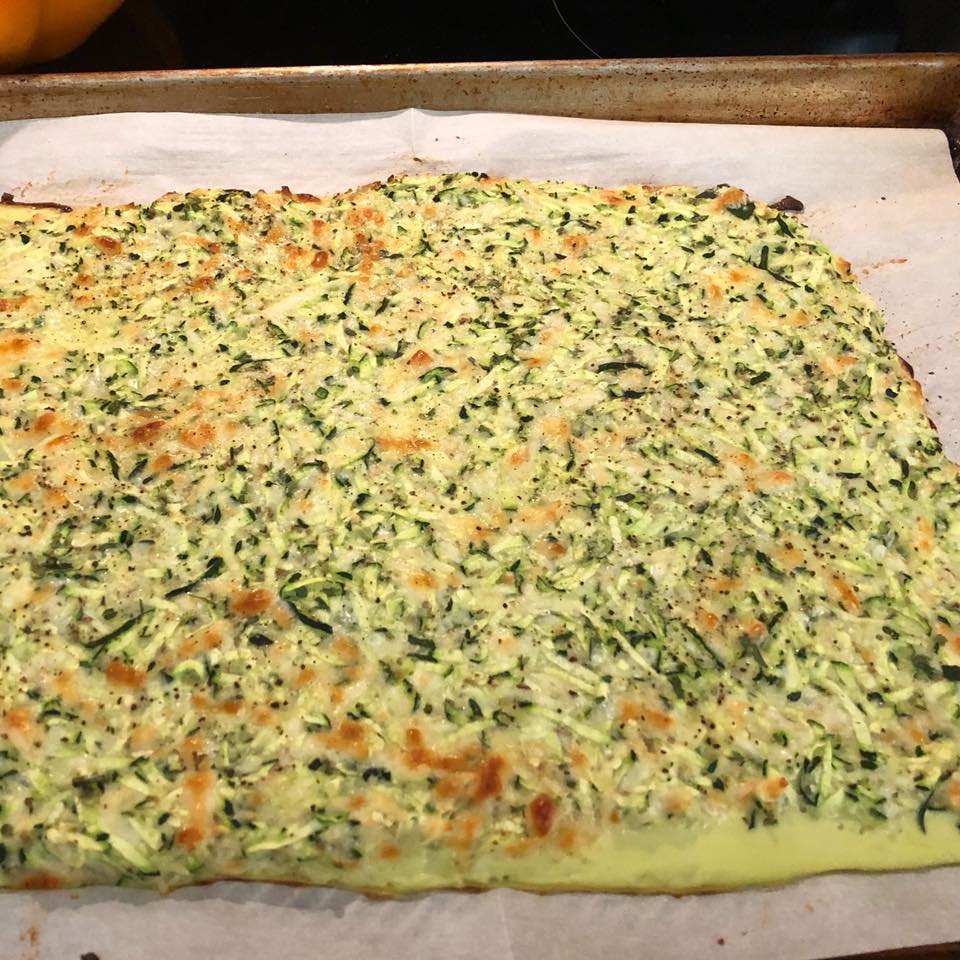
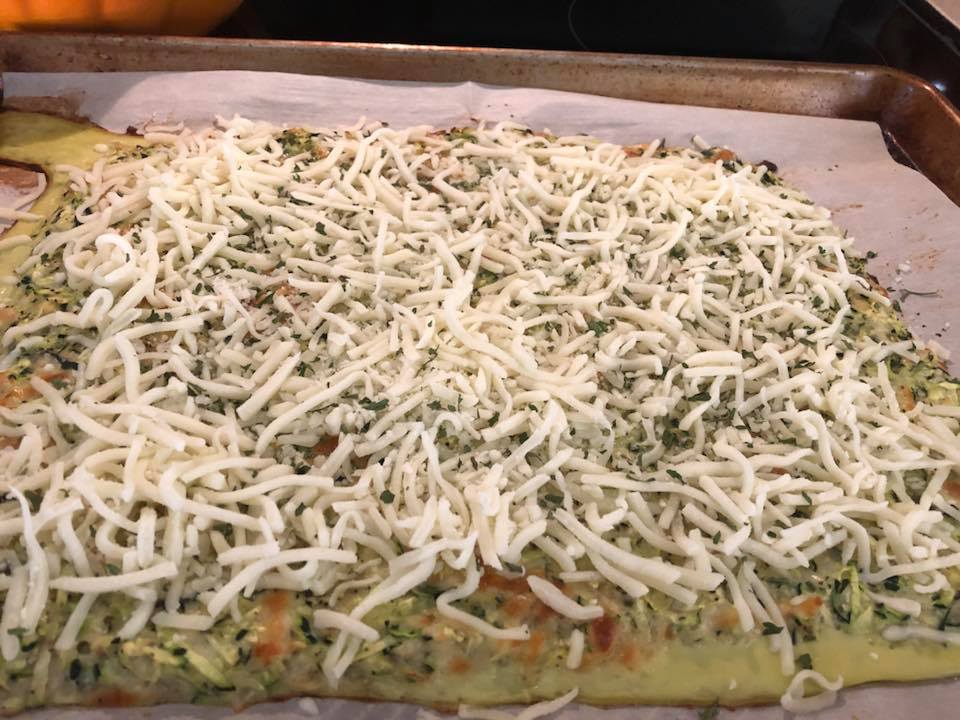
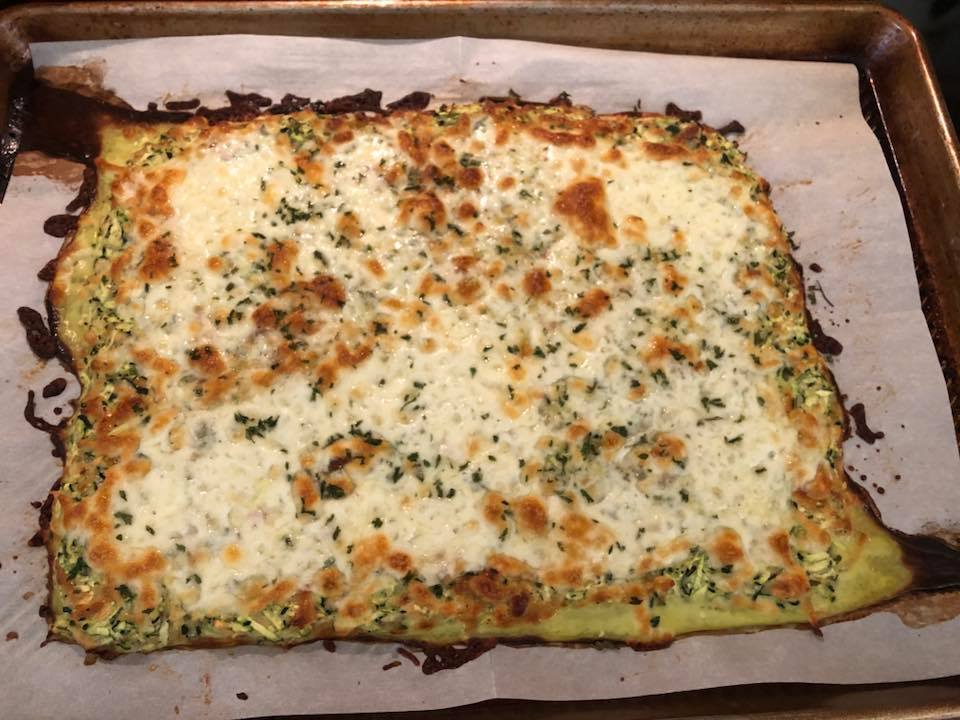
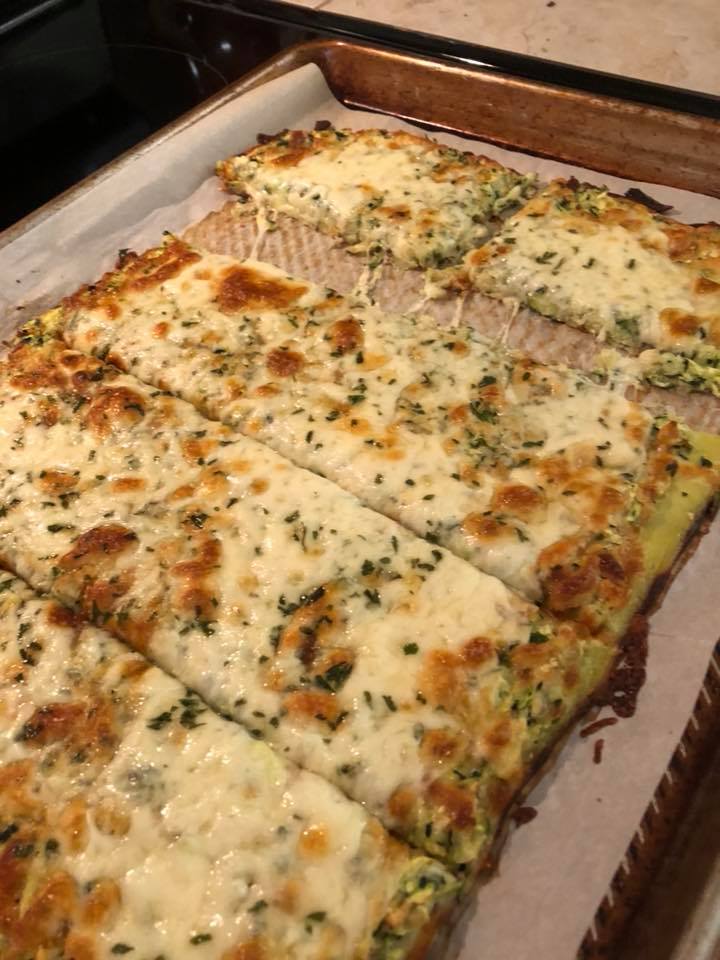
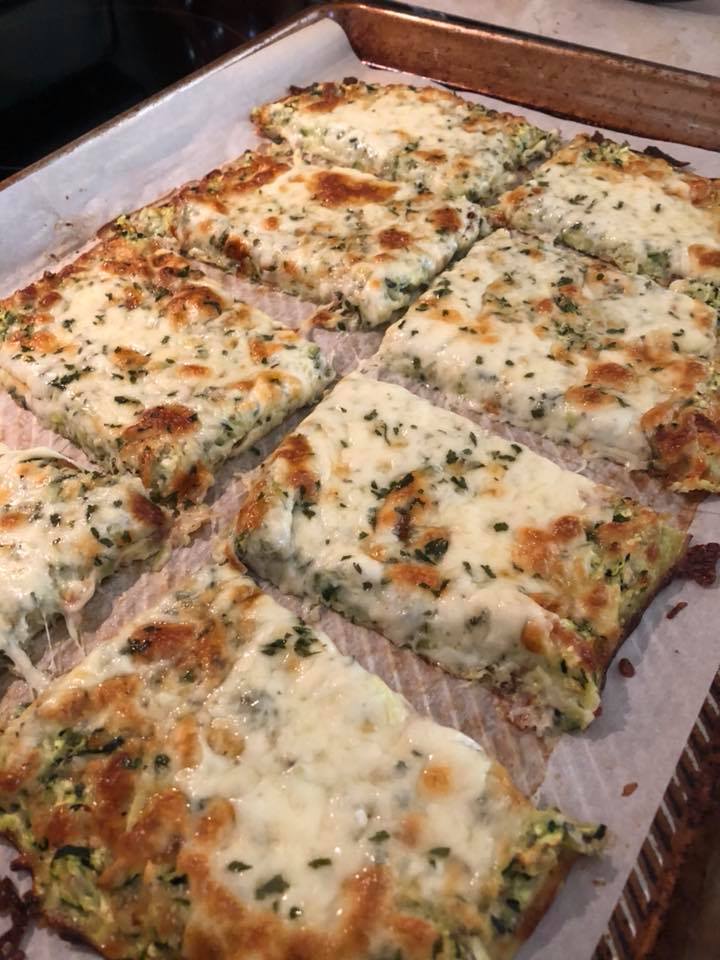
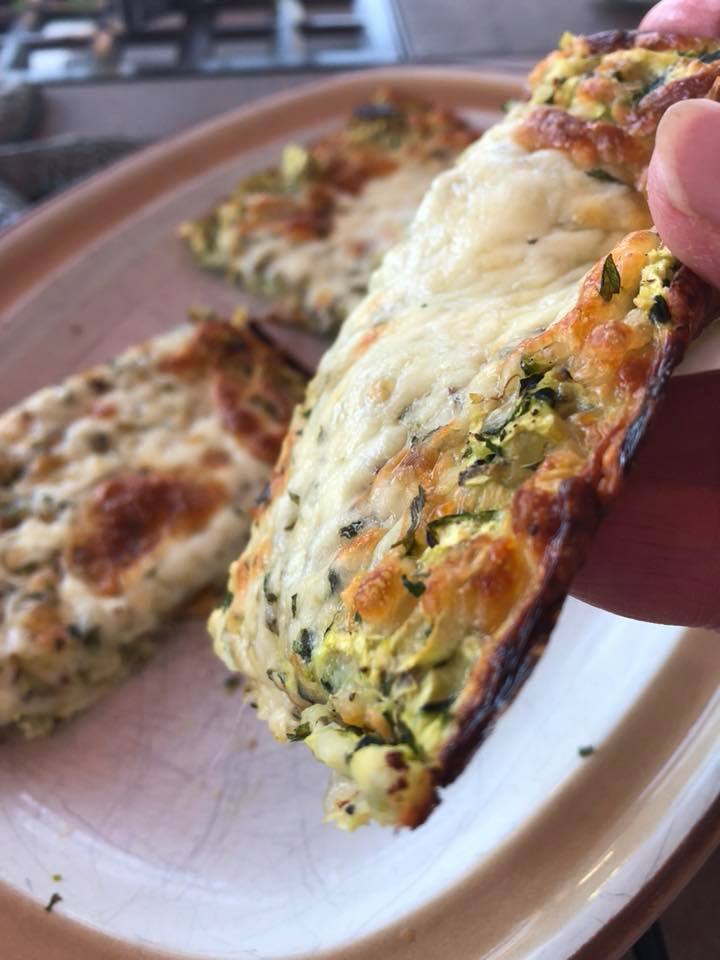
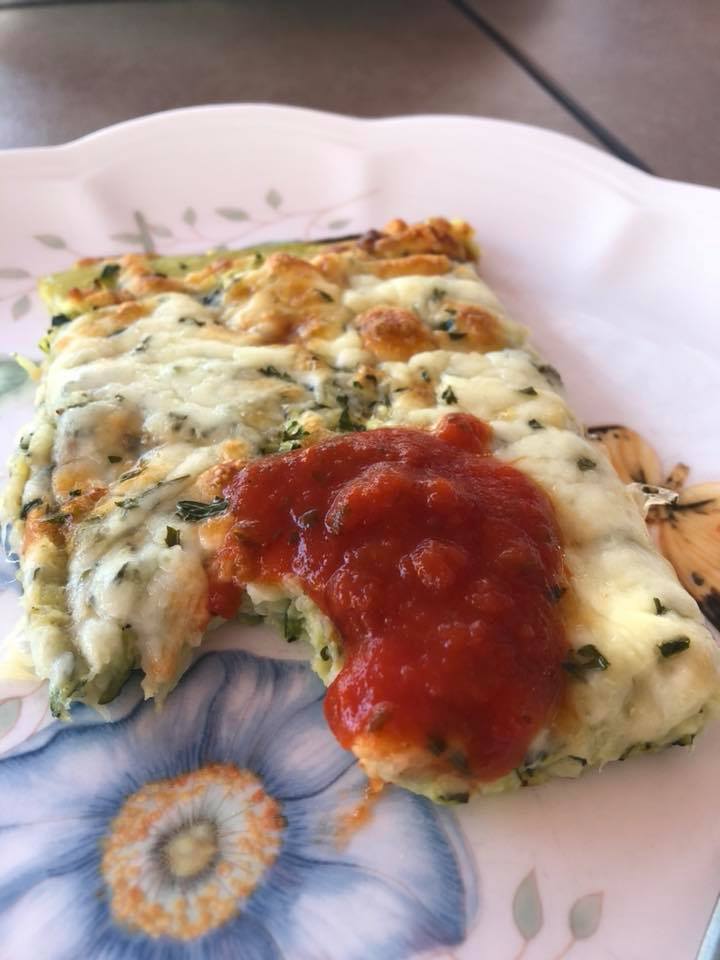
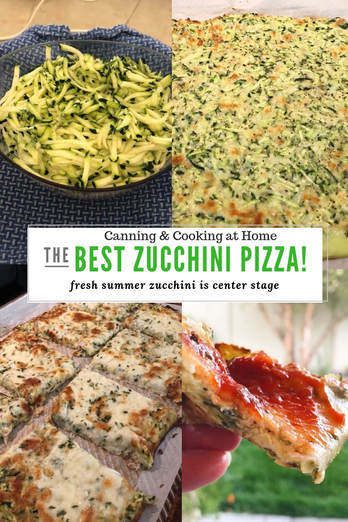
 Zucchini Pizza! I wish I could take credit for this recipe but, I cannot! My husband saw this one day and sent the recipe to me, it was from there that I gathered the ingredients and set out to bake one up - doubting the entire way that this would turn out - at all. This zucchini pizza not only turned out beautiful - its fantastic! The two of us at this for dinner and were fully satiated and enjoyed each bite thoroughly. I have always shred my garden zucchini in 2 cup portions for zucchini bread but, now I will be adding 4 cup portions to my freezer for this recipe needs to be made on a more consistent basis!! It's 'guilt-free' and again - its TASTY!!!!!!! Don't forget you can add your own twists to the ingredients but, important note: always use parchment paper to bake this on, and always wring your zucchini out really well!! I use my jelly bag in place of a kitchen towel to wring out all the excess water from my zucchini - works like a charm! Enjoy! Diane Ingredients 4 cups grated zucchini, about 3-4 medium zucchini 2 large eggs, lightly beaten 2 cloves garlic, minced 1/2 teaspoon dried oregano 3 cups shredded mozzarella, divided: reserve 2 cups for topping pizza 1/2 cup finely shred Parmesan 1/4 cup cornstarch 1 teaspoon kosher salt, or adjust to your liking 1/2 teaspoon ground black pepper, or adjust to your liking 2 teaspoons dried parsley flake: to top pizza Marinara sauce for dipping bake pizza Preheat oven to 425F Line a baking sheet with parchment paper. Using a clean kitchen towel, wring out excess water/moisture from the zucchini *important step to get a good bake! Place zucchini in a large mixing bowl, add eggs, garlic, oregano, 1 cup of the mozzarella, the parmesan, cornstarch, salt & pepper. Stir until well combined. Spread out zucchini mixture onto the prepared baking sheet and pat into a 'crust'. Bake until golden and dried out, approximately 25 minutes. Remove from oven and top with remaining mozzarella cheese, and sprinkle on the parsley. Bake once again until cheese is melted, approximately 8-10 minutes. Slice and serve with marinara. Enjoy! Diane Baker for Canning and Cooking at Home
0 Comments
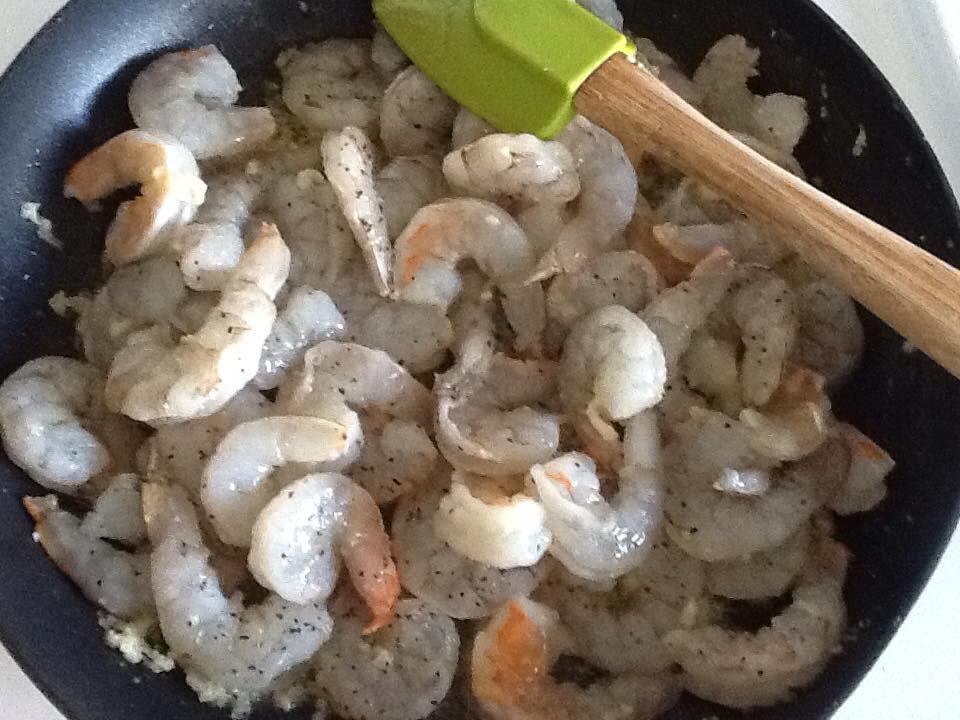
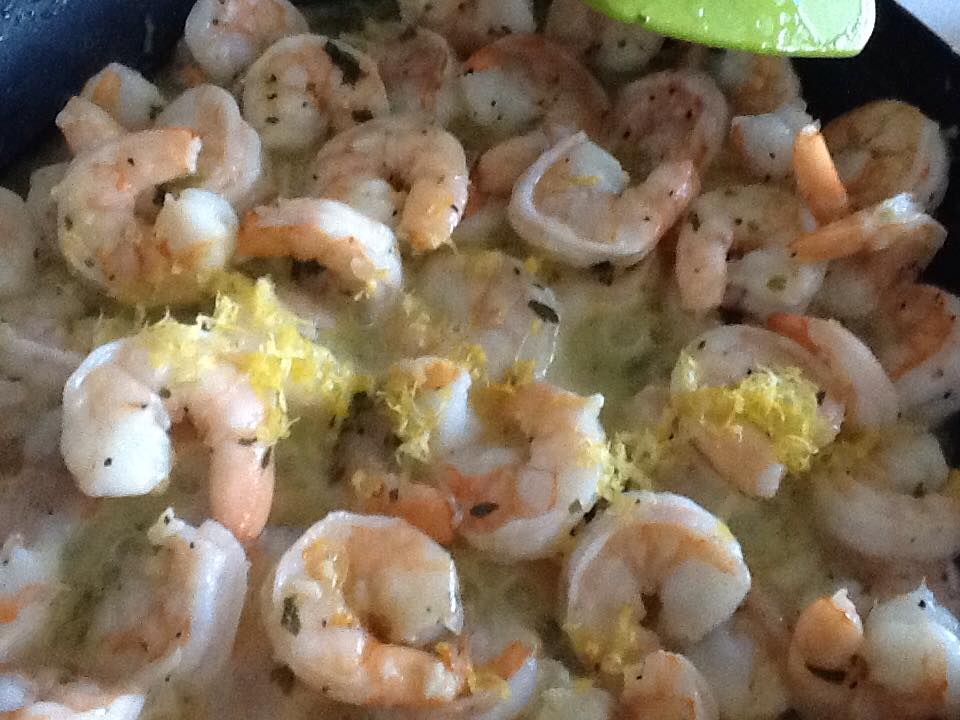
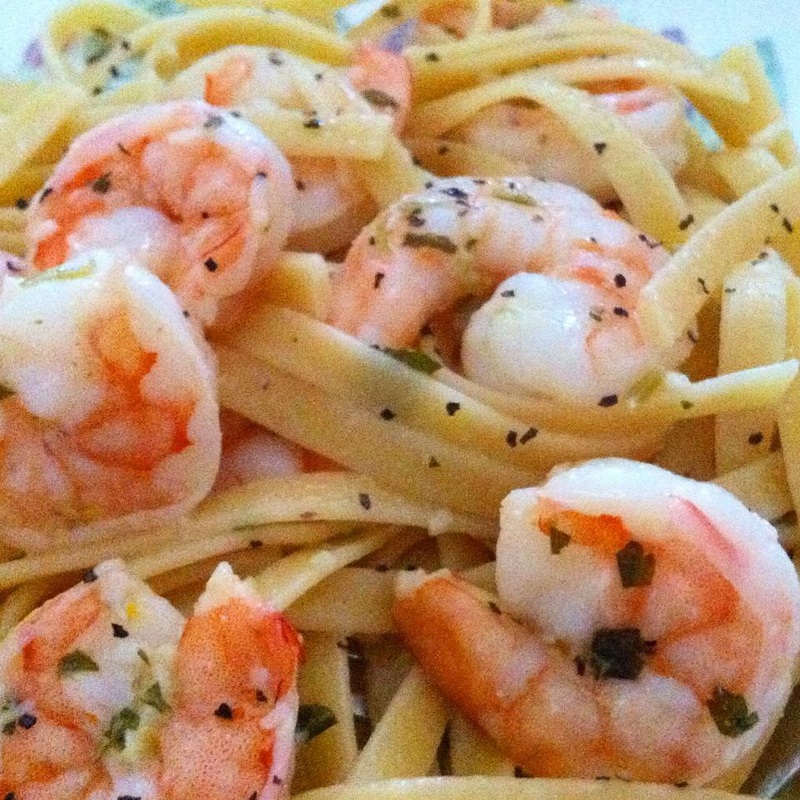
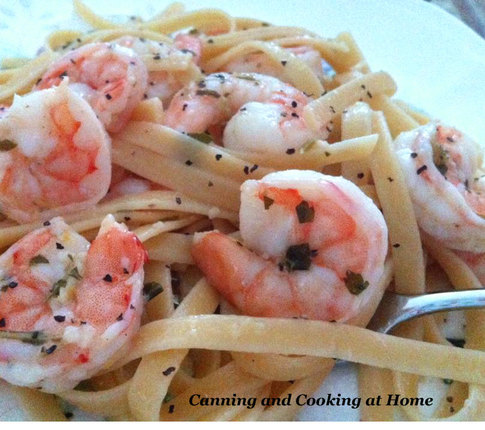 Shrimp scampi is pretty easy to make, I always have all my "shrimp mix" ingredients ready to go so that when the pasta finishes, I am done cooking the shrimp. You can cook up any pasta you prefer - it all works! Just remember that you want to cook just about 3/4 lbs of dried pasta so that there is enough 'sauce' to coat everything. Some folks are not huge fans of garlic so, you can back off on that a bit if you prefer. As well, if you do not like adding in red pepper flakes or hot chili oil - you can always add in a splash of white wine instead. I serve this dish with a simple side salad and my Homemade One Hour French Bread for a complete meal. Enjoy!~Diane Shrimp Scampi with Linguine Ingredients: Pasta: 1 Tablespoon kosher salt, added to pasta water 3/4 pound linguine pasta 1 Tablespoon butter, melted, added to cooked pasta Scampi Mix: 3 tablespoons unsalted butter 2 1/2 tablespoons good olive oil 2-4 cloves garlic, minced (depending on your taste) 1 pound large raw shrimp (about 18 shrimp), peeled and de-veined 1 1/2 teaspoon kosher salt 1/4 teaspoon freshly ground black pepper 1/3 cup chopped fresh parsley leaves 1/2 lemon zest, grated freshly squeezed lemon juice from one large lemon pinch of red pepper flakes, or dash of red chili oil (optional) Directions: Prepare and cook pasta for 7 to 10 minutes, or according to the directions on the package. Mix in the 1 Tbs of melted butter to cooked pasta once drained, Set aside, covered until ready for shrimp. (try to time it so that the pasta is ready when you are done cooking the shrimp.) Prepare the shrimp mix in a large, heavy-bottomed or non-stick pan. Melt the butter and olive oil together over medium heat. Add the garlic. Saute quickly for just about 1 minute. Add the shrimp, salt, and pepper and saute until the shrimp just turn pink, about 5 minutes, stirring often. Turn heat to low, Add in the parsley, lemon zest, lemon juice, and red pepper flakes. Toss to combine. Remove from heat. Immediately add the shrimp and sauce, to the cooked pasta, toss well, and serve. Recipe and Photo by: Diane Baker for Canning and Cooking at Home  Pickled Grape Tomatoes with Rosemary & Garlic
Ingredients 2 Quarts Grape tomatoes 1 tsp Canning/Pickling Salt 1 Cup White wine vinegar 1 Cup White vinegar - 5% acidity 1 Quart Water 4 Cloves Garlic, peeled, sliced in half 4 Sprigs Fresh rosemary Yield: 4 Pints Directions: 1. Wash the grape tomatoes and drain them to dry. Using a toothpick, prick each tomato in 2 opposite spots (this helps prevent splitting.cracking) 2.Combine the salt, white wine vinegar, vinegar, water, in a medium saucepan and bring to a boil, then simmer for 10 minutes. 3. Pack the grape tomatoes in hot 1-pint sterile jars and leaving a 1/2-inch headspace. Ladle the warm pickling liquid leaving a 1/2-inch headspace, and be sure to add two cloves of garlic to each jar and at least one rosemary sprig. 4.Remove any air bubbles, bring back to proper head-space if needed. Add the two-piece lids and rings onto each jar. Process the jars in a boiling-water canner pot with 1 to 2 inches of water covering the tops of the jars for 10 minutes or according to your local altitude . 5.Turn off heat and remove lid from pot, allow the jars to sit in the hot water for 10 more minutes, then remove the jars and allow them to cool on a kitchen towel for 24 hours. Remove rings, wash jars, label and date - then store the jars of pickled grape tomatoes for up to 1 year. 6. These are best if refrigerated a day before serving if possible. Photos by: Diane Baker for Canning and Cooking at Home Recipe by: Ball Blue Book "Guide to Preserving" - Pickled Grape Tomatoes. 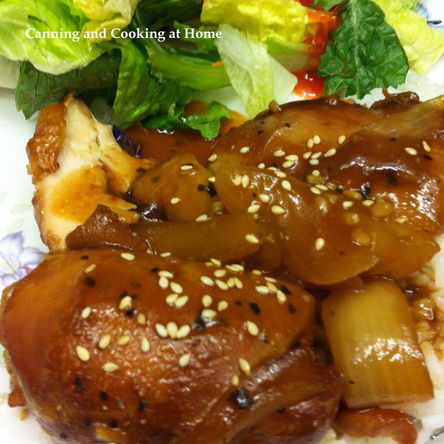 This is a nice slow-cooker recipe. I say nice because it's not completely JUST cooked in the slow-cooker. The taste is amazing but, there are extra 'steps' that are needed to complete the recipe - if I told you it was 'solely' slow-cooker recipe, you'd be sad in the end that you had a bunch of chicken thighs floating around in a 'soupy-sauce'. Here is what I did: I let my chicken cook (from fresh) on HIGH for one hour and then switch to Medium (which is more like Low on other models) for the final 4 hours. About one hour before slow-cooker time ended, I placed in large slices of onion. At the end of slow-cooker cook time, I removed all the thighs to a foil lined baking sheet and proceeded to 'thicken up' the soupy sauce...all the taste is in there - it just needs a little help getting to 'sauce' stage! I added a cornstarch/slurry mix to thicken the sauce in the slow-cooker. I then basted the chicken thighs with the sauce and popped it into the oven for 10 minutes, letting the chicken brown up and 'marry' to the sauce. I served the remaining sauce/onion mix separate and the baked thighs in sauce over steamed rice. We LOVED the taste of the meal. ~Enjoy! Diane
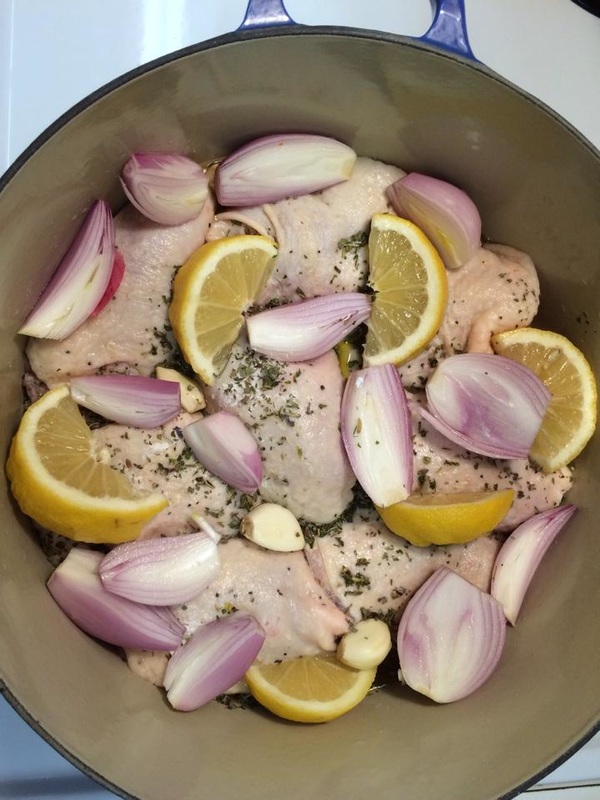
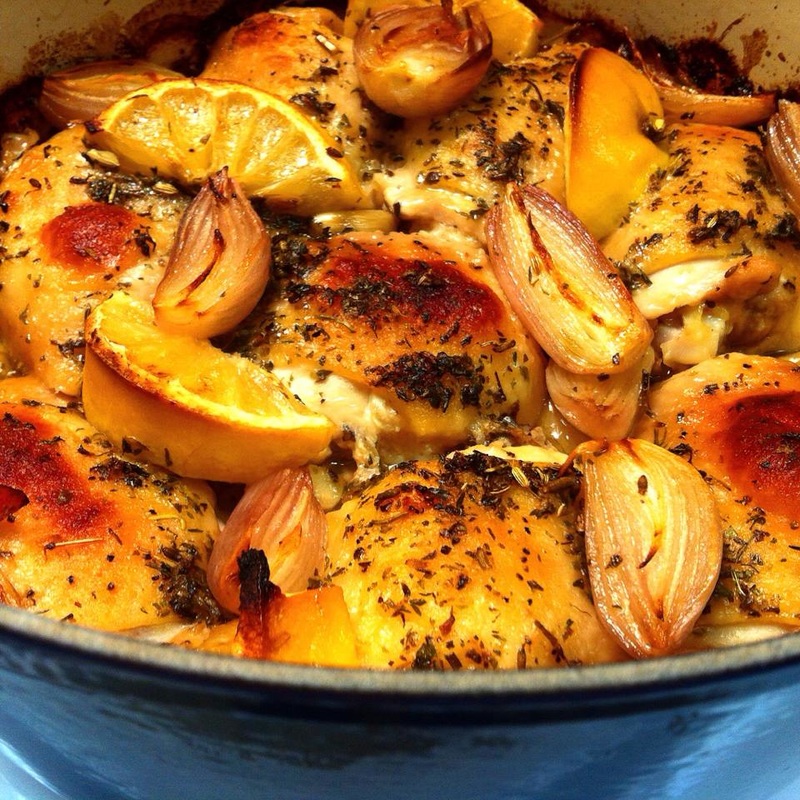
Honey-Garlic Chicken Thighs Ingredients 6-8 skinless, boneless chicken thighs 1/2 cup soy sauce 1 Tbs ketchup 1/2 cup tomato sauce 1 large onion, sliced 1/3 cup honey 3 cloves garlic, minced 1 teaspoon dried basil 1 Tbs hot chili oil, optional 2 Tbs cornstarch for slurry at end Directions Lay chicken thighs into the bottom of a 4-6 quart slow cooker. Whisk soy sauce, ketchup, tomato sauce, honey, garlic, and basil together in a bowl; pour over the chicken. Add sliced onion into slow-cooker one hour before end of cook time. There are some 'final' prep steps that are needed with this recipe. I use about 2 Tbs cornstarch and a bit of cold water added to make a paste (slurry) that is added to the sauce to thicken. I remove my chicken to a foil lined baking sheet, heat my oven to 375 and thicken the sauce and onion mixture that is in my slow-cooker. Once the sauce is thickened, I baste the chicken that is on the baking sheet and pop into the oven for 10 minutes. Serve chicken over steamed rice. Serve the extra sauce/onions on the side. Cook on Low in slow-cooker for 5 hours - Finish in oven 10 minutes (check chicken with an instant read meat thermometer to ensure it's done) Recipe & Photos by: Diane Baker for Canning and Cooking at Home  In this dish, you will want to eat the shallots and garlic right out of the pan! LOL I found this recipe in the NY Times. It's rated as one of their "top hits of 2015" so, I thought I'd give it a go. The ingredients seem simple enough - just bringing roasted chicken to a new level of flavors. The sweetness of the vermouth (wine or sherry) added in creates a slightly sweet flavor in combination with the lemon in this dish. I loved how the shallots and garlic melted into roasted sweet and tasty flavors! I know next time I will add more garlic to this dish so we have some to smear onto a baguette! I served this dish with a nice side salad and fresh green beans, it was a hit! My only tip on this recipe is to not "crowd" the pan with the chicken - I used my 7+quart dutch oven and had 8 skin-on thighs in there - which was probably 2 too many and took longer to cook. Also, when pouring in vermouth, make sure to not pour it directly over the chicken and instead, pour around it. It is important to 'baste' at the 30 min mark in this recipe - I basted all the chicken and the shallots, garlic to make sure they all finished roasting nicely. ~Enjoy! Diane Roasted Chicken Provençal Ingredients: 4 chicken legs (thigh-on) or 6 bone-in, skin-on chicken thighs 2 teaspoons kosher salt 1 teaspoon freshly ground black pepper 3/4 cup all-purpose flour 3 tablespoons olive oil 2 tablespoons Herbes de Provence 1 lemon, quartered 8 to 10 cloves garlic, peeled 4 to 6 medium-size shallots, peeled and halved 1/3 cup dry vermouth, dry white wine or sherry Directions: Preheat oven to 400 degrees. Season the chicken with salt and pepper. Put the flour in a shallow pan, and lightly dredge the chicken in it, shaking the pieces to remove excess flour. Swirl the oil in a large roasting pan, and place the floured chicken in it. Season the chicken with the Herbes de Provence. Arrange the lemon, garlic cloves and shallots around the chicken, then add the vermouth, wine or sherry to the pan. Put the pan in the oven, uncovered. Roast for 25 to 30 minutes, then baste all with the pan juices. Continue roasting for another 25 to 30 minutes, or until the chicken is very crisp and the meat cooked through. The more "crowded" your pan, the longer the chicken will take to brown up...and cook through. Serve in the pan. Recipe Note: I used 8 skin-on chicken thighs and it took about an extra 30 minutes to get the chicken browned and cooked through. Recipe Adapted from: The New York Times/"The Enduring Appeal Of Roasted Chicken Provençal." by Steven Stolman Photos by: Diane Baker for Canning and Cooking at Home |