Pickled Grape Tomatoes with Rosemary & Garlic
Ingredients 2 Quarts Grape tomatoes 1 tsp Canning/Pickling Salt 1 Cup White wine vinegar 1 Cup White vinegar - 5% acidity 1 Quart Water 4 Cloves Garlic, peeled, sliced in half 4 Sprigs Fresh rosemary Yield: 4 Pints Directions: 1. Wash the grape tomatoes and drain them to dry. Using a toothpick, prick each tomato in 2 opposite spots (this helps prevent splitting.cracking) 2.Combine the salt, white wine vinegar, vinegar, water, in a medium saucepan and bring to a boil, then simmer for 10 minutes. 3. Pack the grape tomatoes in hot 1-pint sterile jars and leaving a 1/2-inch headspace. Ladle the warm pickling liquid leaving a 1/2-inch headspace, and be sure to add two cloves of garlic to each jar and at least one rosemary sprig. 4.Remove any air bubbles, bring back to proper head-space if needed. Add the two-piece lids and rings onto each jar. Process the jars in a boiling-water canner pot with 1 to 2 inches of water covering the tops of the jars for 10 minutes or according to your local altitude . 5.Turn off heat and remove lid from pot, allow the jars to sit in the hot water for 10 more minutes, then remove the jars and allow them to cool on a kitchen towel for 24 hours. Remove rings, wash jars, label and date - then store the jars of pickled grape tomatoes for up to 1 year. 6. These are best if refrigerated a day before serving if possible. Photos by: Diane Baker for Canning and Cooking at Home Recipe by: Ball Blue Book "Guide to Preserving" - Pickled Grape Tomatoes.
0 Comments
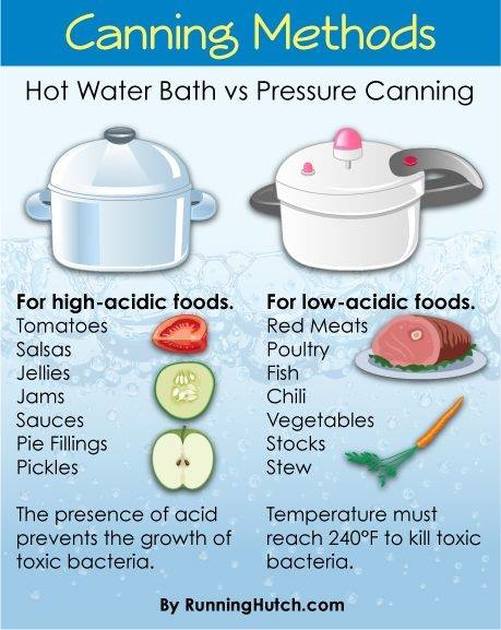
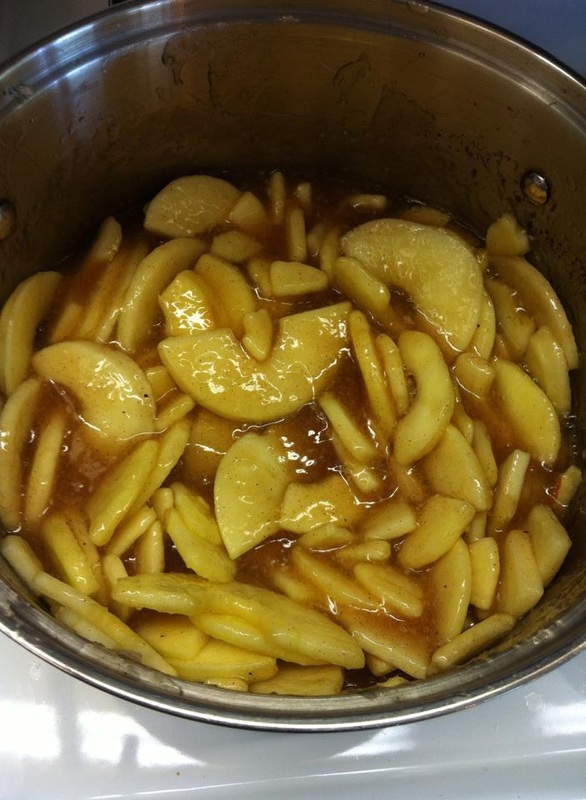
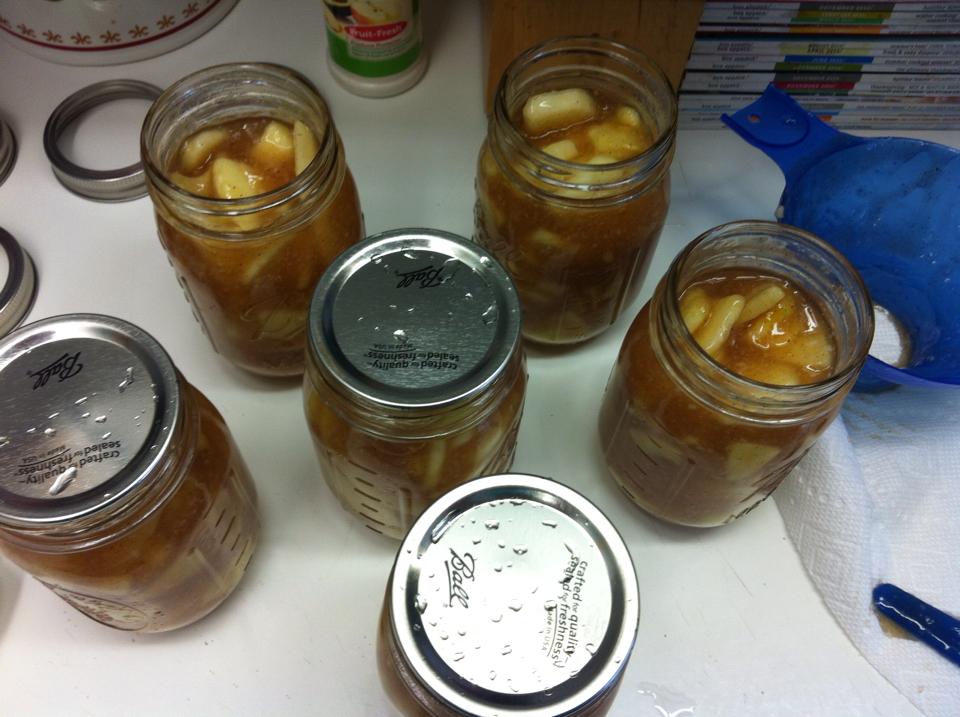
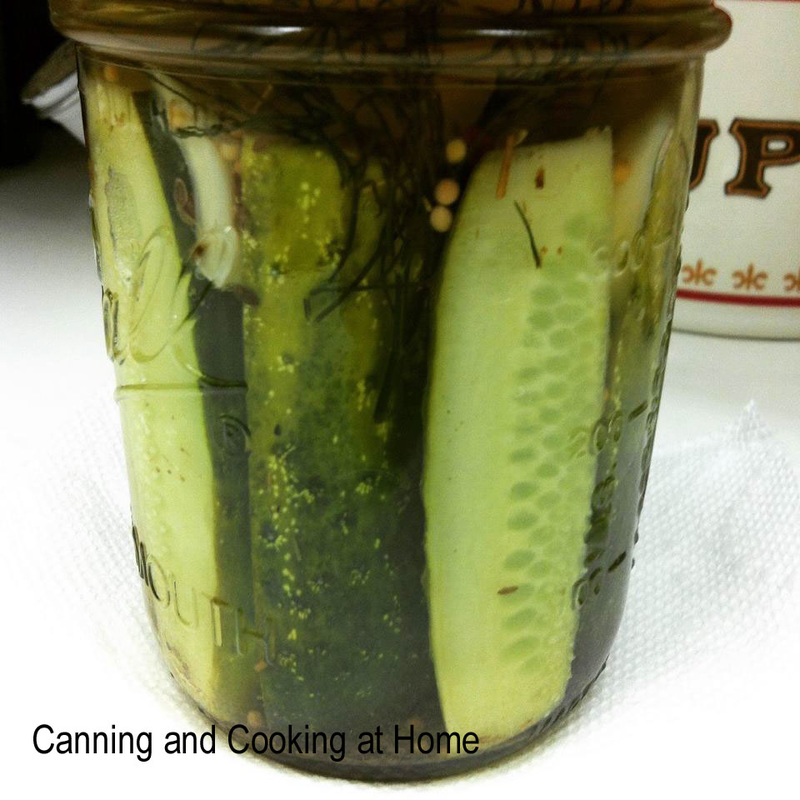 {Marybelles} Polish Dill Pickles -a per pint recipe Ingredients: 1 pint small pickling cucumber (approx 3 kirbys) 1 teaspoon dill seed 1 garlic clove 1 sprig dill weed, pretty (optional) 4 coriander seeds 1⁄2 teaspoon mustard seeds 1 small bay leaf 1⁄8 teaspoon hot pepper flakes 1⁄2 cup white vinegar 1⁄2 cup water (I use bottled) 1 1⁄2 teaspoons canning/pickling salt Directions: Wash and scrub cucumbers. Trim a little off the stem end and more off the blossom end (where bitterness can reside). Leave small cucumbers whole, or slice into spears or sandwich slices as desired. All cucumbers in a jar should be similar in size and thickness. Add seasonings, except salt, to 1 pint wide mouthed jar. Pack firmly with cucumbers, leaving a 1/2" head-space. Combine vinegar, water, and salt in a small sauce pan. Heat until boiling. Ladle into jar to cover cucumbers - again, leave a 1/2" head-space. Seal jar with sterilized lid & band, and process in a boiling water bath for 10 minutes (15 minutes for quarts) adjusting for altitude. Wait 4-6 weeks before tasting to allow pickles to cure. Refrigerate after opening. (you will want to scale this recipe up to make a full canner load) YOU CAN ALSO NOT CAN THESE - JUST MAKE UP THE BRINE AND SET JARS IN FRIDGE ONCE COOLED A BIT - LET SIT FOR AT LEAST A WEEK OR MORE FOR ENHANCED FLAVORS Recipe by: Marybelles Polish Dill Pickles ~ at Food.com Photos by: Diane Baker for Canning and Cooking at Home 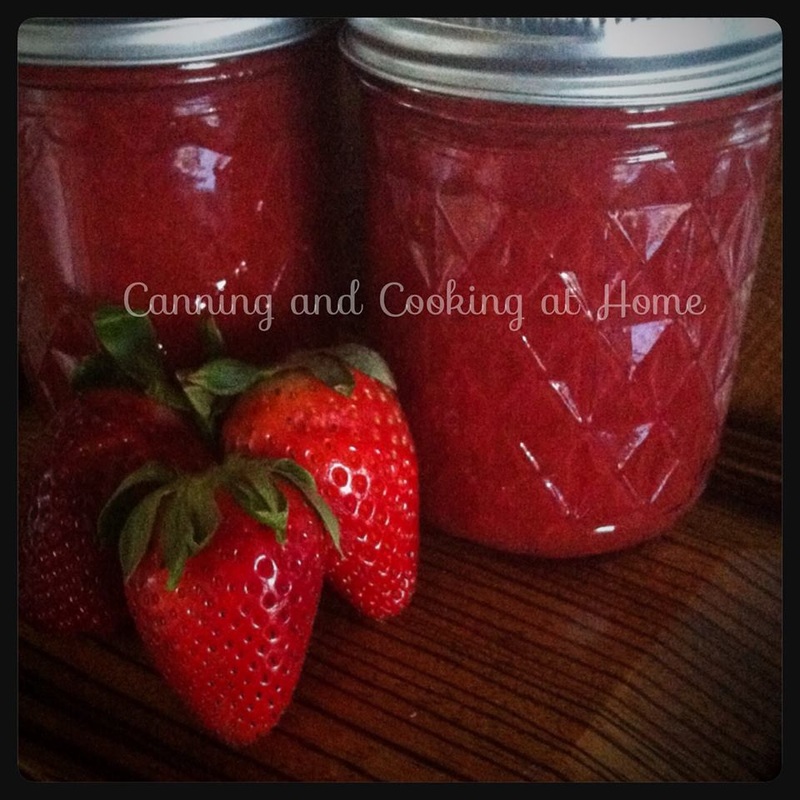 Strawberry Vanilla Jam Ingredients: 1 quart strawberries ( 4 cups of chopped berries) 3/4 Cup of honey 1 Cup of Sugar (you can use 2 Cups sugar and leave the honey out) 2 vanilla beans, split and scraped (or add 2 tsp vanilla bean paste before jarring) 1 lemon, zested and juiced Commercial Pectin (*I used 4Tbs Pamona Commercial Pectin Powder) Instructions: Wash, hull and chop berries. Toss them with the 1 cup of sugar and the split vanilla beans and place in a large jar or bowl. Allow the berries to macerate for at least 1-2 hours (cover with saran and placed in fridge). When you're ready to make the jam, prepare two to three pint jars. Pour macerated strawberries and vanilla beans into a large pot and add the honey. Add commercial pectin of your choice. *follow your pectins instructions on when to add to jam mixture. Bring to a boil and cook until the jam reaches 220 degrees, stirring often and regularly. Add the lemon zest and juice in the final 5 minutes of cooking and remove the vanilla beans. Once the jam has reached 220 degrees, remove the pan from the heat. Pour jam into your prepared jars. Wipe rims, apply lids and rings and process in your canner for 10 minutes. (or according to your altitude) When time is up, remove jars from canner and let them cool on a towel-lined counter top. When jars are cool enough to handle, remove rings and check seals. If any jars are not sealed, store them in the fridge and use them first. Store washed, sealed jars in a cool, dark place. (In this recipe - I added my pectin (Pamona) before the final rolling boil.) Pinterest Pin: https://www.pinterest.com/pin/68727975039/ Recipe & Photos by: Diane Baker for Canning and Cooking at Home 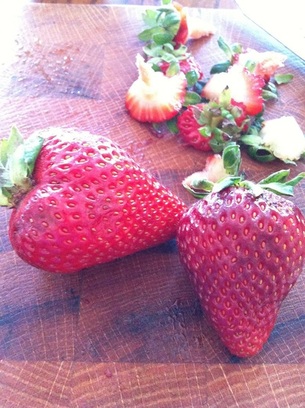 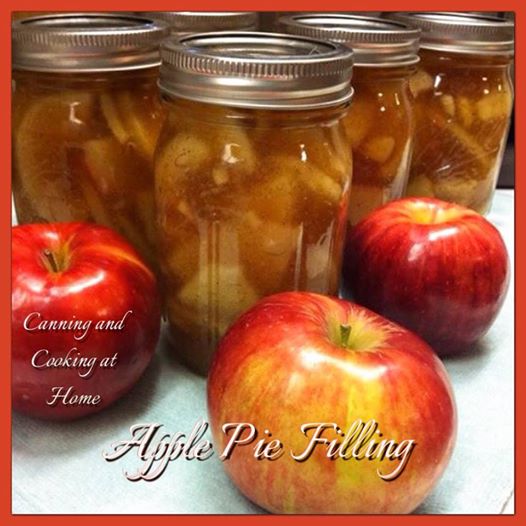 Finally! I waited and waited for my clear jel to arrive to make homemade apple pie filling. I even ventured out to the store and invested in an apple peeler (the hand crank, corer, peeler, slicer) which was SO worth it - I highly recommend one as they make peeling a snap (cost approx. $16-19) This recipe is a bit more involved as far as ingredients but, I had apple cider from making apple butter. I read a bunch of different recipes and did not like that many of them didn't narrow down how many apples you are to use. I took the time here to cut and measure how many apples I used and size I used so that maybe it will save you a small hassle... this recipe is a snap to make. I suggest that you bring all the filling ingredients (minus the apples) to a medium simmer and mix your clear jel and some of the cold water called for in the recipe together in a separate cup, then add to filling and bring to a boil (you don't want any clumps of clear jel in your filling/syrup) *If you DO get clear jel clumps, you can use an immersion blender to blend them away. Enjoy ~ Diane. Homemade Apple Pie Filling Yield: approx.4 quarts (or 8 pints) Ingredients: 12 cups apples, peeled and sliced into 1/2 inch pieces (I used 5 large jonagold & fuji apples and 6 small jonathan & gala apples) 3 cups sugar 1 cup Clear Jel starch**(see note below) 2 teaspoons ground cinnamon 1/2 teaspoon ground nutmeg 1/2 teaspoon Rodelle Vanilla Bean Paste 2 1/2 cups cold water 2 cups apple cider or apple juice 1/2 cup bottled *lemon juice (plus additional if adding to water after slicing apples, see note below) *Fruit Fresh (optional to lemon juice, see note below) Instructions: Peel apple slices and place slices in a pot of cold water with *fruit fresh or lemon juice. Drain the apples and boil the apple slices in smaller batches for 1 minute in boiling water. Place warmed apples slices in a large bowl and cover with a towel while you prepare the sauce below. Combine sugar, clear jel, cinnamon, vanilla and nutmeg in a large pot with the cold water and apple cider or juice. Stir and cook over medium high heat until mixture thickens and begins to boil. Add the bottled lemon juice and cook for 1 minute. Add in the warm sliced apples to the mixture, stir to combine and immediately ladle into hot jars, leaving 1 inch headspace. Remove air bubbles with a long plastic knife or thin spatula. Wipe rims and cover with lids and ring bands. Process (Quarts and Pints) in a water bath for 25 minutes (see notes for high altitude processing time). Let cool 24 hours and ensure lids have sealed. Store any unsealed jars in the fridge and use within a few weeks. To bake a pie, simply pour it into a prepared pie shell. Bake at 425 degrees until filling is bubbling or follow your own pie recipe for two crust fruit pies. *Notes: Store sliced apples in a solution of water and *lemon juice (2 tablespoons lemon juice per large bowl of water) to prevent browning until ready to proceed with recipe OR add *fruit fresh to the water. **Clear Jel - is a thickener/starch that is used in high heat canning - do not use any other thickening agent (such as flour, cornstarch or tapioca) Only use 'Cook Type' Clear Jel for this recipe. Increase processing time for high altitude as needed: 1,001-3,000 ft 5 minutes, 3,001-6,000 ft 10 minutes, 6,001+ ft 15 minutes. Recipe Adapted from USDA Home Canning Guide. Photos by: Diane Baker for Canning and Cooking at Home  |