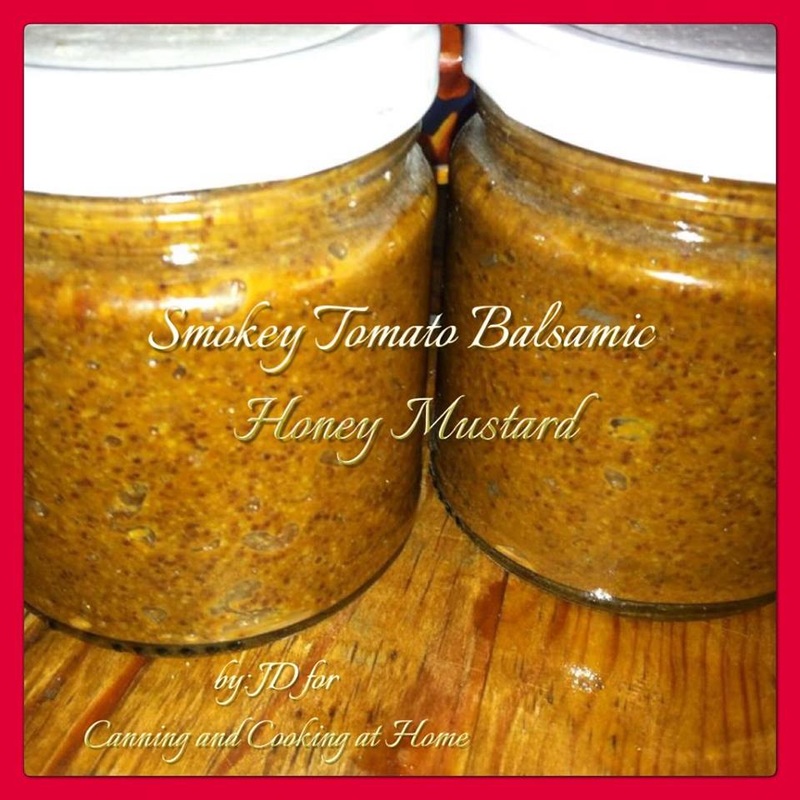
 Smokey Tomato Honey Mustard
Ingredients: 1/2 Cup Brown Mustard Seeds 1/2 Cup Spiced Winter Ale, or beer of your choice 1 Cup Smoked Sun Dried Tomatoes (any sun dried tomatoes will work) 1/2 Cup Balsamic Vinegar 4 T EVOO 4 T dry mustard 2 t Sea salt 2 T granulated honey (liquid will work, this turns out VERY thick) Directions: Put seeds and beer in covered jar and soak overnight. Drain off beer and rinse seeds. Add seeds and all remaining ingredients to food processor and pulse until smooth. Spoon into jars and water bath process 10 minutes, or store if refrigerator. Use immediately, or let age a few days to a few weeks, to let flavors meld and improve overall flavor. Makes approximately 1 pound prepared mustard Recipe & Photo by: JD for Canning and Cooking at Home
0 Comments
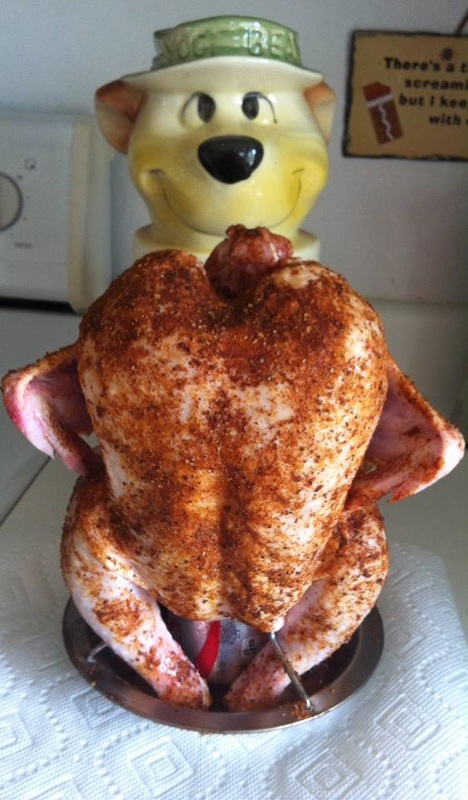
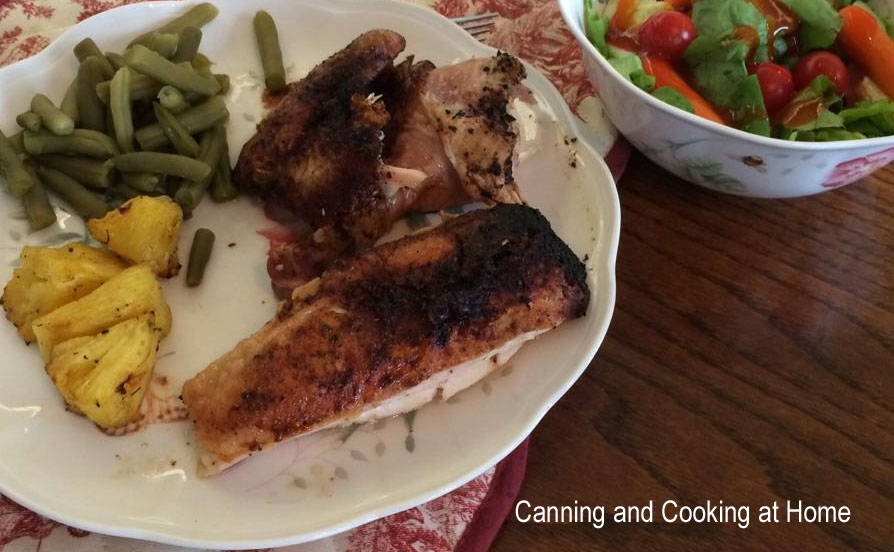
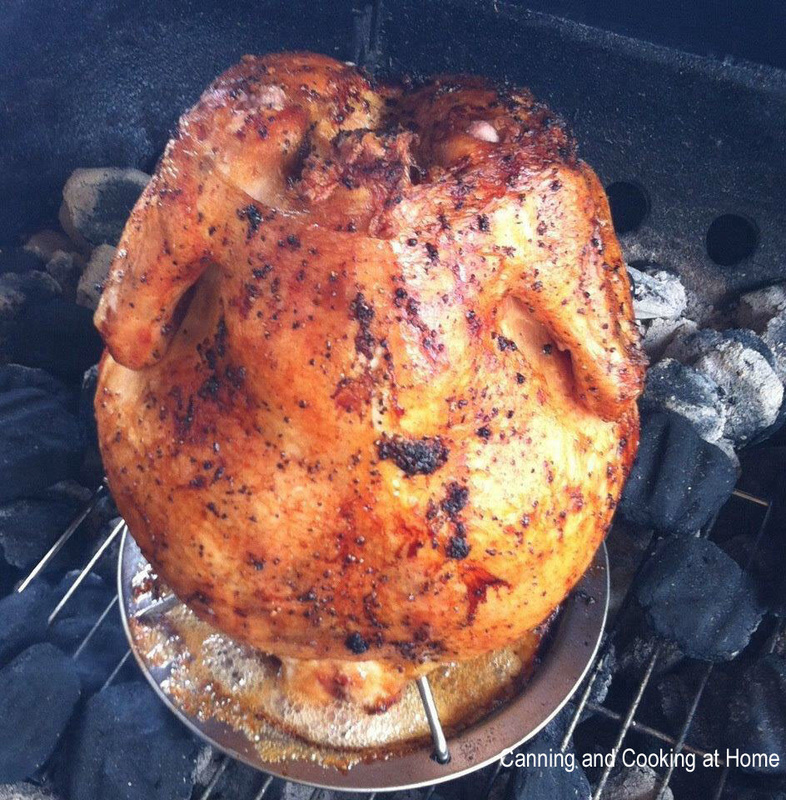 Chicken on the Grill Do you say soda or pop? Either way, using the can to have the chicken perch on top of - forces the heated apple juice in this recipe in and around the chicken and creates the most tender and moist chicken that we have had to date. You do want to baste the chicken but, not until near the end - that moment when you open the grill to check on the bird and say "oh no! its burning" that is when you start to baste - you want that nice crust to form on the outside of the bird (which also helps retain the moisture) The rub is great on this too - you can buy "Down and Dizzy" Rub from the folks who make the Big Green Egg but, you can also make your own - in either case, its WORTH using on this. I rarely (almost never) eat the skin from a chicken but, in this recipe - you'll want to! there truly is nothing better then 'can in the chicken' on the grill...and we've tried the more traditional "beer can chicken" but, apple juice in my opinion is 100% better tasting overall. ~Enjoy! Diane Pop Can Chicken Ingredients: One 4 to 5 pound whole chicken 2 Tbsp extra light olive oil 1 opened can of pop (you're using the can for recipe) 8 oz apple juice your favorite BBQ Rub (we use our own, see below) RUB Ingredients:
Directions: 1 Prepare your grill for indirect heat. If you are using charcoal, put the coals on one side of the grill, leaving another side free of coals. If you are using a gas grill, fire up only half of the burners. 2 Remove neck and giblets from cavity of chicken, if the chicken came with them. Rub the chicken all over with a bit of olive oil. Mix the salt, pepper, and rub in a little bowl, then sprinkle/pat into the chicken. 3 Drink the pop leaving can empty, rinse & clean well - poke a few holes around the upper 1/4 of can and fill can with apple juice about 3/4 full. If you want, you can put a sprig of thyme (or another herb like rosemary or sage) in the can. Lower the chicken on to the open can, so that the chicken is sitting upright, with the can in its cavity. Place the chicken on the cool side of the grill, using the legs and beer can as a tripod to support the chicken on the grill and keep it stable. 4 Bring your grill up between 350-375. Close the grill hood, and walk away. Do not even check the chicken for at least an hour. After an hour, check the chicken and refresh the coals if needed (if you are using a charcoal grill). Keep checking the chicken every 15 minutes or so, basting chicken with juices from drip pan (mostly apple juice) until a meat thermometer inserted into the thickest part of the thigh reads 160°F - 165°F. The total cooking time will vary depending on the size of your chicken, and the internal temperature of the grill. A 5 lbs chicken will usually take around 1 3/4 hours. If you don't have a meat thermometer, a way to tell if the chicken is done is to poke it deeply with a knife (the thigh is a good place to do this), if the juices run clear, not pink, the chicken is done. 5 Carefully transfer the chicken to a tray or pan. "Carefully" because the pop can, and the juice inside of it, is quite hot. Let chicken rest for 5 mins before carving. Recipe & Photos by: Diane Baker for Canning and Cooking at Home 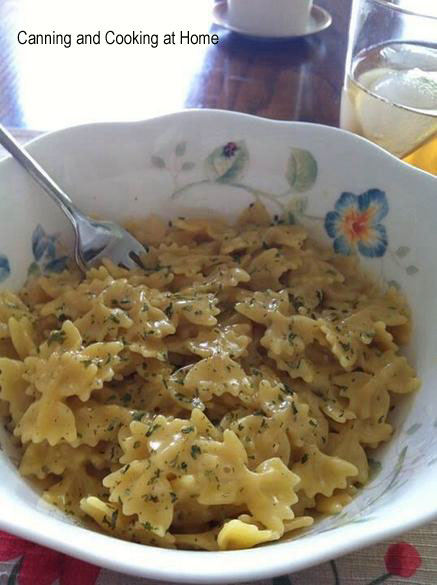 Creamy Garlic Pasta Seeing all the posts for the "One Pot Pasta" had me think back to my own pasta dish I make using 'one pot.' I've never shared this recipe but, we love this dish and its made in one pot - even better for clean up! A lot like the flavor of an Alfredo too. Use the thinnest noodles so that they cook in time as the broth will reduce. When I use a fatter/thicker noodle - I tend to add an extra cup of broth to extend cooking time but, angel hair pasta or thin spaghetti work great in this too.
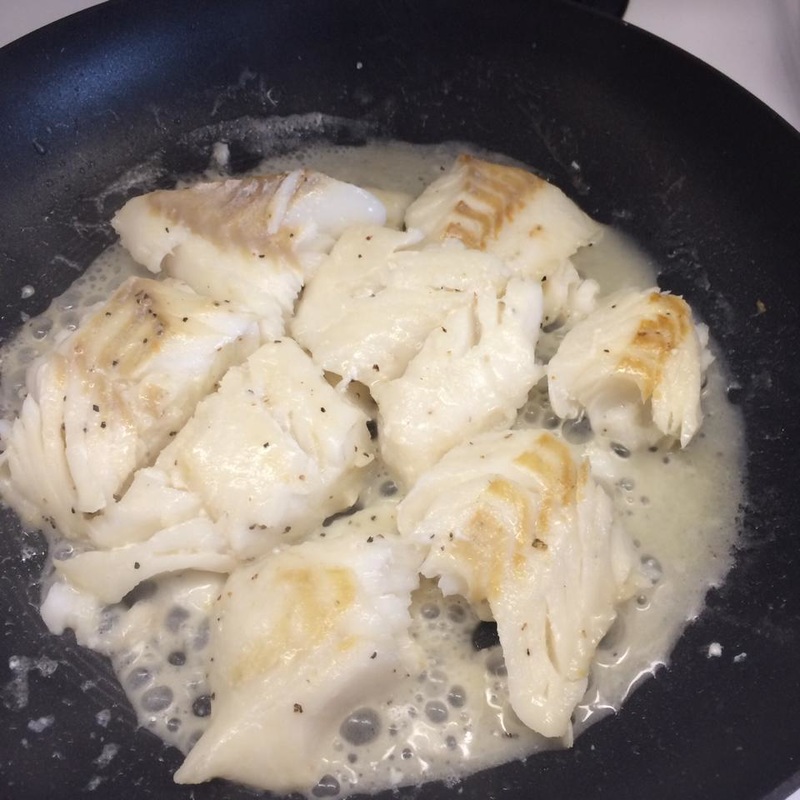
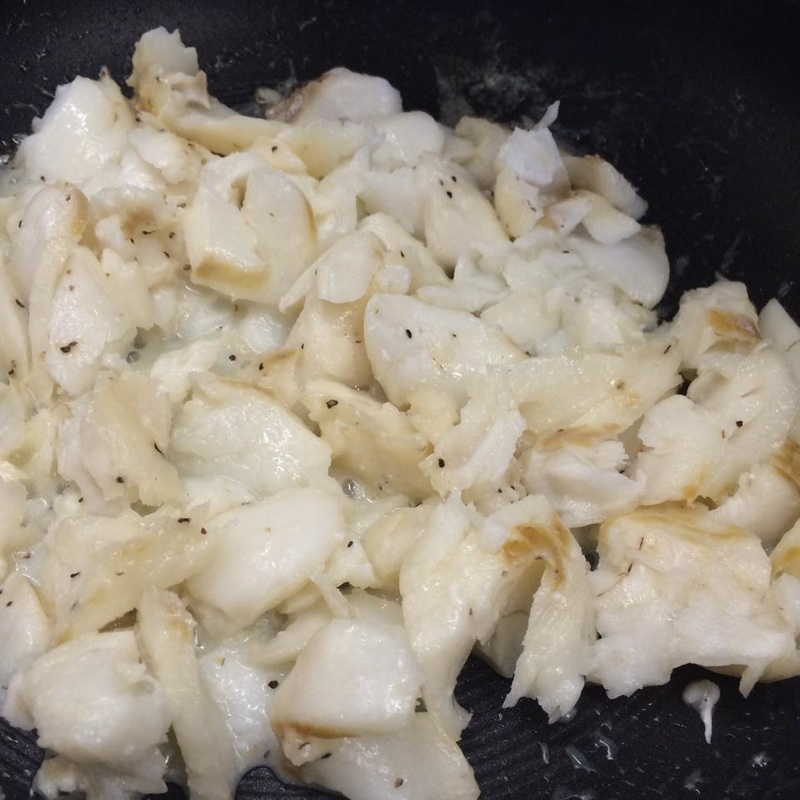
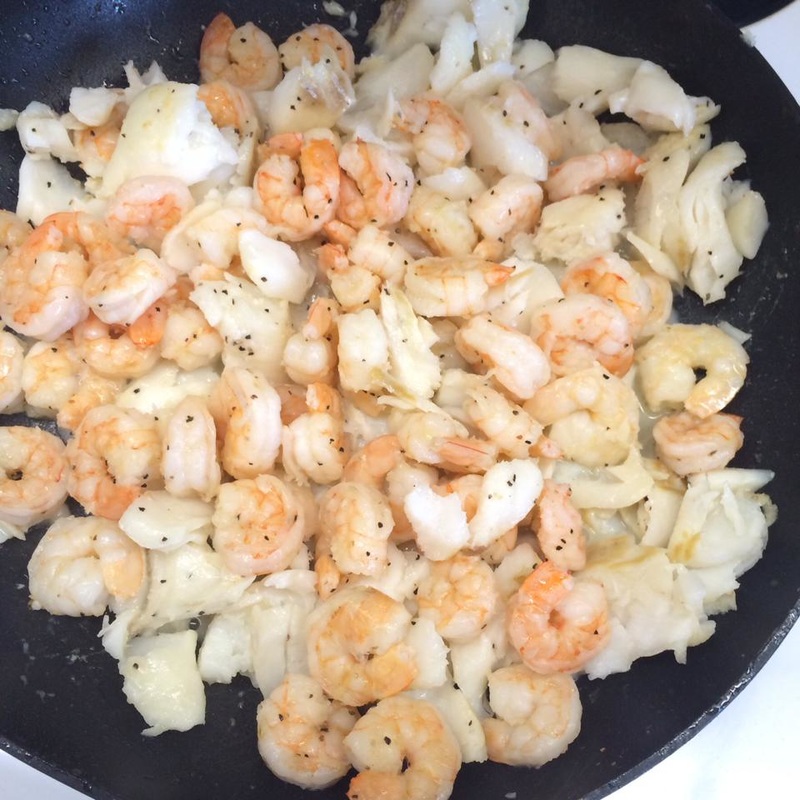
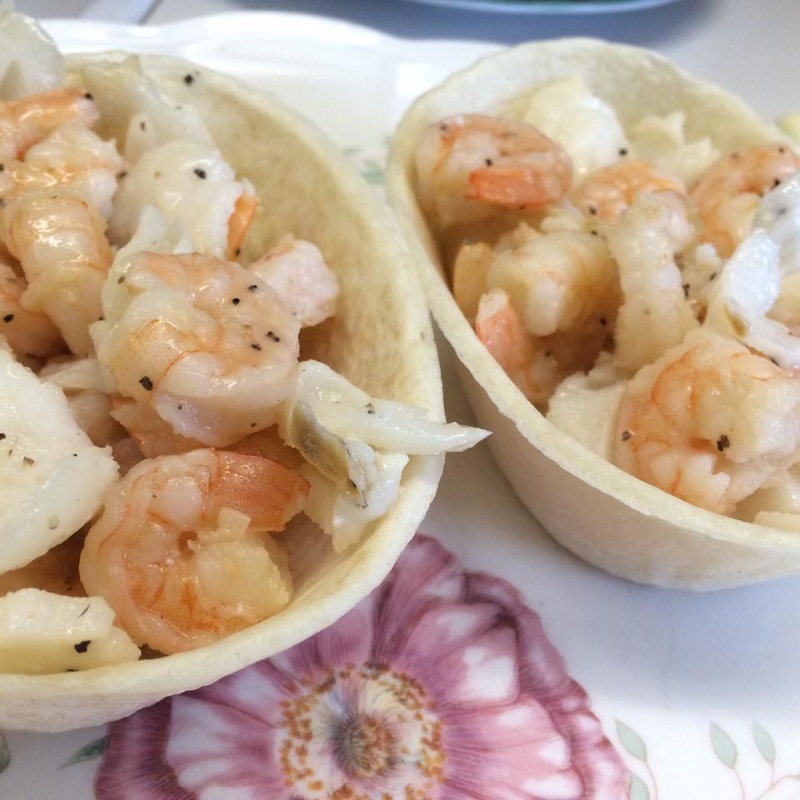
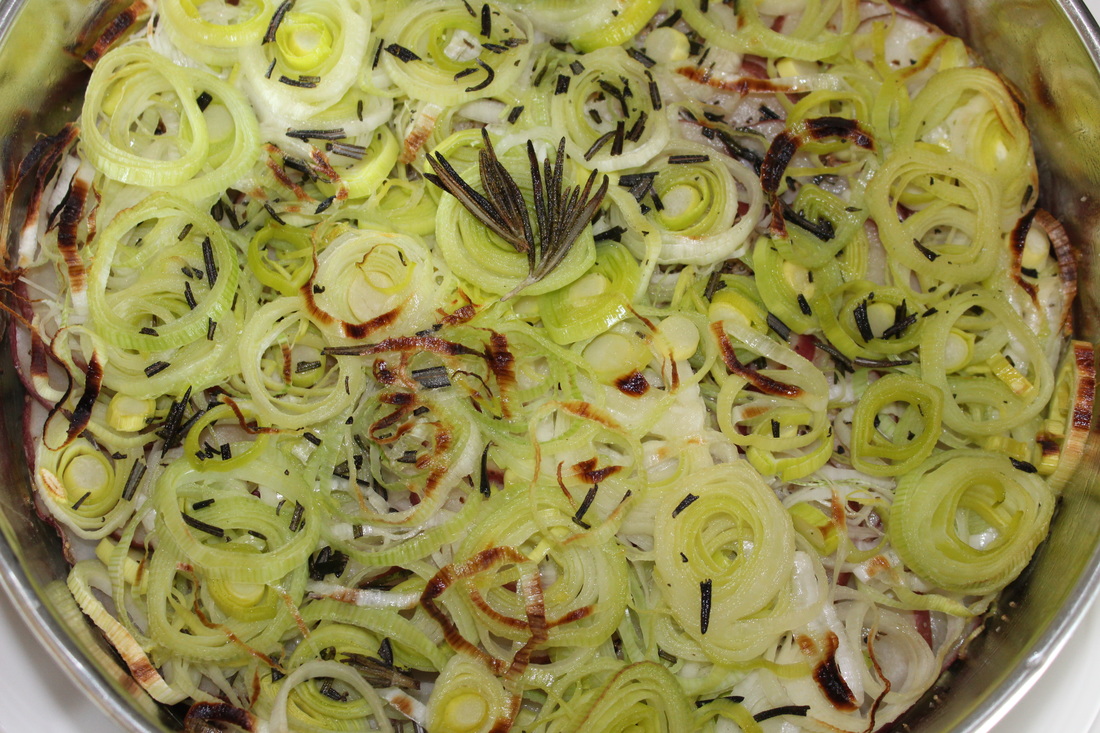
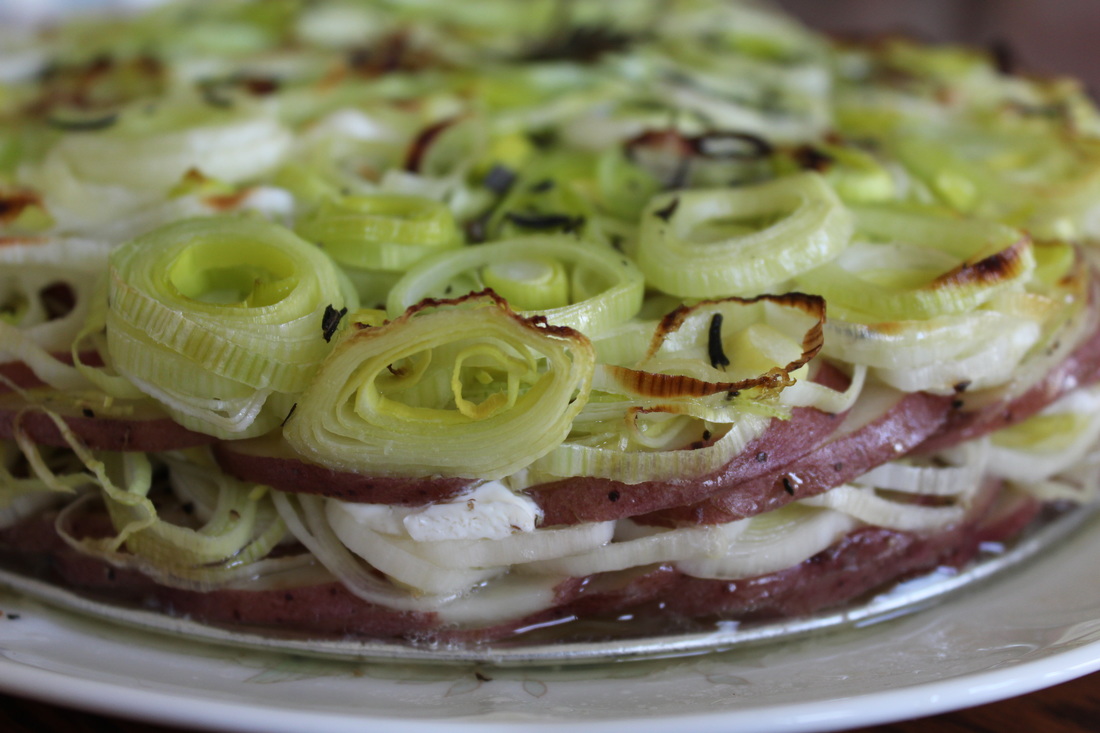
{One Pot} Creamy Garlic Pasta Ingredients: 2 tsp olive oil 4 cloves garlic - minced 2 Tbsp butter 1/4 tsp salt 1/2 tsp pepper 3-4 cups chicken stock 1/2 lbs pasta noodles *angel hair or thin spaghetti work best 1 cup grated Parmesan cheese 3/4 cup heavy cream 2 Tbsp chopped fresh parsley *you can throw in 1 cup shredded, pan-seared chicken at the end or cooked shrimp for extra protein Directions: In a pot, add olive oil and bring to med-low heat. Add garlic and stir, cooking for 1-2 minutes. Mix in the butter until melted. Add salt, pepper and chicken stock to pot. Raise heat to High and let it come to a boil. Add pasta and cook according to package directions. Reduce heat to medium and mix in parmesean cheese until melted, stir in heave cream just until warmed thru. Turn off heat add parsley. Serve. *Tip: no heavy cream? use Milk and add 1 Tbs butter, warm in microwave together in a bowl...before adding to pasta in pot. *Tip: Pasta? use a thin noodle (like angel hair, something that cooks in under 7 mins as chicken stock will start to cook off.) *Tip: Sauce too thick - add a touch more chicken stock *Tip: Sauce to thin - add a Tbs of corn starch until desired thickness is reached. *Tip: No fresh Parmesan? you can use grated/canned just use 3/4 Cup. It just won't taste as good as fresh parmesan. *Tip: Great as a side dish OR place a nice grilled chicken breast or grilled shrimp on top of pasta as a main course. Recipe and Photo by: Diane Baker for Canning and Cooking at Home  Many have asked "what makes these naked?" Well, most fish tacos are battered and fried. Some are tempura battered or beer battered and I think that somehow defeats the purpose of eating a healthy dinner when we are so inclined. I do think that the cod fish can stand all on its own in these tacos but, we had shrimp that needed eaten. I use 3 different sauce depending on our mood. I am sharing my white lime/cilantro sauce with you today. This is a pretty easy dinner to throw together. ~Enjoy! Diane {Naked} Fish Tacos Sauce: 1/4 cup thinly sliced green onions 1/4 cup chopped fresh cilantro 3 Tbs mayonnaise *can use light 3 Tbs sour cream *can use light 1 teaspoon grated lime rind 1 1/2 teaspoons fresh lime juice 1/4 teaspoon salt 1 garlic clove, finely minced Taco/Season: 1 teaspoon ground cumin 1 teaspoon ground coriander 1/2 teaspoon smoked paprika 1/4 teaspoon red pepper flake 1/8 teaspoon sea salt 1/8 teaspoon garlic powder ****** 1 1/2 pounds cod fillets 1/2 pound cooked shrimp *optional Cooking spray 8 (6-inch) corn tortillas 2 cups shredded romaine Directions: To prepare sauce: combine the Sauce ingredients in a small bowl; set aside. To prepare tacos, combine cumin and next 5 ingredients (all the spices) in a small bowl; sprinkle spice mixture evenly over both sides of fish *and some on the shrimp. Oven: Bake on a baking sheet sprayed with cooking spray at 425° for 9 minutes or until fish flakes easily when tested with a fork. *Add the cooked shrimp to baking sheet the last 3 minutes of cook time to heat through with cod. Place fish in a bowl; break into pieces with a fork. OR Stove Top: Place fish in hot skillet with a light coat with oil. Fry turning once, until easily flaked with fork. *Shrimp is optional: I tossed my cooked shrimp in a bowl with a little of the season mixture before adding to cod in my skillet as it was nearing the end of cook time. Heat tortillas according to package directions. Divide fish evenly among tortillas; top each with 1/4 cup romaine and 1 tablespoon sauce. Recipe and Photos by: Diane Baker for Canning and Cooking at Home 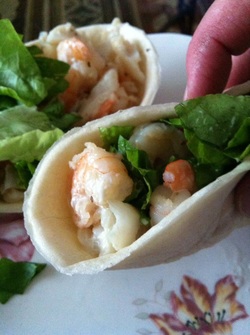  I love this new dish that I came across when reviewing Ally's new cookbook just a few short months ago. (Ally's Kitchen: a passport for adventurous palates) We make it all the time now! It's so easy to make and can be a great side dish or even a meal (I just served this with a large spinach salad and it was a hit) Rosemary, Red Potato & Leek Galette Ingredients
Instructions
Recipe by: Alice Phillips: Ally's Kitchen: a passport for adventurous palates Photos by: Diane Baker for Canning and Cooking at Home |