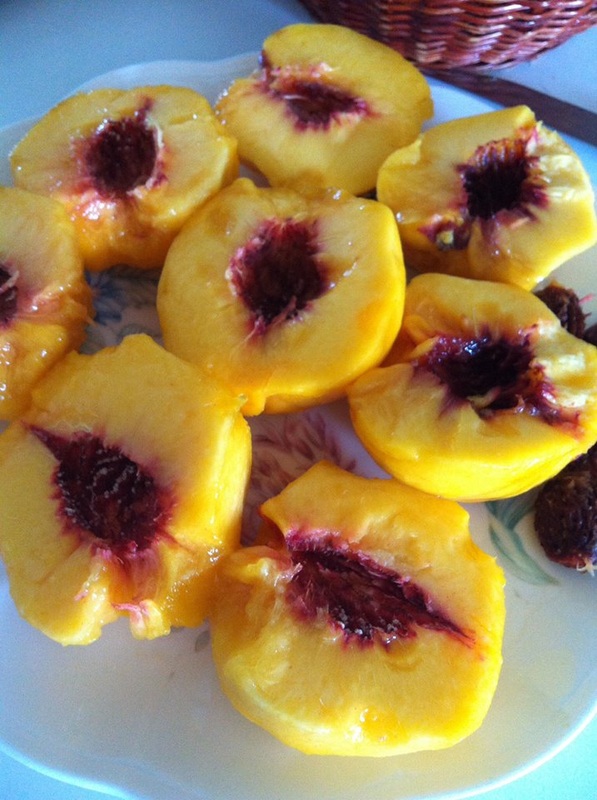
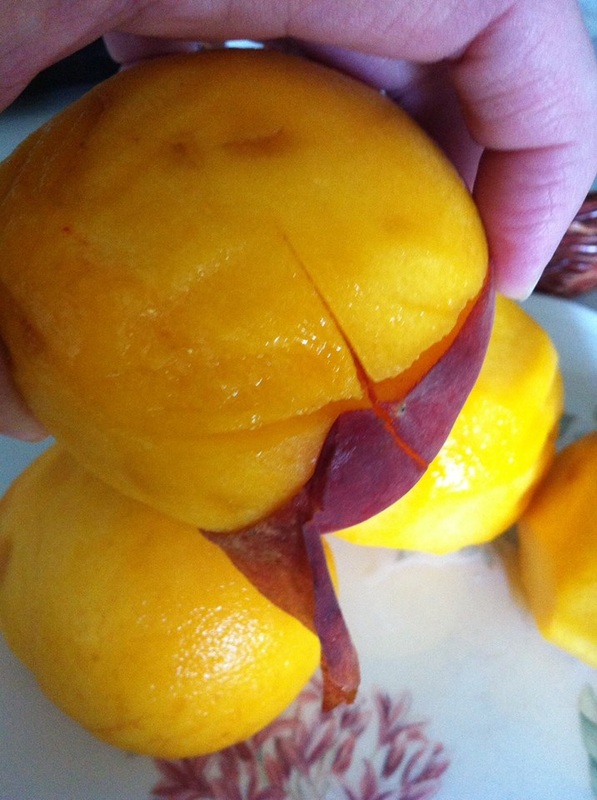
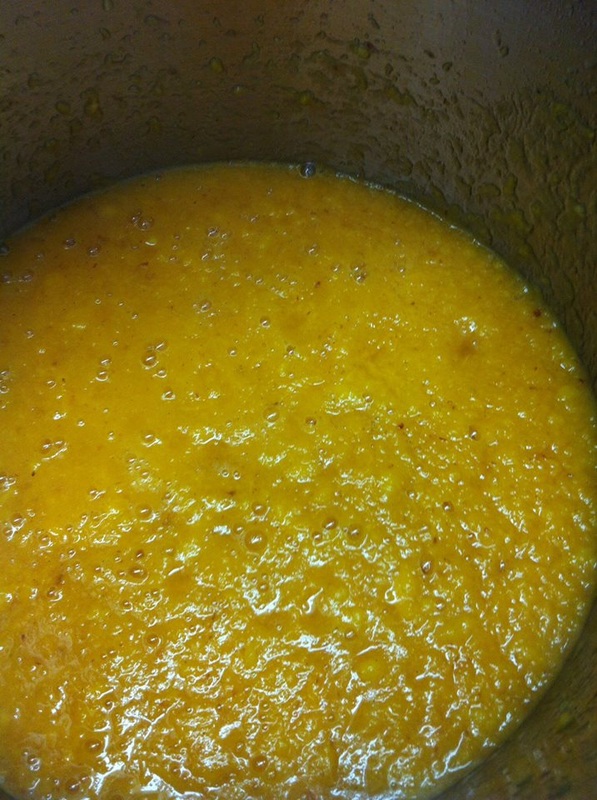
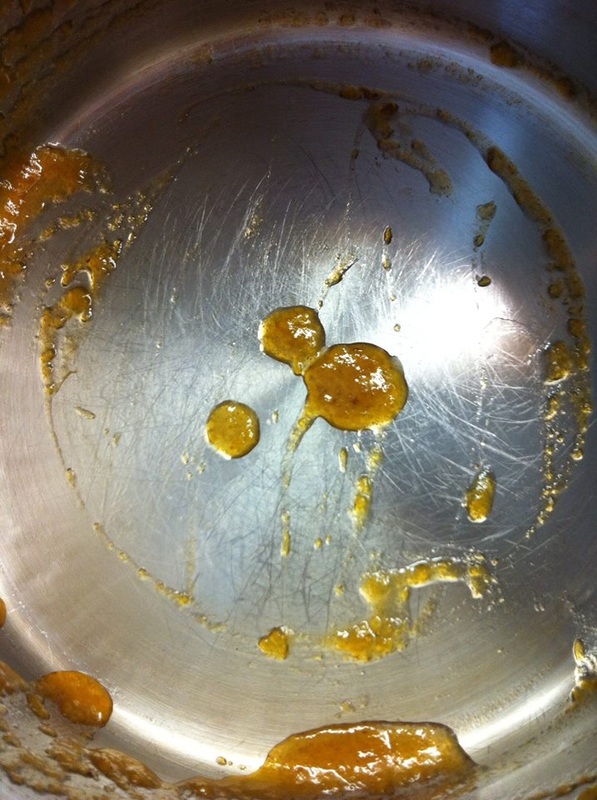
I ran to the store yesterday and found beautiful large peaches and decided I just wanted a very small batch of Peach Butter. I bought 4 large peaches that weighed in at 2 1/2 lbs. (which made 3 half pints of peach butter) This is a great small batch for a beginner. Not too large of a process that it can overwhelm a 'newbie.' Once you try this - you'll be hooked AND you'll feel more confident to move onto larger batches! Enjoy - Diane Small Batch Peach Butter Ingredients: 2 1/2 lbs fresh peaches 1 3/4 cups sugar 1 vanilla bean, split open 1/4 cup water 1/8 cup bottled lemon juice Directions: Wash peaches in cold water to remove dirt and fuzz. Cut an X mark on the stem end of each peach. Blanch peaches in boiling water for about one minute. Plunge peaches in ice water and let set for two minutes. Peel away skins, slice and remove the pit. **If your peaches are fully ripe - the skins will be easy to peel off using a paring knife - I sometimes luck out and can do this without blanching. To me, peaches are ripe when you can press the flesh with your thumb and leave a slight indentation into the peach. Once peeled, slice and pit your peaches. Place sliced peaches, lemon juice, vanilla bean and water in a large sauce pot. Simmer over medium heat until peaches are soft (approx 5-10 mins) Remove vanilla bean. Lightly puree peaches with a food processor or immersion blender - being careful not to liquefy them. Add the sugar into peach mixture. Cook over medium heat until thick enough to round up on a spoon (approx 30-40 mins.) Stir mixture frequently as it thickens to prevent sticking. (you will be lightly stirring continually as mixture starts to thicken until you are ready to jar the butter) Prior to jarring, I do the "plate test" by placing a small dish in the freezer for at least 10 mins. I place a spoonful of peach mixture onto plate and tip plate - mixture should not run at all. As well, the mixture should mound/round up easy onto a regular spoon and not run off back into pot. Wash jars in warm soapy water, rinse and place in canning pot/water to warm up jars for canning. Place lids and bands in warm (not boiling) water. Setup your area to process the butter. Ladle hot butter into hot jars, leaving ¼ inch head space. Remove any air bubbles. Wipe rim of jar to remove any food particles. Adjust two piece caps on jar and tighten finger tight. Process in a water bath canning pot for 10 minutes (or according to regs in your area) Remove and place on cloth towel in a draft free area. Do not move jars for 24 hours to allow for proper seal. Any jars that haven't sealed properly place in fridge for immediate use. Date and Label your jars, Peach Butter will keep up to one year in storage. Yield: 3 half pints. Recipe & Photos by: Diane Baker for Canning and Cooking at Home #homemade #peach #canning
0 Comments
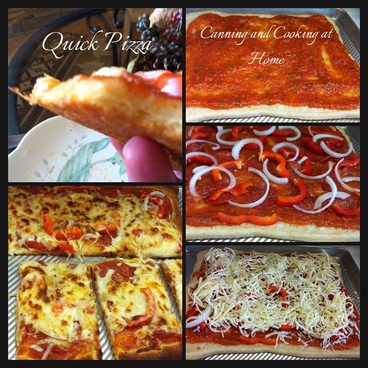 Quick Pizza Ingredients: Homemade Dough (NOT AS QUICK) OR Pillsbury Thin Crust Dough (QUICK!) Tomato Sauce, Pint *I use my home-canned sauce Mozzarella Cheese, 2 cups Olive Oil Non Stick Cookie Sheet **toppings of your choice - I used: -pepperoni, sliced -sweet onion, sliced -sweet red pepper, sliced I lightly oil my nonstick cookie sheet with extra light olive oil. Make your homemade pizza crust dough OR open canned dough and lay out on to cookie sheet, slightly stretching and shaping into a rectangle. lightly coat top of dough with extra light olive oil. Pre-bake as instructed (*Pre-baking your crust gives it a crunchier, crisp crust so that any wet toppings don't break through the crust or create a soggy crust...) Heat tomato sauce and slice toppings (thinly.) Remove pre-baked crust and add sauce and all your toppings (I always add cheese at the end by preference) Finish baking pizza in oven according to dough/package directions. I end with broiling the pizza on low for 2-3 minutes. Make sure not to add too much sauce and do not overload the toppings which will leave you with a crispier crust too... Fresh Homemade Tomato Sauce ~Click the title to go to my home canned tomato sauce recipe/directions. This is made ahead of time~ ********************************* Homemade Pizza Crust - KAF 2 teaspoons active dry yeast or instant yeast 7/8 to 1 1/8 cups lukewarm water* 2 tablespoons olive oil 3 cups Unbleached All-Purpose Flour 1 1/4 teaspoons salt Directions 1) If you're using active dry yeast, dissolve it, with a pinch of sugar, in 2 tablespoons of the lukewarm water. Let the yeast and water sit at room temperature for 15 minutes, until the mixture has bubbled and expanded. If you're using instant yeast, you can skip this step. 2) Combine the yeast with the remainder of the ingredients. Mix and knead everything together—by hand, mixer or bread machine set on the dough cycle—till you've made a soft, smooth dough. If you're kneading in a stand mixer, it should take 4 to 5 minutes at second speed, and the dough should barely clean the sides of the bowl, perhaps sticking a bit at the bottom. Don't over-knead the dough; it should hold together, but can still look fairly rough on the surface. 3) Place the dough in a lightly greased bowl, cover the bowl, and allow it to rise till it's very puffy. This will take about an hour using instant yeast, or 90 minutes using active dry. If it takes longer, that's OK. We are making: One 1 1/2"-thick 9" x 13" rectangular pizza; 4) If you're making a rectangular pizza, shape the dough into a rough oval, don't pat it flat; just stretch it briefly into shape. Allow the dough to rest, covered with an overturned bowl or lightly greased plastic wrap, for 15 minutes. 5) Place the dough in the prepared pan(s). Press it over the bottom of the pan, stretching it towards the edges. You'll probably get about two-thirds of the way there before the dough starts shrinking back; walk away for 15 minutes. Cover the dough while you're away, so it doesn't dry out. 6) When you come back, you should be able to pat the dough closer to the corners of the pan. Repeat the rest and dough-stretch one more time, if necessary; your goal is to get the dough to fill the pan as fully as possible. 7) Allow the dough to rise, covered, till it's noticeably puffy, about 90 minutes. Towards the end of the rising time, preheat the oven to 450°F. 8) Bake the pizza on the lower oven rack till it looks and feels set on top, and is just beginning to brown around the edge of the crust, but is still pale on top. This will take about t 10 to 12 minutes. 9) To serve pizza immediately: Remove it from the oven, and arrange your toppings of choice on top. Return to the oven, and bake on the upper oven rack for an additional 10 to 15 minutes, until the crust is nicely browned, both top and bottom, and the cheese is melted. Check it midway through, and move it to the bottom rack if the top is browning too much, or the bottom not enough. 10) Remove the pizza from the oven, and transfer it from the pan to a rack to cool slightly before serving. For easiest serving, cut with a pair of scissors or pizza cutter Homemade Crust Recipe from: King Arthur Flour - Pizza Crust Photos by: Diane Baker for Canning and Cooking at Home  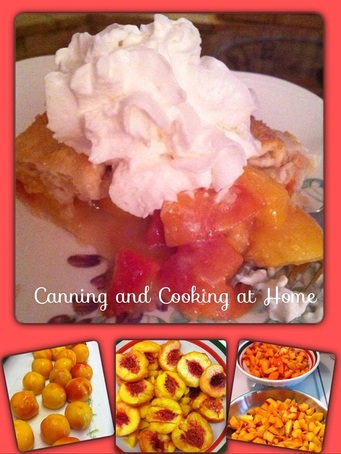 Sweetie Peach Pie
Crust: 2 2/3 cups all-purpose flour 2 teaspoons sugar 3/4 teaspoon salt 4 oz. cold unsalted butter, cut into 1/2-inch pieces 1/2 cup plus 1 Tbs (4 ounces) cold, solid, vegetable shortening 1/2 cup ice water Filling: 8 large, ripe but firm peaches - (3 1/2 pounds) 3/4 cup sugar 1 1/2 Tbs fresh lemon juice 1/4 cup plus 1 Tbs all-purpose flour 1 1/2 Tbs unsalted butter, thinly sliced Egg wash (made with 1 egg yolk mixed with 2 tablespoons water) In a food processor, pulse the flour with the sugar and salt until combined. Add the butter and shortening and pulse until the mixture resembles coarse meal. Transfer the mixture to a large bowl and sprinkle the ice water on top. Stir with a fork until a crumbly dough forms. Turn the dough out onto a work surface and knead 2 or 3 times, just until the dough comes together. Cut the dough in half and form into 2 disks; wrap in plastic and refrigerate until firm, at least 30 minutes or overnight. On a lightly floured surface, roll out each disk of dough to a 12-inch round. Ease one of the rounds into a 9-inch glass pie plate and transfer the other round to a baking sheet. Refrigerate the dough. Preheat the oven to 400°. Bring a large saucepan of water to a boil and fill a large bowl with ice water. Using a sharp knife, mark a shallow X in the bottom of each peach. Blanch the peaches in the boiling water for about 1 minute, until the skins begin to loosen. Using a slotted spoon, transfer the peaches to the ice water to cool. Drain and peel the peaches and cut them into 3/4-inch wedges. Transfer the peaches to a large bowl. Add the sugar, lemon juice and flour, toss well and let stand for 5 minutes. Pour the peaches and their juices into the chilled pie shell and scatter the butter slices on top. Brush the edge of the pie shell with the egg wash and lay the round of dough from the baking sheet on top. Press the edges of the pie shell together to seal and trim the overhang to a 1/2 inch. Fold the edge of the pie dough under itself and crimp decoratively. Brush the remaining egg wash on the top crust and cut a few slits for venting steam. Transfer the pie to the oven and place a baking sheet in the bottom to catch any drips. Bake for 30 minutes. Reduce the oven temperature to 375°, cover the edge of the pie with foil and bake for about 40 minutes longer, until the filling is bubbling and the crust is deeply golden on the top and bottom. Transfer the pie to a rack to cool completely. Serve with Whipped Cream. Adapted from: Food & Wine Photos by: Diane Baker For Canning and Cooking at Home 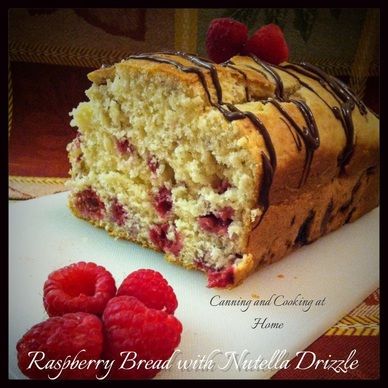 This is my first time making this bread as I had some fresh raspberries to put to good use. I am surprised at the nice rise of the bread considering I am at altitude. This recipe does make one loaf. I doubled the batch with no problem. The berries are fresh but, tart and the nutella drizzle is the perfect offset to complete the flavors - they work so well together. My husband requested nutella drizzled right onto his slice (a great idea too) Enjoy! Diane
Raspberry Bread with Nutella Drizzle Ingredients: 2 cups all purpose flour, plus 2 Tablespoons 1/2 cup sugar 2 1/2 teaspoons baking powder 1/2 teaspoon salt 1/2 cup sour cream 1/2 cup milk 1/2 cup vegetable oil 2 large eggs 6 ounces raspberries 1/3 cup Nutella *optional Directions: Preheat oven to 350 degrees F. Grease a loaf pan with baking spray. Mix 2 cups of flour, 1/2 cup sugar, baking powder, and salt in one bowl. In a separate bowl combine the sour cream, milk, vegetable oil and eggs. Add the wet ingredients to the dry ingredients. Mix until just combined. Gently toss 2 Tablespoons of flour with the berries. Add them to the batter. Pour the batter into the prepared pan. Bake for 55-60 minutes. This recipe makes one loaf. You can double the recipe and make two loaves as well... *If desired, before serving, microwave 1/3 cup Nutella in 15-second increments, stirring in between, until melty. Spoon into a small plastic bag, snip off the corner, and drizzle over bread before serving. Recipe partially adapted from Southern Living December 2003 by: Baker's House Photos by: Diane Baker for Canning and Cooking at Home. 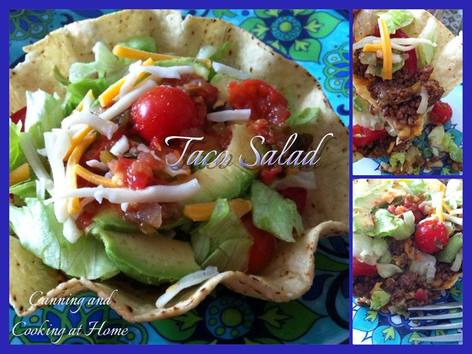 Taco Salad Night
Ingredients: 1 lbs lean ground beef 3-4 green onions, diced 1 large tomato, diced Lettuce, chopped *your choice shredded cheese *your choice Salsa *your choice 3 Tbs.taco season mix *see below 2/3 Cup water Taco Bowls *your choice Directions: Brown ground beef, drain fat off and add taco seasoning and water with most of the green onion. Cook thoroughly. Serve with tomato, lettuce, shredded cheese, and salsa on the side. ***************** Taco Season Mix: 1 tablespoon chili powder 1/4 teaspoon garlic powder 1/4 teaspoon onion powder 1/4 teaspoon crushed red pepper flakes *decrease for less spiciness 1/4 teaspoon dried oregano 1/2 teaspoon smoked paprika 1 1/2 teaspoons ground cumin 1 teaspoon sea salt 1 teaspoon black pepper this makes approx. one ounce. mix together and store in airtight container until ready to use. Season mix Recipe by: Bill Echols Taco Recipe and Photos by: Diane Baker for Canning and Cooking at Home |