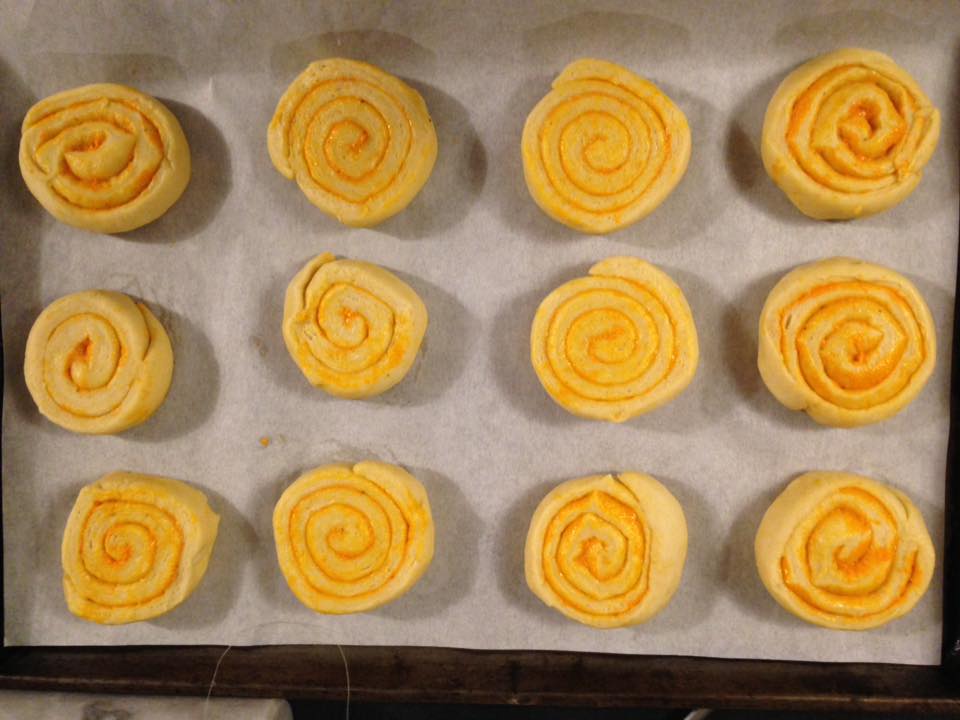
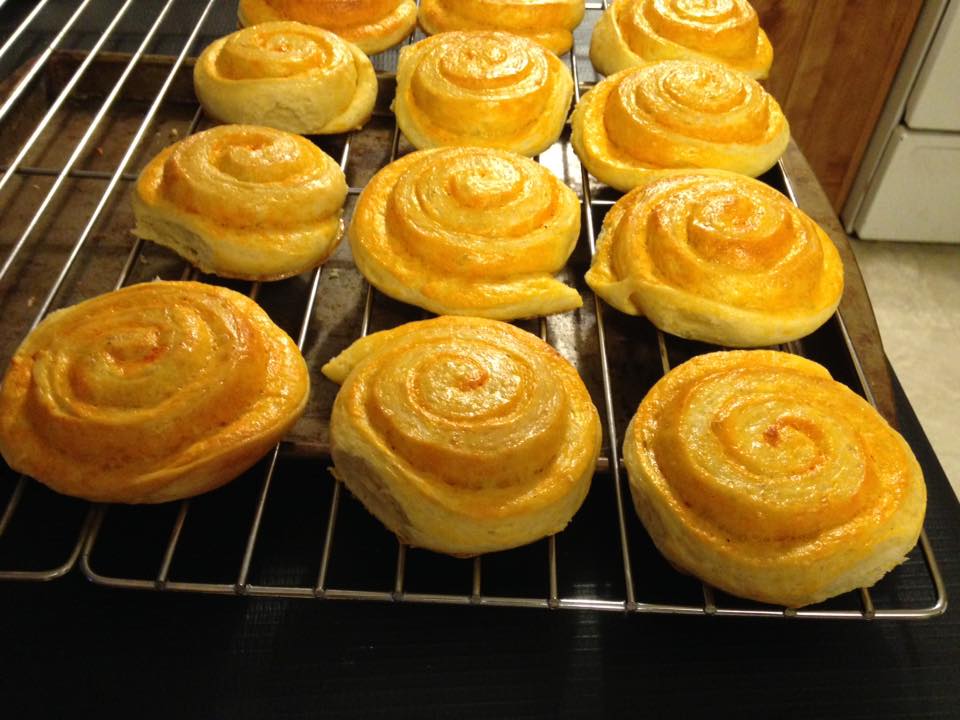
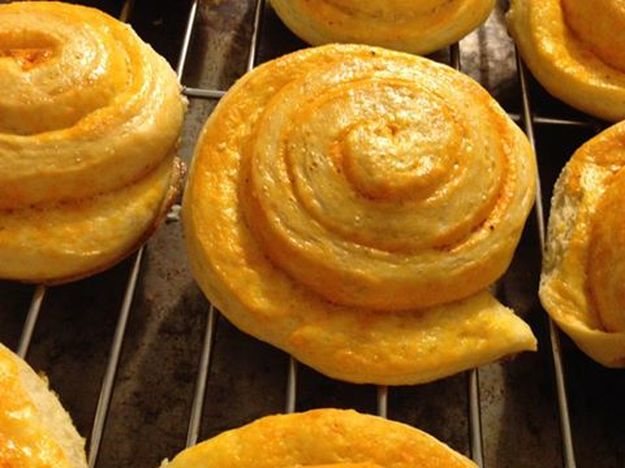
 ...and our Guest posts continue from JD on with recipes using sourdough starter. I think these look crazy tasty!! I bet these would be awesome served at Thanksgiving too. ~Enjoy! Diane Sourdough Cheesy Wheels DOUGH 1/2 cup sourdough starter, fed or unfed 3 cups King Arthur Unbleached All-Purpose Flour or Organic All-Purpose Flour 2 1/2 teaspoons instant yeast 1 tablespooon sugar 1 1/4 teaspoons salt 1 large egg 5 tablespoons soft butter 2/3 cup lukewarm water TOPPING 4 tablespoons melted butter, divided 1/4 cup cheddar cheese 1/4 teaspoon paprika, optional Instructions Combine all of the dough ingredients in a large bowl, and mix and knead — using your hands, a stand mixer, or a bread machine set on the dough cycle — to make a soft, smooth dough. Place the dough in a lightly greased container — an 8-cup measure works well here — and allow the dough to rise for 1 1/2 to 2 hours, until it's just about doubled in bulk. Gently deflate the dough, and transfer it to a lightly greased work surface. Roll and pat the dough into a rough rectangle approximately 12" x 16". Put 2 tablespoons melted butter in a small bowl, and add the paprika, if desired; it's there for color, and accentuates the buns' swirl, but omit it if you wish. Spread the dough with the melted butter. Starting with a long side, roll the dough into a log. Cut the log in 1" slices, using a sharp knife, or a piece of dental floss looped between your fingers. Lightly grease two 8" or 9" round cake pans. Arrange 8 buns in each pan. Cover the pans, and let the buns rise for 60 minutes, until they're noticeably puffy. Don't let these buns rise too long; you want them to have enough rising power left to expand nicely in the oven. Towards the end of the rising time, preheat the oven to 350°F. Uncover the pans, and brush each bun with some of the remaining melted butter. Bake the buns for 22 to 25 minutes; they'll color only slightly. Remove the buns from the oven, and turn them out of the pan onto a rack. Brush with any remaining melted butter. Serve hot or warm. To reheat, place the buns on a baking sheet, tent lightly with aluminum foil, and bake for 10 minutes in a preheated 350°F oven. Wrap any leftover buns airtight, and store at room temperature for several days. For longer storage, wrap airtight and freeze. Yield: 16 buns Photos by: JD Provence for Canning and Cooking at Home Recipe Adapted from: King Arthur Flour/JD Provence
0 Comments
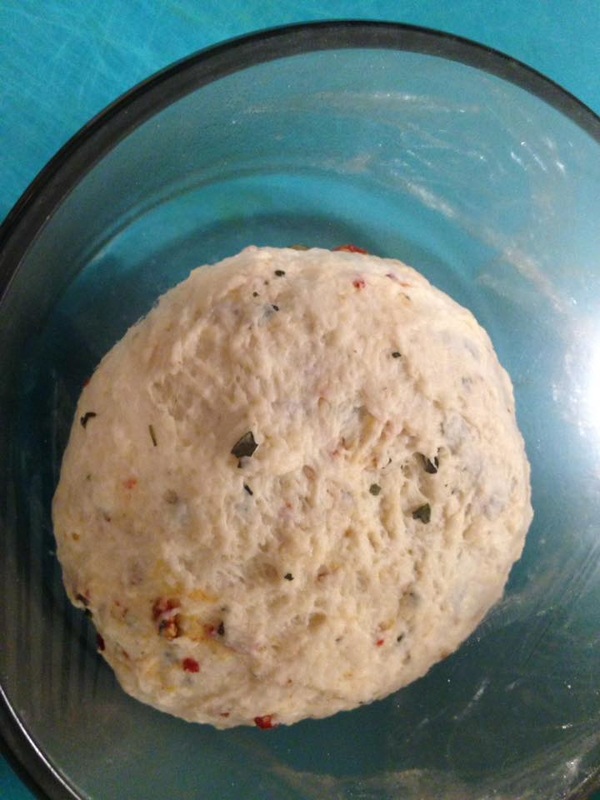
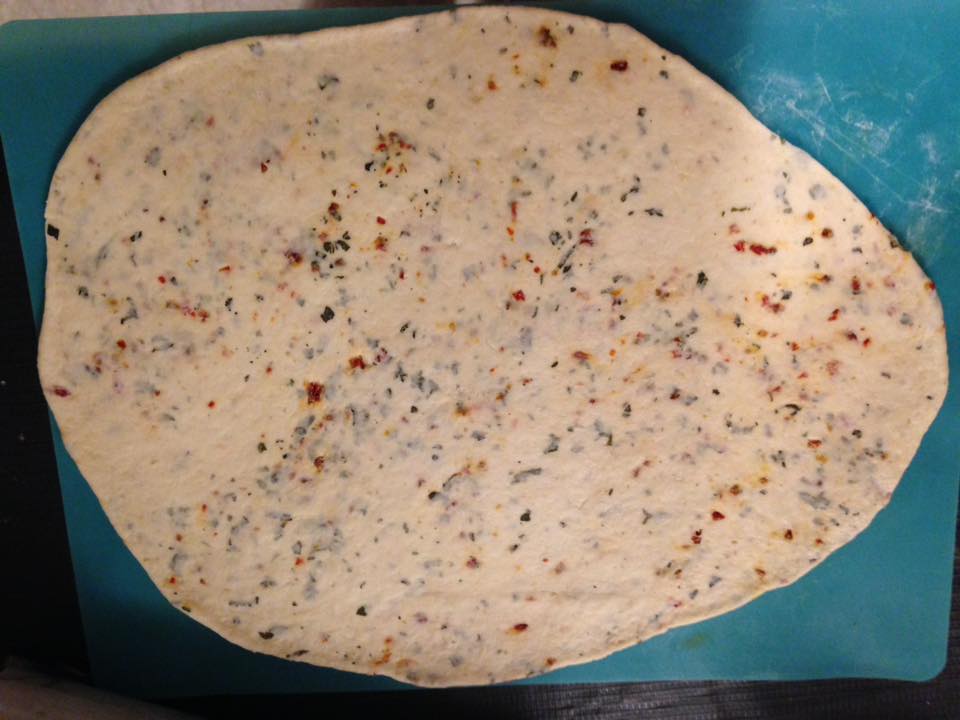
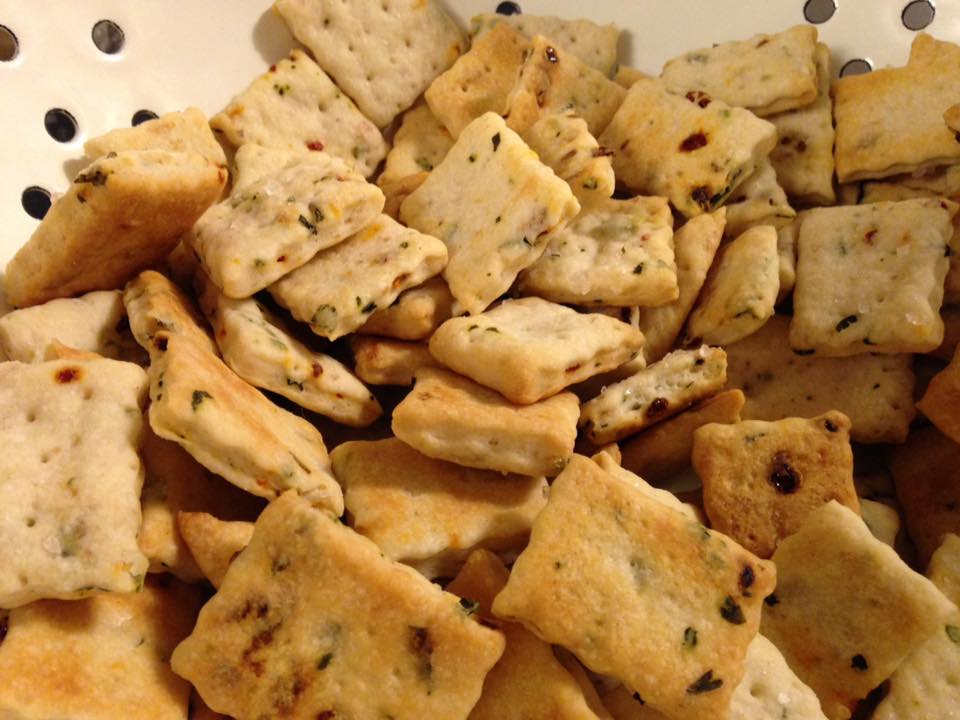 Tomato Basil Sourdough Crackers Ingredients: 1 cup flour 1/2 teaspoon sea salt 1 cup unfed sourdough starter... 1/4 cup (4 tablespoons) unsalted butter, room temperature 2 tablespoons dried herbs of your choice, optional 1\8 cup chopped, dried tomatoes 1\8 cup dried basil oil for brushing coarse salt (such as kosher or sea salt) for sprinkling on top Instructions Mix together the flour, salt, sourdough starter, butter, and optional herbs to make a smooth(not sticky), cohesive dough. Divide the dough in half, and shape each half into a small rectangular slab. Cover with plastic wrap, and refrigerate for 30 minutes, or up to a couple of hours, until the dough is firm. Preheat the oven to 400°F. Very lightly flour a piece of parchment, your rolling pin, and the top of the dough. Working with one piece at a time, roll the dough to about 1/16" thick. The dough will have ragged, uneven edges; that's OK. Just try to make it as even as possible. Transfer the dough and parchment together onto a baking sheet. Lightly brush with oil and then sprinkle the salt over the top of the crackers. Cut the dough into 1 1/4" squares; a rolling pizza wheel works well here. Prick each square with the tines of a fork. Bake the crackers for about 20 minutes, until the squares are starting to brown around the edges. When fully browned, remove the crackers from the oven, and transfer them to a cooling rack. Store airtight at room temperature for up to a week; freeze or dehydrate in a dehydrator for longer shelf life or storage. Yield: about 100 crackers, 20 servings. Guest Post by: JD Provence - Recipe adapted from KAF (Sourdough Crackers) Photos by: JD for Canning and Cooking at Home "Once you create a sourdough starter - you open yourself up to endless baking possibilities! " JD decided to tackle creating/growing some starter and created some wonderful recipes already using it! ~Enjoy! Diane The Starter: When you get the dry starter you feed it: 1 Tablespoon Water 1 Tablespoon Flour, then follow on with the feeding: 1/3 Cup Flour + 1/4 Cup Water. 1-2 times daily. Ideal temperature 80-85, place on-top of freezer or water heater (warmest place in house). Note: Temp over 90f will kill it. Where to find "wild yeast" that is used to create the Starter? You can purchase 'wild yeast' OR make your own 'wild yeast' ..."A sourdough starter is how we cultivate the wild yeast in a form that we can use for baking. Since wild yeast are present in all flour, the easiest way to make a starter is simply by combining flour and water and letting it sit for several days. You don't need any fancy ingredients to "capture" the wild yeast or get it going — it's already there in the flour. (Also, the yeast adapts to whatever environment it is in. So even if your cousin in San Francisco gives you some sourdough starter, it will eventually no longer be true San Francisco sourdough, but rather New York sourdough or Austin sourdough or London sourdough.)After a day or two, bubbles will start to form in the starter, indicating that the wild yeast is starting to become active and multiply. To keep the yeast happy, we feed the starter with fresh flour and water over the next several days, until the starter is bubbly and billowy. Once it reaches that frothy, billowy stage, the starter is ready to be used..." (from TheKitchn) JD's Sourdough Starters date WAY BACK in not only time but, origination! take a look below": "...the sourdough cultures I'm working with? Black Hills, Dakota Territory, circa 1865. Sitka Alaska, circa 1885, San Fransisco, circa 1780.." JD Guest post & photo by: JD for Canning and Cooking at Home and The Kitchn 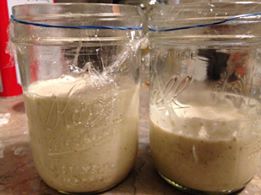 |