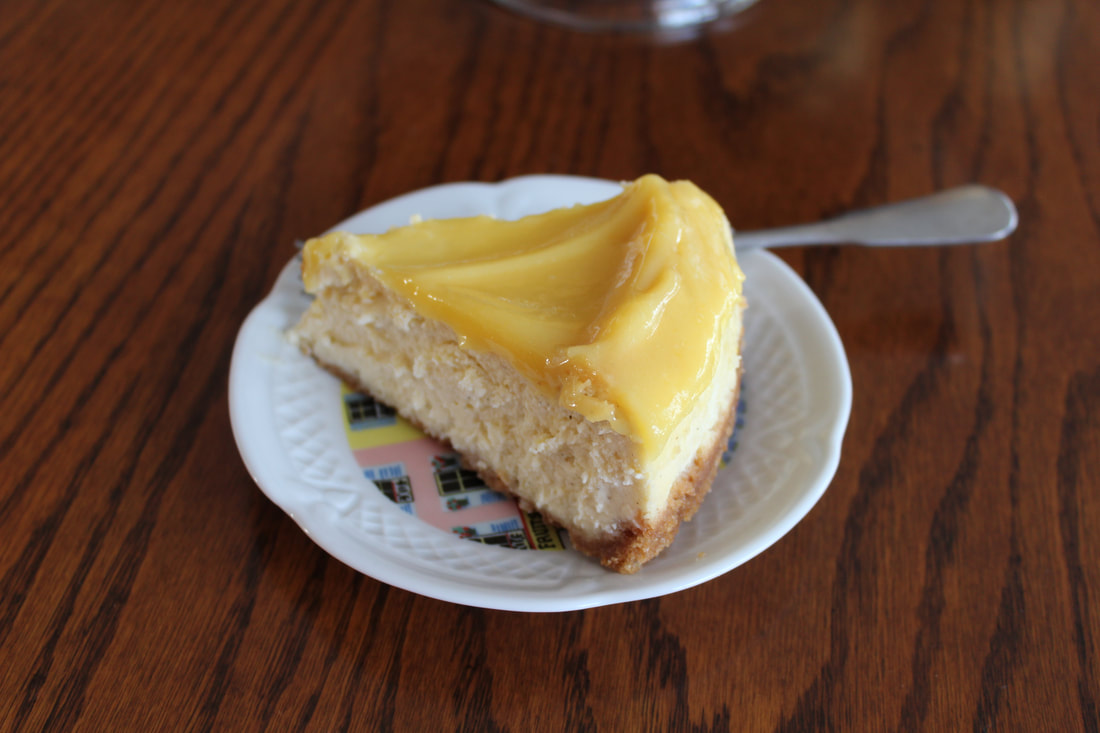
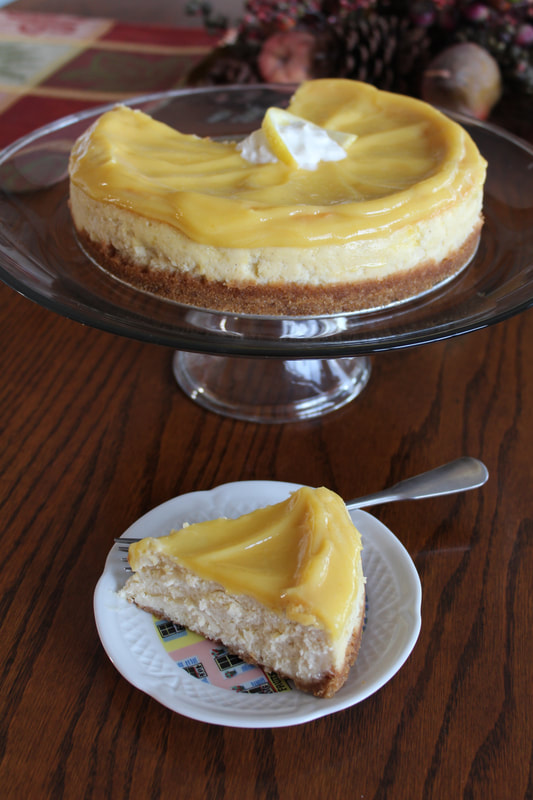
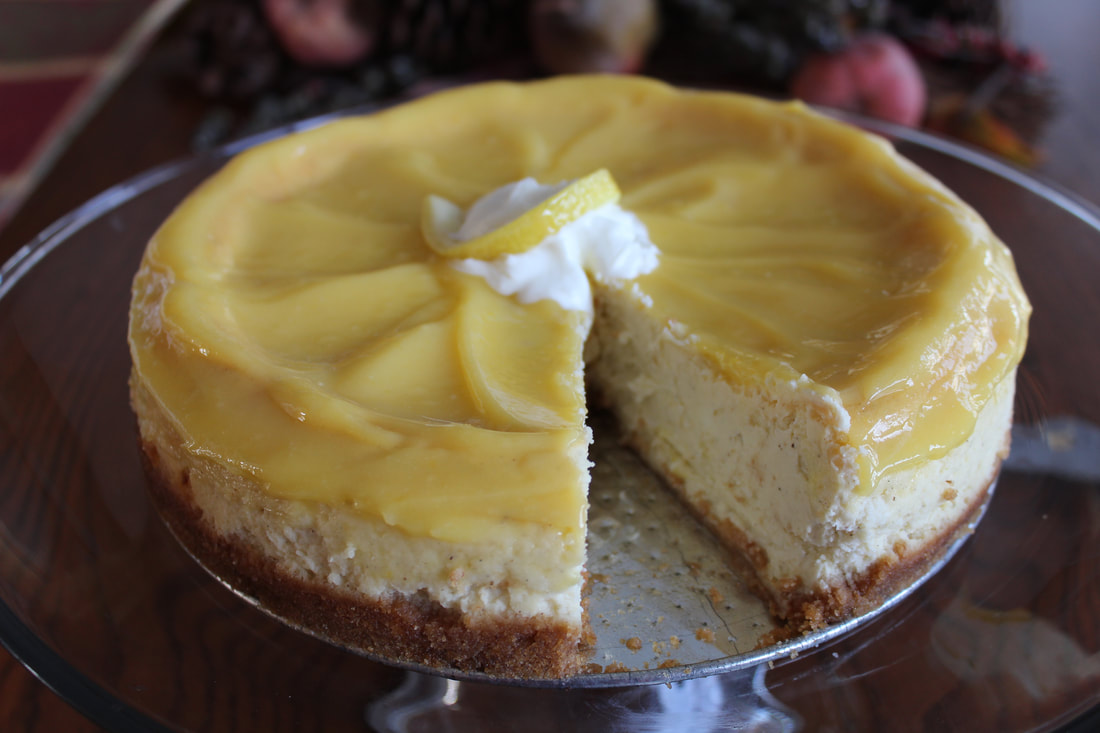
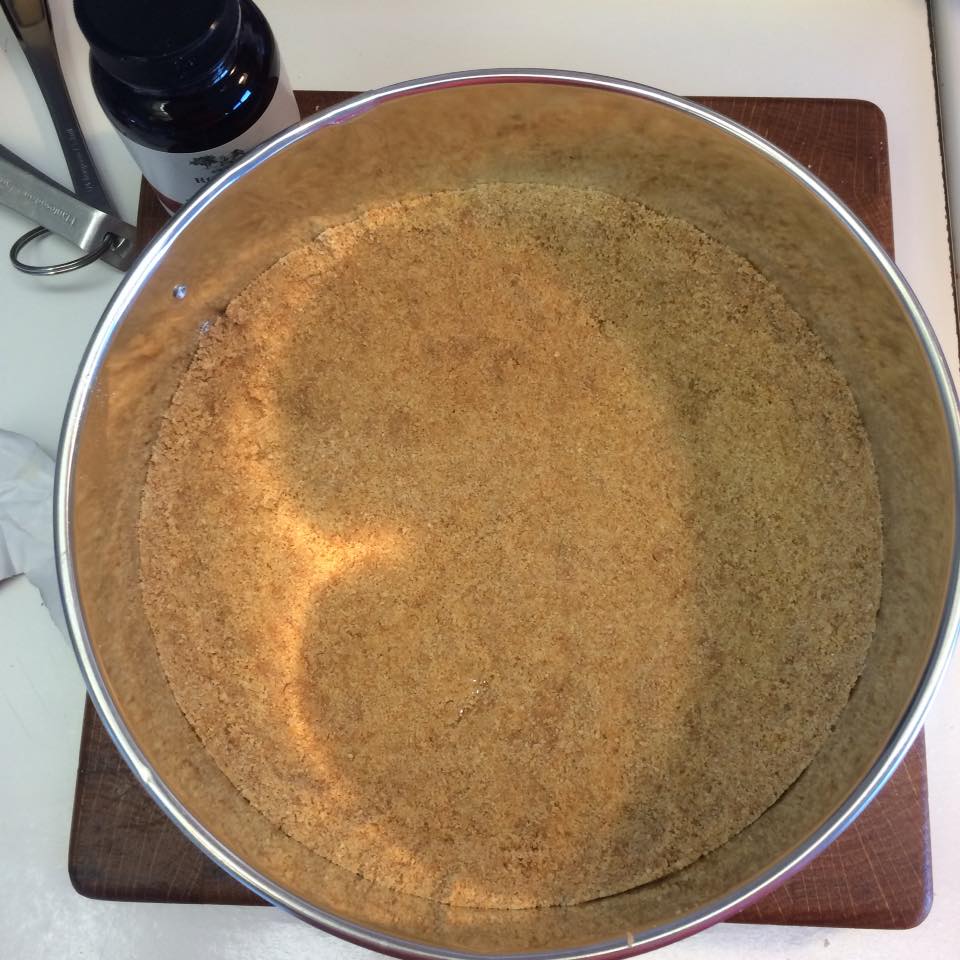
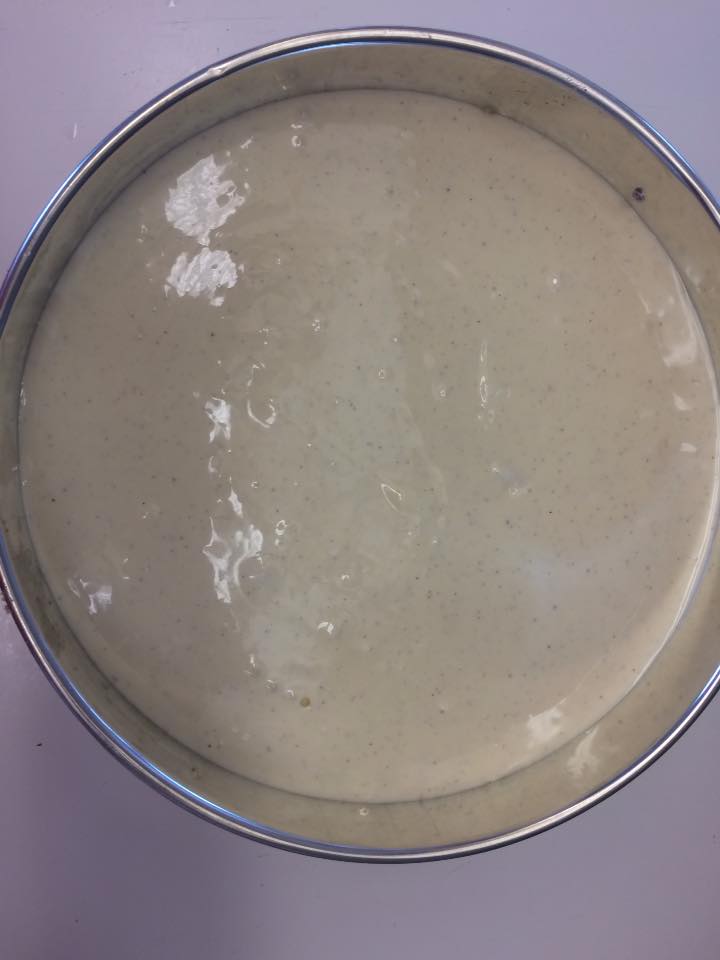
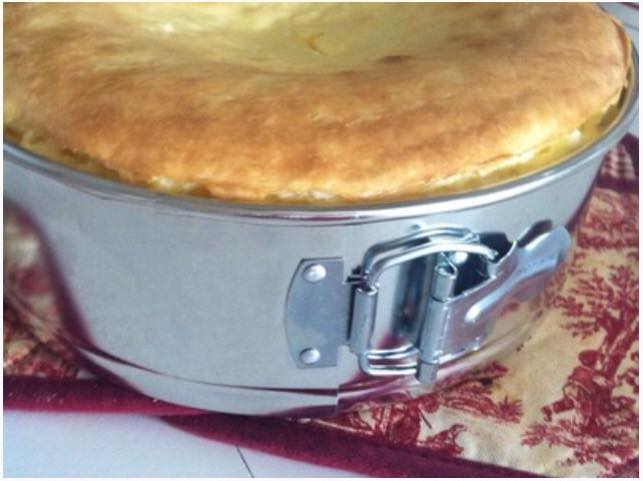
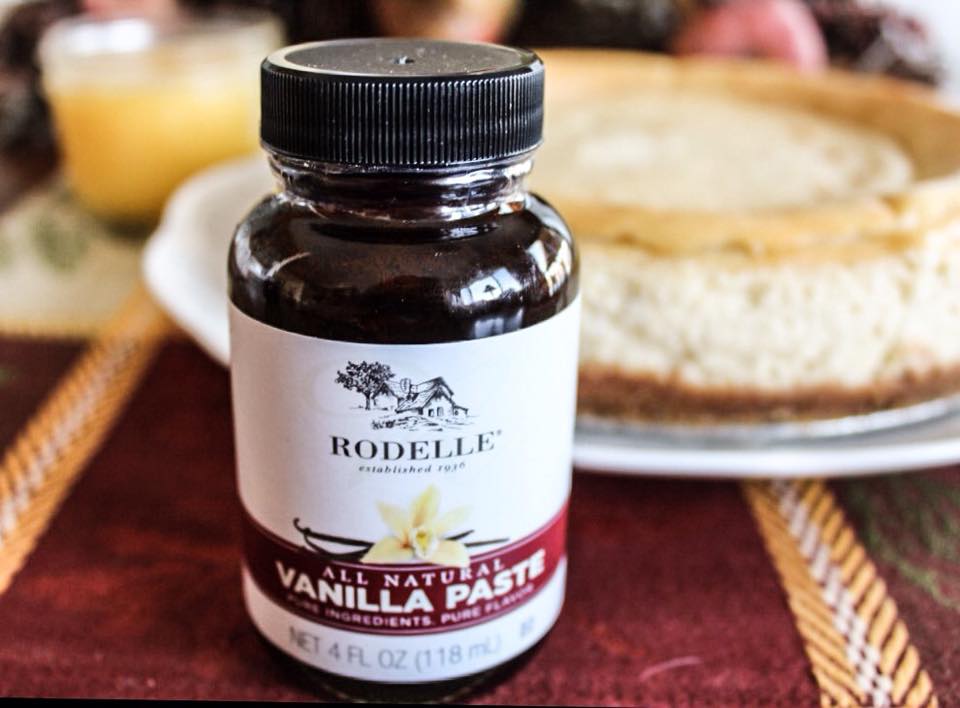
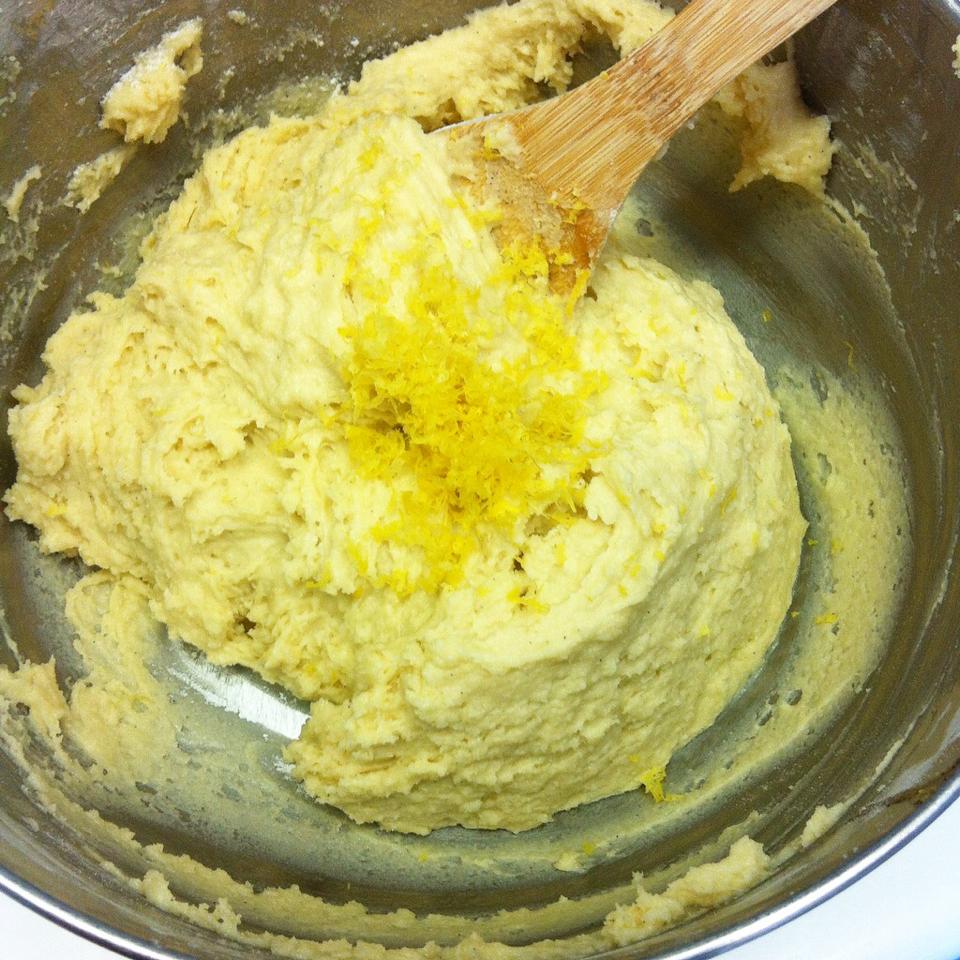
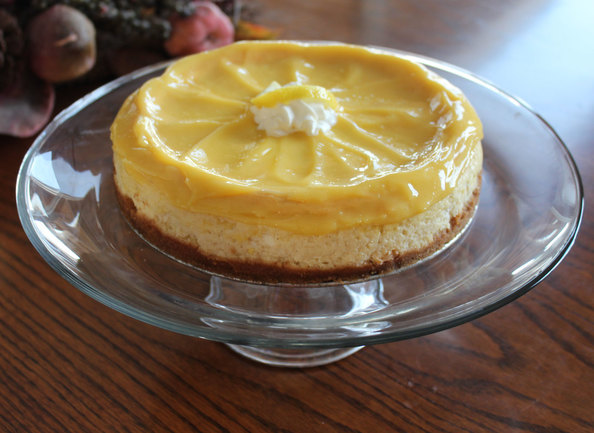
 When canning and cooking at home goes hand in hand in a new recipe creation, and the result turns out beyond outrageously tasty - it's nirvana to me! This is why I created my website; to use my homemade, home-canned items (in this case, my Lemon Curd) and quality ingredients, that take my recipe creations to a whole new level. This time, by combining lemon curd with a great tasting homemade cheesecake infused with one of the best vanilla pastes which enhances the depth and richness of this cheesecake, truly a winner for any occasion. ~Enjoy! Diane Vanilla Bean Cheesecake with Lemon Curd Topping Crust Ingredients: 1 cup finely crushed Graham Crackers (about 14 square crackers) 3 Tablespoons Butter, melted 3 Tablespoons Sugar Vanilla Bean Batter Ingredients: 4 packages (8 oz. each) Cream Cheese, softened 1 cup Sugar 1 cup Sour Cream 1 Tablespoon, plus 1 teaspoon Vanilla Bean Paste 4 Eggs Topping: Homemade Lemon Curd (follow directions on making, click here) Other Great Toppings: Dulce de Leche, Raspberry Jam and the like... Directions: Preheat oven to 325ºF. CRUST:
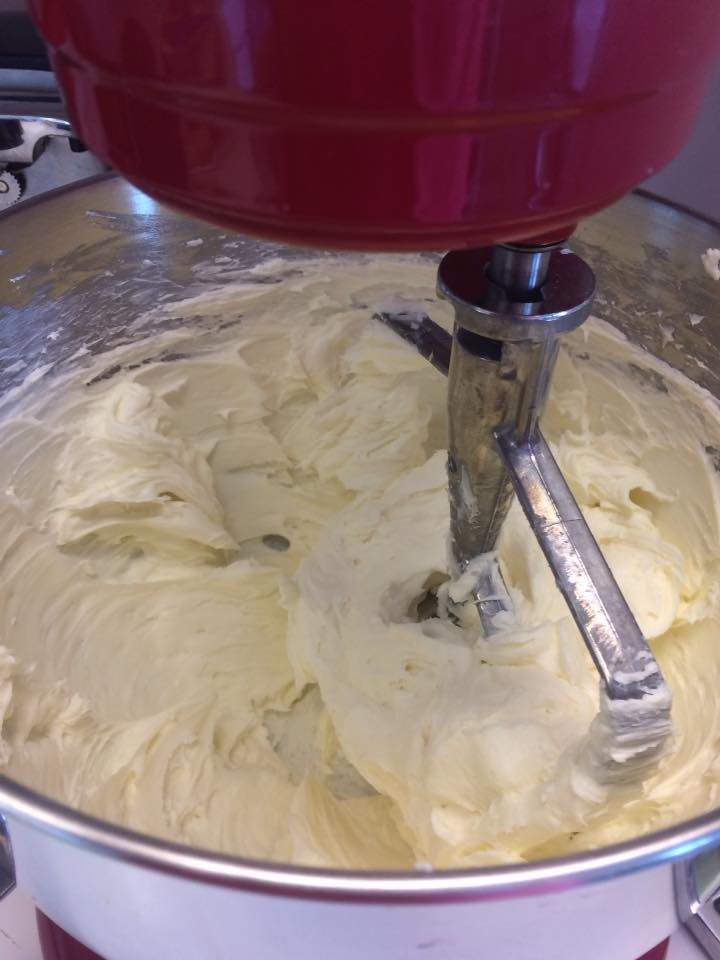
BATTER:
Recipe Note: **Rodelle Vanilla Bean Paste and other great baking essentials can be found on their website at www.rodellekitchen.com Kitchen Tip: crack your 4 eggs into a cup first - then drop into batter one yolk at a time - this keeps any shells out of your batter and also doesn't spoil your batter if an egg is "bad"... 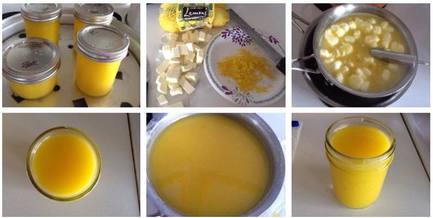 Homemade, Home-canned Lemon Curd
0 Comments
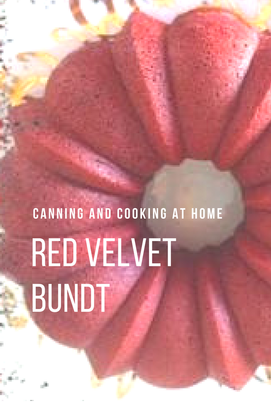 I've made this bundt many times. This is always a hit with my friends and family. This bundt cake is rich in color and taste! Perfect for serving up to your favorite Valentine too. I prefer to pipe on my cream cheese frosting but, even a decadent white chocolate drizzle works too! Red Velvet cake is moist, rich, delicious and sure to leave you smiling. ~Enjoy! Diane Red Velvet Bundt Cake with Cream Cheese Frosting Ingredients: Cake 2 1/2 Cups Flour 1 3/4 Cups Sugar 1 teaspoon Baking Soda 3/4 teaspoon Salt 2 Tablespoons Cocoa Powder 1 1/4 Cup Vegetable or Canola Oil 1 Cup Buttermilk 2 Large Eggs, (room temperature) 2 Tablespoons Red Food Coloring 1 teaspoon Distilled White Vinegar 2 teaspoons Vanilla Frosting 4 Ounces Butter, Softened 8 Ounces Cream Cheese, Softened 2 Cups Confectioners' (powdered) Sugar 1 Teaspoon Vanilla Instructions:
Recipe Adapted from: Kiss my Bundt Photos by: Diane Baker for Canning and Cooking at Home 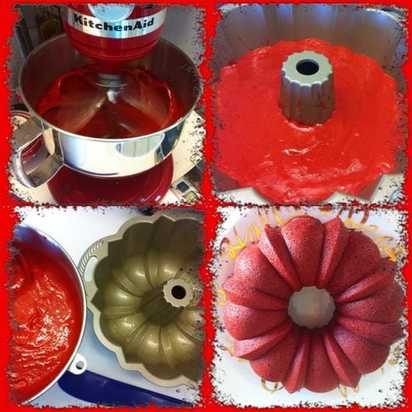 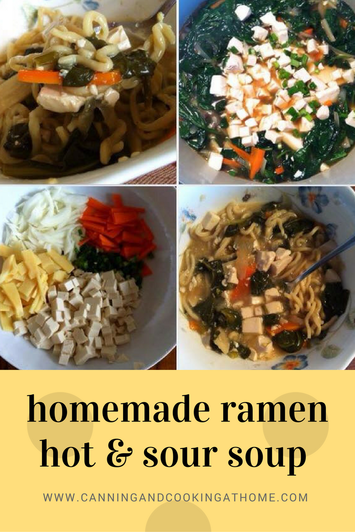 Ramen broths and soup recipes can be a highly regarded secret in Japan. Families passing down recipes generation to generation. I was fortunate to have my dear Japanese friend Arleen share her families favorite version many years ago. I've adapted the recipe a bit more to my families liking over the years but, the overall taste is the same. A spiced broth with fresh vegetables in my homemade chicken broth/stock and adding in homemade ramen noodles upon serving. A perfect pairing! ~ Enjoy! Diane
Homemade Ramen Hot & Sour Soup Ingredients: 4 cups chicken broth 3 tablespoons soy sauce 1 bag baby spinach, fresh 1/2 cup mushrooms, thinly sliced 1/2 tablespoon Sriracha sauce * 1 Tbs Red Hot Chili Oil * 1/4 teaspoon black pepper 1/4 cup rice vinegar 1/2 cup bamboo shoot, julienned 6 ounces firm tofu, cubed *silkened 2 tablespoons cornstarch 2 tablespoons water 1 egg, beaten 1/4 teaspoon toasted sesame oil 2 green onions, sliced serve over my: homemade ramen noodles Directions: Bring chicken broth to a simmer in a 3 qt saucepan/pot. Add soy sauce, sriracha sauce, shredded meat and mushrooms. Simmer for 5 minutes. Add pepper, rice vinegar, bamboo shoots and the cubed tofu. Simmer 5 minutes. Combine cornstarch and water, mix well. Add to soup, stirring continuously until thickened. Simmer for 5 minutes. Beat egg in a cup and gradually stir into soup mixture while using a fork to 'thread' the egg. Add Red Hot Chili Oil and Stir in. After 30 seconds add green onion and sesame oil, stir well and remove from heat. Spoon Cooked Ramen into bottom of bowl, serve hot soup over. Diane's Kitchen Notes: *Sriracha sauce, Red Hot Chili Oil, Vinegar and Toasted Sesame Oil can be adjusted to taste. You can also use any mushrooms of choice, or whatever is available for added flavor. 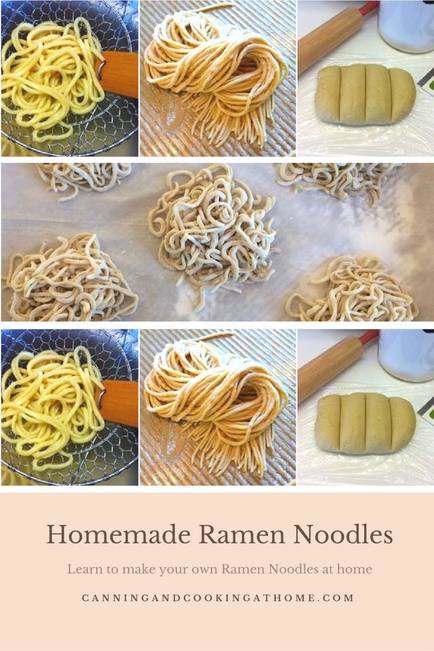 Homemade Ramen Noodles Noodles! Who doesn't love them! How about making your own Homemade Ramen Noodles. These can be cooked fresh or even from frozen. This simple noodle has such a rich history which dates back to 1900's Japan (thoughts are that the noodles did originated in China and were brought to Japan) These have a 'trick ingredient' from Inner Mongolia's Lake waters that transforms the dough into a bouncy/elastic broth loving noodle! The trick ingredient: Kansui (a lye-type water) in its place, we will be using baking soda. I made 3 doughs with slight variations to the egg, and baking soda and I feel this one is the best. Since you don't want mushy noodles, do what I do and cook the noodles and soup or broth separately and serve together. That way you prolong the structure of the ramen. Try these ramen noodles with my Hot & Sour Soup. ~Enjoy! Diane Homemade Ramen Noodles Ingredients: 3 cups all-purpose flour 1 teaspoon fine sea salt 1 teaspoon baking soda 2 large eggs beaten 1/2 cup warm water Directions: In the bowl of a stand mixer, fitted with a dough hook, stir together flour, salt and baking soda. Add in the beaten eggs and warm water. Mix at the lowest speed until the ingredients are moistened. Increase speed to 'dough level' (2 on my machine) and mix until dough comes together and a dough ball has formed, continue to knead with dough hook for 5 minutes, until dough is smooth. Turn dough out on to a floured surface and shape into a rectangle. Cover with plastic wrap and refrigerate for at least 1 hour. Remove dough from refrigerator and divide into 4-6 equal pieces on floured work surface and cover loosely with plastic wrap. Take each section of dough and using a rolling pin, roll into a rectangle. Use a sharp knife to trim up edges so that your final dough sheet is able to run through your pasta machine as a perfect rectangle. As you work, place the machine ready dough on a parchment lined baking sheet and cover with either a towel or wrap until you are done rolling out all the dough (you don't want your prepared dough to dry out.) Once you have your rectangle pieces of dough cut, run through a manual pasta machine, beginning at setting 3 (run dough through twice on 3) Turn dial to the next setting 2 and run dough through once. For a shorter ramen noodle, cut the dough in half crosswise before running through the pasta cutter. Run dough through the spaghetti sized pasta cutter. Dust noodles with flour to coat and separate and place on prepared baking sheet in bundles. Repeat with remaining dough. If cooking fresh, cook noodles for 1 to 2 minutes in a generous amount of water or broth until cooked through. You can also freeze the noodles. They can be added to boiling liquid directly from the freezer and cook about 30 seconds longer than when fresh. Recipe Note: To knead the dough by hand only. Once you've stirred the ingredients together, turn out onto a floured surface; knead for 6 minutes, cover the dough and let it rest for 20 minutes; then knead again for 5 minutes and refrigerate tightly wrapped for at least an hour. Pictured below: Ramen Noodles with my Hot & Sour Soup *I subbed in baby spinach for the pork called for in my original recipe.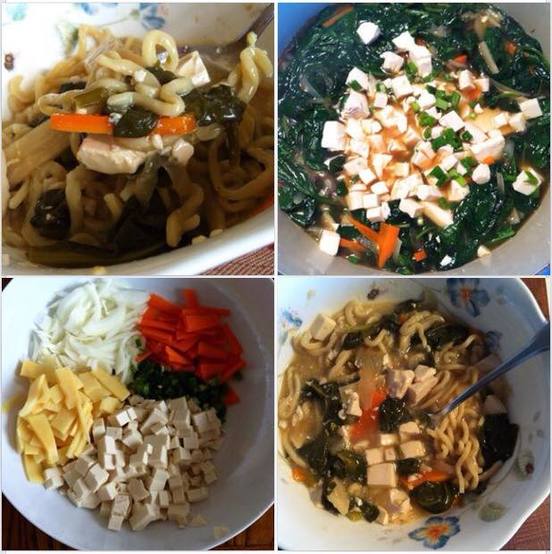 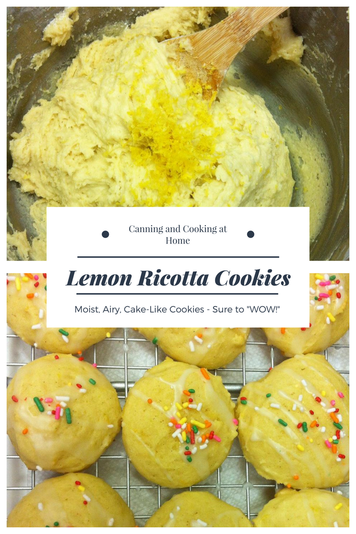 Two things happened the other day, I found myself facing needing to use up some ricotta cheese that was in our fridge and I my friend Claudia from What's Cookin' Italian Style Cuisine posted one of her most requested cookie recipes, that uses ricotta (view Claudia's recipe here). I know baking with sour cream or ricotta means a soft, moist end product that is sure to "Wow!" folks. I decided to make her cookies which is actually a recipe from her Mom, even better as I love true 'family recipes.' These cookies are moist, cake-like, airy and fluffy with the wonderful flavor of lemon shining through. This is a wonderful Traditional Italian cookie, and can be made into so many other wonderful flavors, I can't wait to make more!! ~Enjoy! Diane "Mom's Lemon Ricotta Cookies" (recipe can be doubled) recipe by: What's Cookin' Italian Style Cuisine Ingredients: 1 cup granulated sugar 1/2 cup butter, room temperature 1 cup whole milk ricotta cheese 2 large eggs 2 cups all purpose flour 1/2 teaspoon vanilla extract 1/2 teaspoon lemon extract 1 teaspoon baking soda pinch of salt 1 teaspoon lemon zest Directions:
Icing/Glaze: 2 cups powdered sugar drops of hot water to make a thin frosting 1/2 teaspoon grated lemon peel assorted candy sprinkles, for the tops of cookies Mix the water a little at a time until the frosting runs a small stream, add in peel. Dip cookies into the frosting and sprinkle with colored candies. Makes Approx: 3 1/2 dozen |