 Join me over at my Facebook Page: https://www.facebook.com/canningandcookingathome/ for a look back at 2015.
I will be sharing my Top 15 Recipes from 2015 over the next two days... Happy New Years ~ Diane
0 Comments
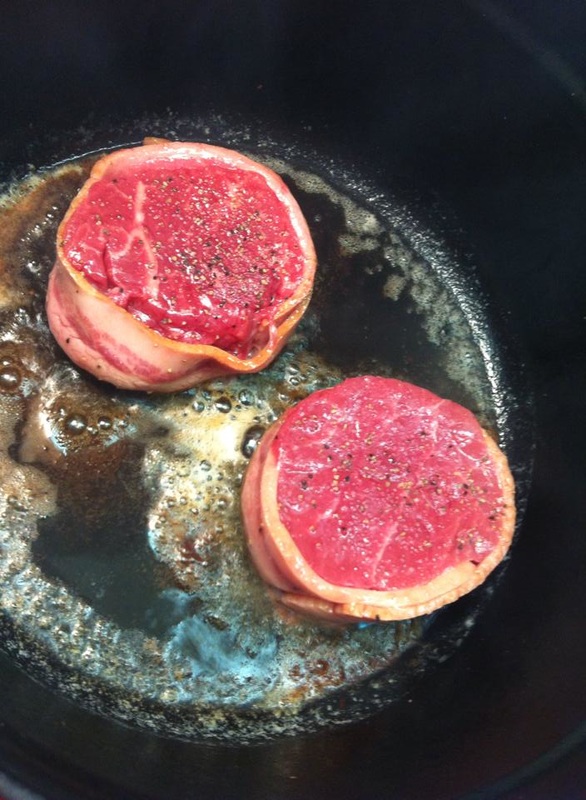
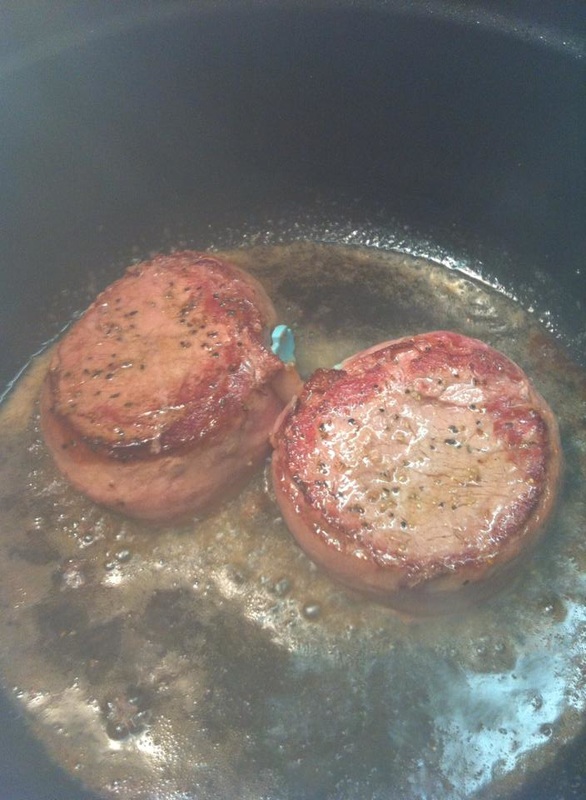
 Bacon Wrapped Beef Tenderloin It's too cold and snowy outside to grill these so, we did them quickly in the oven. I thought I would share as they are quite easy to cook when a grill is unavailable. All you need are a few tenderloins, a strip of bacon for each and a toothpick (soaked in water) to secure the bacon... Bacon Wrapped Beef Tenderloin Ingredients: Beef tenderloin Medallions Bacon Olive Oil Butter Salt Pepper Directions: Preheat the oven to 450 degrees F. Generously salt and pepper both sides of the steak. Wrap the steak with the bacon and secure with a toothpick. Heat an ovenproof skillet over medium-high heat. Add 1 Tbs butter and 1 Tbs olive oil. When melted, add the steak to the skillet and sear on both sides until a really nice color, about 1 minute per side. Remove the skillet or dutch oven from the stove-top and place into the oven to finish cooking. (I do place the lid on my Dutch Oven to prevent splatter) Cook until medium rare, 7 to 10 minutes. Remove from the oven and allow to rest for 5 minutes before serving. Recipe & Photos by: Diane Baker for Canning and Cooking at Home 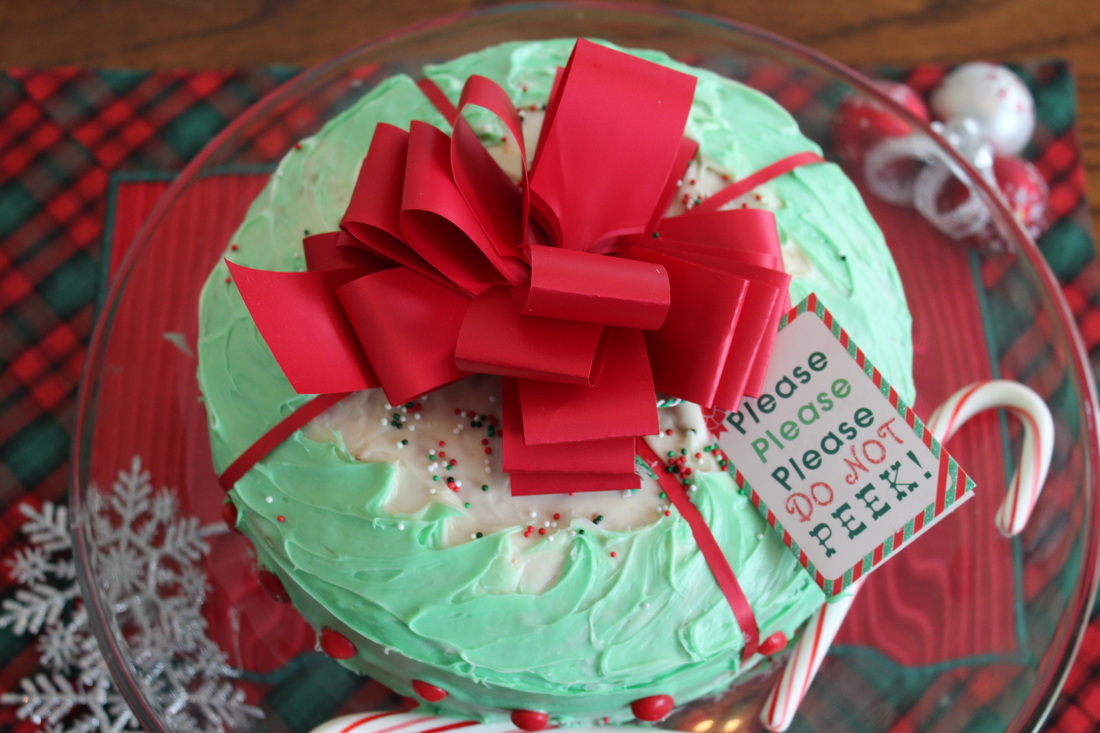 Want to whip up a cute cake to serve at a party? Take 3 simple items and take a "simple cake" to "cute"... What you need: 1) The Cake, store bought or homemade with simple icing. 2) A Bow, 3) Assorted Candies, candies that relate to your party or events 'theme"... What could be easier? take a simple iced cake and dress it up with 'accessories". I made two 9" round cakes, iced in white cream cheese frosting (and I held out some of the frosting to add green food coloring to) tossed on a bow and some non-perils on top, red hots dotting the perimeter of cake and candy cakes Photos by: Diane Baker for Canning and Cooking at Home 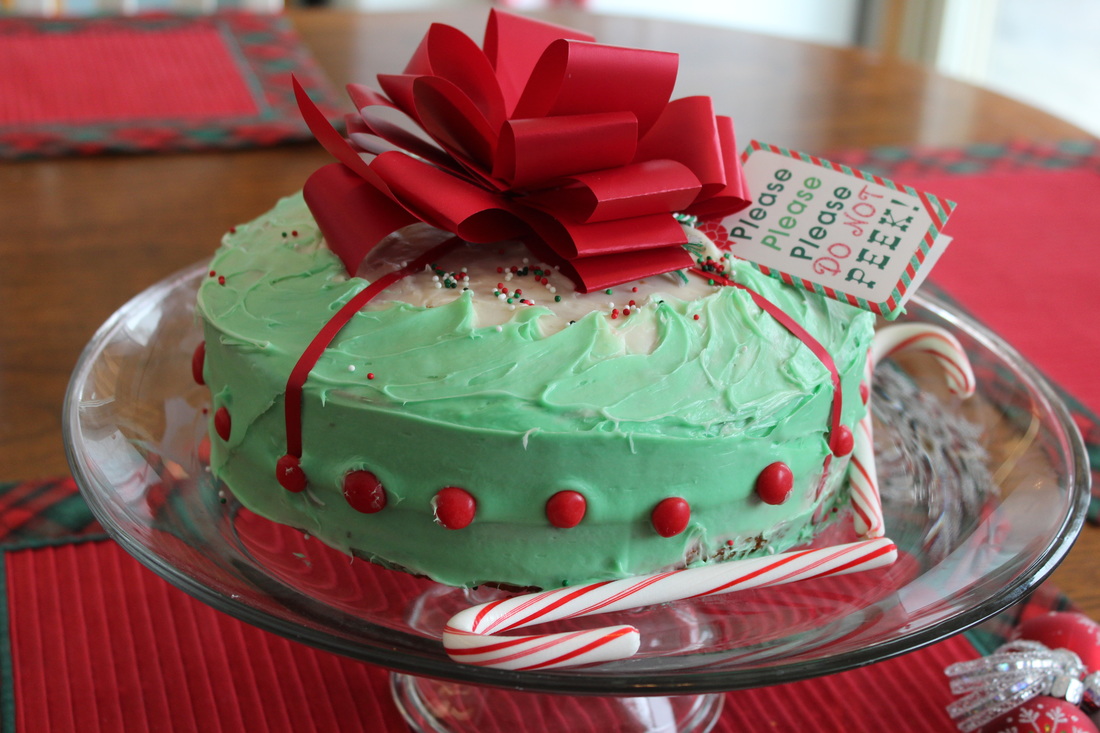 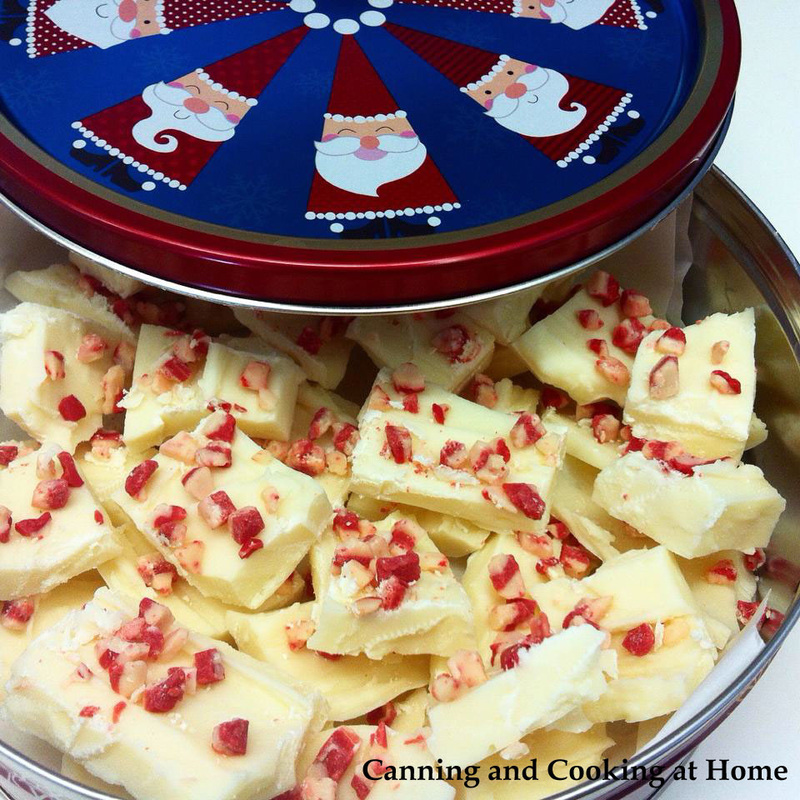 White Chocolate Peppermint Bark Candy
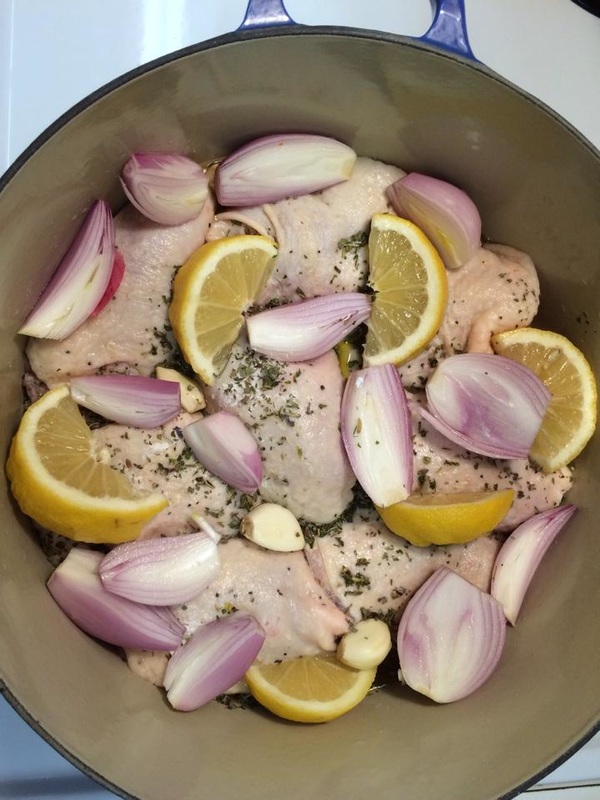
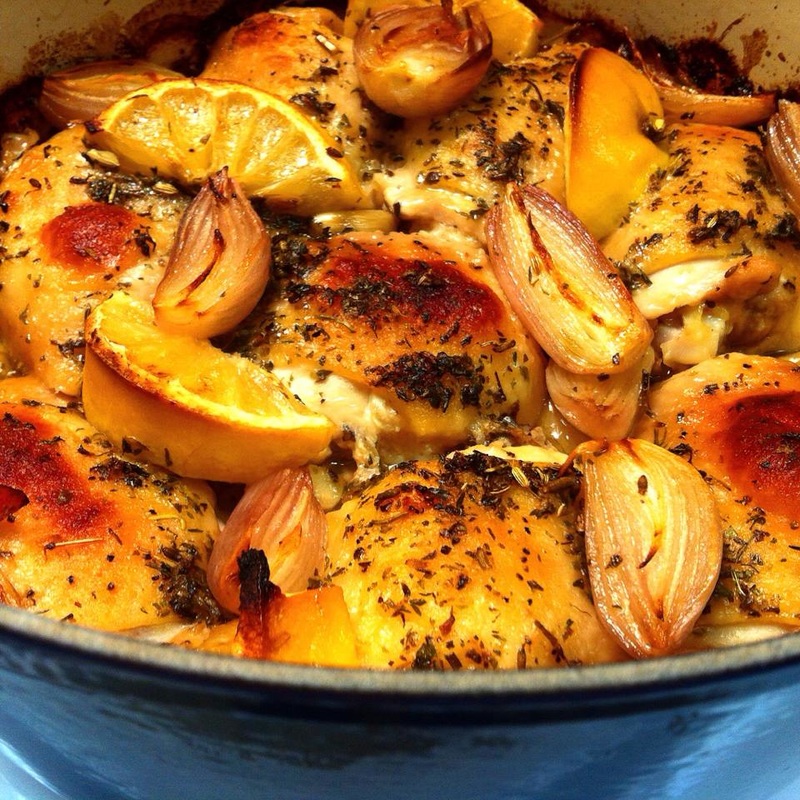
Ingredients: 1 20oz Pkg. Almond Bark (Vanilla flavored) 1 Cup Peppermint Candy Canes, crushed or Peppermint Baking Sprinkles 2 tsp Peppermint Extract *a few drops of red food coloring, *optional Parchment Paper/Liner 8x8 Baking Dish Directions: Using a double boiler or make one using two pots (rest a smaller pot in a larger one – in the bottom of the larger pot place water to boil but, don’t have the water touch the upper bowl). Place ½ the Almond Bark into top pot and keep an eye on it as it melts, stir frequently. When first ½ is melted, add remaining ½ of Bark to melt. Now add the Peppermint extract, a few drops of red food coloring, optional (until you get the pink-y color you want) stir well. Pour candy mixture into a prepared 8x8 dish that is lined with wax or parchment paper, sprinkle with crushed peppermint candy. Set in fridge at least 45 mins. Until cooled. Score with knife to cut into pieces, carefully break apart – then place back in fridge for a final 10 mins. Store in an airtight container/tin. Recipe and Photos by: Diane Baker for Canning and Cooking at Home  In this dish, you will want to eat the shallots and garlic right out of the pan! LOL I found this recipe in the NY Times. It's rated as one of their "top hits of 2015" so, I thought I'd give it a go. The ingredients seem simple enough - just bringing roasted chicken to a new level of flavors. The sweetness of the vermouth (wine or sherry) added in creates a slightly sweet flavor in combination with the lemon in this dish. I loved how the shallots and garlic melted into roasted sweet and tasty flavors! I know next time I will add more garlic to this dish so we have some to smear onto a baguette! I served this dish with a nice side salad and fresh green beans, it was a hit! My only tip on this recipe is to not "crowd" the pan with the chicken - I used my 7+quart dutch oven and had 8 skin-on thighs in there - which was probably 2 too many and took longer to cook. Also, when pouring in vermouth, make sure to not pour it directly over the chicken and instead, pour around it. It is important to 'baste' at the 30 min mark in this recipe - I basted all the chicken and the shallots, garlic to make sure they all finished roasting nicely. ~Enjoy! Diane Roasted Chicken Provençal Ingredients: 4 chicken legs (thigh-on) or 6 bone-in, skin-on chicken thighs 2 teaspoons kosher salt 1 teaspoon freshly ground black pepper 3/4 cup all-purpose flour 3 tablespoons olive oil 2 tablespoons Herbes de Provence 1 lemon, quartered 8 to 10 cloves garlic, peeled 4 to 6 medium-size shallots, peeled and halved 1/3 cup dry vermouth, dry white wine or sherry Directions: Preheat oven to 400 degrees. Season the chicken with salt and pepper. Put the flour in a shallow pan, and lightly dredge the chicken in it, shaking the pieces to remove excess flour. Swirl the oil in a large roasting pan, and place the floured chicken in it. Season the chicken with the Herbes de Provence. Arrange the lemon, garlic cloves and shallots around the chicken, then add the vermouth, wine or sherry to the pan. Put the pan in the oven, uncovered. Roast for 25 to 30 minutes, then baste all with the pan juices. Continue roasting for another 25 to 30 minutes, or until the chicken is very crisp and the meat cooked through. The more "crowded" your pan, the longer the chicken will take to brown up...and cook through. Serve in the pan. Recipe Note: I used 8 skin-on chicken thighs and it took about an extra 30 minutes to get the chicken browned and cooked through. Recipe Adapted from: The New York Times/"The Enduring Appeal Of Roasted Chicken Provençal." by Steven Stolman Photos by: Diane Baker for Canning and Cooking at Home |