CANNING AND COOKING AT HOME
  • Home
  • Diane's Blog
  • Canning 101
  • Pickling
    • My Pickle Creations
    • Pickle Recipes
  • Recipe Index
    • Canning Recipes >
      • Jams/Jellies/Fillings/Butters/Juices
      • Meats/Other
      • Pressure Canned Soups
      • Tomatoes
    • Cooking Recipes >
      • Breads
      • Breakfast
      • Instant Pot Recipes
      • Main Dishes
      • Soups
      • Sweets
      • Drinks
      • Sauces/Apps/Sides
    • Recipe Collections >
      • The Apple Cart
      • Asian Inspired Recipes
      • Bundts to Bake
      • Cherry Recipes (preserving)
      • Easter Menu Ideas
      • Freezer to SlowCooker
      • Irish Fare
      • Jelly & Jam Recipes
      • Mexican Inspired Recipes
      • Pickle Recipes
      • Soups
      • Summer Grillin' Guide
  • Work with Me
    • Privacy Policy
    • Give Aways
  • Recipes Via Email

Thumbprint Cookies

12/21/2020

0 Comments

 
Picture
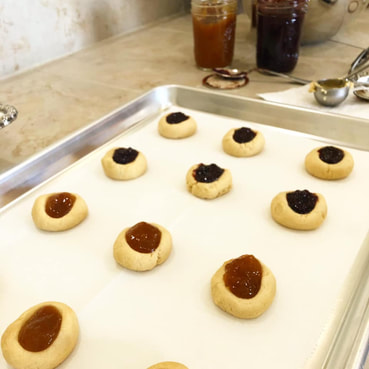
   Super easy cookie recipe - and as a bonus uses your homemade jam if preferred.  I used my peach jam and cherry jam for this batch of thumbprints. Enjoy! Diane 

Ingredients: 

2 Cups all purpose flour *I prefer King Arthur
1/2 teaspoon baking powder
1/2 teaspoon salt
1 Cup butter, room temperature
1/4 Cup white granulated sugar
1/2 Cup brown sugar, packed
1 large egg 
1 teaspoon vanilla extract *I prefer Rodelle
1 Cup prepared jam 


Directions:  

Preheat oven to 350F. 
   Cream the butter and sugars together on high in the bowl of a stand mixer until light and fluffy (2-3 minutes.)  Lower mixer speed and beat in all the remaining ingredients leaving the flour to add in last until well mixed.  Line baking sheets with parchment paper and roll dough into small 1.5" balls, placing about 2" apart on baking sheet.  Using your thumb, depress each ball so that it makes a small "well" for the jam to set in.  Fill each indentation with the jam of your choice.  Bake cookies 13-15 minutes or until bottom edges are slightly browned.  Let cool on baking sheets for at least 5 minutes before carefully removing to cooling racks.  Cookies can be stored up to one week in an air tight container. 

0 Comments

Dulce De Leche & Pecan Topped Vanilla Bundt Cake

12/15/2020

0 Comments

 
Picture
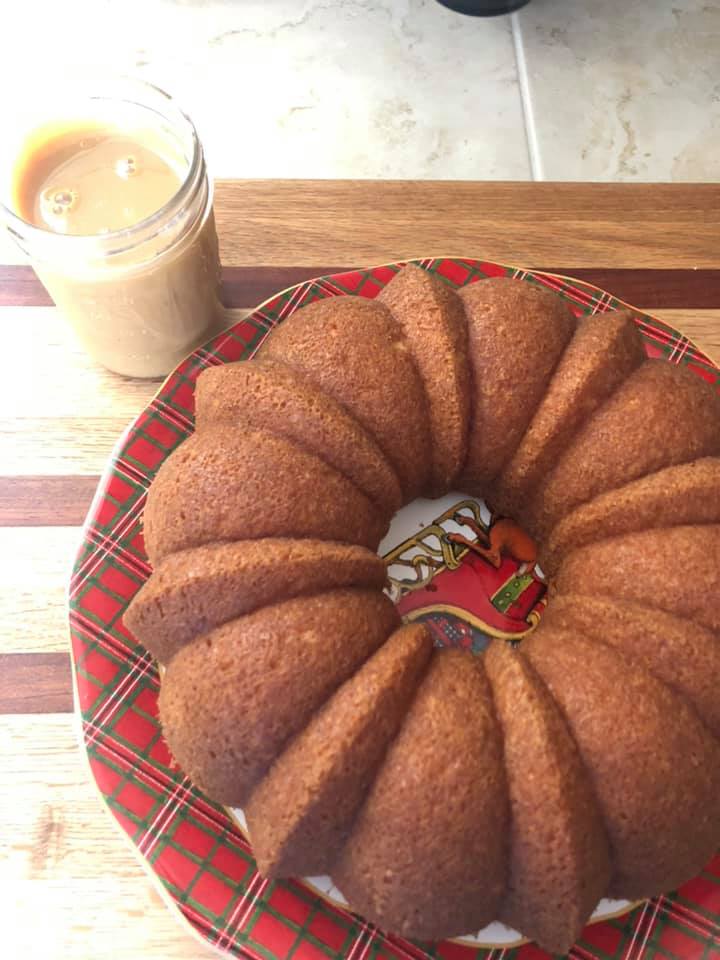
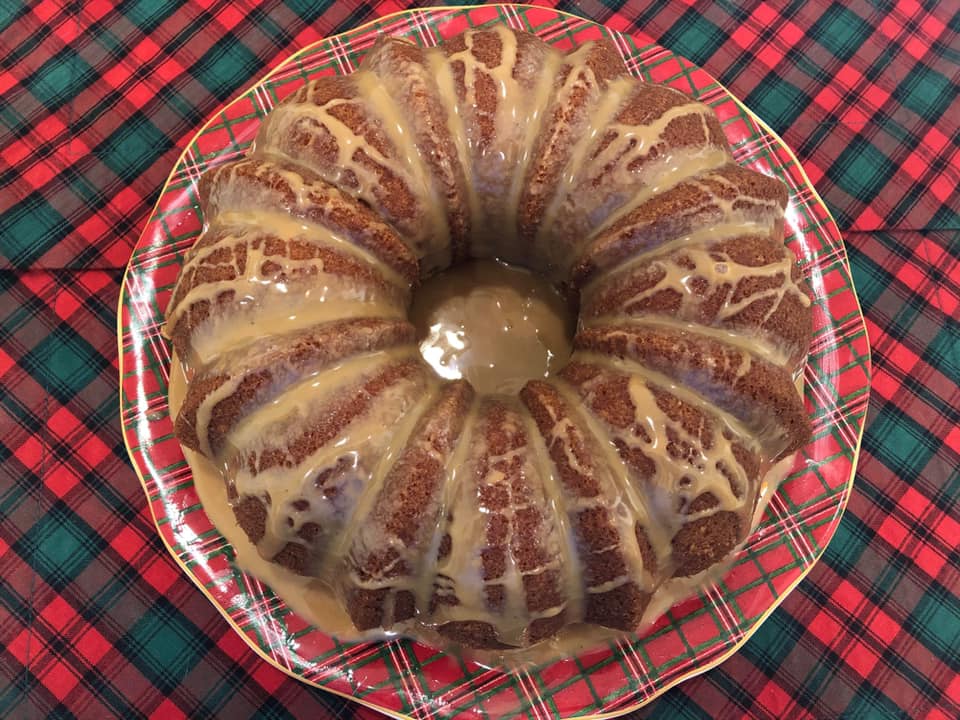
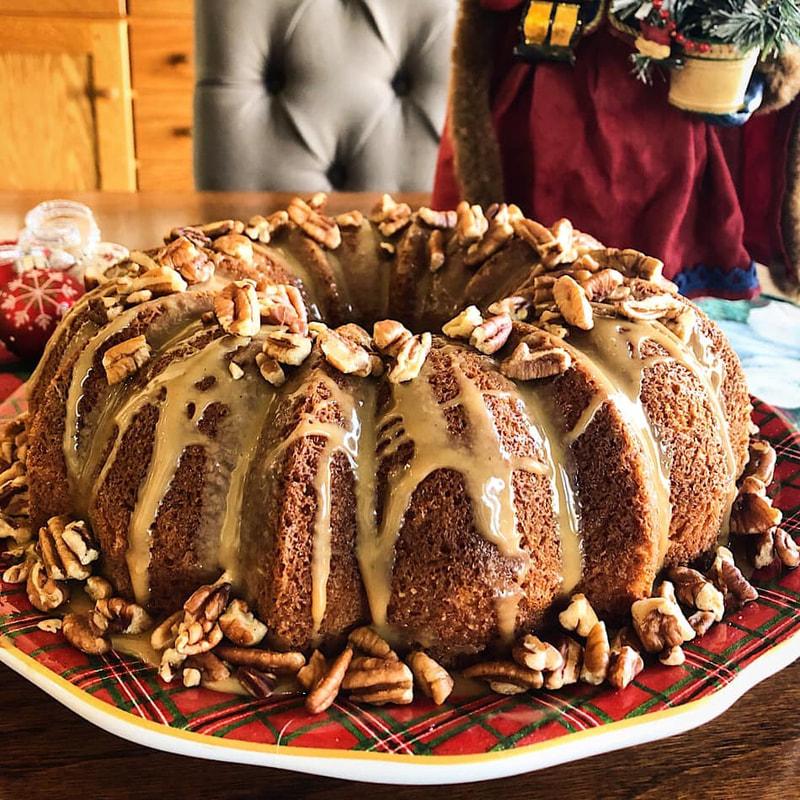
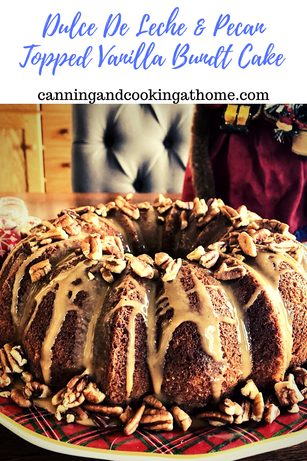
     Sometimes the Holidays mean you are rushed for time.  Try my decadent Vanilla Bundt cake that is dressed up with homemade dulce de leche and chopped pecans.  The "easy button" is used by utilizing a boxed cake mix and instant pudding but that does not detract from the final cake. Enjoy! Diane 

Ingredients: 
  1. 2 3/4 cups cake flour 
  2. 2 1/2 cups sugar 
  3. 1/2 cup powdered buttermilk 
  4. 1 tsp baking powder 
  5. 1/2 tsp baking soda
  6. 1 small box INSTANT Vanilla Pudding Mix (3.4 ounces)
  7. 1 Tablespoon Rodelle Vanilla Bean Paste 
  8. 1/2 cup Sour Cream
  9. 1/2 cup Canola Oil
  10. 3/4 cup Water
  11. 1/2 cup Sugar
  12. 4 Eggs

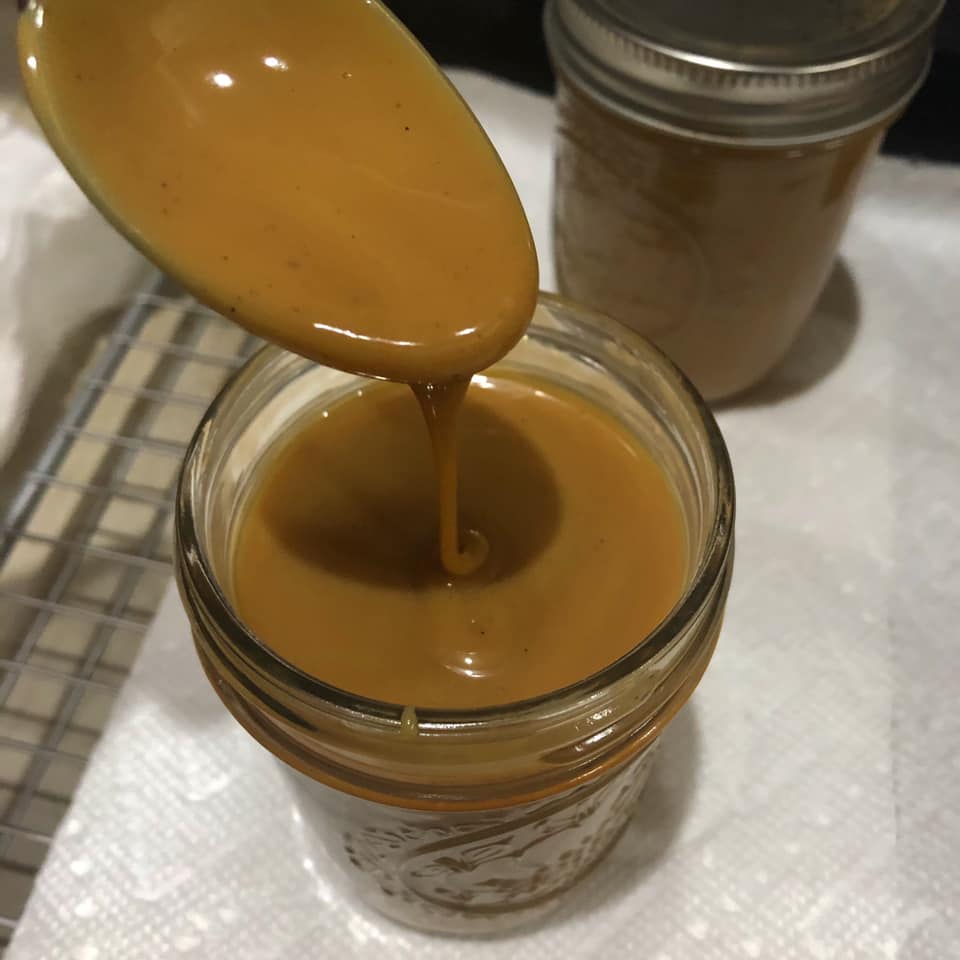
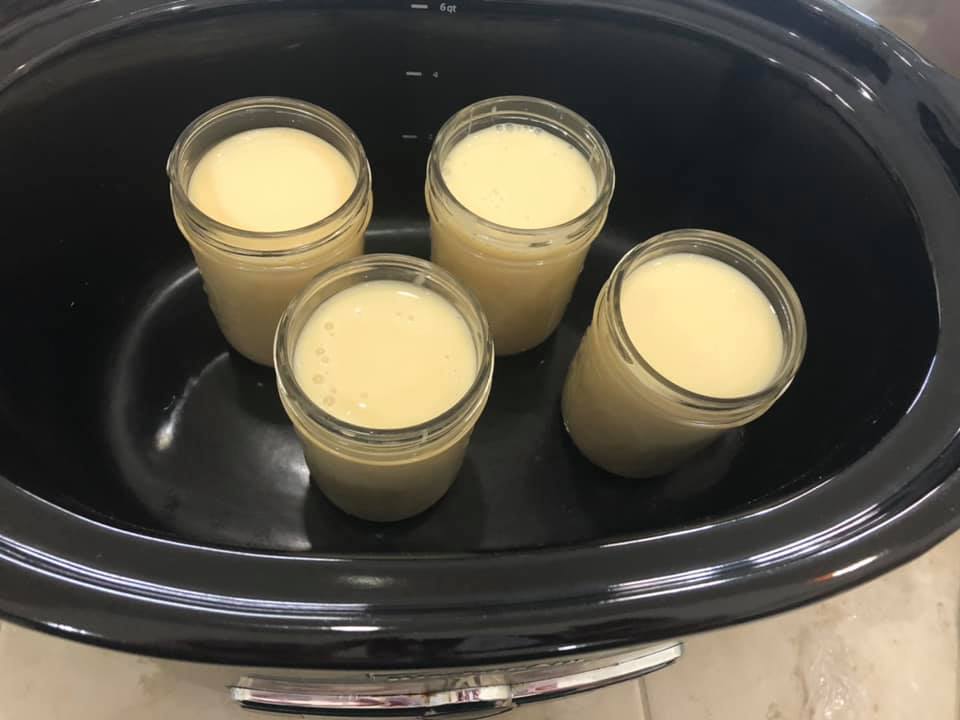
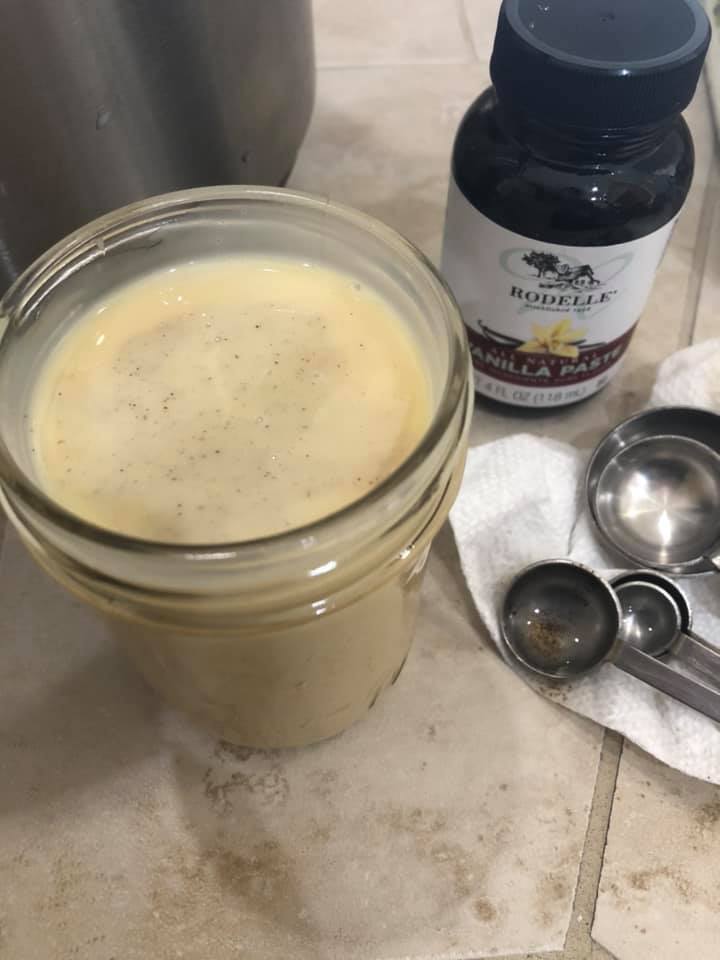
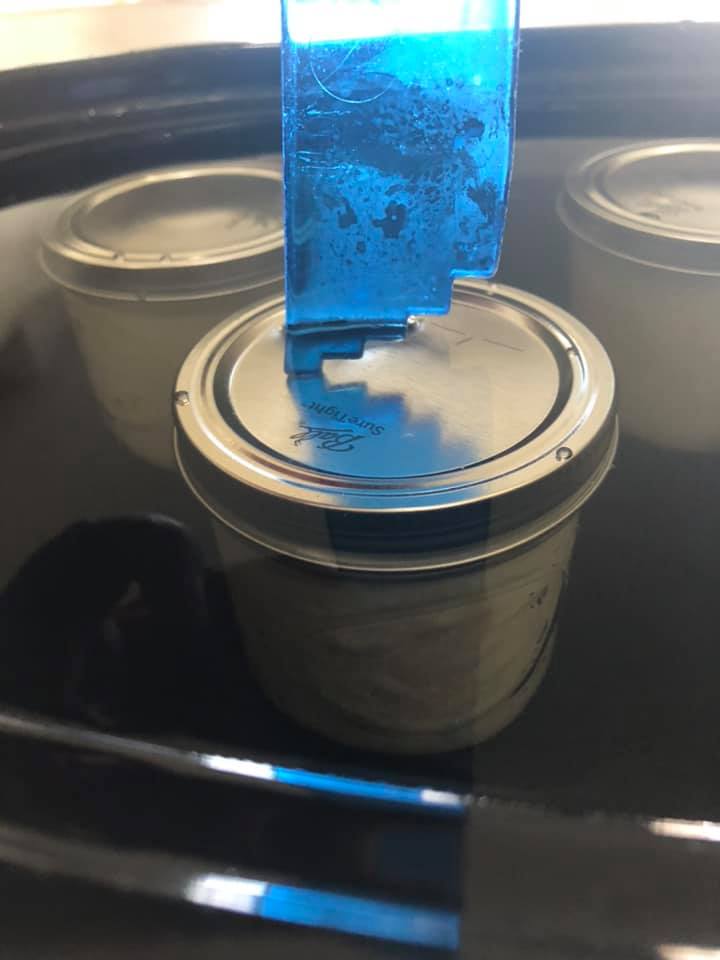
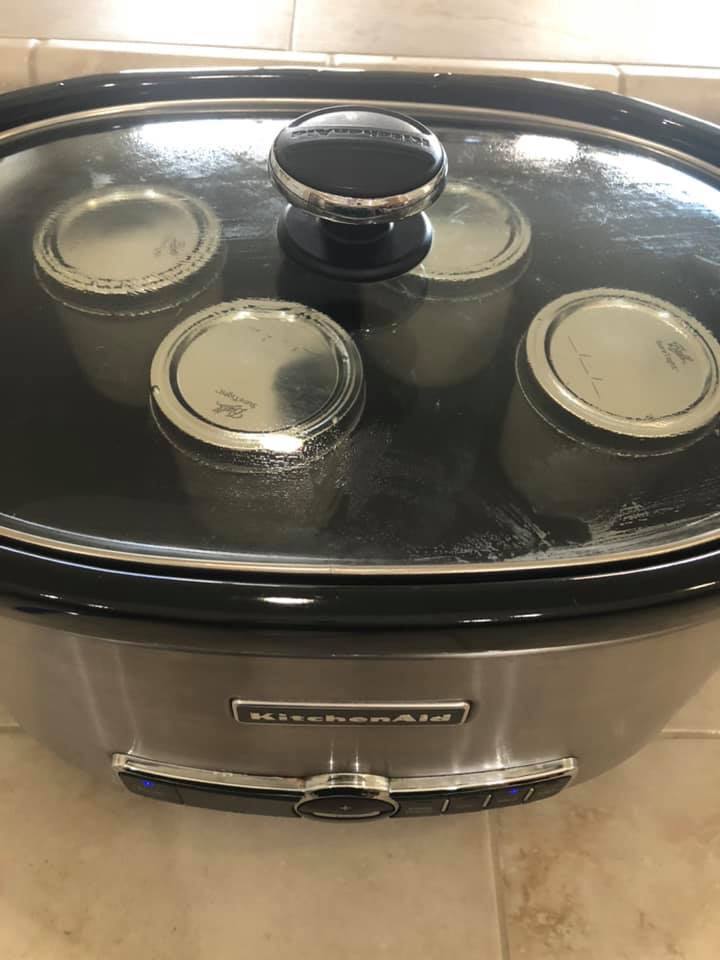
Topping:
1/2 cup chopped Pecans 
1/2 pint of Dulce de Leche caramel sauce 

Directions: 
Preheat oven to 350 degrees F.

Bundt Cake:
In a large bowl of a stand mixer, mix all ingredients together for 3 minutes on high. Pour into a greased bundt pan.  Bake for 45-50 minutes or until a toothpick comes out clean. Let cool in pan for 15-30 minutes, then invert onto a cooling rack until completely cooled before topping with dulce de leche and chopped pecans.  

Recipe Note: want to hit the "easy button" on this recipe - replace the first 5 cake ingredients with a box of white cake mix! 

0 Comments

Dulce De Leche

12/15/2020

1 Comment

 
     This is one of the handiest sauces to have on hand for the Holiday season and baking.  It's easy to make and can always be frozen for future use.  This is used easily as a fruit dipper, cake filling, cake glaze, stirred into coffee and always great with ginger and chocolates.  This sauce does need refrigerated and used within 2 weeks or frozen.  Enjoy! Diane 

Dulce De Leche (caramel sauce) 

Ingredients: 
3 (14 ounce) can Sweetened Condensed Milk
1/2 teaspoon Rodelle Vanilla Bean Paste 
1 Pinch of Salt, optional 
4 (half pint) canning jars with screw bands and lids 

Directions: 
     Open the condensed milk and pour evenly into the 4 half pint canning jars. You will be leaving about a 1 inch of headspace.  Place canning lids and bands on to finger-tip tightness.  Set the filled canning jars in a slow-cooker large enough to cover with at least 1/2" of water over the top of canning jars.  Set cooker to Low and let cook 8-12 hours.  You want the white condensed milk to turn a caramel brown.  Once the jars are light brown; turn cooker off and carefully remove the jars. Let jars cool at least 4 hours before placing into refrigerator.  
  
1 Comment

Spicy Spinach & Cheese Tortellini

12/11/2020

2 Comments

 
Picture
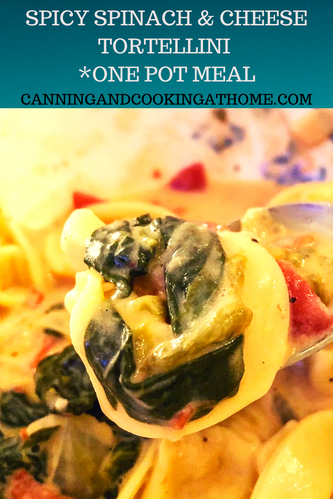
     I designed this recipe because I had a large bag of spinach that needed to be used up.  I wanted a total "comfort food dish" and spinach paired with my favorite 5 cheese tortellini (we prefer Rana) this dish was a huge hit!!  You can add more spice to this dish by using jalapenos in place of poblanos and green chiles but, we like a mild heat.  You can even use pepper-jack cheese in place of the cheddar... Enjoy! Diane 

Ingredients:
1 (20 ounce) bag of cheese tortellini, refrigerated not frozen
1 (10 ounce) bag fresh spinach, cleaned and destemmed 

1 onion, chopped  
1 poblano chile, chopped

1 (4 ounce) can roasted green chiles 
4 garlic cloves, minced
3 cups chicken broth
1 (14.5 ounce) can fire roasted diced tomatoes
1 cup heavy cream   
1/2 tsp Kosher salt
1/4 tsp ground black pepper
3/4 cup cheddar cheese, finely shredded 

Directions:
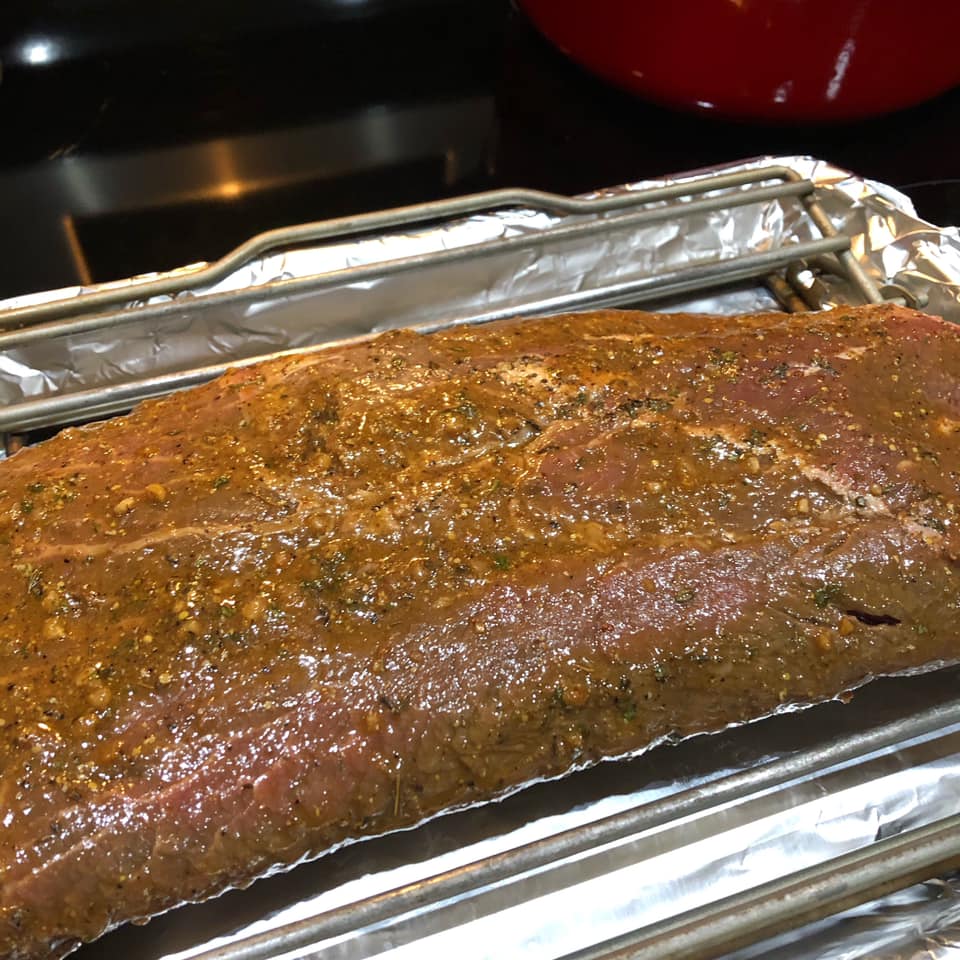
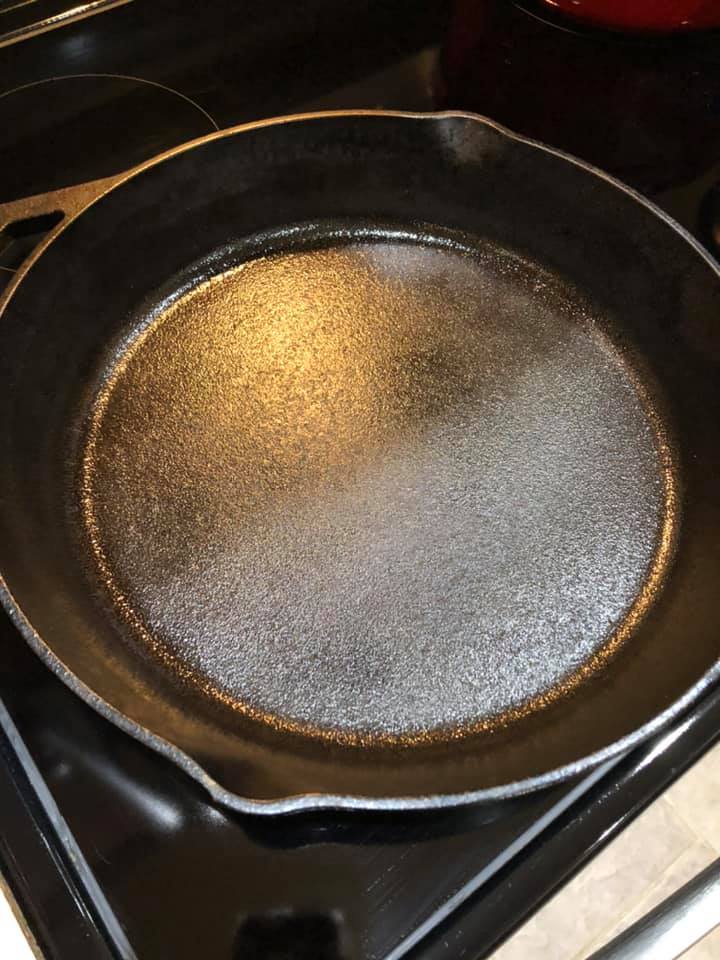
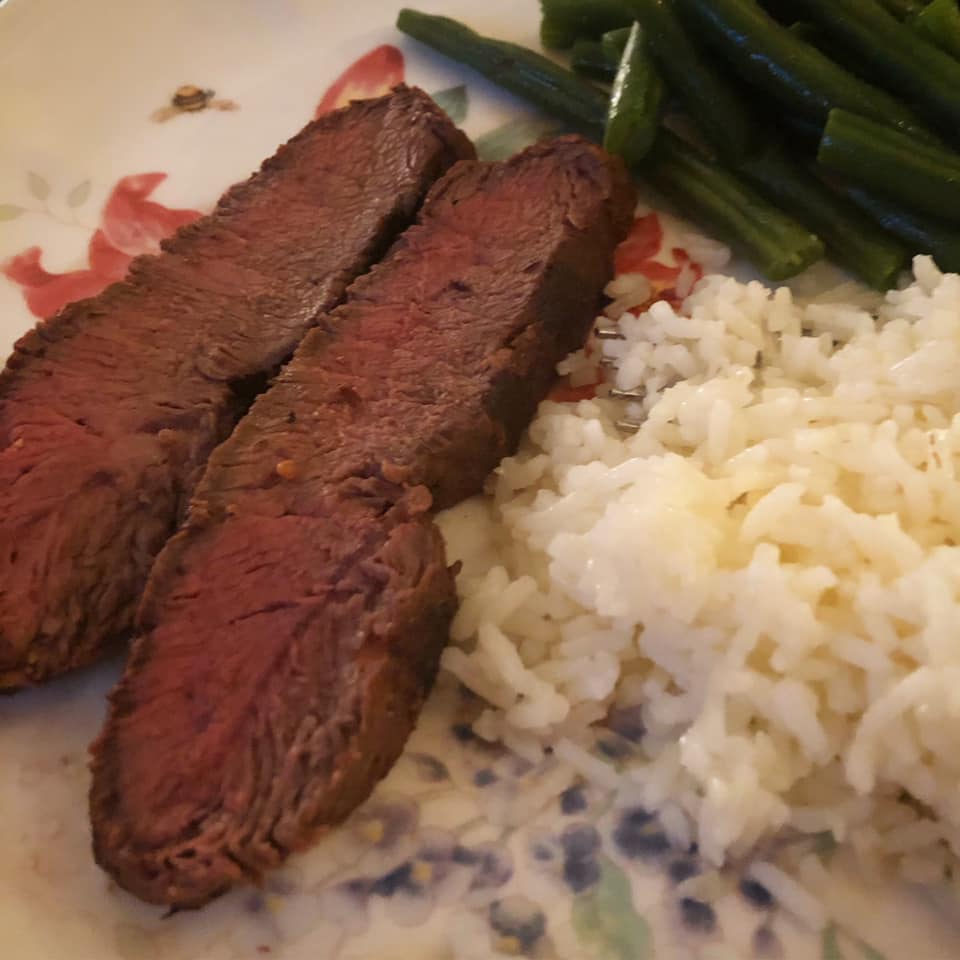
  • Brown/Sauté onion and poblano in large pot with a bit of olive oil added (I use my 7 quart dutch oven), over medium-high heat until lightly browned, about 8 minutes.  
  • Add in the green chiles and garlic, cook until fragrant, about 30 seconds. Stir in broth, tomatoes, half the cream, salt, and pepper and bring to boil.
  • ​Add in the tortellini, boil for 4 minutes (or according to package.)
  • Add in remaining cream and spinach, cover pan and reduce heat to a low simmer, stirring frequently, until tortellini is tender and sauce if to your liking. 
  • You want the broth to be cooked down enough that it starts creating a creamy 'sauce'.  If it is too thin, let entire dish cook another 5 minutes,  I like the sauce a bit runny as it will thicken a bit as it cools. 
  • Once the sauce is to your liking, fold in your cheese, heat through and Serve Hot. 

Serves 4.
Picture
2 Comments

Reverse Sear Flat Iron Steak

12/6/2020

0 Comments

 
Picture
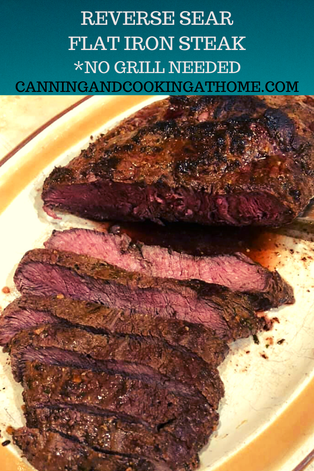
    Who wouldn't want grilled steak without a grill!  Did you know you can get a great restaurant "chop house" quality steak just by reverse searing the meat?  Yep!!  Marinate your cut of beef, bake low until 10 degrees under your desired temperature and finish off with a HOT and quick SEAR on your stove top.  Flavorful and "melt in your mouth" tasty - just remember "bake low, sear high"... Enjoy! Diane 
  
Directions: 
Preheat oven to 275F. 
  • Use a cut of beef that is at least 1.25" thick.  I prefer to marinate my beef ahead of time but, it's not necessary. 
  • Line a baking sheet with foil and place a small rack above pan (catches drips and makes for easier clean up.)
  • If using marinade, remove steak from marinade (discard marinade) and place on prepared rack. Bake steak at 275F for around 45-60 minutes  (*see chart from What's Cooking America, below.) You want to remove your steak from oven when it's 10 degrees away from reaching final temp. 
  • Take a large cast iron skillet, run a paper-towel with some olive oil or any similar high temp oil around the pan to give it just a slight "wiped on" coat of oil. You want your stovetop searing pan super hot.
  • Blot your steak off with paper towels if its too moist to get a better sear crust. 
  • Sear your baked beef, each side 1-2 minutes.
  • Cover skillet with foil, off heat and let steak rest 10-15 minutes then slice against the grain and serve. 

A Meat Thermometer is a MUST for reverse searing.  You will be doing a temperature check near the end of bake time to ensure your level of doneness.  
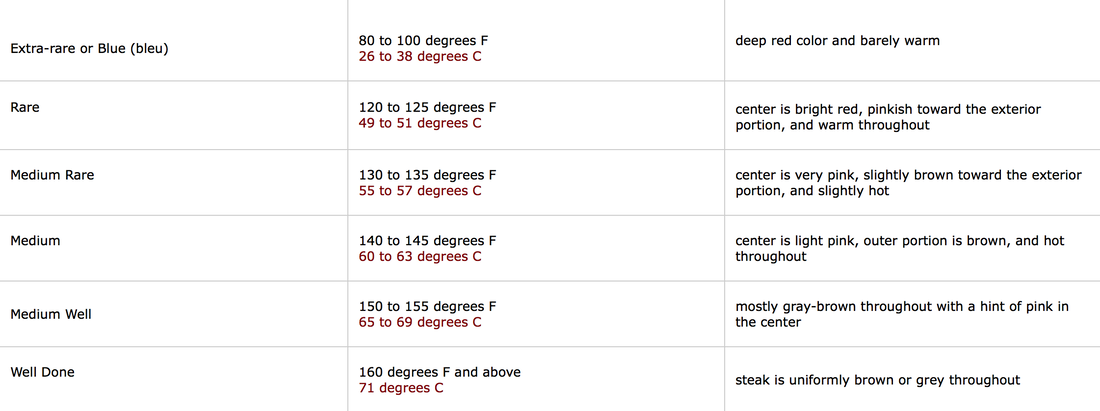
​
Picture
0 Comments
<<Previous
    F I N D  A  R E C I P E 

         PRINT OR SAVE TO .PDF 
    Print Friendly and PDF


    RSS Feed

    Archives

    February 2023
    January 2023
    December 2022
    November 2022
    October 2022
    September 2022
    July 2022
    June 2022
    May 2022
    March 2022
    February 2022
    January 2022
    December 2021
    October 2021
    September 2021
    July 2021
    February 2021
    January 2021
    December 2020
    November 2020
    October 2020
    September 2020
    August 2020
    July 2020
    June 2020
    May 2020
    April 2020
    March 2020
    February 2020
    December 2019
    November 2019
    October 2019
    September 2019
    August 2019
    July 2019
    May 2019
    April 2019
    March 2019
    February 2019
    January 2019
    December 2018
    November 2018
    October 2018
    September 2018
    August 2018
    July 2018
    April 2018
    March 2018
    February 2018
    January 2018
    December 2017
    November 2017
    October 2017
    September 2017
    August 2017
    July 2017
    June 2017
    May 2017
    April 2017
    March 2017
    February 2017
    January 2017
    December 2016
    November 2016
    October 2016
    September 2016
    August 2016
    July 2016
    June 2016
    May 2016
    April 2016
    March 2016
    February 2016
    January 2016
    December 2015
    November 2015
    October 2015
    September 2015
    August 2015
    July 2015
    June 2015
    May 2015
    April 2015
    March 2015
    February 2015
    January 2015
    December 2014
    November 2014
    October 2014
    September 2014
    August 2014
    July 2014
    June 2014
    May 2014
    April 2014
    March 2014
    February 2014
    January 2014

Picture
© Copyright 2023, Canning and Cooking at Home.
All images & content are copyright protected. Please do not use my images on your own site/page without prior permission. Sharing, pinning, and tweeting is always appreciated as long as the shares and pins link back to this website and recipe.  Canning and Cooking at Home claims NO liability for the safety of ANY recipe or advice contained within this website.  Always consult with the NCHFP to ensure Canning Safety. 

  • Home
  • Diane's Blog
  • Canning 101
  • Pickling
    • My Pickle Creations
    • Pickle Recipes
  • Recipe Index
    • Canning Recipes >
      • Jams/Jellies/Fillings/Butters/Juices
      • Meats/Other
      • Pressure Canned Soups
      • Tomatoes
    • Cooking Recipes >
      • Breads
      • Breakfast
      • Instant Pot Recipes
      • Main Dishes
      • Soups
      • Sweets
      • Drinks
      • Sauces/Apps/Sides
    • Recipe Collections >
      • The Apple Cart
      • Asian Inspired Recipes
      • Bundts to Bake
      • Cherry Recipes (preserving)
      • Easter Menu Ideas
      • Freezer to SlowCooker
      • Irish Fare
      • Jelly & Jam Recipes
      • Mexican Inspired Recipes
      • Pickle Recipes
      • Soups
      • Summer Grillin' Guide
  • Work with Me
    • Privacy Policy
    • Give Aways
  • Recipes Via Email