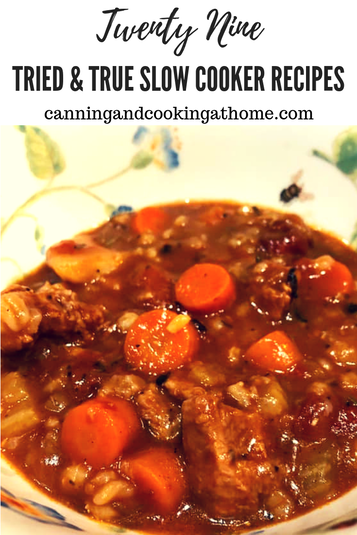
 Beef Barley Stew One thing that has always been a great benefit, is being able to cook a great family meal using our Slow-Cooker (aka 'Crock-Pot.') The advent of the Instant Pot craze pushed so many great slow cooker recipes aside. I personally don't like to cook with an Instant Pot - I make very few dishes that we actually "like" in it - those three recipes are listed at the bottom of this post. Making homemade stocks for canning is great in an Instant Pot but, pressure cooking meats (like beef) just isn't our preferred method. I still reach for our Slow Cooker - more so in the Fall and Winter. I thought I'd compile all my Slow Cooker recipes for you - tried and true! So, dust off your Slow Cooker and show it some love by whipping up some great meals. Enjoy! Diane
Slow Cooker Recipes: Chicken: Honey Soy Chicken Chicken Cacciatore Applesauce BBQ Chicken Ranch Chicken Burritos/Tacos Cantonese Sweet & Sour Chicken Stock/Bone Broth Creamy Chicken with Chives Beef: Pot Roast Mississippi Pot Roast Italian Beef Sandwiches Coca Cola Roast Coca Cola Beef Ribs Mongolian Beef French Dip Mushrooms & Beef Tips Corned Beef & Cabbage Steak Fajitas Steak Tips & Gravy Pepper Steak Beef & Broccoli My Beef Stew Beef & Cabbage Stew Beef Stroganoff Hawaiian Beef Beef Barley Stew Pork: Braised Pork Carne Asada BBQ Pork Sammies Zuppa Toscana Beans: Party Beans Instant Pot Recipes: Cashew Chicken Shredded Chicken Burritos Green Chile Mac & Cheese Hamstock
0 Comments
 Caramel Apple Taquitos
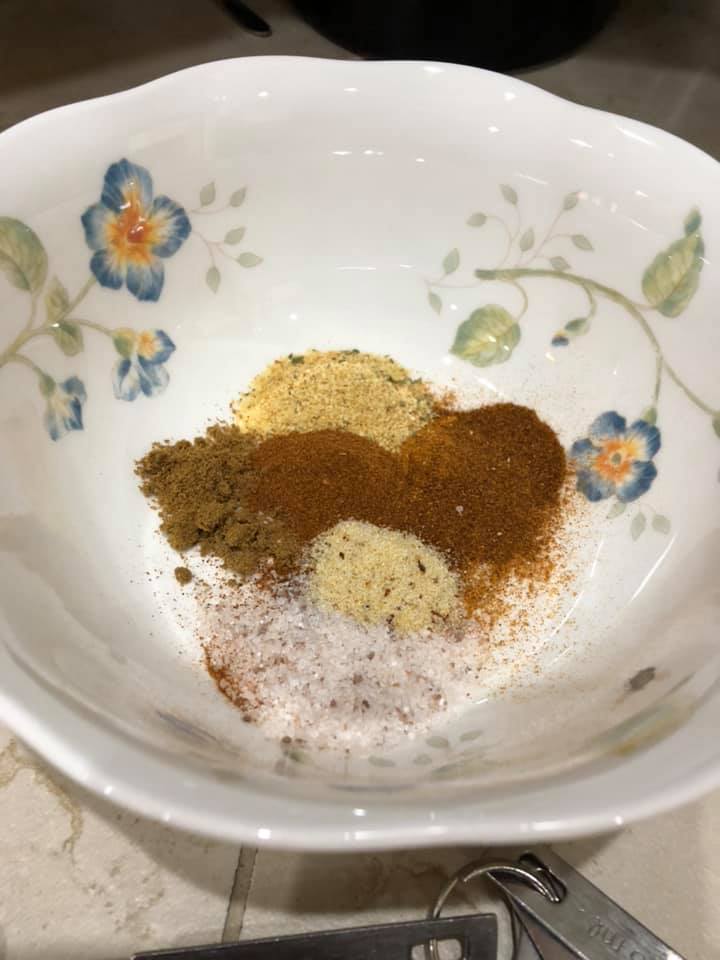
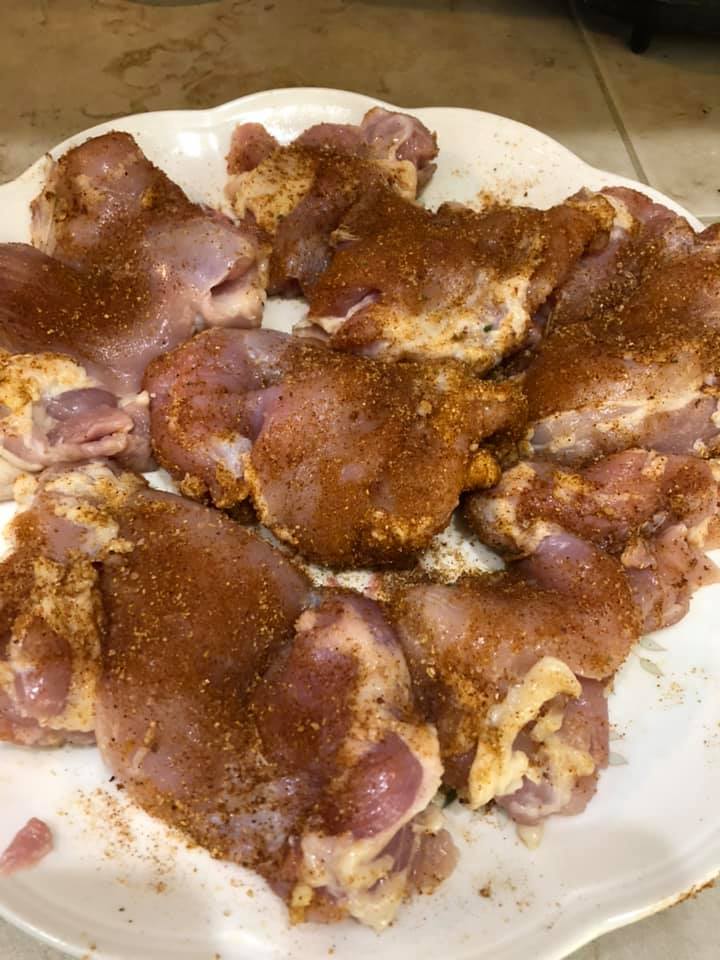
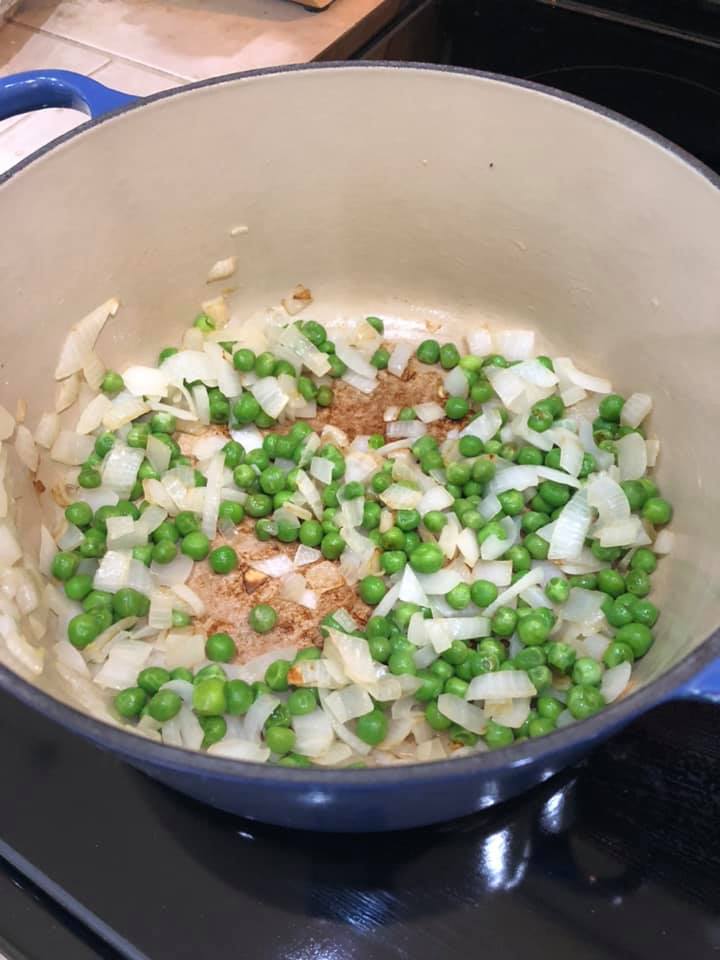
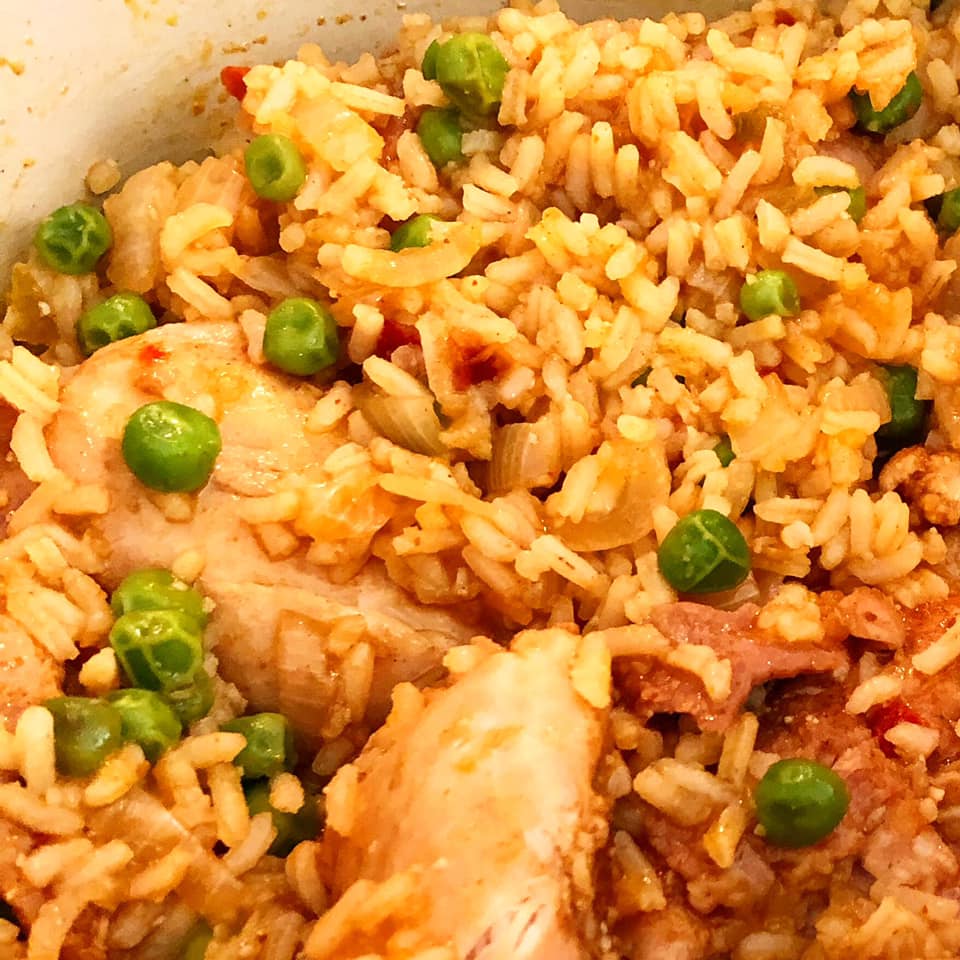
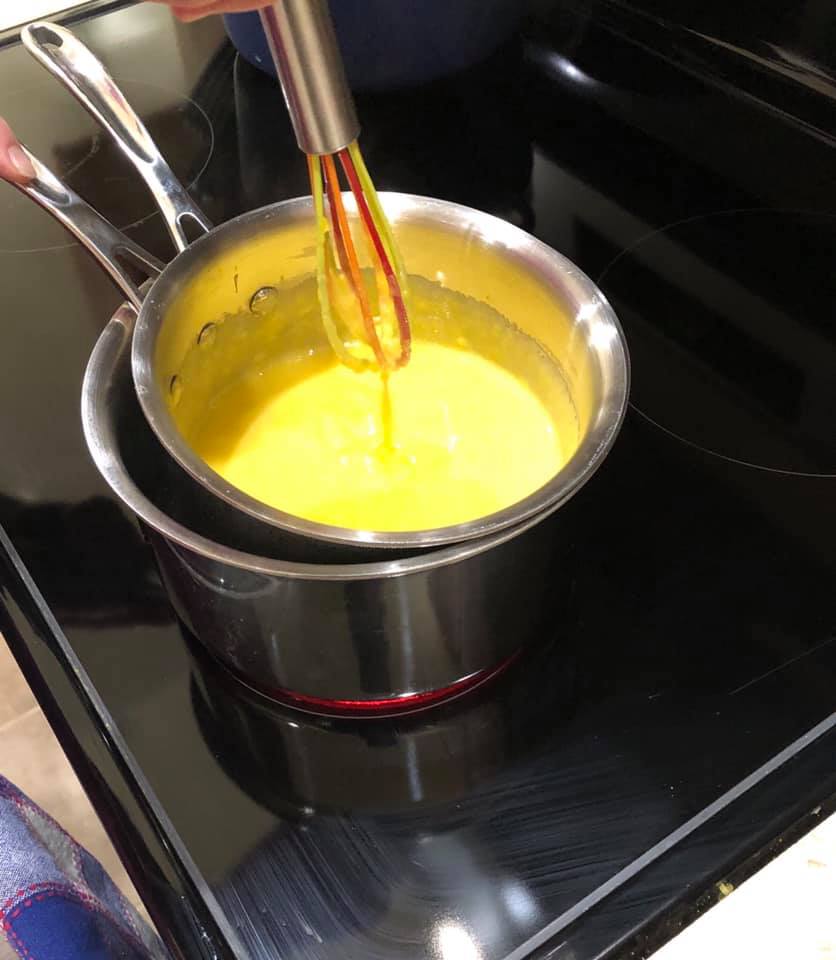
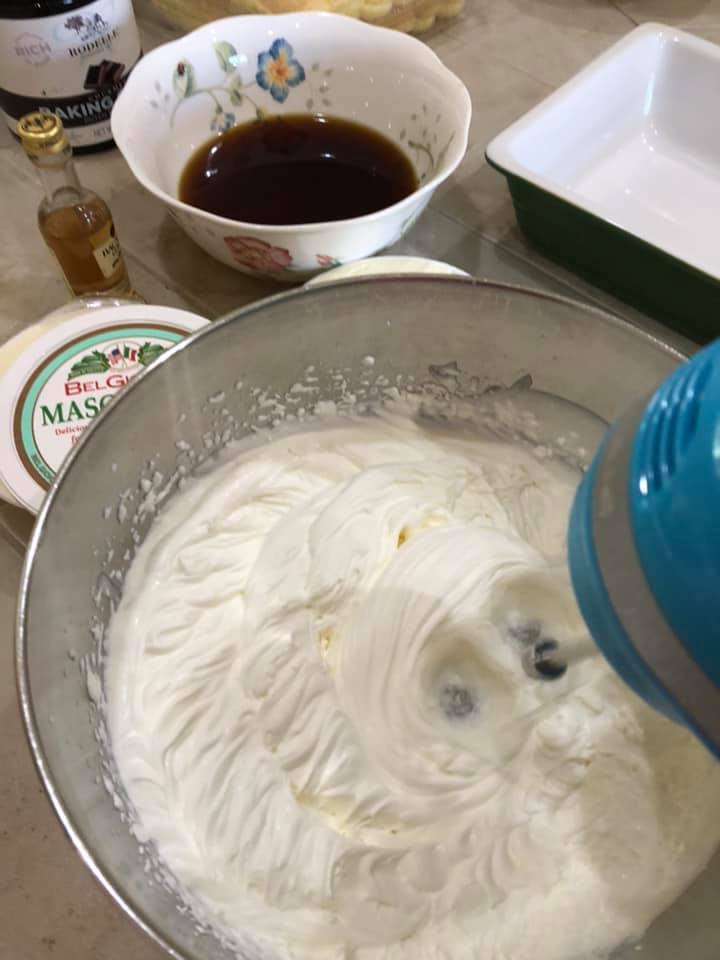
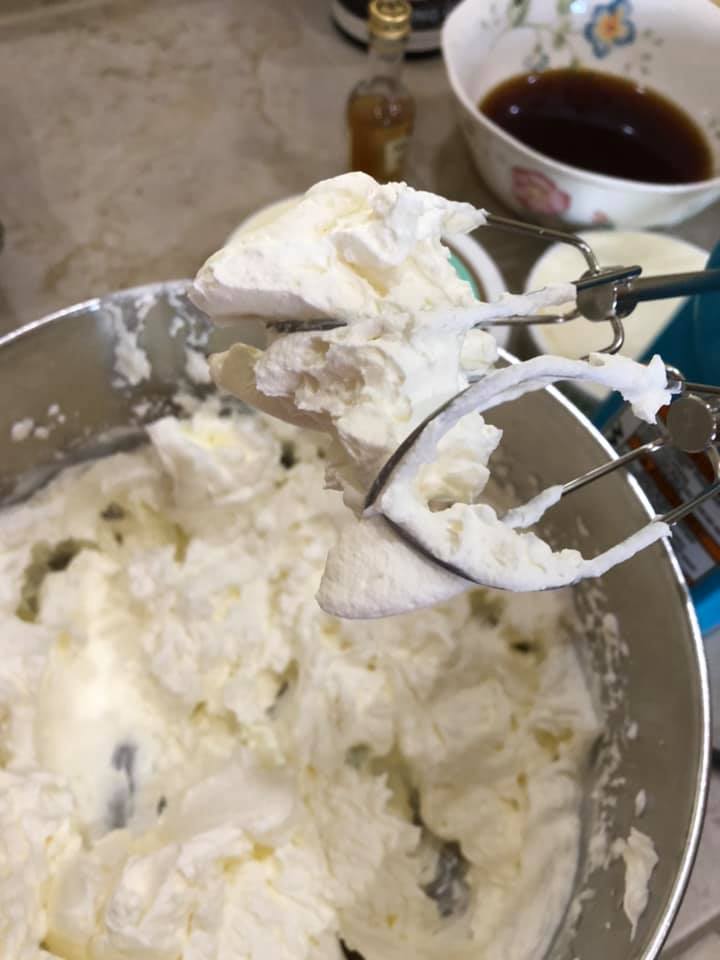
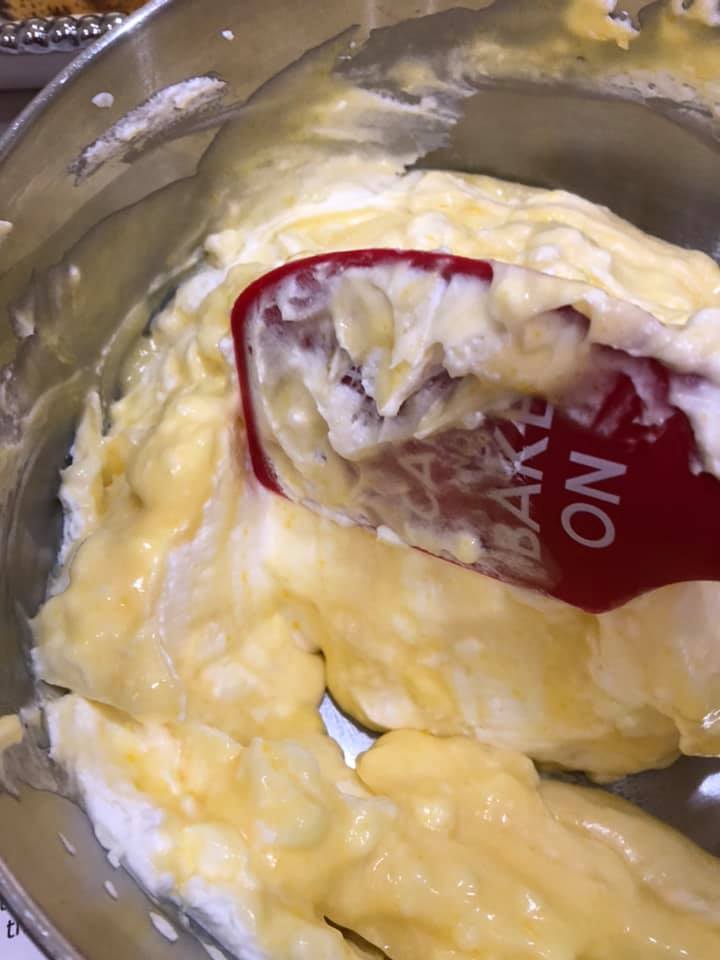
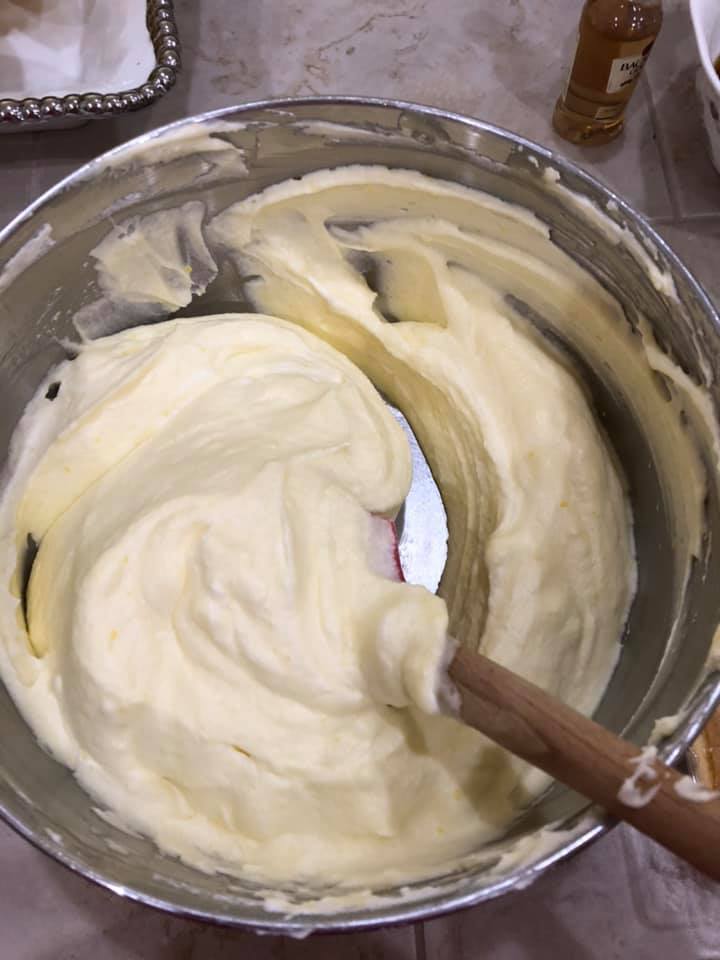
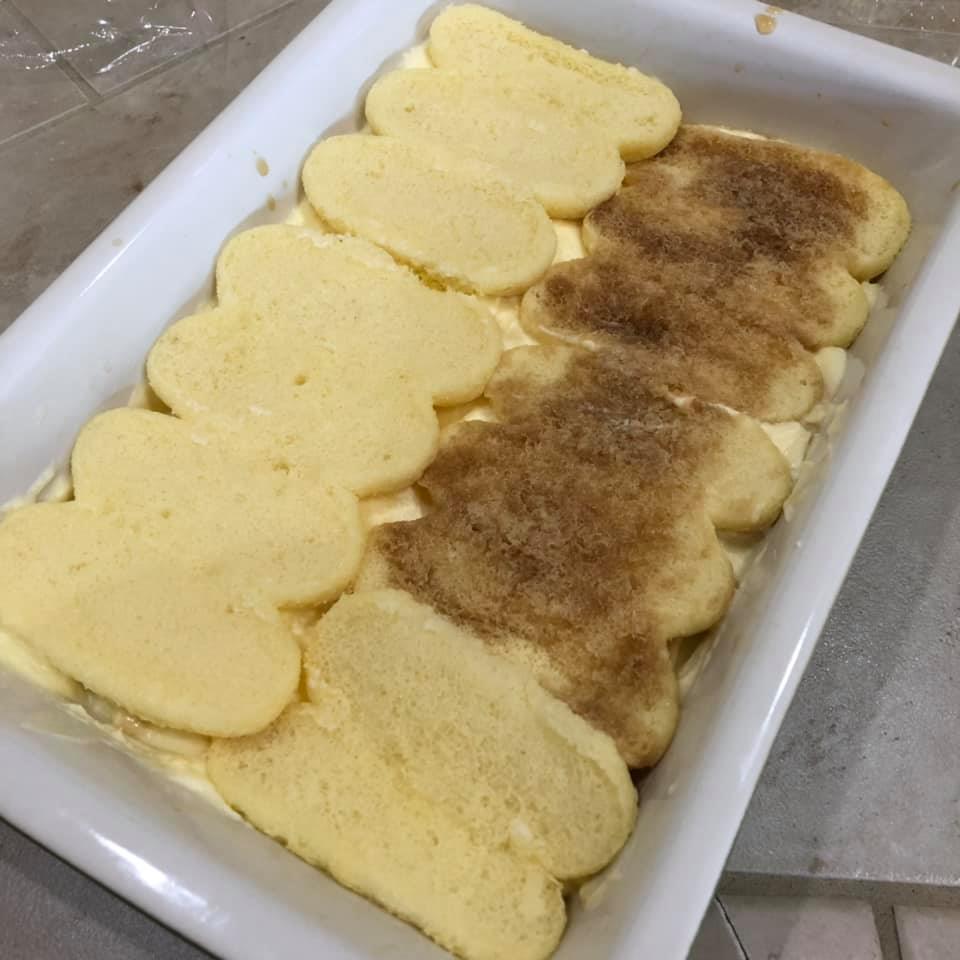
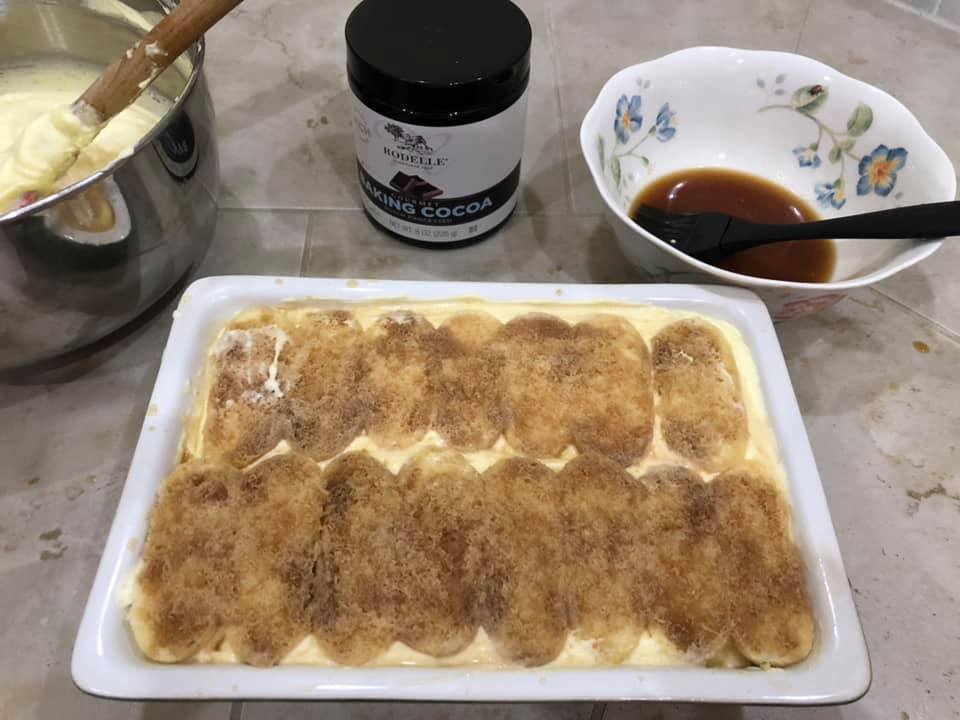
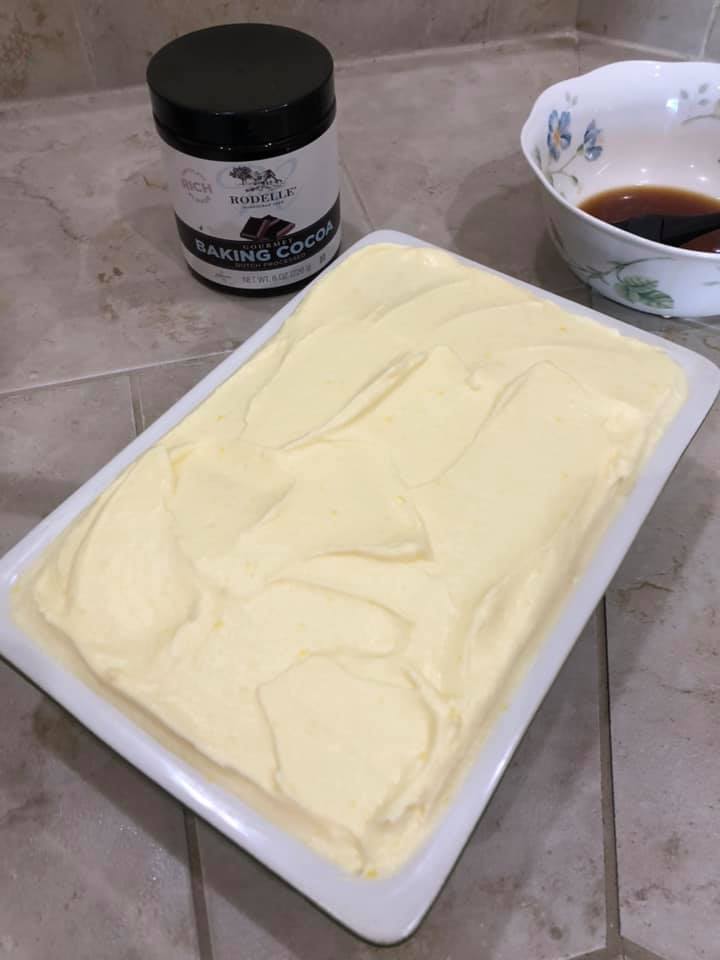
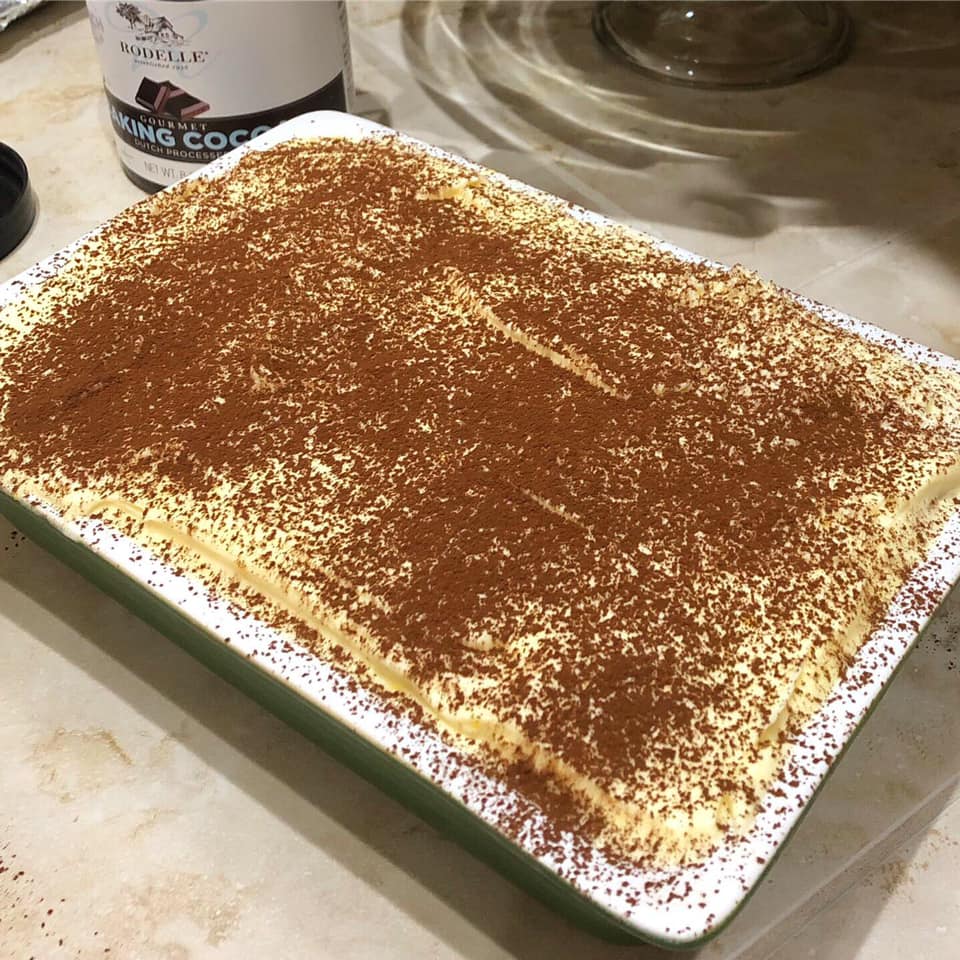
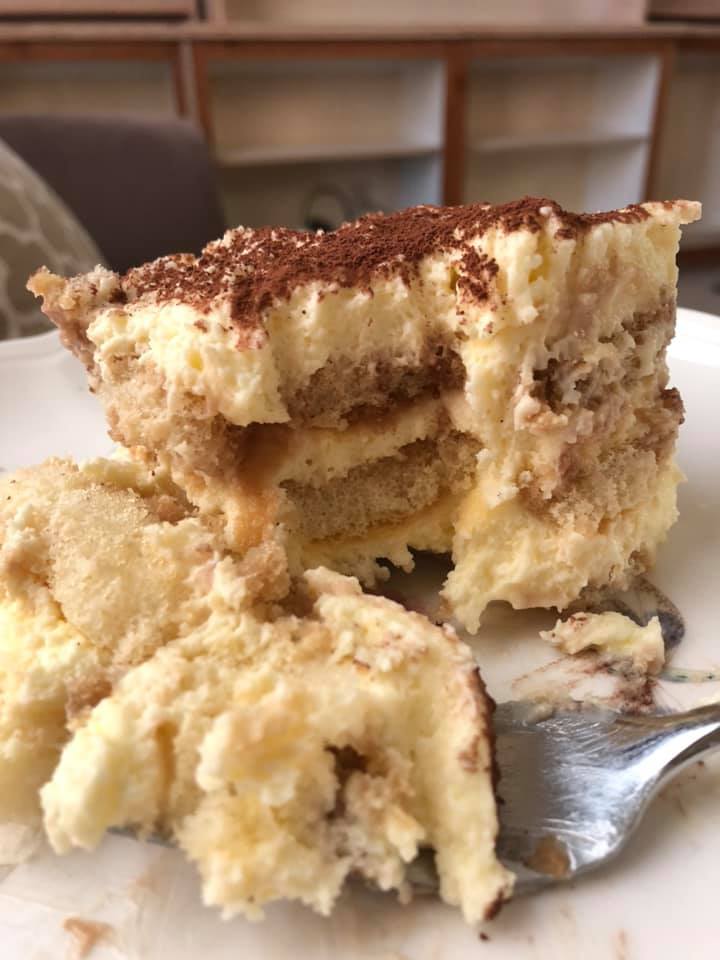
Diane's Caramel Apple Jam (click here) Flour tortillas (room temperature) Powdered sugar (optional) Grated cheddar cheese (also optional) Wooden toothpicks or skewers Spread a generous portion of Diane’s Caramel Apple Jam across tortilla, roll and pin with toothpicks. Cook in 325F oven or airless fryer about 10-15 minutes, until golden brown. Serve hot with a sprinkle of powdered sugar or cheddar cheese. Tip: if jam isn’t very thick, put taquitos on a sheet of aluminum foil, with ends folded up to prevent leakage. Guest Post by: JD Provence for Canning and Cooking at Home 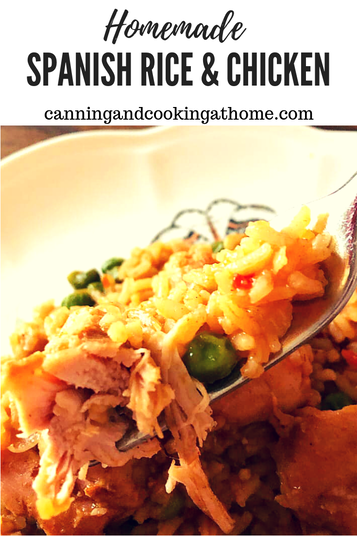 This is a flavorful dish and perfect for dinner any time. If you have the time, let the chicken sit/marinate in a covered dish in the fridge with the spice rub on it for a few hours. I prefer to make the rice and chicken separate (the chicken has a better crust to it if kept separate.) Enjoy! Diane Chicken Spice Rub for 5-6 chicken thighs (boneless, skinless): 1 teaspoon smoked paprika 1 teaspoon paprika 1 teaspoon garlic powder 1 teaspoon pink salt 1 teaspoon ground cumin 1 teaspoon chili powder 1/2 teaspoon Italian seasoning Directions for Chicken: Add 2 Tablespoons of olive oil to a large ovenproof skillet over medium-high heat. Once oil is hot and just starting to smoke, add in spice rubbed chicken. DO not flip chicken until it moves freely from the skillet, about 4 minutes. Cook on opposite side for another 4-5 minutes. Turn chicken back over and place chicken in skillet into a 375F oven to hold until rice is ready. I like to start the rice first so that the chicken is in the oven about 10-15 minutes. Always use a meat thermometer to confirm your chicken is cooked to at least 165F. If you do not have a large ovenproof skillet, transfer chicken to oven using a baking skeet instead. Spanish Rice Ingredients for each one cup uncooked rice: 1 medium onion, chopped 2 tablespoons olive oil 2 1⁄2 cups chicken broth (preferred) or water 1 (8 ounce) can tomato sauce 1 small green or red bell pepper, finely chopped 1 1⁄2 teaspoons salt 3⁄4 teaspoon chili powder 1⁄8 teaspoon garlic powder 1 cup frozen peas 1/4 teaspoon saffron threads, optional Directions for the Rice: In a dutch oven, heat the oil over medium heat. Add rice, onion and peas and cook about 8-10 minutes, stirring occasionally, until rice is golden brown and onion is tender. Stir in remaining ingredients and bring to a boil. Reduce heat, cover and simmer 25-30 minutes, stirring occasionally, until rice is tender. Serve Chicken over Rice. 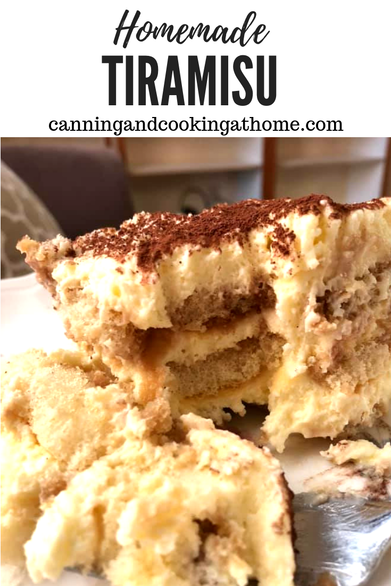 I really do think that everyone needs to give Tiramisu a try - just once. A light and airy dessert with a deep coffee and brandy taste. It was my birthday the other day and I decided to make my own Birthday Tiramisu. This is truly the closest I've come to authentic Italian Tiramisu. Enjoy! Diane Ingredients: 6 large egg yolks 1 cup sugar 1 1/4 cup mascarpone cheese (room temp) 1 3/4 cup heavy whipping cream 2 7oz packages of Italian LadyFingers 1 cup of strong coffee (cold) 2 Tablespoons brandy Rodelle Gourmet Baking Cocoa for dusting Directions: You'll want to gather all your ingredients and bowls and go over what order you will need items as this moves from step to step at a slightly quick pace. Here is my suggestion: Place the 6 egg yolks and sugar into a bowl, Set out the mascarpone cheese, Place the heavy whipping cream into a steel mixing bowl and set in fridge. Have your baking dish (9x9), ladyfingers and a pastry brush at the ready. A hand-mixer is preferred for this recipe. Now, you're ready to start! Add the eggs and sugar to the top of a double boiler and let the sugar dissolve into the eggs, keep a constant stir so you do not end up with scrambled eggs. You want to stir this mixture for about 6 minutes over a medium-high heat. The yolks should be thickened and lemon yellow colored. Once ready, set aside to cool slightly while you move onto the next step. Take your heavy whipping cream out of fridge and using a hand mixer, start on low speed, increasing the speed every 2 minutes until you're at the highest setting (whipping heavy cream slowly will let the cream retain its fullness without having to add a stabilizer.) After about 8-10 minutes you should have thick whipped cream with stiff peaks. Once ready, set aside for a moment. Go back to your egg yolk mixture and add in the mascarpone cheese. Using the hand-mixer from whipped cream, blend the cheese into the egg mixture. (no need to clean off whipped cream from beaters.) Once blended, add egg mixture to whipped cream bowl. Using a large spatula, fold in the whipped cream until fully combined. Now that your Sabayon (custard like filling) is ready - you're ready to assemble the dessert. It's just like layering a lasagna. Place a layer of ladyfingers down into baking dish, add the brandy to the cold coffee and stir. Using a pastry brush, brush the coffee mixture over the ladyfingers ((most ladyfingers sold are super moist and delicate, if you "dunk" the cake into the coffee - you'll have a mess!)) Spoon half the cream filling over the ladyfingers and repeat the layering process ending with a layer of cream filling on top. Refrigerate at least 6 hours. Dust with cocoa before serving. Recipe Notes: **IF you have true HARD Italian LadyFingers (which are harder then the American version, then you can soak them in the coffee/brandy mixture) Otherwise, IF they are SOFT - use the pastry brush method. **I used my 10x7 baking dish and 3 layers the most common is a 9x9 baking dish and 2 layers **you can omit the brandy but, its preferred. Recipe adapted from: Chef Dennis Littley Photos by: Diane Baker for Canning and Cooking at Home |