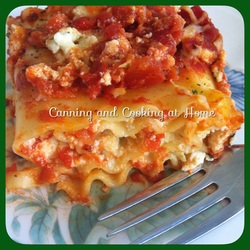
 I love when people make homemade lasagna because it always seems like such hard work, smells so good and tastes SO great! All that layering and getting everything to fit so nice, creating a taste explosion. As a tribute to the great lasagna makers out there - I give you - the lasagna "roll-ups." These are faster and easier to make. I made this recipe using ricotta, parsley and a mix of cheeses. My next adventure will be adding thinly sliced cooked carrot with some nice cooked spinach rolled in with the ricotta and maybe sweet basil strewn across the top with still the awesome gooey mozzarella cheese. The best part? If you have a picky eater at home, you can add or leave out anything they don't want in "their" roll ups. Enjoy ~ Diane Meatless Lasagna Roll Ups Ingredients: 1 (28-ounce) jar spaghetti sauce, divided *more sauce if preferred 1 (2-pound) container ricotta cheese 1 cup mozzarella cheese, divided 1 1/2 cup grated Parmesan cheese (I used a 6 cheese blend with Parmesan in it) 3 eggs, beaten 1 tablespoon chopped fresh parsley 1 teaspoon salt 12 to 14 lasagna noodles, prepared according to package directions Directions: Preheat oven to 375 degrees F. Lightly coat a 9x13 baking dish with olive oil (I use a paper towel just to smear around inside and on bottom of dish) Pour half the spaghetti sauce over the bottom of the baking dish. In a large bowl, combine ricotta cheese, 1 cup Parmesan mix cheese, 1/2 cup of the mozzarella cheese, beaten eggs, parsley, and salt until well blended. Spoon cheese mixture over lasagna noodles, distributing evenly, and roll up. Place roll-ups seam-side down in prepared baking dish; top with remaining sauce. Sprinkle with remaining cheeses. Bake 35 to 40 minutes, or until heated through. Recipe Adapted from: Mr Food Photos by: Diane Baker for Canning and Cooking at Home 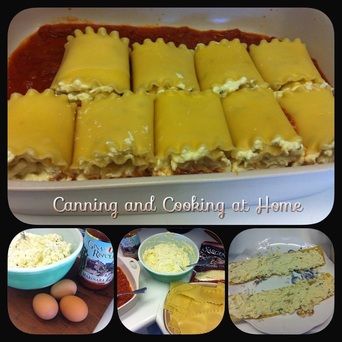
0 Comments
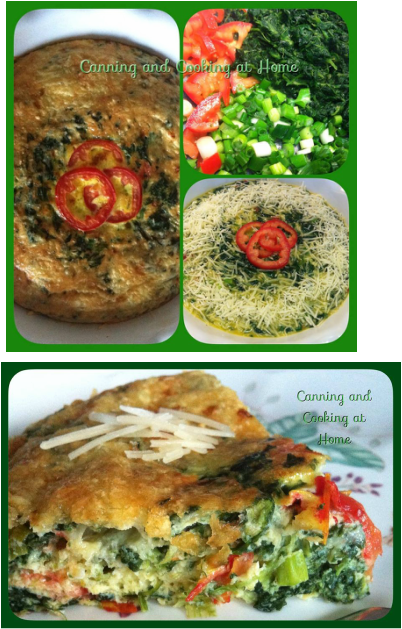 A family tradition in the Spring, eating quiche with fresh OJ and bacon on the side as part of a brunch - and outside on the patio, even better. Yum! One of my favorites is my families crust-less version with Spinach and Swiss Cheese. It's so simple, tasty, easy and inexpensive - it's crazy! I've made traditional quiche, and a more custard like traditional crust less one too but, I still think this one - with the cheese browning under the broiler to form a 'crust' on top - is perfection for me.
~Enjoy! Diane Crustless Spinach Quiche Ingredients: 1 tablespoon butter 1 bunch green onions, chopped 1 shallot, diced 1 large roma tomato, chopped 1 (10 ounce) package frozen chopped spinach, thawed and drained 6 eggs, beaten 1 1/4 cups shredded swiss cheese 1/4 teaspoon salt 1/8 teaspoon ground black pepper dash of nutmeg *optional Directions: Preheat oven to 350 degrees. Lightly grease/spray a 9 inch pie pan. Heat butter in a large skillet over medium-high heat. Add onions and cook, stirring occasionally, until onions are soft. Stir in spinach and tomatoes and continue cooking until excess moisture has evaporated. In a large bowl, combine eggs, 3/4 cup of the cheese, salt, pepper and nutmeg. Add spinach mixture and stir to blend. Scoop into prepared pie pan. Sprinkle remaining cheese on top, around edges and a little in middle (I also place a few tomato rings around the middle.) Bake in preheated oven until eggs have set, about 30-40 minutes. I switch the broiler on for approx 3-4 minutes at the end of cooking time to brown up the cheese a bit - this also makes an upside down 'crust' of cheese. Let cool for 5-10 minutes before serving. Family Recipe & Photos by: Diane Baker for Canning and Cooking at Home 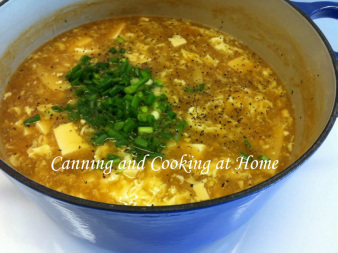 Do you like a soup that wakes you up and fills you up? This one does! You can control the 'spicy' factor bowl by bowl if needed/wanted too. I had never attempted to make this soup myself. This was a soup I didn't find available often and usually waited to 'order out' when possible. My friends Mom made the 'best' version of this and I thought, if I am going to attempt this - I need to get it right! I knew there was tofu in the soup but, never really registered what kind or even that there were "kinds" to choose. I promise, if you put aside your distaste for tofu and make this soup as written that you will like it. I've tried changing the ingredients around and in the end, the original version I am sharing with you here - wins out every time. Try it - you'll like it - even my husband likes it and yes, he is picky AND his name is Mikey!
"He Likes it!, Hey Mikey!" ~Diane Hot & Sour Soup Ingredients: 4 cups chicken broth 3 tablespoons soy sauce 1/2 cup cooked pork, shredded **1/2 cup mushroom, thinly sliced 1/2 tablespoon Sriracha sauce 1 Tbs Red Hot Chili Oil *you control the heat on this one 1/4 teaspoon black pepper 1/4 cup rice vinegar 1/2 cup bamboo shoot, julienned 6 ounces firm tofu, cubed *silkened 2 tablespoons cornstarch 2 tablespoons water 1 egg, beaten 1/4 teaspoon sesame oil 2 green onions, sliced Directions: Bring chicken broth to a simmer in a 3 qt saucepan/pot. Add soy sauce, sriracha sauce, shredded meat and **mushrooms. Simmer for 5 minutes. Add pepper, rice vinegar, bamboo shoots and the cubed tofu. Simmer 5 minutes. Combine cornstarch and water, mix well. Add to soup, stirring continuously until thickened. Simmer for 5 minutes. Beat egg in a cup and gradually stir into soup mixture while using a fork to 'thread' the egg. Add Red Hot Chili Oil and Stir in. After 30 seconds add green onion and sesame oil, stir well and remove from heat. Serve hot. Note: Sriracha sauce, Red Hot Chili Oil, Vinegar and Sesame Oil can be adjusted to taste. **Can also use any mushrooms of choice, or whatever is available for added flavor. Adapted from: FN and Arlene Onkwo Photo by: Diane Baker for Canning and Cooking at Home 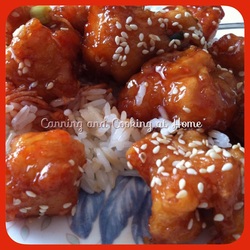 There are certain foods that I just fall in love with after not making them in a long time. This is one of those dishes that evokes 'comfort' to me and is one of my favorites! I love the firm, juicy chunks of white meat chicken surrounded with a honey sweet coating (sometimes I add orange to this too) and the sesame seeds that add a layer of completeness to the dish. This dish does take a bit of time to prepare but, that just gives me more time in the kitchen which equates with more relaxing downtime for me. This is one of my most requested dishes. ~Enjoy! Sesame Chicken Ingredients: For the Marinade: 1 cup chicken stock ½ cup water ½ cup soy sauce ¼ cup honey ¼ cup rice wine vinegar 3 tablespoons light brown sugar 2 tablespoons cornstarch 1 tablespoon sesame oil 1½ pounds boneless, skinless chicken breast, cut into 1-inch chunks For the Sauce: 1 tablespoon sesame oil 2 garlic cloves, minced 1 tablespoon minced fresh ginger 1 teaspoon chili paste For Coating & Frying: 3 egg whites 1½ cups cornstarch ½ cup all-purpose flour ½ teaspoon baking soda *** 6 cups vegetable oil, for frying Sesame seeds, to garnish Scallions, sliced, to garnish DIRECTIONS: 1. To make the marinade, whisk the chicken stock, water, soy sauce, honey, rice wine vinegar, brown sugar, cornstarch and sesame oil in a bowl. Of this mixture, place 6 tablespoons into a zip lock storage bag and add the chicken; seal and refrigerate for at least 30 minutes. Set aside the remaining marinade in the bowl. 2. While the chicken is chilling in the marinade, heat the 1 tablespoon of sesame oil in a large skillet over medium heat until shimmering. Sauté the garlic, ginger and chile paste until fragrant (about 2 minutes). Add 2 cups of the reserved marinade to the skillet and simmer, whisking constantly, until the mixture has become a darker brown and thickened. Remove from the heat and cover. 3. To prepare the chicken for coating and frying, whisk the egg whites in a shallow dish until foamy; set aside. Combine the cornstarch, flour, baking soda, and remaining marinade in a second shallow dish; mix using a fork until it resembles coarse meal. 4. Remove the chicken from the refrigerator and from the marinade. Pat the marinated chicken dry with paper towels. 5. Heat the oil in a Dutch oven over medium high heat until the oil registers 350 degrees. 6. While the oil is heating, prepare the chicken for frying. Toss half the chicken into the foamy egg whites until well coated, then dredge the chicken in the cornstarch mixture, pressing to adhere. Transfer the coated chicken to a plate and repeat with the remaining chicken. 7. Fry half the chicken until golden brown, about 3 minutes, turning each piece halfway through cooking. Transfer the cooked chicken onto a paper towel-lined plate to drain. Return the oil to 350 degrees. Repeat with the remaining chicken. 8. Warm the sauce over medium heat until simmering. Turn off the heat and add the fried chicken pieces. Toss to coat and serve, sprinkling with sesame seeds and chopped scallions. Recipe Adapted from: browneyedbaker Photo by: Diane Baker for Canning and Cooking at Home 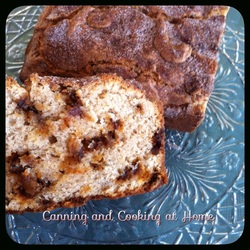 Snickerdoodle Quick Bread
The smell in the house of the cinnamon baking this bread is truly a treat in itself and tells you what the end product will taste like! One of my favorite cookies too - Snickerdoodles!! I'm not sure if it's because of the silly name? or the great taste but, I love this bread! This snickerdoodle bread has sour cream in it which means that it turns out moist. The topping being a sugar and cinnamon mix makes it crunchy. In the end you get this nice mix of cookie feel and airy cake like bread inside. The cinnamon chips (which are awesome by the way) I have only been able to find at Walmart year-round and at most local grocery stores only around Christmas time...This is a rich, cake like bread - a little slice goes a long way... ~ Enjoy! Ingredients: 3 cups all purpose flour 2 teaspoons baking powder 1/2 teaspoon salt 2 teaspoons cinnamon 1 cup butter, softened 2 cup sugar 4 eggs 2 teaspoons vanilla 1 cup sour cream 1 1/2 cup cinnamon chips (one pkg. Hershey's) 2 tablespoons flour 2 tablespoons sugar 2 teaspoons cinnamon Directions: Preheat oven to 350º Spray the bottom two 9x5 loaf pans with cooking spray with flour. (I use "Pam for Baking with Flour") In a medium bowl, whisk together 3 cups flour, baking powder, salt and cinnamon. Set aside. In a large mixing bowl, cream together butter and 2 cups sugar, until fluffy, about two minutes. Add eggs one at a time mixing well after each addition. Add vanilla and sour cream and mix to combine. Add flour mixture and mix just until combine. Do not over mix. Coat the cinnamon chips with 2 tablespoons flour and stir into batter. Spoon batter into greased pans (Don't fill more than 2/3 full.) Combine 2 tablespoons sugar and 2 teaspoons cinnamon and sprinkle over the top of the batter in the pans. (if you do not want a super sugary, crispy crust then reduce the topping mixture in half) Bake for 60-70 minutes until a toothpick inserted into a crack in the center of the loaf comes clean. Remove from oven and let cool 10 minutes before removing from pan. Remove from pan and let cool completely before serving. Recipe Adapted from: BarbaraBakes Photos by: Diane Baker for Canning and Cooking at Home |

