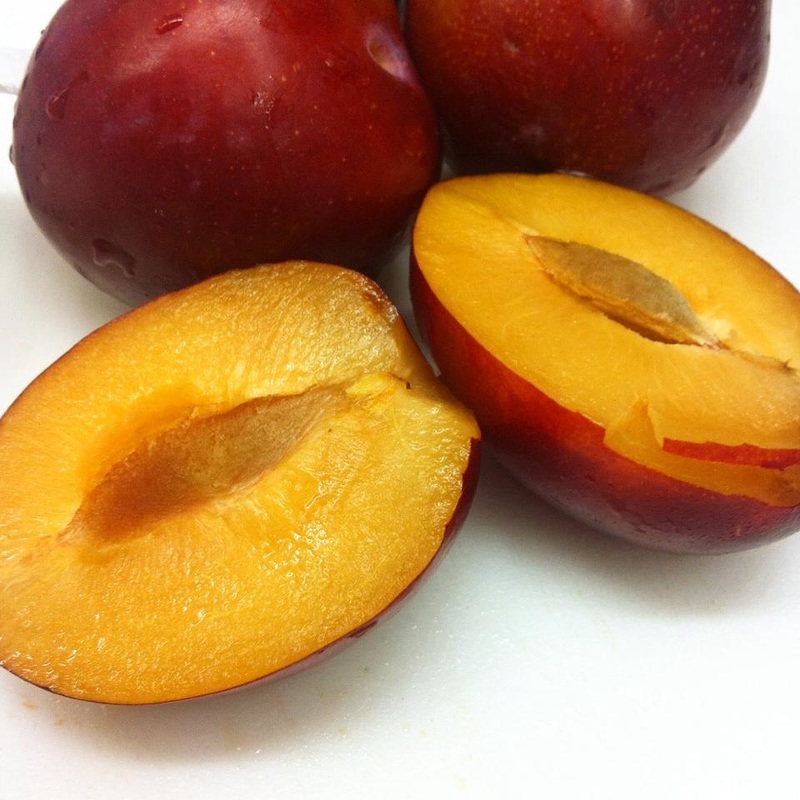
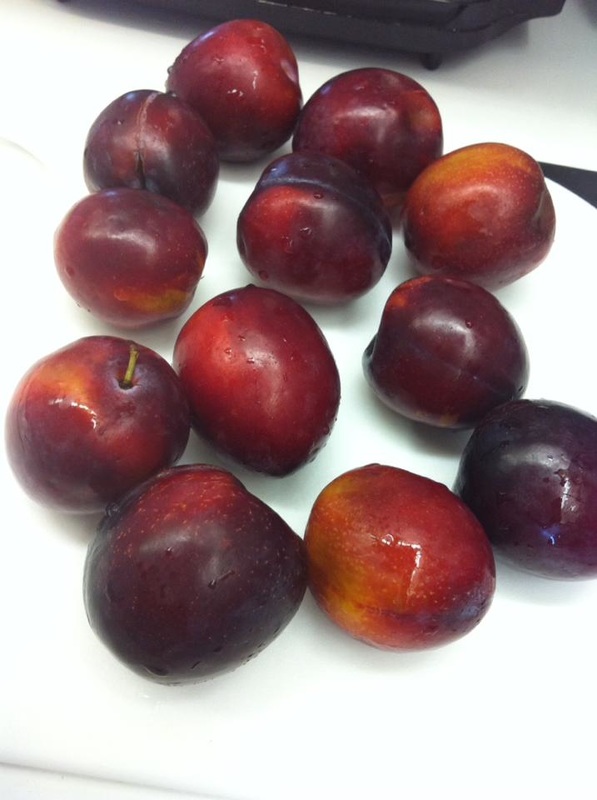
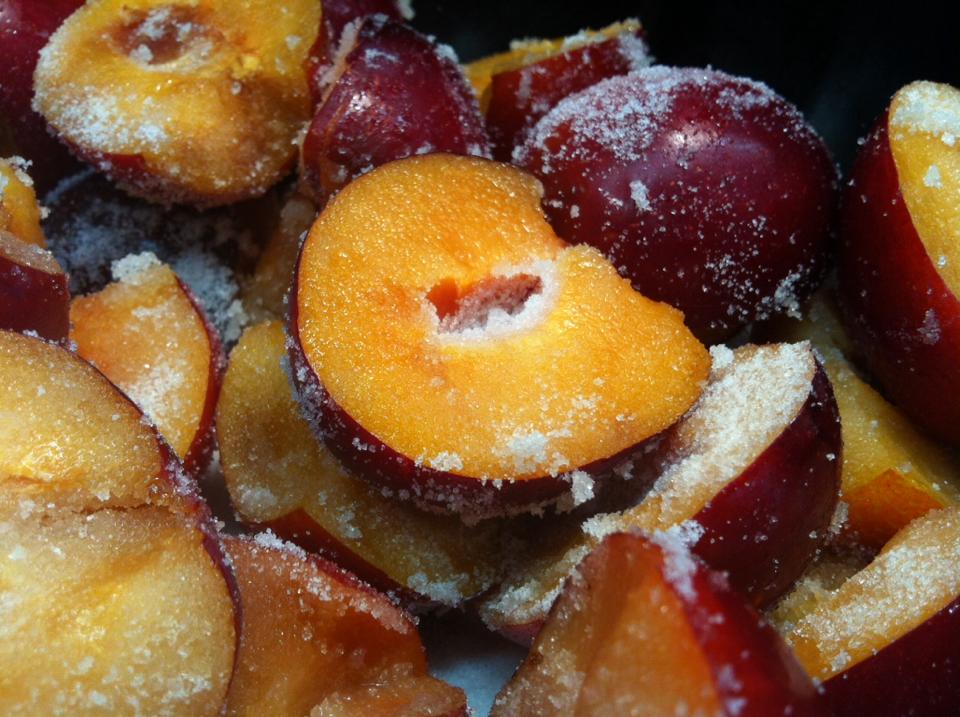
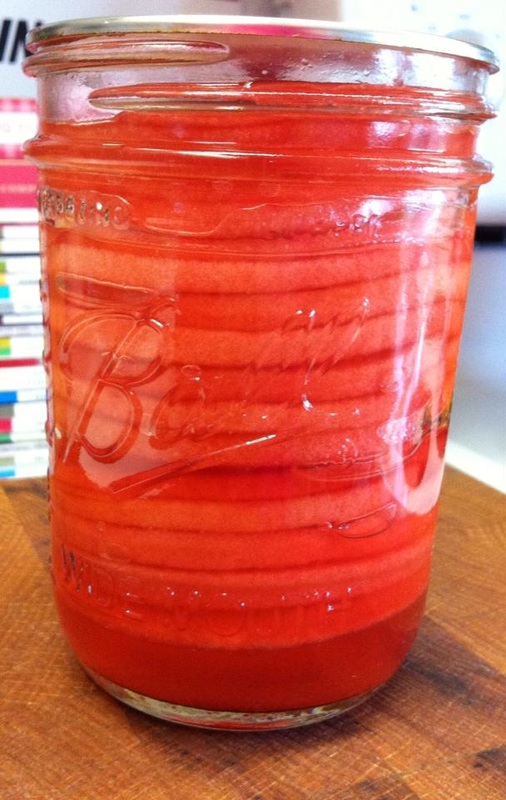
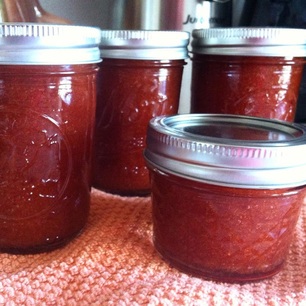
 Pluot Jam Ingredients: 2 lbs sliced pluots (one quart) 1/2 package powdered low-sugar pectin* (*half of a traditional 1.75oz Sure Jell pink boxed pectin package) 4 oz water 3 cups sugar 1/2 tsp vanilla bean paste 1/4 tsp ground cinnamon Yield: About 3.5 half-pint jars Procedure: Sterilize canning jars and prepare two-piece canning lids according to manufacturer's directions. To prepare fruit. Sort fully ripe pluots, wash, cut into pieces, and remove pits. To make jam. Place sliced/pitted pluots into a large pot and add 4 0z water, let fruit cook down about 45 minutes on low. Add in all sugar (reserving 1/4 cup sugar to mix with pectin) and stir well. Use an immersion blender to break up any large chunks of fruit and blend jam down to your preferred consistency. Increase heat to medium-high. Add in pectin/sugar mix and, stirring constantly, bring quickly to a full boil with bubbles over the entire surface, continue stirring, and heat again to a full bubbling boil. Boil hard for 1 minute. Remove from heat, stir in vanilla and cinnamon, stir. Fill with jam immediately into hot, sterile jars, leaving ¼ inch headspace. Wipe rims of jars with a dampened clean paper towel; adjust two-piece metal canning lids. Process in a Boiling Water Canner, 5 mins half-pints or pints (adjusting for altitude) Recipe and Photos by: Diane Baker for Canning and Cooking at Home
1 Comment
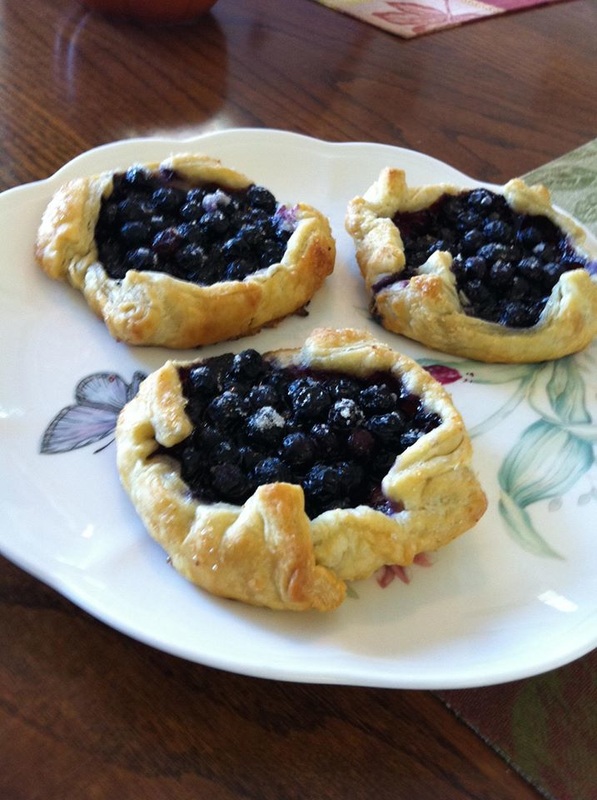
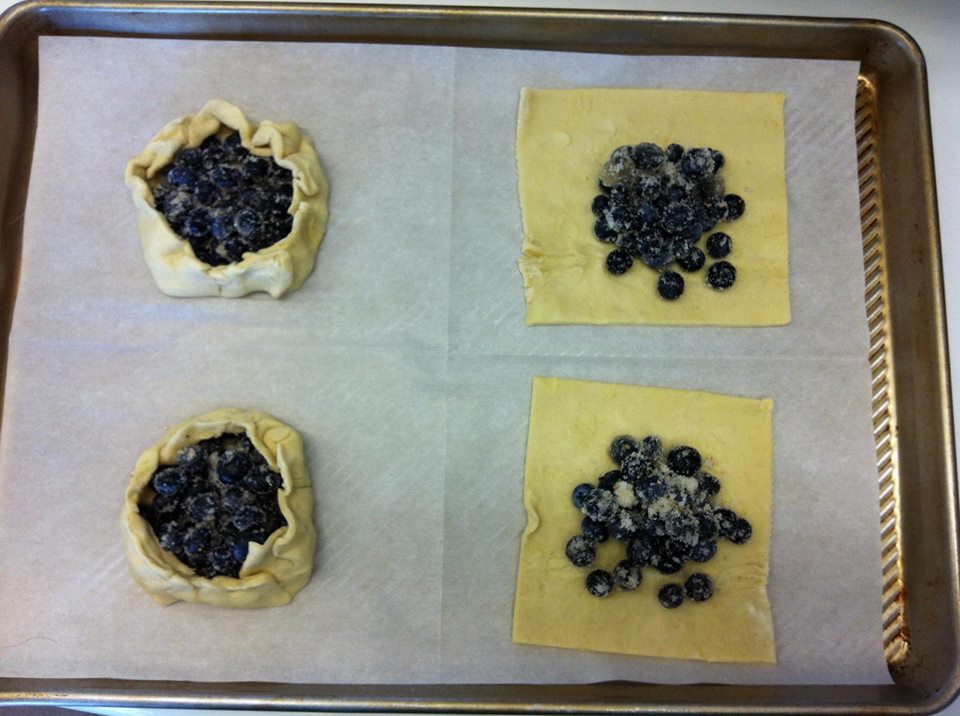
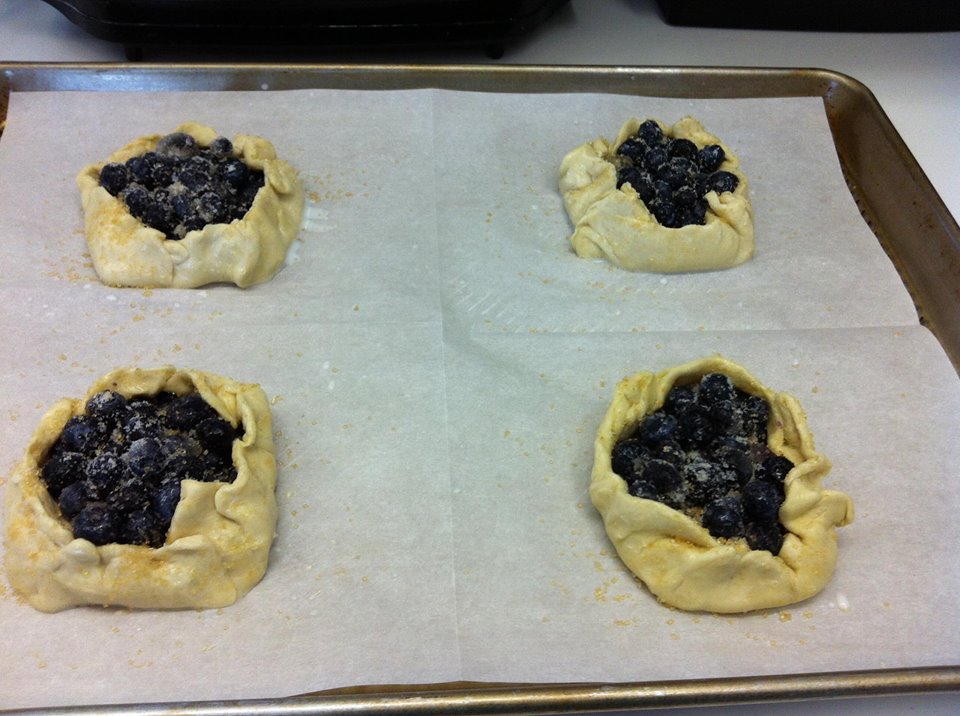
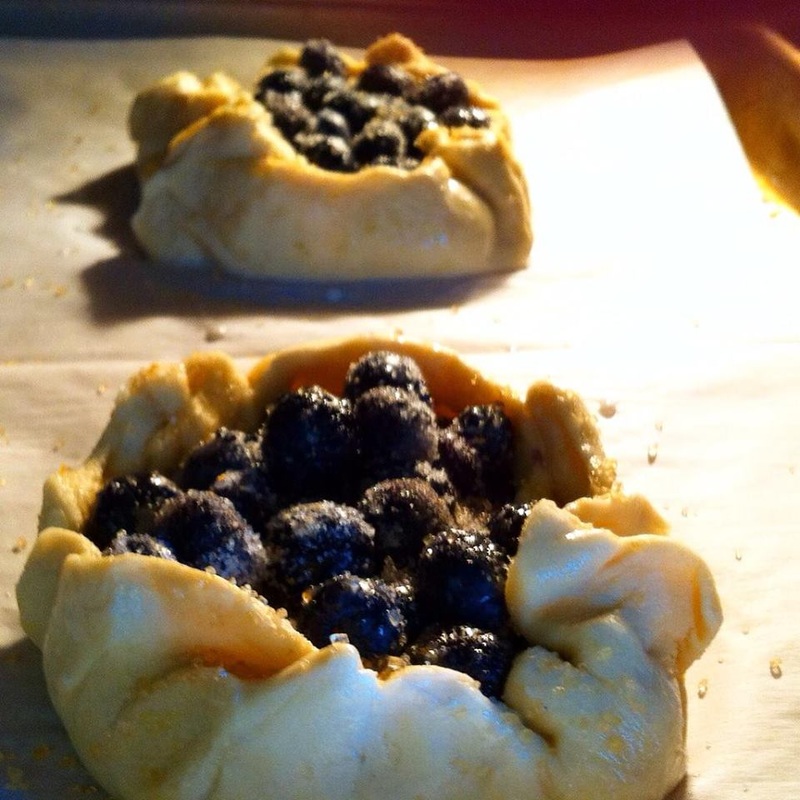
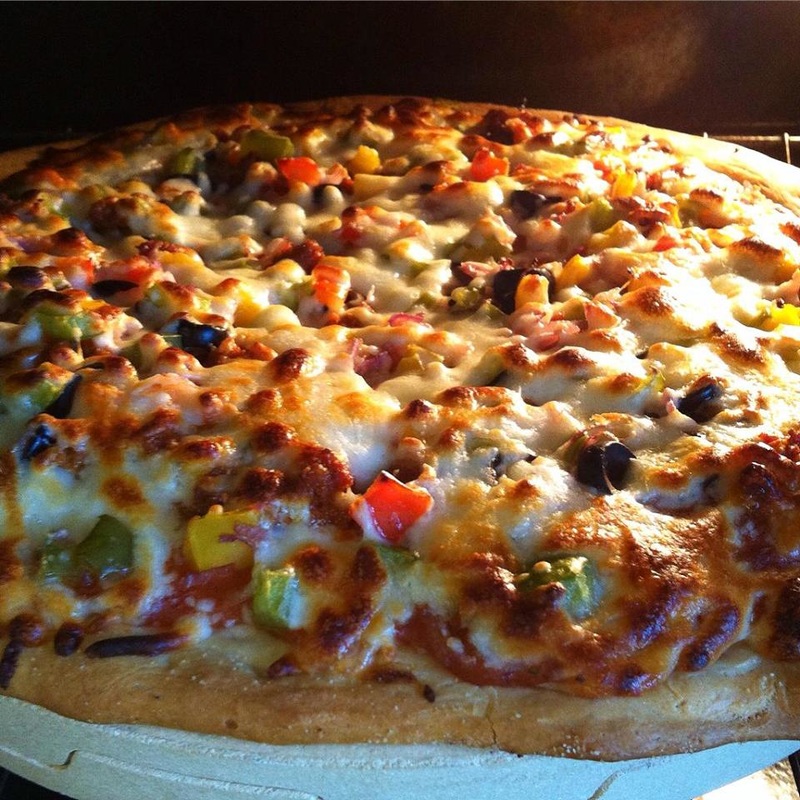
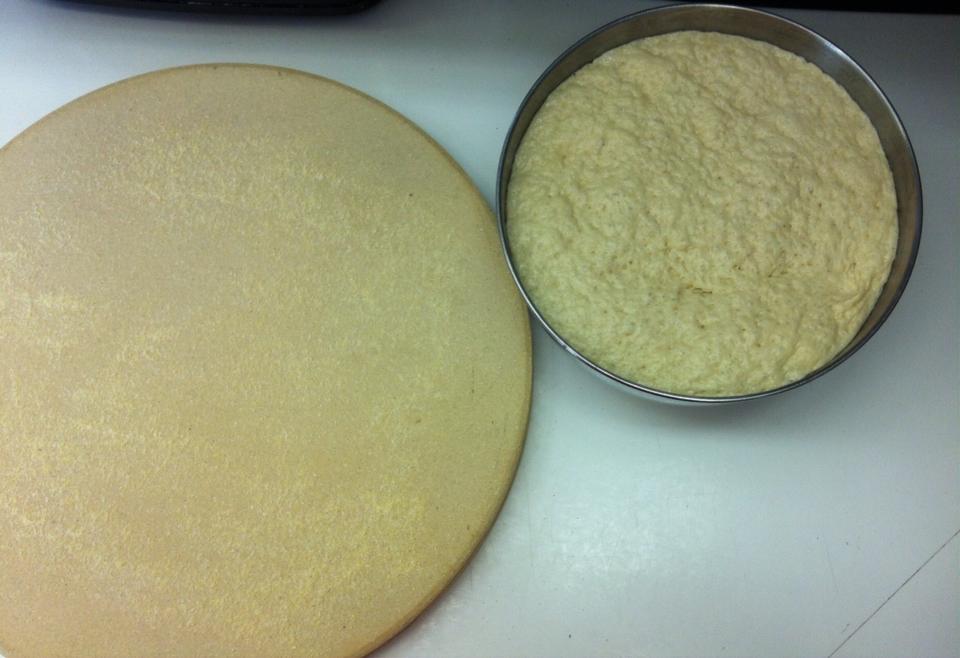
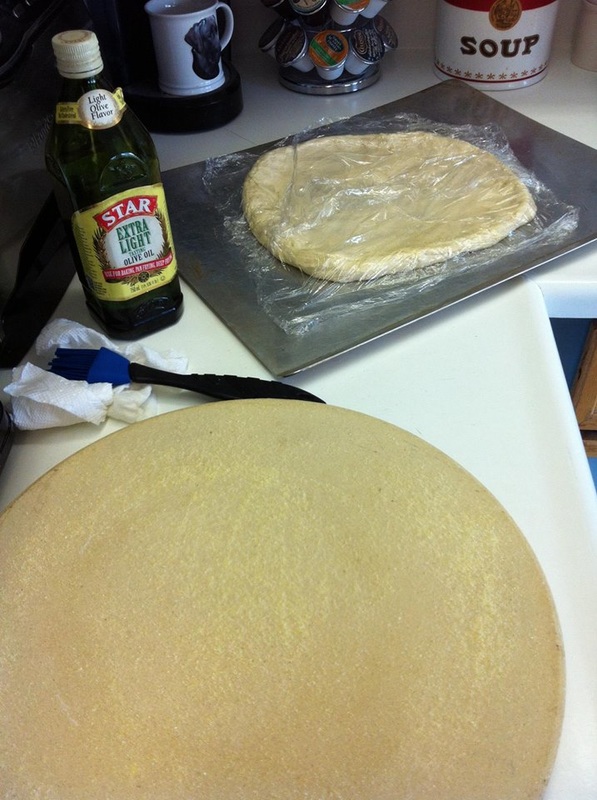
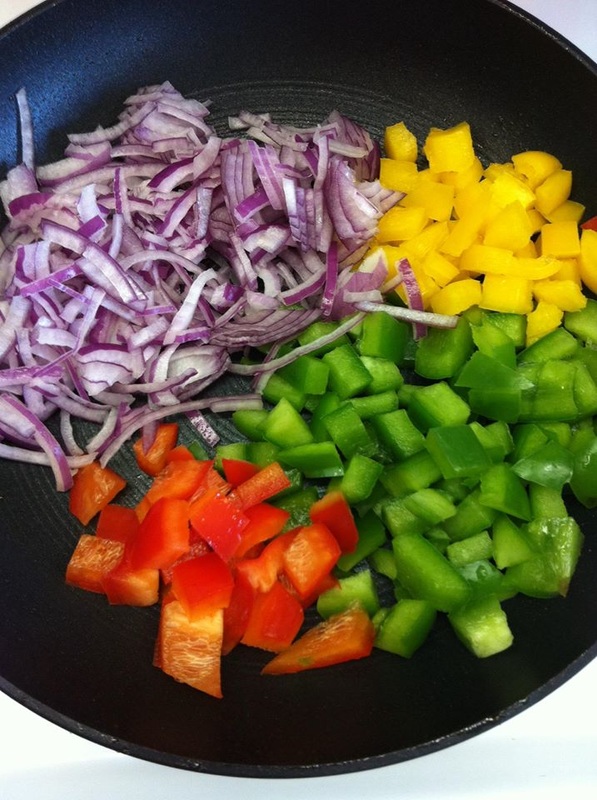
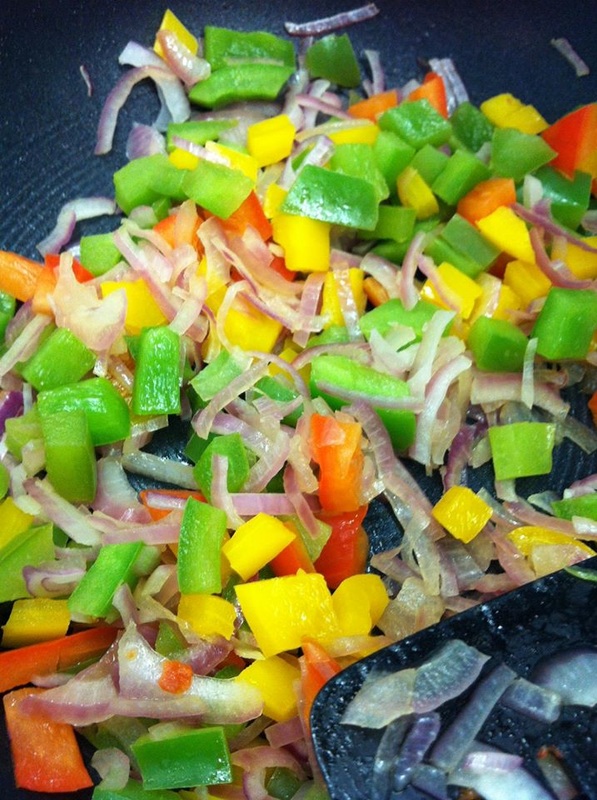
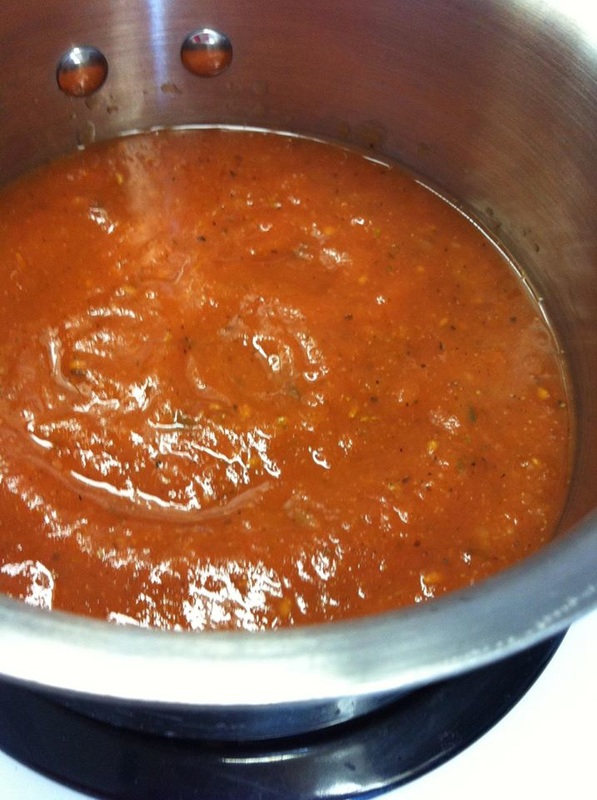
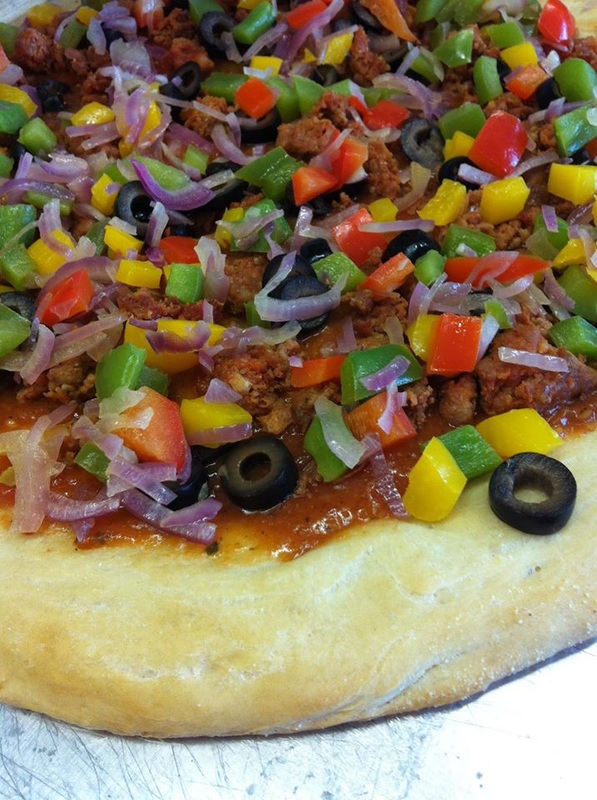
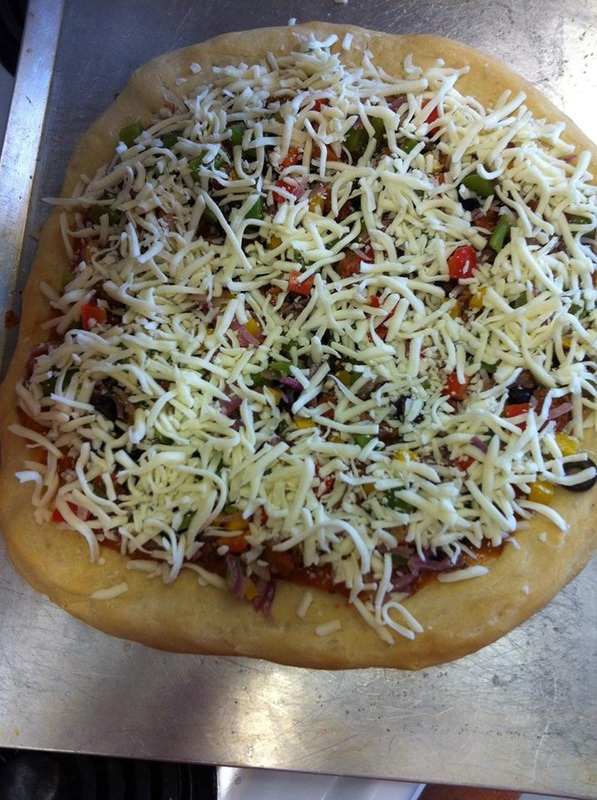
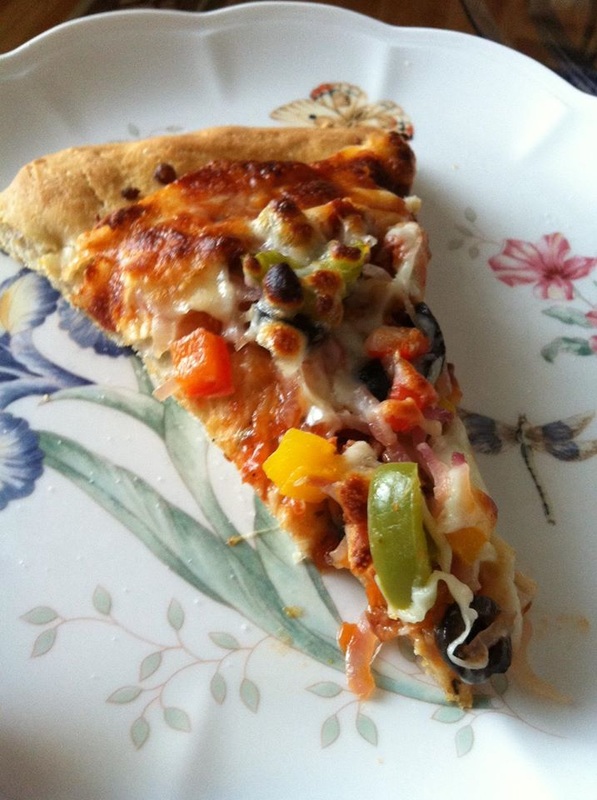
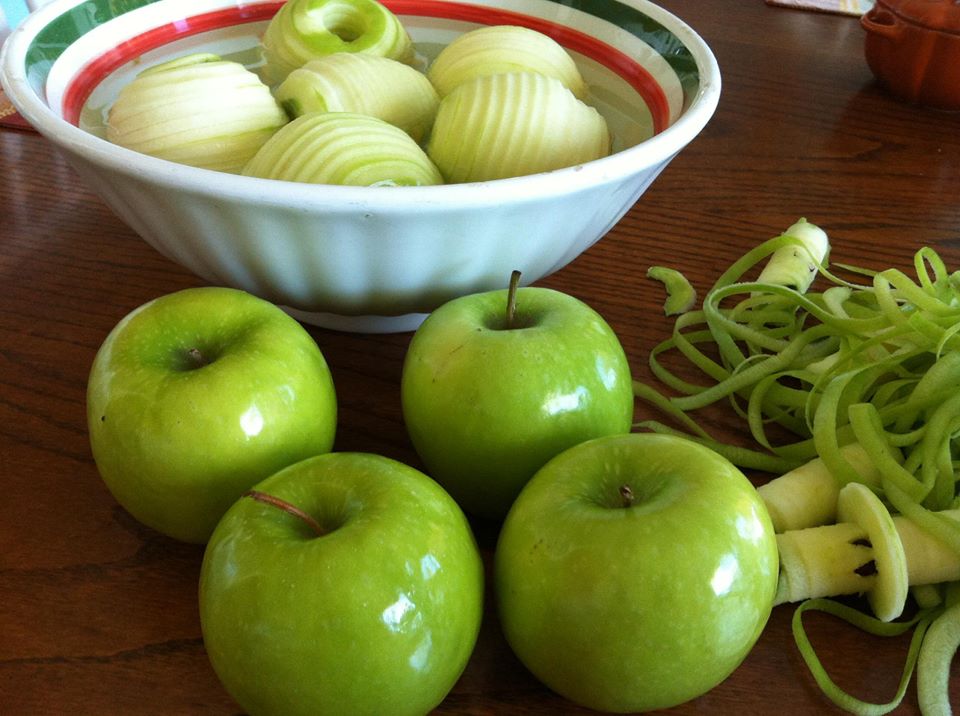
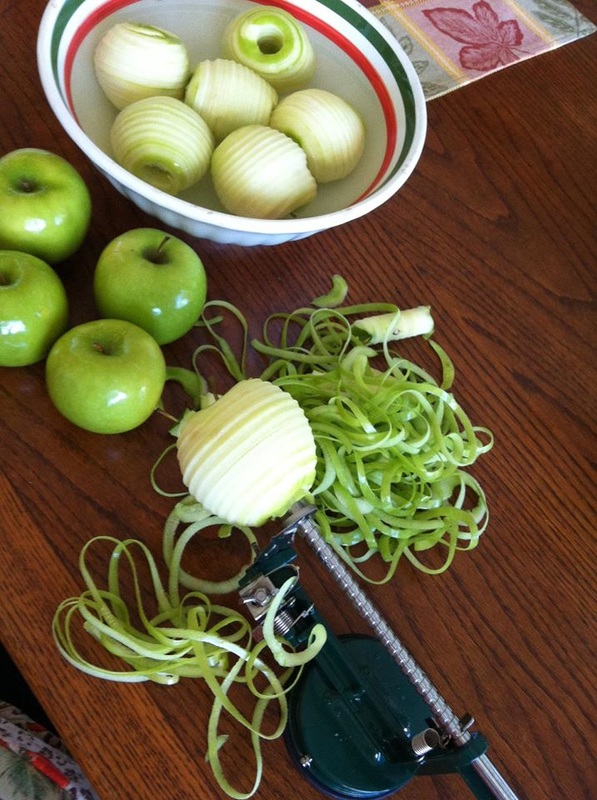
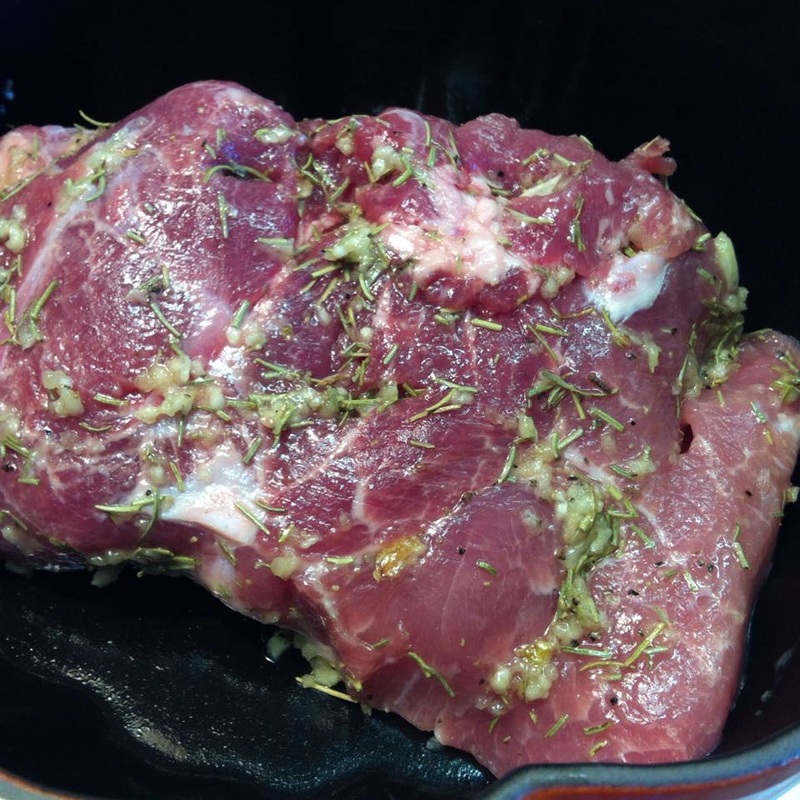
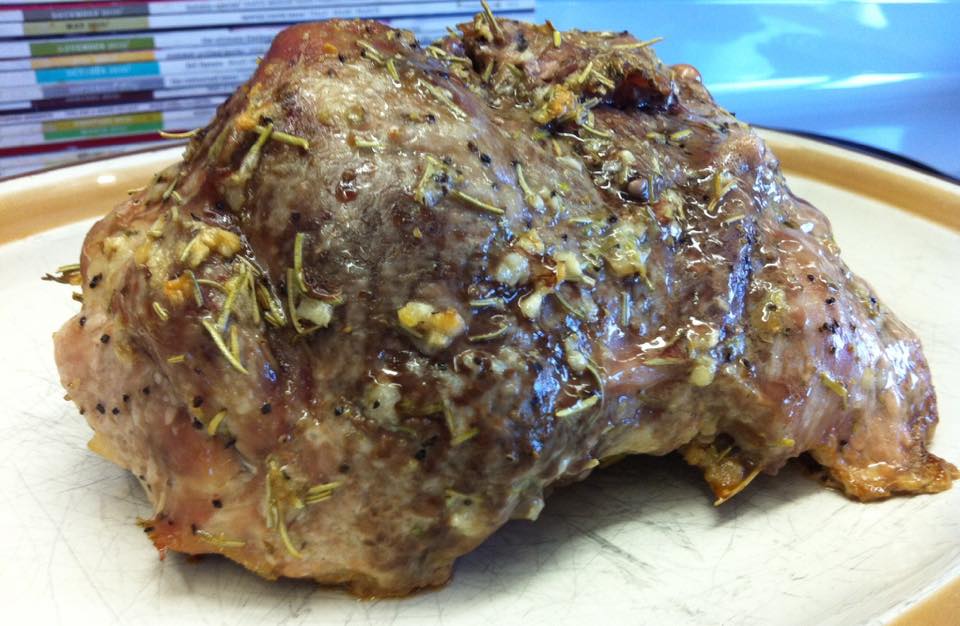
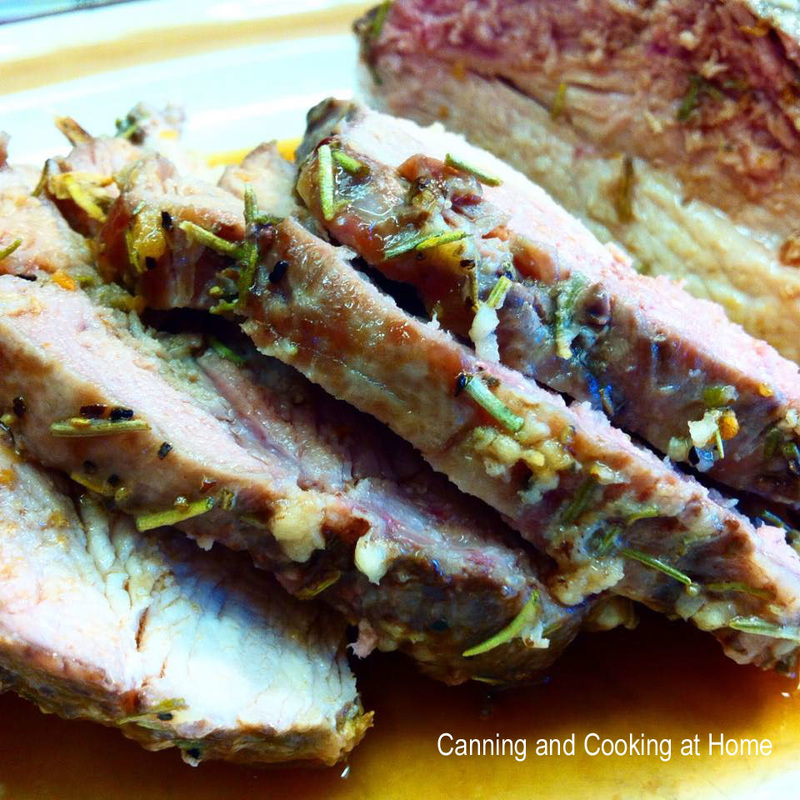
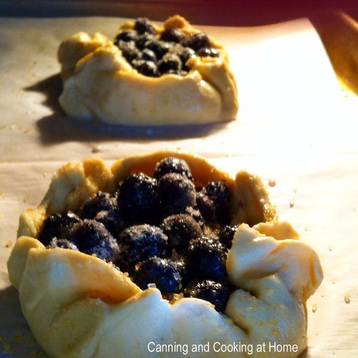 Mini Blueberry Galettes Ingredients: one small 6oz-8oz carton of fresh blueberries (I can fresh blueberries in 100% blueberry juice into pints and use in this too) 1/4 cup white sugar 1/8 tsp dried orange peel 1/2 tsp orange extract 1 Tbs maple syrup 1 sheet of phyllo - makes 4 minis *powder sugar or white chocolate chips, optional mini galettes - you can double the entire recipe and get 8 galettes Directions: Lay out your phyllo dough onto a baking sheet covered with parchment paper (this will help cleanup later, because blueberries have a tendency to ooze) Cut the large square of phyllo dough into 4 individual squares. Combine the blueberries and sugar in a bowl, making sure to coat all the berries with the sugar as you stir, add in the remaining ingredients and mix well. Place two to three heaping tablespoons of blueberries into the center of each square of dough. Working in a circular motion, bring up edges of dough around blueberries to form a circle, making sure to pinch any side seams together, do this with each galette and then fill with any of the remaining berries. Brush the exposed crust/dough lightly with milk and sprinkle with baking sugar or more regular sugar. Bake at 475 for the first 8 minutes - then lower oven to 375 and bake 12 more minutes or until crust is golden brown (juice may ooze onto baking sheet - that's fine and normal *you can add a tablespoon of cornstarch to your blueberry mix which can help firm up the juices that will be created when baking, I did not use a thickener) Remove from oven and carefully move to serving plate. Serve Warm. You can serve warm galettes with: Top with fresh whipped cream or Sprinkle with white chocolate chips or Sift some powdered sugar over the tops... Recipe and Photos by: Diane Baker for Canning and Cooking at Home 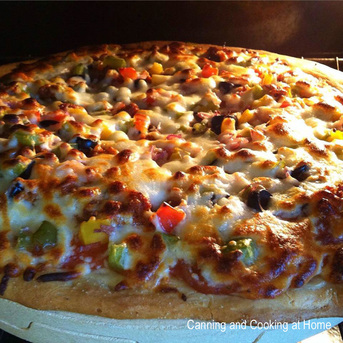 Pizza - Fresh in the oven! Making your own pizza crust does take time but, if you make many and pre-bake/freeze them, your set for quite some time. We like the 14" 1/2 inch round pizzas so, this recipe makes 2 pizza dough's for that...Our pizza stone is 14" so it all works perfectly. I use my homemade pasta sauce as pizza sauce by thickening the sauce upon reheating - works perfect every time. I also saute and cook any toppings that will be needed for the pizza while the dough is rising... ~Enjoy! Diane Homemade Pizza Crust Ingredients: plain basic crust: 2 tsp active dry yeast 1 cup + 2 Tbs, divided lukewarm water, or temp called for by your yeast 2 Tbs extra virgin olive oil 3 cups Unbleached All-Purpose Flour 1 1/4 teaspoons salt *optional - for flavoring the crust: 1/2 Cup finely shredded Parmesan Cheese* 1 tsp Oregano* 1 tsp Basil* 1 Clove of Garlic finely diced, minced" **Brush Extra Virgin Olive Oil on the edges of the crust before baking, to brown the crust. Directions: 1) Dissolve active dry yeast with a pinch of sugar, in 2 tablespoons of the lukewarm water. Let the yeast and water sit at room temperature for 15 minutes, until the mixture has bubbled and expanded. If you're using instant yeast, you can skip this step. 2) Combine the dissolved yeast (or the instant yeast) with the remainder of the ingredients. Mix and knead everything together—by hand, mixer or bread machine set on the dough cycle—till you've made a soft, smooth dough. If you're kneading in a stand mixer, it should take 4 to 5 minutes at second speed, and the dough should barely clean the sides of the bowl, perhaps sticking a bit at the bottom. Don't over-knead the dough; it should hold together, but can still look fairly rough on the surface. 3) To make pizza up to 24 hours later, skip to step 5. 4) To make pizza now: Place the dough in a lightly greased bowl, cover the bowl, and allow it to rise till it's very puffy. This will take about an hour using instant yeast, or 90 minutes using active dry. If it takes longer, that's OK; just give it some extra time. 5) To make pizza later: Allow the dough to rise, covered, for 45 minutes at room temperature. Refrigerate the dough for 4 hours (or for up to 24 hours); it will rise slowly as it chills. This step allows you more schedule flexibility; it also develops the crust's flavor. About 2 to 3 hours before you want to serve pizza, remove the dough from the refrigerator. 6) Decide what size, shape, and thickness of pizza you want to make. This recipe will make one of the following choices: Two 1/2"-thick 14" round pizzas; Two 3/4"-thick 12" round pizzas; One 3/4" to 1"-thick 13" x 18" rectangular (Sicilian-style) pizza; One 1 1/2"-thick 9" x 13" rectangular pizza; One 1"-thick 14" round pizza. 7) Divide the dough in half, for two pizzas; or leave it whole for one pizza. 8) If you're making a rectangular pizza, shape the dough into a rough oval. For a round pizza, shape it into a rough circle. In either case, don't pat it flat; just stretch it briefly into shape. Allow the dough to rest, covered with an overturned bowl or lightly greased plastic wrap, for 15 minutes. 9) Use vegetable oil pan spray to lightly grease the pan(s) of your choice. Drizzle olive oil into the bottom of the pan(s). The pan spray keeps the pizza from sticking; the olive oil gives the crust great flavor and crunch. 10) Place the dough in the prepared pan(s). Press it over the bottom of the pan, stretching it towards the edges. You'll probably get about two-thirds of the way there before the dough starts shrinking back; walk away for 15 minutes. Cover the dough while you're away, so it doesn't dry out. 11) When you come back, you should be able to pat the dough closer to the corners of the pan. Repeat the rest and dough-stretch one more time, if necessary; your goal is to get the dough to fill the pan as fully as possible. 12) Allow the dough to rise, covered, till it's noticeably puffy, about 90 minutes (if it hasn't been refrigerated); or 2 to 2 1/2 hours (if it's been refrigerated). Towards the end of the rising time, preheat the oven to 450°F. 13) Bake the pizza on the lower oven rack till it looks and feels set on top, and is just beginning to brown around the edge of the crust, but is still pale on top. This will take about 8 minutes for thinner crust pizza; about 10 to 12 minutes for medium thickness; and 12 to 14 minutes for thick-crust pizza. If you're baking two pizzas, reverse them in the oven (top to bottom, bottom to top) midway through the baking period. 14) To serve pizza immediately: Remove it from the oven, and arrange your toppings of choice on top. Return to the oven, and bake on the upper oven rack for an additional 10 to 15 minutes, until the crust is nicely browned, both top and bottom, and the cheese is melted. Check it midway through, and move it to the bottom rack if the top is browning too much, or the bottom not enough. 15) To serve pizza up to 2 days later: Remove the un-topped, partially baked crust from the oven, cool completely on a rack, wrap in plastic, and store at room temperature. When ready to serve, top and bake in a preheated 450°F oven, adding a couple of minutes to the baking times noted above. Your goal is a pizza whose crust is browned, and whose toppings are hot/melted. 16) Remove the pizza from the oven, and transfer it from the pan to a rack to cool slightly before serving. Slice and Serve. Recipe Adapted from: King Arthur Flour "Pizza Crust" Photos by: Diane Baker for Canning and Cooking at Home 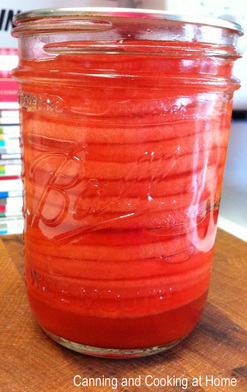 Capture FALL in a jar to savor all year long! Spiced apple rings take a bit of time to prepare but, overall the wonderful, sinful taste is worth it! You need to keep in mind when buying apples that they will need to be small enough in diameter to fit in wide mouth jars if you prefer to stack the rings (like I did) I did use an apple peeler which cut the slices thinner then some may prefer but, since I enlisted my apple corer/peeler to help out on this - I don't mind. 12 Granny Smith apples made just about 6 pints. I processed 5 pints and my husband and I ate the leftovers, about a pint...(someone had to taste test - right?!) We love these!! and you don't have to add the red dye if you don't want to! There are organic red dyes on the market if you prefer or leave out of the recipe. Since some of these will be gifts, I went a bit darker with my dye. If you have a hard time finding Cinnamon Red Hot Candies - try the baking aisle of your grocery store - they usually have them marked as "Cinnamon Imperials for Baking/Decorating" I know there is a lot of sugar in this recipe - I wanted to follow the safe canning method on this before I venture out into switching up the apples and syrup. The recipe listed below has been cut in half from the original. (Next time I will try sweet apples with cinnamon sticks and a light syrup with honey replacing up to half the sugar) ~Enjoy! Diane Spiced Apple Rings Ingredients: 6 lbs firm tart apples/such as granny smiths (max.diameter 2-1/2 inches - approx 12 apples) 6 cups sugar 3 cups water 1/2 cup plus 2 Tbs white vinegar (5% acidity) 1-1/2 Tbs whole cloves, in cheese cloth or tea ball 1/3 cup red hot cinnamon candies (or 4 cinnamon sticks) 1/2+ tsp red food coloring (optional, they do make organic) Fruit Fresh *optional, to prevent darkening Yield: About 5 to 6 pints Procedure: Wash apples. To prevent discoloration, peel and slice one apple at a time. Immediately cut crosswise into 1/2-inch slices, remove core area with a melon baller and immerse in ascorbic acid solution such as Fruit Fresh. (I used my apple peeler to peel/core/slice) To make flavored syrup, combine sugar water, vinegar, cloves (placed in cheesecloth or a tea ball), cinnamon candies, or cinnamon sticks and food coloring in a 6-qt saucepan/pot. Stir, heat to boil, and simmer 3 minutes. Drain apples, add to hot syrup, and cook 5 minutes. Fill jars (preferably wide-mouth) with apple rings and hot flavored syrup, leaving 1/2-inch headspace. Remove air from jars and adjust headspace once again, wipe rims well before applying lids. Process in a Boiling Waterbath Canner for 10 minutes or according to your local altitude/regulations. Once timing is up on canner, let the jars set in your canner with burner off and lid removed for an extra 5-10 mins to help prevent against siphoning, carefully remove jars from canner and let cool in a draft free area for 12-24 hours before washing, labeling and storing sealed jars. Any jars that are unsealed need to be refrigerated and eaten first. Recipe Adapted from: "So Easy to Preserve" Photos by: Diane Baker for Canning and Cooking at Home  Sundays are meant for rest and good food to share with family. This pork roast is easy to make and flavor-filled. I serve my roast with a fresh spinach salad, green beans and mashed potatoes. Remember to roast your cut of meat low and slow, and check the temp at 60 mins to make sure its not overcooking. (I use a digital meat thermometer for the quickest temp results.) I like making smaller roasts in my smaller 3.5Qt dutch ovens so that when the time comes to take the roast out of the oven, to 'rest', I can pop the lid on and not have to wrestle with foil. ~Enjoy! Diane Sunday Pork Roast Ingredients: 2 Lbs Boneless Pork Roast 3 cloves Garlic, minced 1 Tbs dried Rosemary, crush with fingers 1/8 tsp ground Black Pepper 1/4 tsp Sea Salt 2 Tbs Olive Oil 1/2 Cup White Wine (or Chicken Broth) Directions: Combine minced garlic, crushed rosemary, salt and pepper in a small bowl. Pierce pork with a sharp knife tip in several places and press in some of the garlic mixture into openings. Pour olive oil into remaining garlic mixture and stir, distribute remainder evenly over the pork. Place pork in a lightly greased smaller dutch oven or baking pan with at least a 2" lip. Sprinkle lightly with more pepper and salt, if preferred. Bake, uncovered at 350 for 60 minutes, or until a meat thermometer reads 155 degrees from the thickest part of the meat. Remove from oven. Let stand, covered 10 minutes or until meat thermometer reaches 160 degrees. Remove to serving platter, slice and keep warm. Add wine or broth to pan with drippings and stir until all the browned bits have been scraped down and stirred. Spoon some of the pan drippings over pork and serve the rest on the side. Serves 6 to 8. Recipe Adapted from: Tiffany Brinkley Photos by: Diane Baker for Canning and Cooking at Home |