CANNING AND COOKING AT HOME
  • Home
  • Diane's Blog
  • Canning 101
  • Pickling
    • My Pickle Creations
    • Pickle Recipes
  • Recipe Index
    • Canning Recipes >
      • Jams/Jellies/Fillings/Butters/Juices
      • Meats/Other
      • Pressure Canned Soups
      • Tomatoes
    • Cooking Recipes >
      • Breads
      • Breakfast
      • Instant Pot Recipes
      • Main Dishes
      • Soups
      • Sweets
      • Drinks
      • Sauces/Apps/Sides
    • Recipe Collections >
      • The Apple Cart
      • Asian Inspired Recipes
      • Bundts to Bake
      • Cherry Recipes (preserving)
      • Easter Menu Ideas
      • Freezer to SlowCooker
      • Irish Fare
      • Jelly & Jam Recipes
      • Mexican Inspired Recipes
      • Pickle Recipes
      • Soups
      • Summer Grillin' Guide
  • Work with Me
    • Privacy Policy
    • Give Aways
  • Recipes Via Email

Cowboy Candy Wontons

1/11/2021

0 Comments

 
Picture
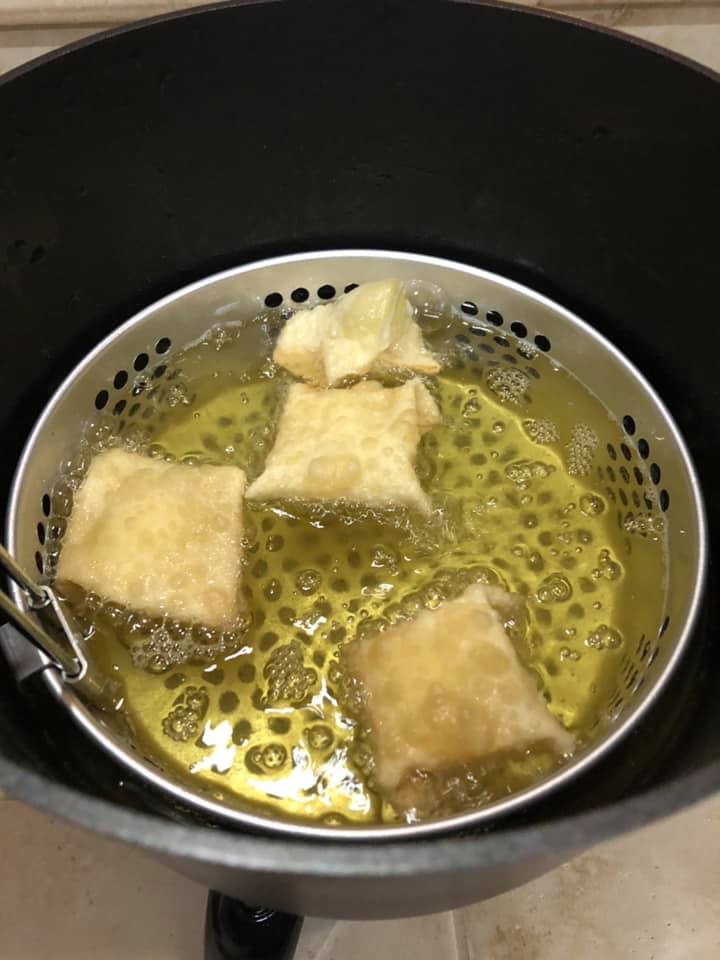
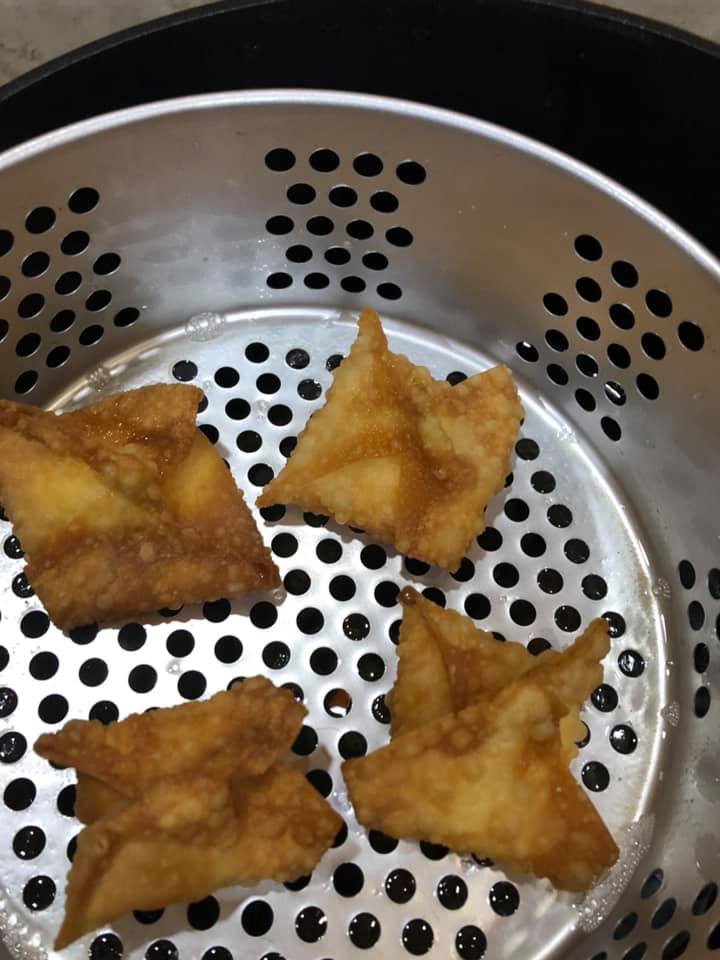
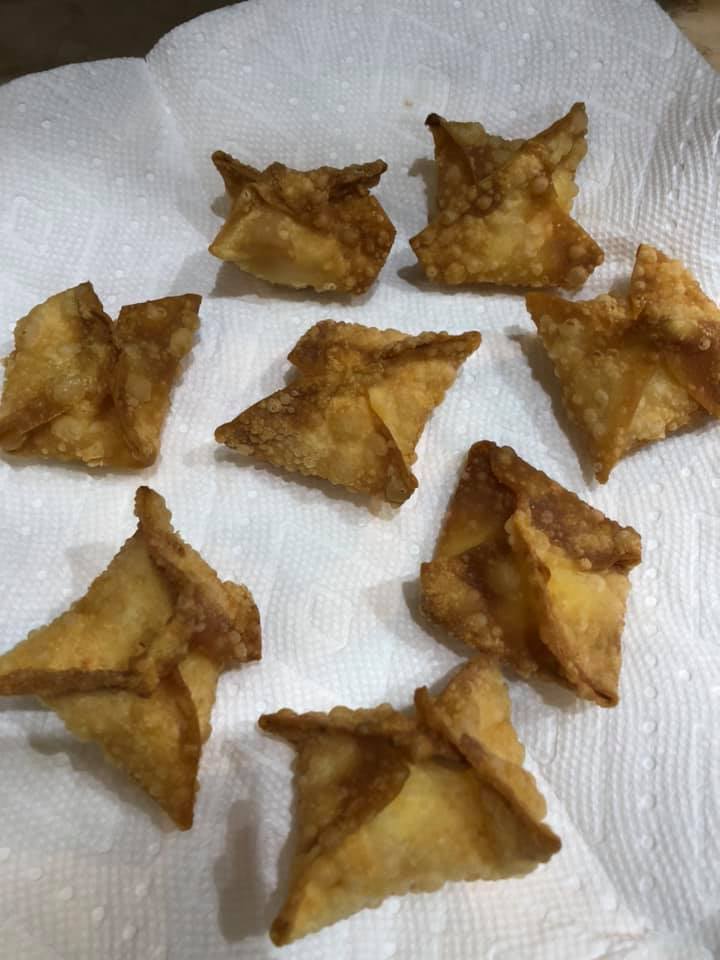
       If you're going to fry up some cream cheese wontons - why not add in some cowboy candy into the filling!  It's a great little surprise!  These are fun and easy to make.  My most important recommendation is to not overstuff the wontons with filling or they can open up while frying.  Always use egg wash along all sides of the wonton which helps seal all the edges. The fillings are endless - you can make these without the cowboy candy - just add a touch more cream cheese filling.  Enjoy! Diane 

Homemade Cream Cheese Wonton
*with cowboy candy 


Ingredients: 
  • 8 ounces cream cheese softened
  • 1/2 teaspoon sugar
  • 1/2 teaspoon onion powder
  • 1/2 cup Cowboy Candy 
  • 24 wonton wrappers 
  • 1 egg beaten for sealing wontons
  • canola oil for frying wontons

Directions:
  • Combine the room temperature/softened cream cheese, sugar and onion powder.  Stir until well mixed.
  • Place a wonton wrapper on a flat surface and place a teaspoon of the cream cheese mixture into the center along with a ring or two of candied jalapeño.
  • Brush all of the edges of the wonton wrapper with the egg wash.  
  • Bring 2 opposite corners together in the middle of the wonton and pinch. Repeat with the other 2 corners and pinch to form a square package shape.
  • Repeat - keeping folded wontons on a saran wrap covered tray so they don't dry out.
  • Heat 4 inches of oil in a deep pan or fryer to 350 degrees F.
  • Fry 4-6 wontons at a time, turning them as needed to make sure they brown evenly. This process takes about 3-5 minutes. Do not overcrowd the fryer as the oil temperature will drop greatly.  
  • Drain the cooked wontons on paper towels and repeat the frying process with remaining wontons. 
  • Let the wontons cool down a good 5 minutes or more as filling will be very hot. 
  • Serve with dipping sauce of choice if preferred.  

0 Comments

Mixed Berry Jam Scones

1/9/2021

0 Comments

 
Mixed Berry Jam Scones with Demerara Sugar Topping
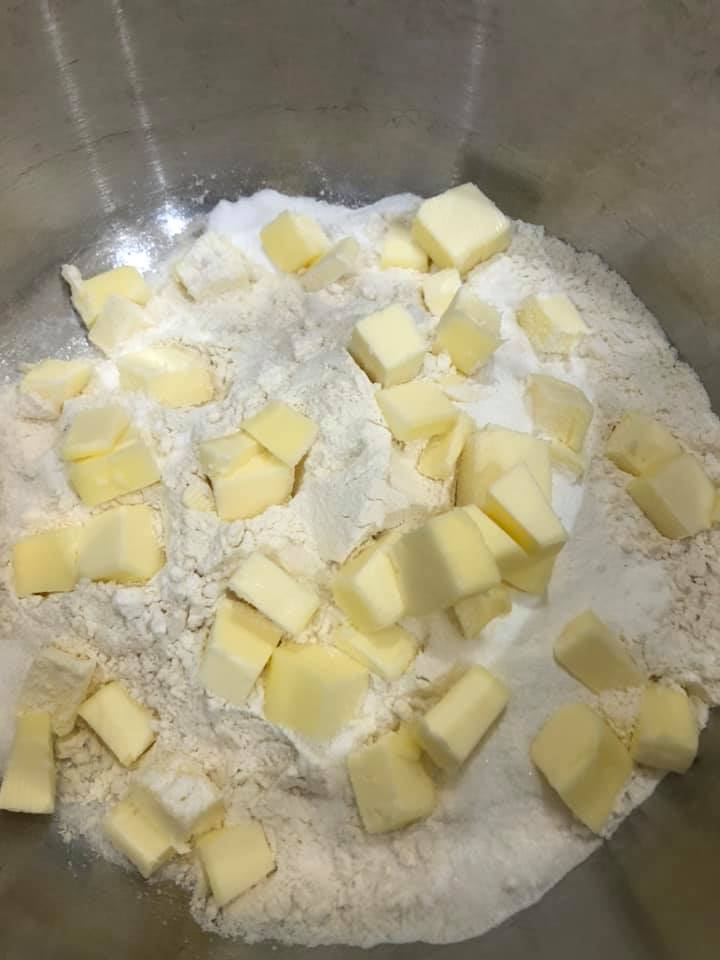
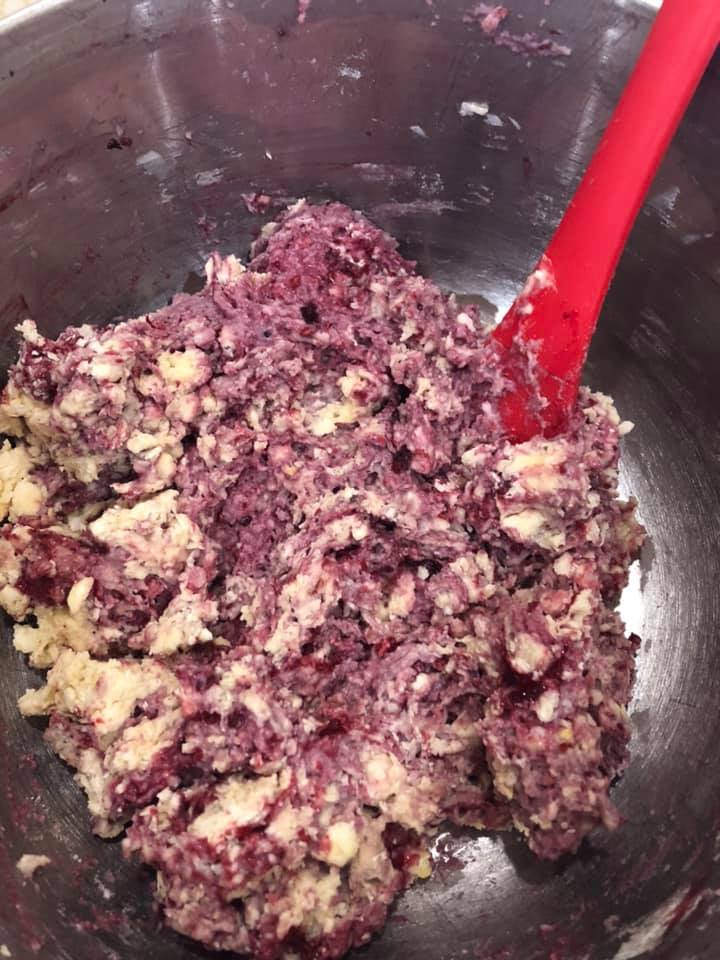
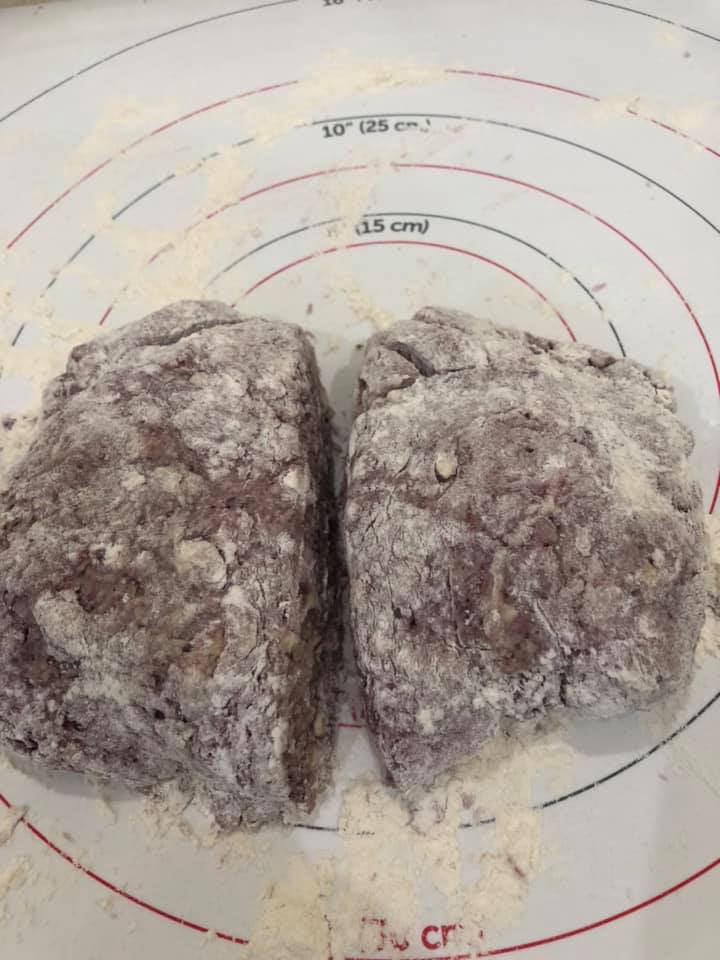
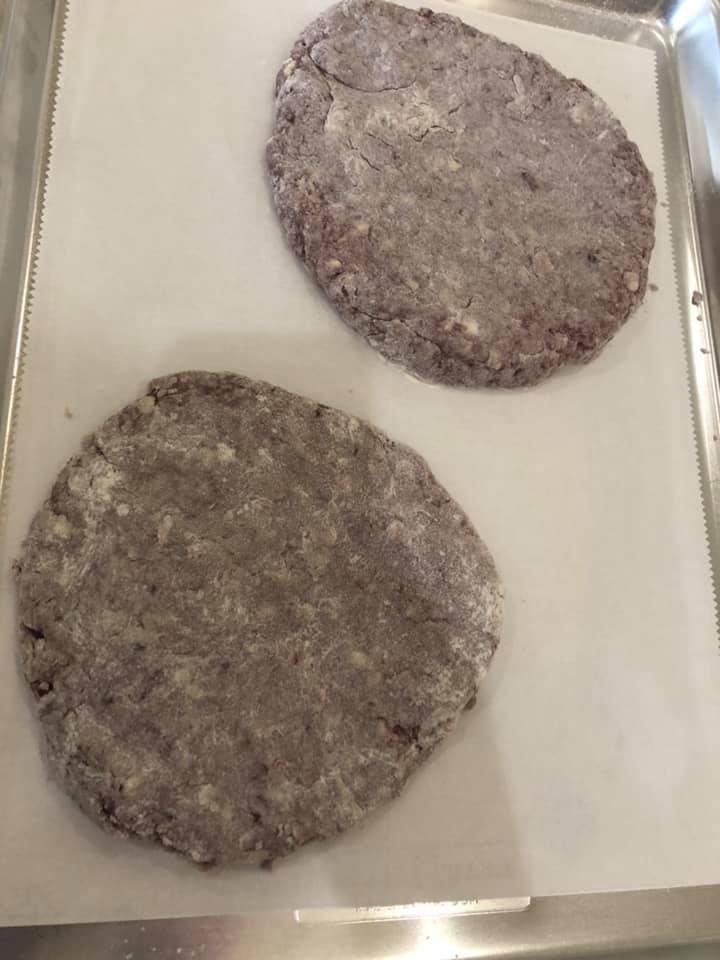
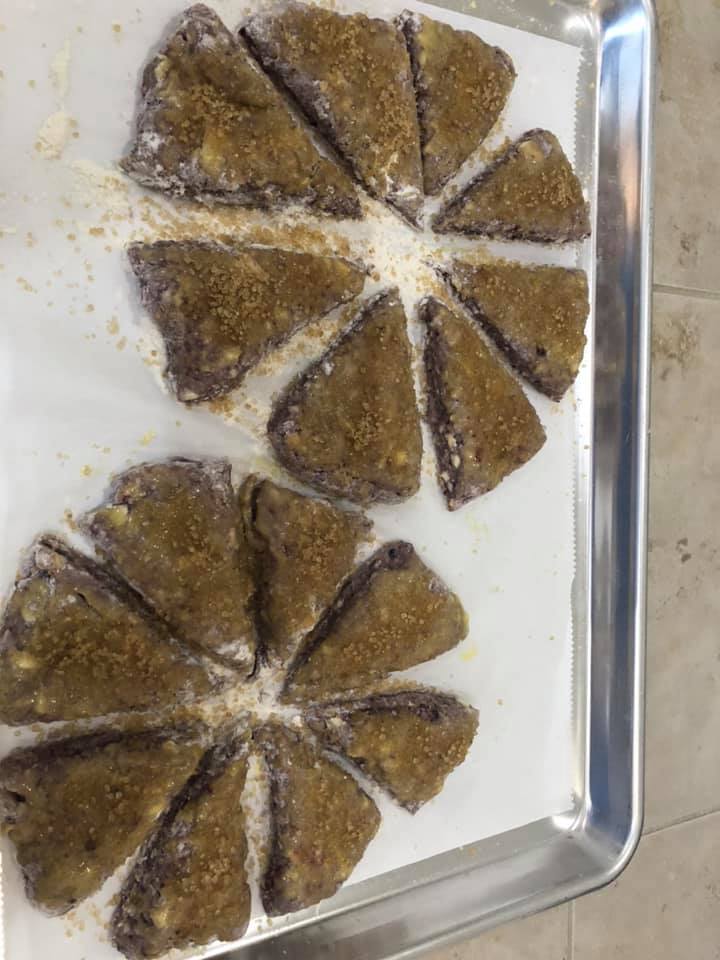
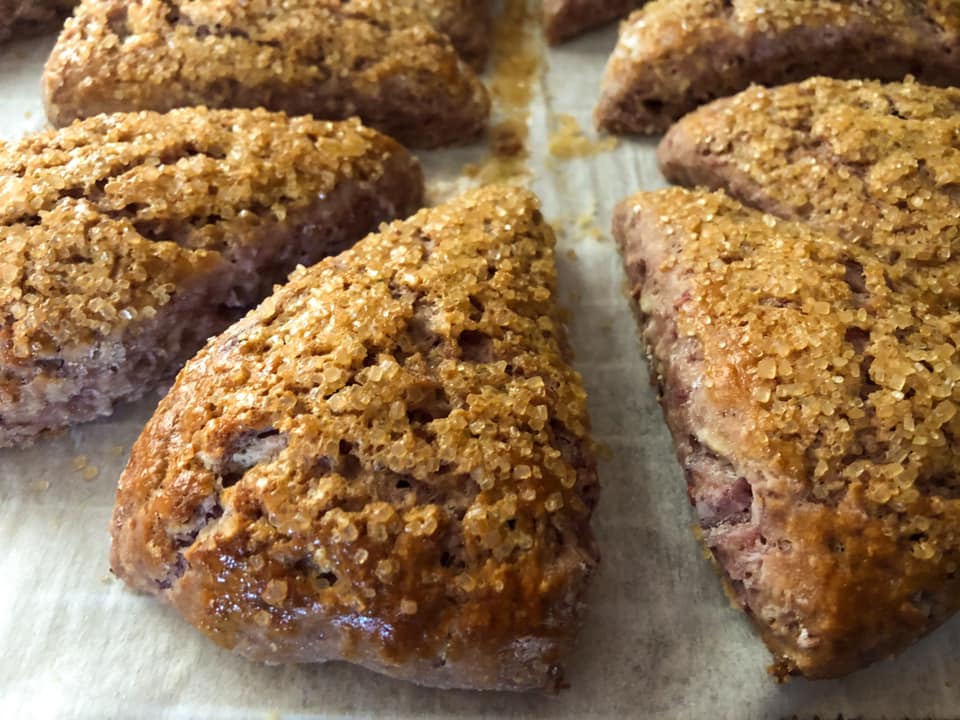
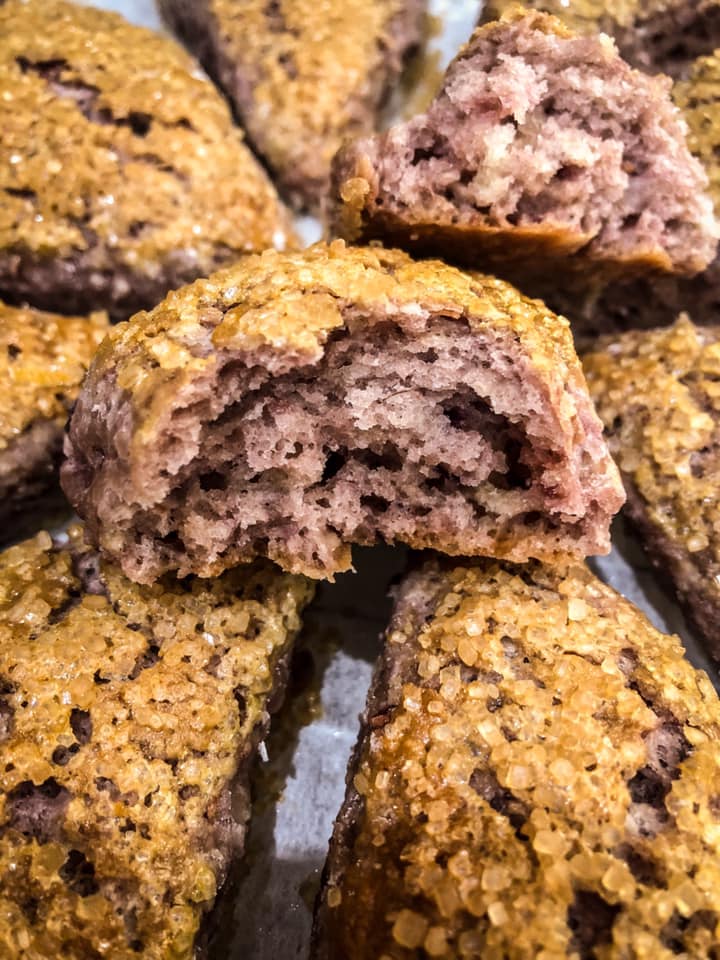
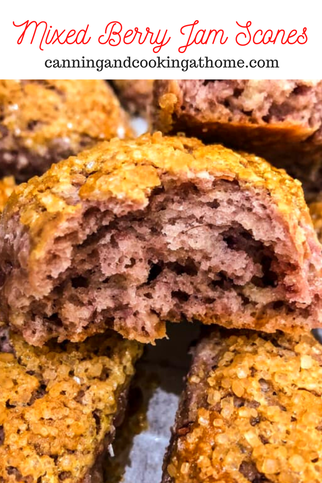
Mixed Berry Jam Scones with Demerara Topping
    Love these scones.  They held a nice flavor through the baking process.  I used my mixed berry jam which is a jam I make every year around Christmas time.  You can use any jam but, raspberries in my mixed berry jam really lent a lot to the end result.  Enjoy! Diane   

Homemade Mixed Berry Jam Scones

makes 16 scones 

Ingredients
Scones:
1/2 Cup Mixed Berry Jam (my Christmas Jam) 
2 cups all-purpose flour, plus more if needed 
2 Tablespoons sugar
2 teaspoons baking powder
1/4 teaspoon salt
1 egg
6 Tablespoons unsalted butter
2/3 cup milk

Topping:
1 egg, whisked for egg wash
3 Tablespoons demerara sugar

Directions
Preheat oven to 400 F degrees.
  1. In a large bowl, place the flour, salt, baking powder and sugar. Add the butter and using 2 knives or a pastry blender start cutting into the butter. Use your hands if necessary but the mixture needs to resemble small peas.
  2. Add the jam to the dough and mix well with the dry ingredients.
  3. In a small bowl mix the egg and milk together then add to the flour bowl. Using a spatula mix everything well. 
  4. Turn dough onto a  well floured surface and shape into two equal rounds. Add in more flour, as needed, if dough is too wet (if it sticks to your hands too much.)
  5. Cut each round of dough into 8 triangles, just like you would cut pizza and place the triangles over a cookie tray lined with parchment paper.
  6. Brush the tops of the scones with the egg wash. Sprinkle the tops of the scones with demerara sugar.  
  7. Bake for 20 to 30 minutes or until golden brown.

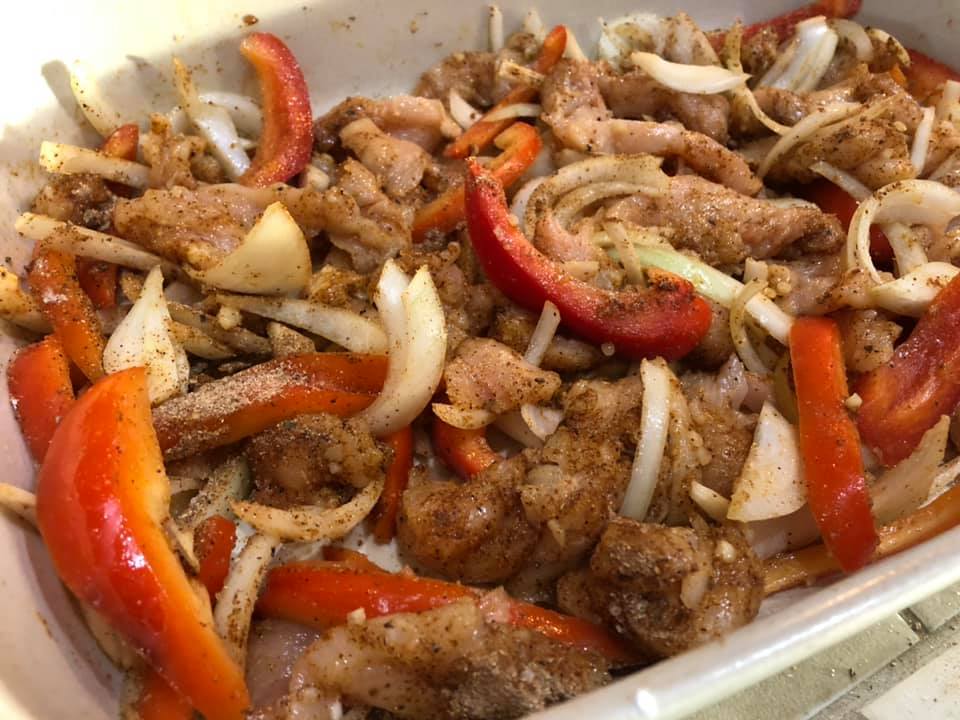
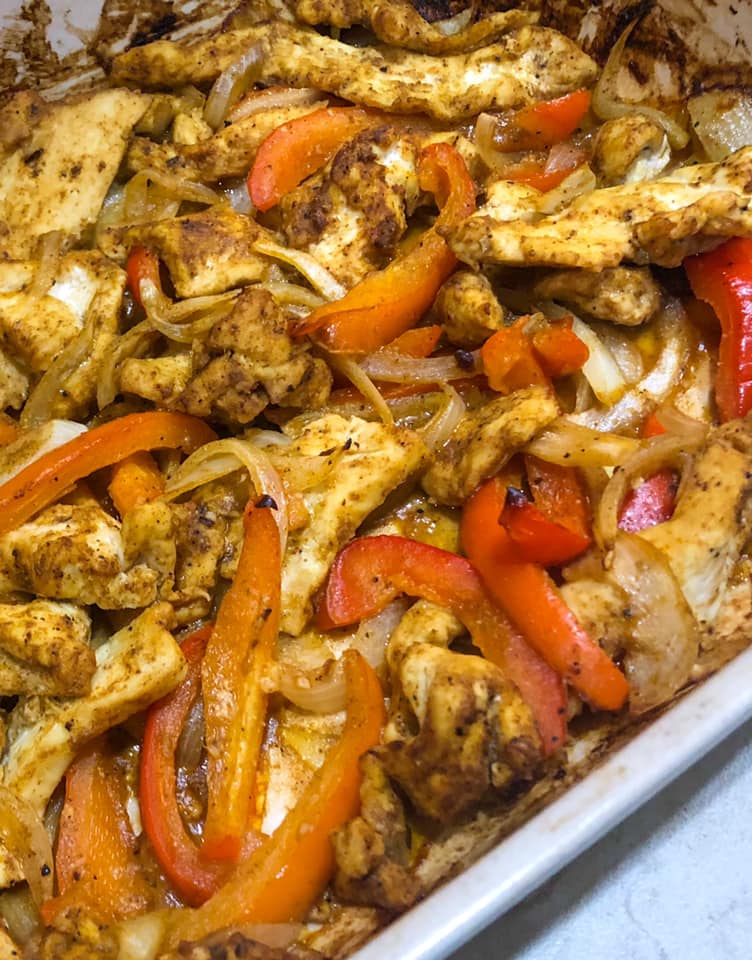
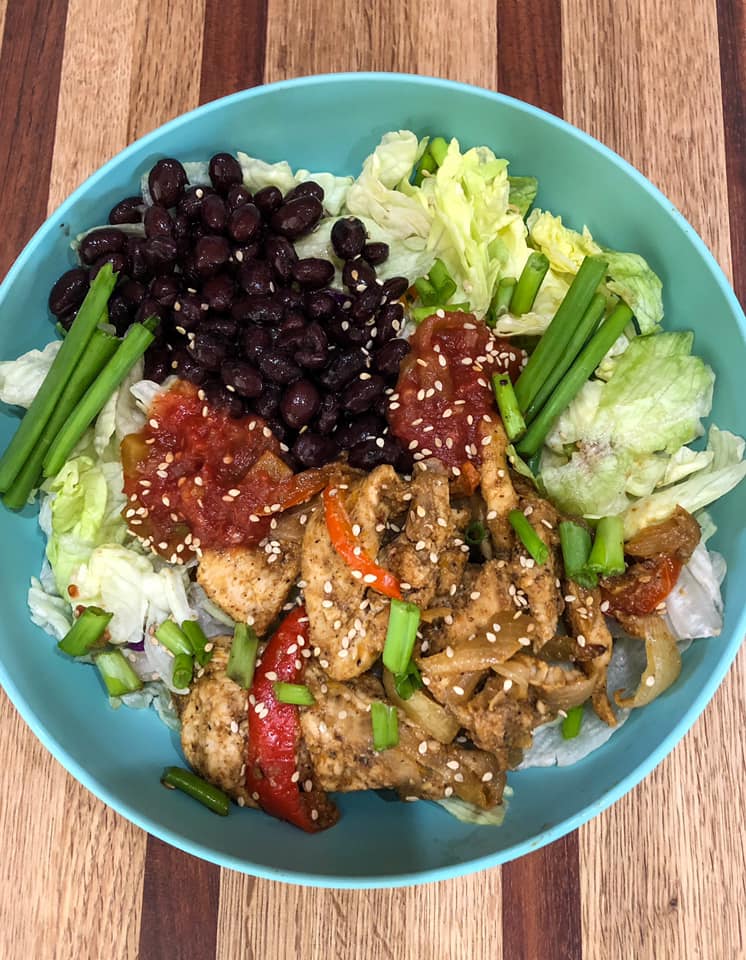
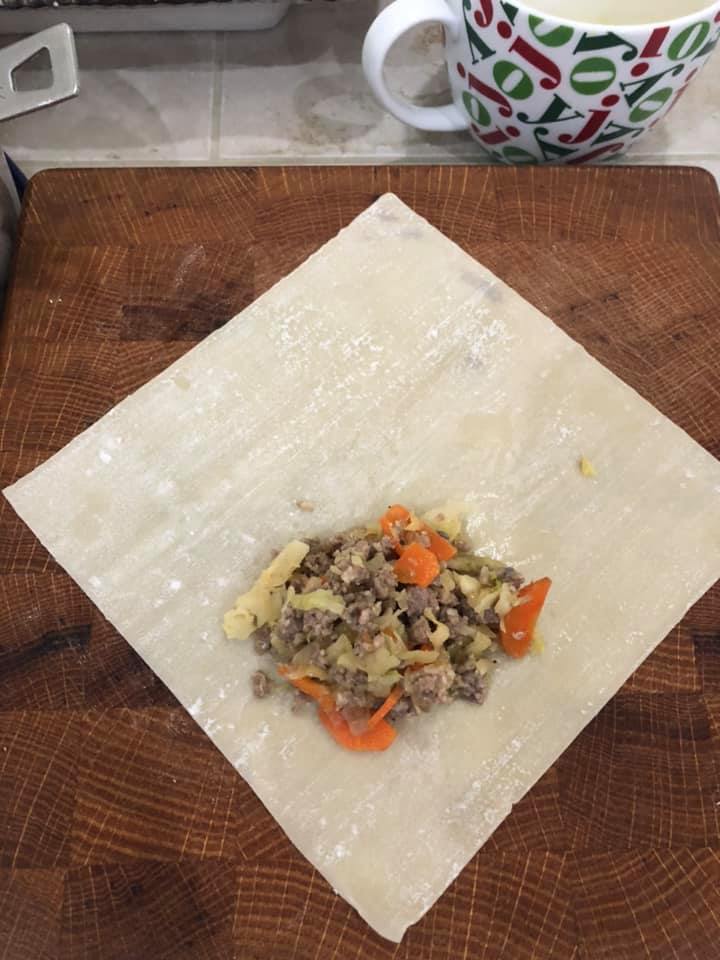
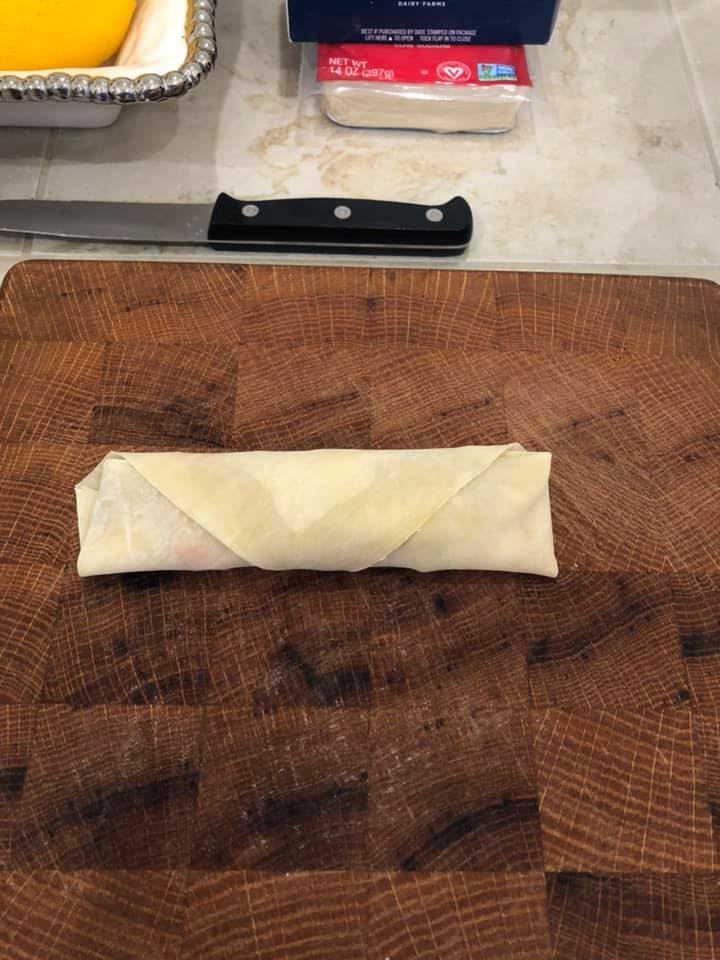
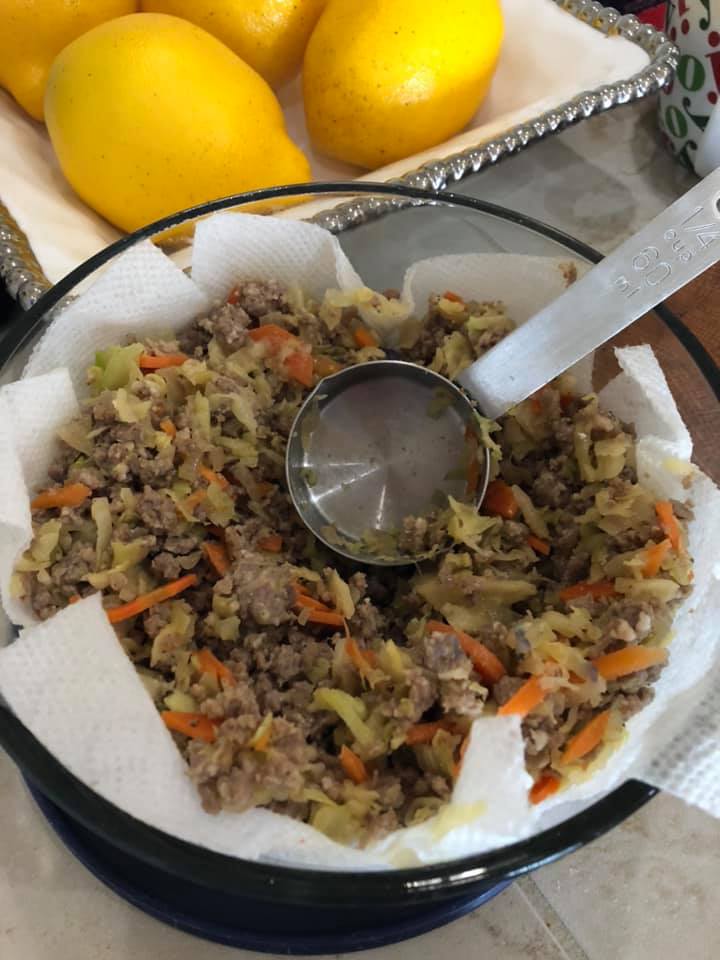
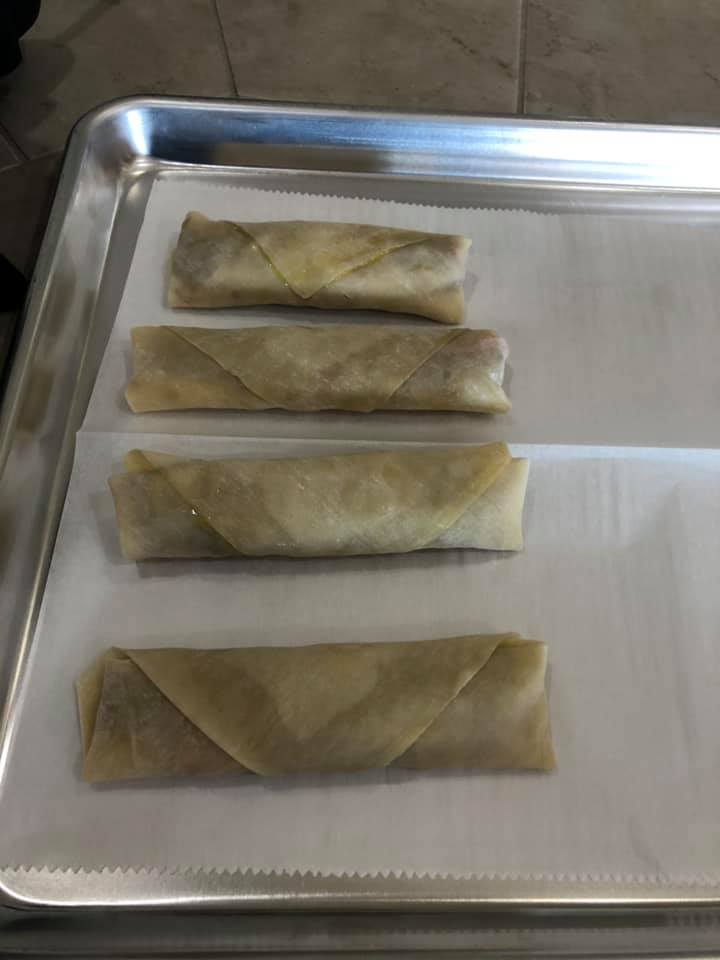
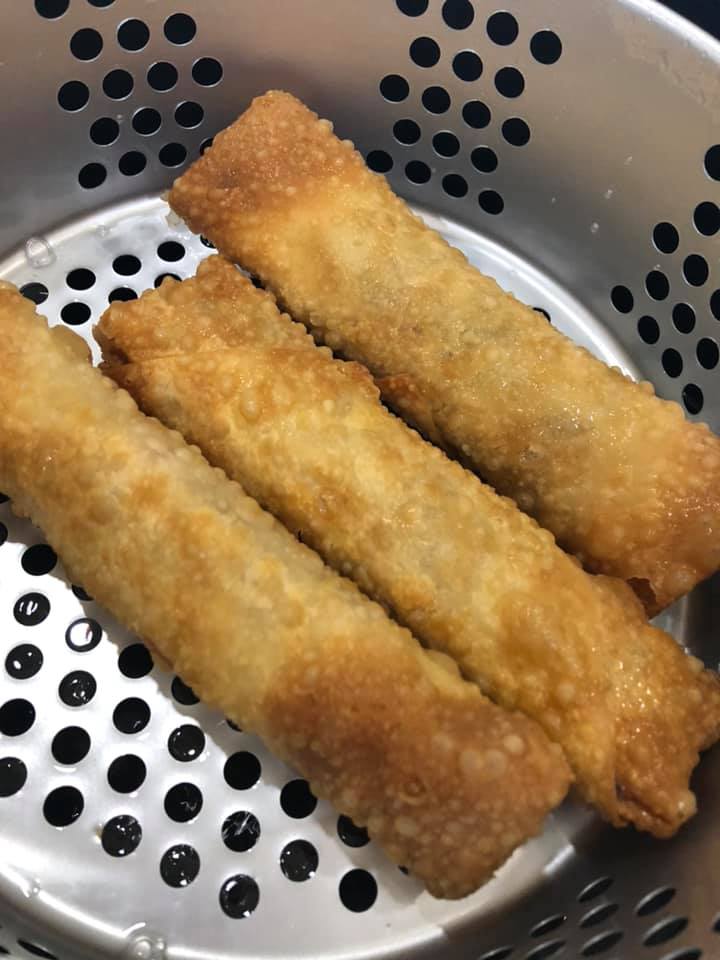
Kitchen Tip:  The butter in scones needs to be super COLD.  IF you've handled your dough too much, you will want to set your scones in the freezer for at least 15 minutes before baking.  In the Winter, its cold enough here that can I set my baking tray, covered in saran, outside on our patio table to chill before baking. 
0 Comments

Chicken Fajita Protein Bowl

1/8/2021

0 Comments

 
Picture
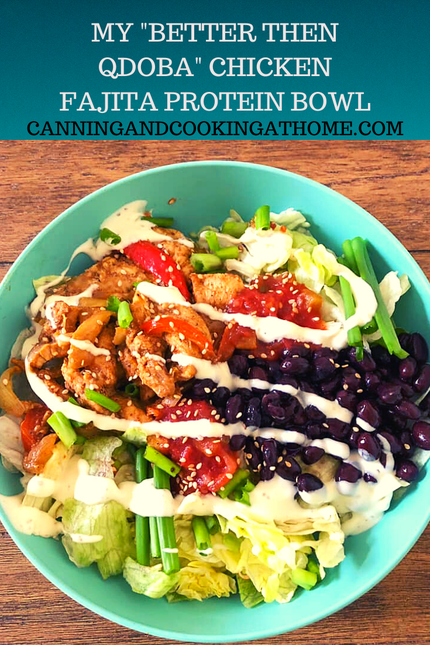
     We LOVE Chicken Fajitas.  Even more so, the chicken fajita Protein Bowls from Qdoba.  We don't love their price and most times don't have the time to drive into town to get them.  Add in the stress of pandemics and our decision was to make them ourselves!!  You can make up a huge batch of the chicken at home and then add what you want to your own bowls through the week.  Great for lunches or dinners!  Just assemble and enjoy! Diane 

Chicken Fajita Protein Bowl 

Ingredients: 
 (for the Fajita Chicken) 
1 large yellow onion, sliced long and thin
1 large green, yellow or orange bell peppers, seeded and sliced long
1 large red bell pepper, seeded and sliced long
3 large cloves garlic, minced

1 1/2 pounds chicken breast, sliced into thin strips
2 Tablespoons canola or olive oil
Spice Mix**


For Homemade Mexican Spice Mix **:
(for the fajita chicken) 

2 tsp. chili powder
1 1/2 teaspoons smoked paprika
1 teaspoon granulated onion
1/2 teaspoon garlic powder
2 teaspoons cumin
1/8 teaspoon of cayenne
1/8 teaspoon ground black pepper

1 teaspoon salt 
1 Tablespoon cornstarch


Directions:  
Preheat oven to 400°F.
Place sliced onion, peppers, and garlic with chicken in a 9x13 baking dish together.
In a small bowl, mix all dry seasoning mix and spread over chicken and veggies. Drizzle oil over all and mix everything together until all ingredients are well seasoned. Bake uncovered for 25 minutes and then give the entire mixture a good stir.  Finish baking the remaining 10 minutes. 

Assemble your protein bowl with all your favorite toppings too:  My Bowl shown has shredded lettuce carrot and cabbage on the bottom (some people add brown or white steamed rice or a cilantro lime rice) then top with baked fajita chicken, salsa, black beans, green onion and toasted sesame seeds along with a light mexi-ranch dressing.

​
Optional additions: your favorite dressing, sour cream, guacamole, avocado, ranchera or green chile sauce or salsas, shredded cheese, tomato, shredded lettuce, fresh cilantro, sour cream, salsa, crushed roasted peanuts, toasted pepita seeds, lime rice, black or pinto beans and green onion. 

0 Comments

Homemade Egg Rolls

1/4/2021

0 Comments

 
Picture
     I've made egg rolls before but, always baked them and wanted to try frying them!  I love the combinations of flavors that you can use for filling.  In this recipe - you can substitute the pork with any ground meat mixture you prefer.  I suggest making this recipe first to get the idea of the whole process before changing things up later on.  These egg rolls were super tasty and a welcome addition to our freezer! Yep, you can bake these now and then vacuum seal and freeze in portions for enjoying later! 
Hope you enjoy them as much as we do! Diane 

Homemade Egg Rolls

1 package (18 ounces) Twin Dragon Egg Roll Wrappers from the refrigerated section 
*usually found near the fresh produce. 

Filling: 
1 (16 ounce)tube jimmy dean pork sausage - crumbled, cooked well and drained on paper towels.
1 large carrot, sliced thin
1 small onion, finely diced 
1 bag (14 ounce bag) shredded coleslaw mix

Sauce for Filling:
(Mix together and set aside)  

1/2 teaspoon sugar
1/2 teaspoon salt
1 teaspoon toasted sesame oil 

1 Tablespoon soy sauce
1 Tablespoon sherry
1 Tablespoon water
1 Tablespoon corn starch

Directions: 
  1. Cook your ground pork in a sauté pan and place cooked pork on paper towels to drain off grease as you prepare the vegetable mixture. 
  2. Place cut carrot and onion in a large Dutch oven with a minimal amount of oil or butter to sauté vegetables for 5 minutes. 
  3. Add in the cabbage mix. 
  4. Add in the Sauce. 
  5. Let cabbage mixture cook down about 7 minutes and add well-drained meat back into pot with cabbage mixture and warm entire mixture through - place the entire filling mixture in a bowl lined with paper-towels. ((The trick for non-greasy egg rolls; is to get filling really dry and remove as much oil and grease as possible from the filling.))
  6. Take an egg roll wrapper out and place it on your work space facing you like a diamond.
  7. Using a 1/4 Cup measuring cup place about 1/4 cup of the prepared filling in the lower corner nearest you.
  8. Using a pastry brush or your finger, wipe the perimeter of the egg roll wrapper with egg wash.  (This will seal the egg rolls so they don't open while cooking.)
  9. Fold the bottom corner up over filling and then fold the sides in, like an envelope. Then roll from bottom upwards, making sure its as tight as you can get it until all the way rolled.
  10. Place on a parchment lined cookie sheet covered with saran until they are all rolled and ready for frying. 
  11. Fill your fryer or Dutch oven with Canola Oil.  You want the oil heated to 350 degrees.  Always use caution when frying! Remember that water droplets will cause the oil to sizzle and can splatter!  I use only the amount of oil that will just cover the tops of the eggrolls and I use tongs to turn them in the oil if need be. 
  12. Cook only a few egg rolls at a time or your cooking oil temperature will lower too greatly - my fryer cooks 3 egg rolls at a time.  I fried mine for 4 minutes before moving to the oven. 
  13. Preheat your oven to 425F.  *This is an added step to ensure crispiness and doneness of your egg rolls.  Once You've fried your eggrolls - place them on a rack set above a baking sheet and pop in the oven for 3-5 minutes.  
  14. Remove egg rolls from oven and place on a paper towel lined plate to cool.  This will help remove any more oil off of the rolls before eating. 
​Makes Approx. 12-16 eggrolls. 
  
Kitchen Notes:
  
  • The Filling can be made and refrigerated a day ahead, which helps remove even more grease.  
  • Using an egg-wash to seal the egg roll wrapper edges will help prevent filling from spilling while frying. 
  • I used refrigerated Egg Roll Wrappers which were great! Just remember to keep them from drying out.  I opened the package but kept a moist paper towel draped over the package while assembling my egg rolls.  
  • Serve the eggrolls with; Sweet Chili Thai sauce, Sweet & Sour sauce or Chinese Spicy Mustard. 

Recipe Credit:  I'd like to thank Lynn over at Southern With a Twist for sharing her egg roll recipe!  I used the sauce from her recipe *adding in some toasted sesame oil. She has a few tasty looking egg roll recipes - make sure to stop by and check out her site as well!!   
0 Comments
    F I N D  A  R E C I P E 

         PRINT OR SAVE TO .PDF 
    Print Friendly and PDF


    RSS Feed

    Archives

    February 2023
    January 2023
    December 2022
    November 2022
    October 2022
    September 2022
    July 2022
    June 2022
    May 2022
    March 2022
    February 2022
    January 2022
    December 2021
    October 2021
    September 2021
    July 2021
    February 2021
    January 2021
    December 2020
    November 2020
    October 2020
    September 2020
    August 2020
    July 2020
    June 2020
    May 2020
    April 2020
    March 2020
    February 2020
    December 2019
    November 2019
    October 2019
    September 2019
    August 2019
    July 2019
    May 2019
    April 2019
    March 2019
    February 2019
    January 2019
    December 2018
    November 2018
    October 2018
    September 2018
    August 2018
    July 2018
    April 2018
    March 2018
    February 2018
    January 2018
    December 2017
    November 2017
    October 2017
    September 2017
    August 2017
    July 2017
    June 2017
    May 2017
    April 2017
    March 2017
    February 2017
    January 2017
    December 2016
    November 2016
    October 2016
    September 2016
    August 2016
    July 2016
    June 2016
    May 2016
    April 2016
    March 2016
    February 2016
    January 2016
    December 2015
    November 2015
    October 2015
    September 2015
    August 2015
    July 2015
    June 2015
    May 2015
    April 2015
    March 2015
    February 2015
    January 2015
    December 2014
    November 2014
    October 2014
    September 2014
    August 2014
    July 2014
    June 2014
    May 2014
    April 2014
    March 2014
    February 2014
    January 2014

Picture
© Copyright 2023, Canning and Cooking at Home.
All images & content are copyright protected. Please do not use my images on your own site/page without prior permission. Sharing, pinning, and tweeting is always appreciated as long as the shares and pins link back to this website and recipe.  Canning and Cooking at Home claims NO liability for the safety of ANY recipe or advice contained within this website.  Always consult with the NCHFP to ensure Canning Safety. 

  • Home
  • Diane's Blog
  • Canning 101
  • Pickling
    • My Pickle Creations
    • Pickle Recipes
  • Recipe Index
    • Canning Recipes >
      • Jams/Jellies/Fillings/Butters/Juices
      • Meats/Other
      • Pressure Canned Soups
      • Tomatoes
    • Cooking Recipes >
      • Breads
      • Breakfast
      • Instant Pot Recipes
      • Main Dishes
      • Soups
      • Sweets
      • Drinks
      • Sauces/Apps/Sides
    • Recipe Collections >
      • The Apple Cart
      • Asian Inspired Recipes
      • Bundts to Bake
      • Cherry Recipes (preserving)
      • Easter Menu Ideas
      • Freezer to SlowCooker
      • Irish Fare
      • Jelly & Jam Recipes
      • Mexican Inspired Recipes
      • Pickle Recipes
      • Soups
      • Summer Grillin' Guide
  • Work with Me
    • Privacy Policy
    • Give Aways
  • Recipes Via Email