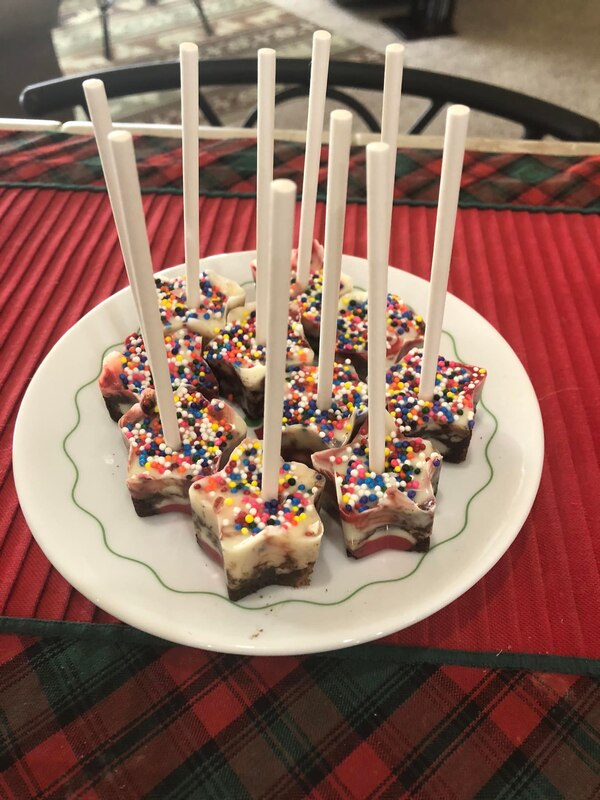
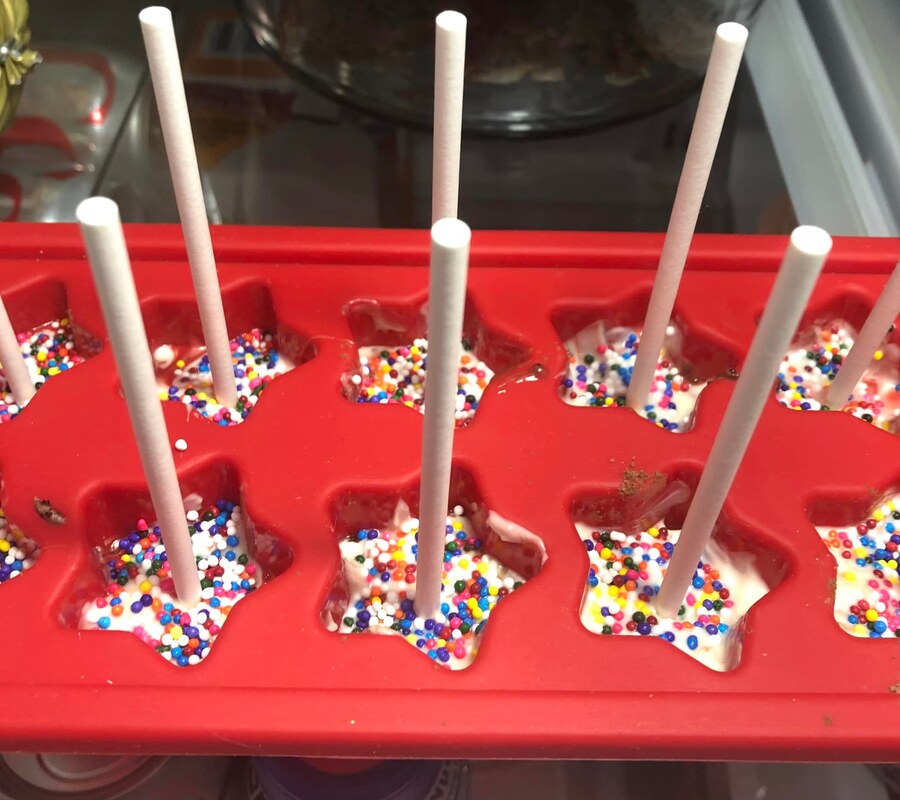
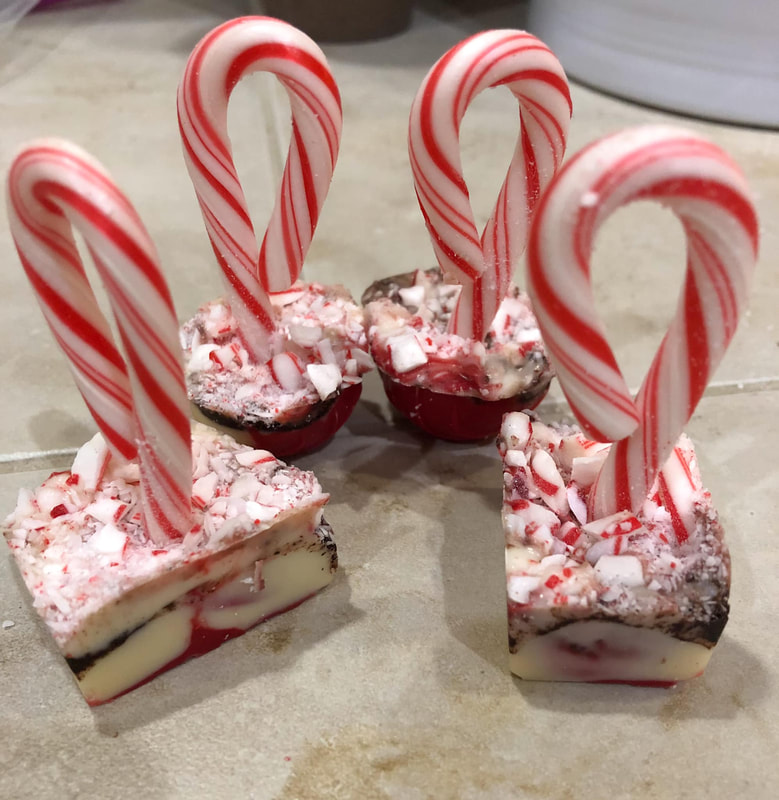
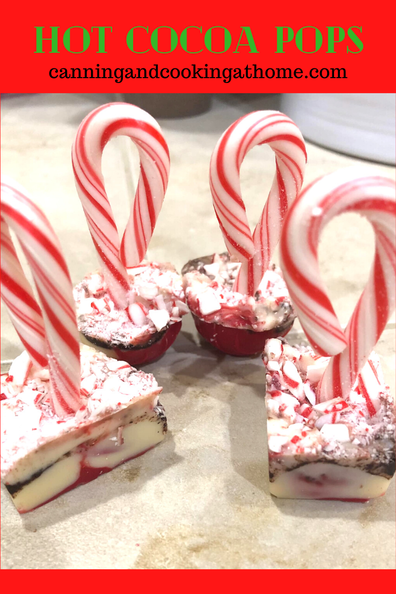
 I was trying to figure out an easy recipe for a hot cocoa treat that used my candy molds. This recipe worked great. If you don't have candy molds you can use bathroom sized dixie cups, or even smaller muffin tins (make sure to spray with non-stick so they release once chilled) Remember too that your choice of "pan" can change the final yield. Enjoy! Diane Hot Cocoa Pops *just stir one pop into 8 ounces of hot milk and Voila! Hot Cocoa... Ingredients
Instructions
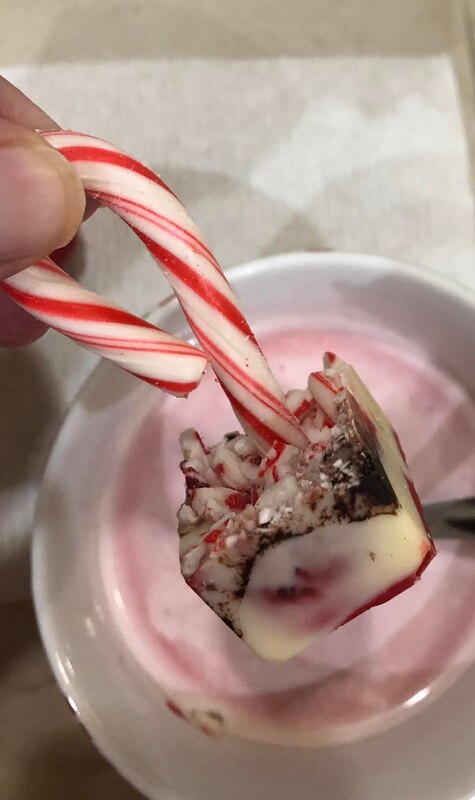
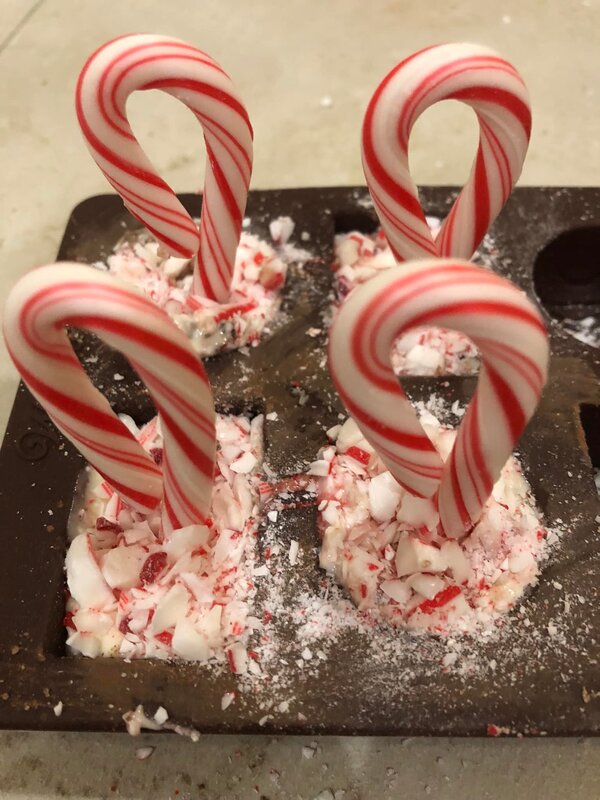
Kitchen TIPS: Do not store your finished pops in the fridge - they don't like condensation. The finished pops will be good for up to three weeks wrapped on counter. I add layers of just white chocolate but, if doing so, let your first pour chill first before adding the white chocolate layer. Add your toppings last and use them to help secure the stirer sticks/candy canes. For the Holidays made the above recipe and then I also I took some melted red candy melts and layered white chocolate in and a little of the hot cocoa mixture in between layers.
0 Comments
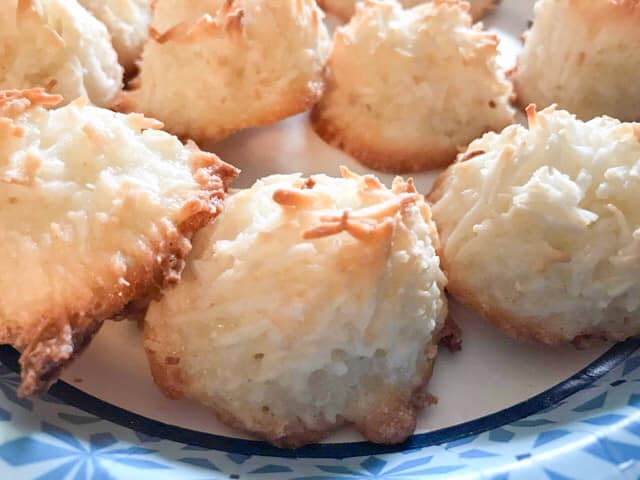
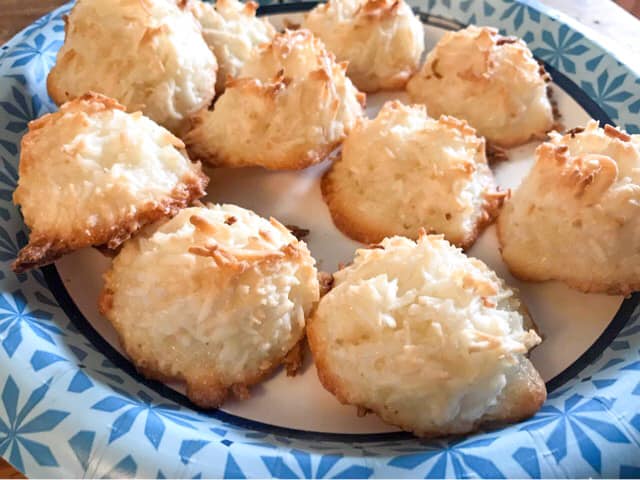
 Guest post from JD. He's perfected his recipe and everyone seems to agree that these are one of the best they've ever tasted. Hope you make a batch and Enjoy! Diane Easy Coconut Macaroons Ingredients: 3 cups sweetened shredded coconut 3 egg whites 1/2 cup sugar 1/8 cup all purpose flour 1/2 - 1 Tablespoon almond or vanilla extract Sea salt (optional) Directions:
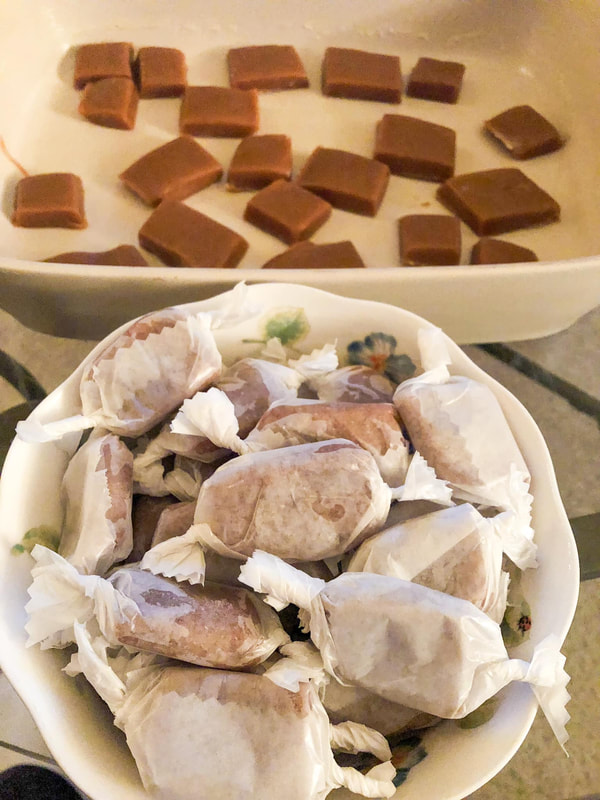
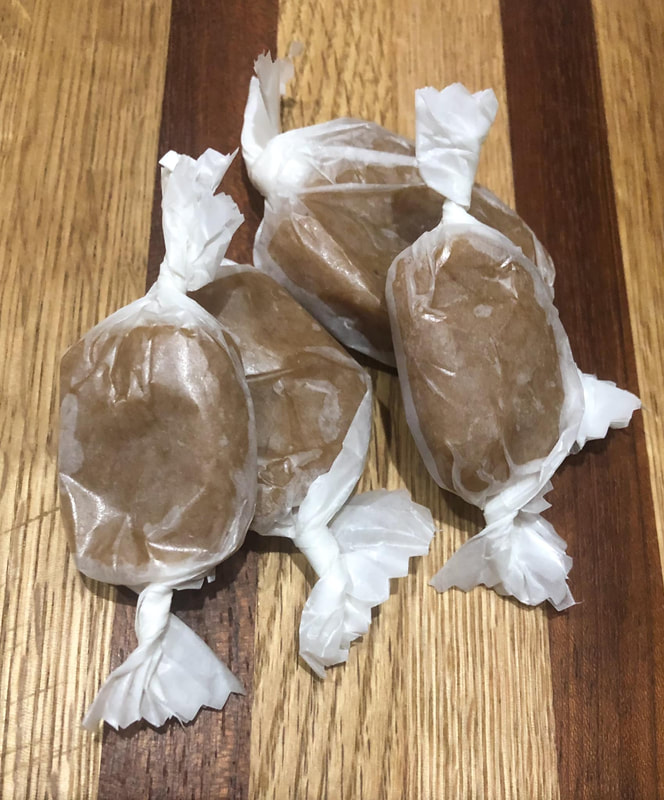
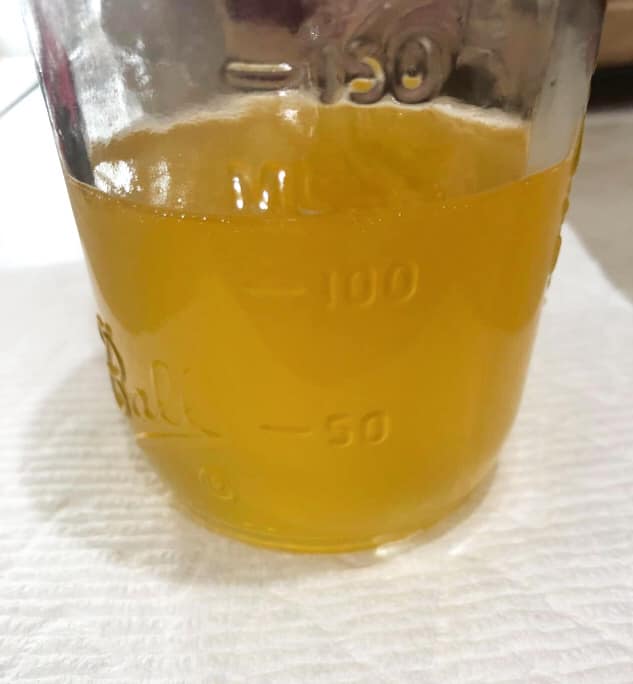
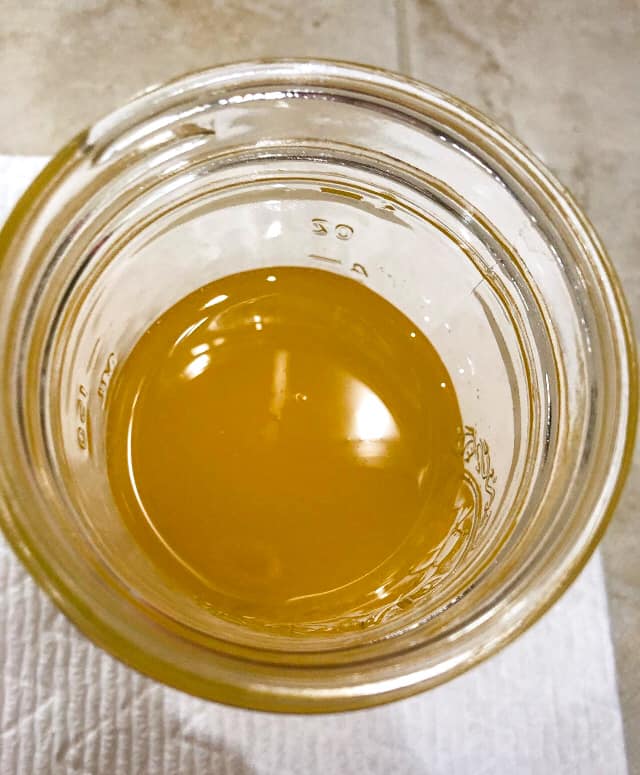
(Note: If mixture seems thin or runny, add an additional small amount of flour, to prevent cookies from spreading.) Cook 15-20 minutes at 325°F, until light golden brown. Makes about 30 macaroons. 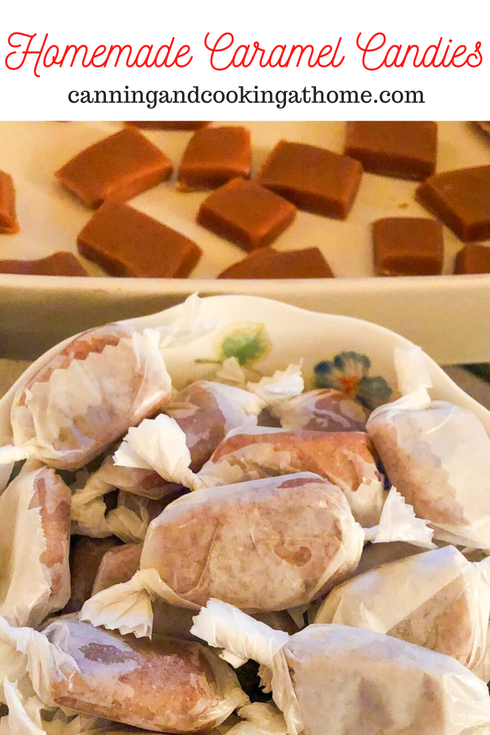 This was my first time making homemade caramels. I've made toffee and made various caramel sauces but, never candy. My friend gave me her recipe for "non-sticky" caramel and I thought I'd give it a go. This recipe was not only easy - its tasty!! It's great for hostess gifts and treat bags! Enjoy! Diane Homemade Caramel Candies Needed: *Candy Thermometer or Instant Read *9x13 buttered Pan *Wax paper or candy wrappers (3x3) Stirred in on heat: 1 Cup unsalted butter 1 can sweetened condensed milk, 14oz. 1 cup light corn syrup 2 cups brown sugar Stirred in off heat: 2 teaspoons vanilla extract 1/4 teaspoon salt Directions: Lightly coat a 9x13 pan with butter and set aside. In a large saucepan over medium heat on stovetop melt together the butter, condensed milk, corn syrup and brown sugar. Make sure to use a rubber:silicon spoon as your making candy and the mixture will get very hot. Once your mixture has melted down, increase to a simmer and stir constantly until your mixture reaches "softball stage" on your instant read or candy thermometer ((between 235 - 245 F)) You will aim for the lower end range if you are at a higher altitude and aim for the higher end of range if you are a lower altitude. Once you hit "soft-ball stage" remove your mixture from heat and stir in the vanilla extract and salt. Pour mixture into the buttered 9x13 pan. Let cool on countertop completely before cutting into squares. Wrap in individual pieces of wax paper if preferred. I cut my wax paper into 3x3 squares to wrap caramels and twist ends. You can buy cellophane caramel candy wrappers online, which seem to be preferred as they won't tear when twisting. I varied the sizes of my caramels and my yield was approx 70 caramels. If you cut all yours into 1 inch squares, you'll get approx 115 in total. 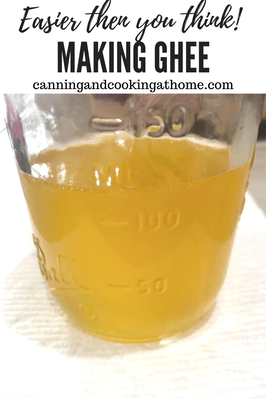 Do you know the benefits of making Ghee? Cooking with ghee! It's really just a version of clarified butter but, different...if you remove the water in butter it becomes shelf stable. Making ghee entails cooking to remove the moisture:water from butter. Since the water is removed you not only get a high smoke point for frying, you get a great "crisp" to foods that you would normally pan fry in traditional butter (think salmon and hashbrowns.) If you want tasty popcorn with loads of butter...but, tired of watching your popcorn melt away when you pour the warm melted butter over it - try ghee!! Since the water is removed, your popcorn stays true to form and doesn't shrivel and melt away! Enjoy! Diane Ghee Ingredients: 4 Sticks Unsalted Sweet Cream Butter *any decent quality brand Yield: Approx 2 Cups Ghee Directions: Melt your butter in a sauce pan on low. It's best to use a light colored bottom pot so you can see when your milk solids are browning. You want to cook the butter at a gentle simmer (you'll see white foam form on top of your butter.) Let the mixture cook, stir the foam out of the way on top to make sure nothing is burning at the bottom of your pan (which means your stove is set too high) eventually the foam (which is milk solids) will settle to the bottom of your pan. You want your mixture bubbling at a simmer (but, not so high its a boil.) The key is to cook the water off and brown the white foam (milk solids.) It's important to note that you do not want to be scraping down into the bottom of the pan, only moving foam around on top (its mostly a hands off recipe that should take around 20 mins from start to finish.) After 12 minutes of simmering you should start to see any slight foam left on the top floating is turning a slight brown/tan tinge and often times the yellow will change color slightly as well. When all the foam is gone and the bubbles on top start to pop up more fast and furious - you can stop and consider your ghee done. I prefer to go just a little longer to get a slightly more nutty flavor to my ghee. If in doubt, stop and consider your ghee done. Although ghee is very forgiving, you do not want to burn your ghee because it can have a bitter flavor. Remove your pot from stove and let the mixture settle and cool. Any residual foam should drop down to the bottom. Place a small sieve over your clean, dry storage container (I use a glass canning jar and a ladle.) Ladle the ghee into the jar *you leave the milk solids in the bottom of the pot undisturbed...they should be brown but, not burned (these milk solids do not go into your jar.) You can store ghee on your counter for up to 4 months or in refrigerator for up to a year. **Interesting factoid: Ghee is often used as a religious offering in Hindu culture. (as butter is from a cows milk and cows milk is sacred in India's culture.) **Kitchen Tip: When using your ghee - make sure to use a clean, dry spoon everytime your dipping into your jar - you do not want to introduce any water back into the ghee which can invite bacteria to grow. |