CANNING AND COOKING AT HOME
  • Home
  • Diane's Blog
  • Canning 101
  • Pickling
    • My Pickle Creations
    • Pickle Recipes
  • Recipe Index
    • Canning Recipes >
      • Jams/Jellies/Fillings/Butters/Juices
      • Meats/Other
      • Pressure Canned Soups
      • Tomatoes
    • Cooking Recipes >
      • Breads
      • Breakfast
      • Instant Pot Recipes
      • Main Dishes
      • Soups
      • Sweets
      • Drinks
      • Sauces/Apps/Sides
    • Recipe Collections >
      • The Apple Cart
      • Asian Inspired Recipes
      • Bundts to Bake
      • Cherry Recipes (preserving)
      • Easter Menu Ideas
      • Freezer to SlowCooker
      • Irish Fare
      • Jelly & Jam Recipes
      • Mexican Inspired Recipes
      • Pickle Recipes
      • Soups
      • Summer Grillin' Guide
  • Work with Me
    • Privacy Policy
    • Give Aways
  • Recipes Via Email

Oven Baked Asian Stir Fry

10/21/2020

0 Comments

 
Picture
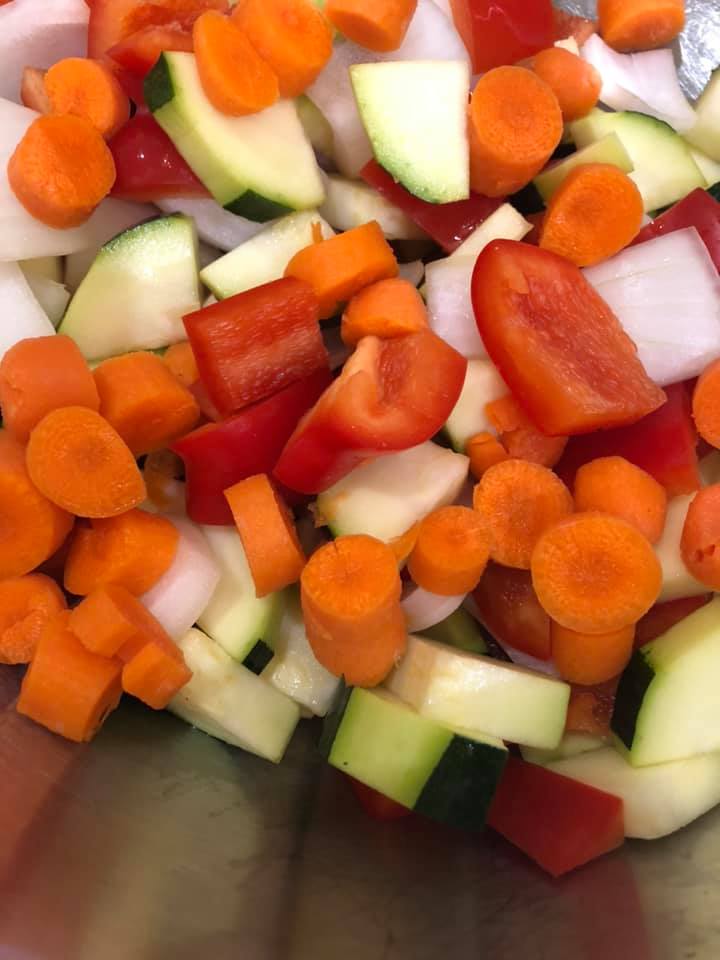
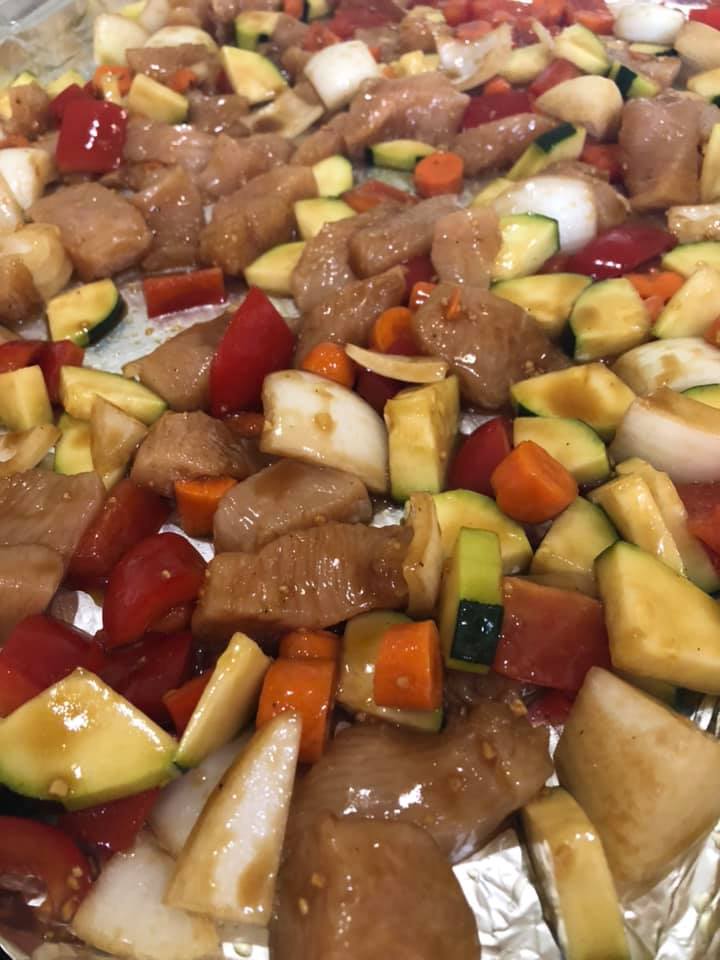
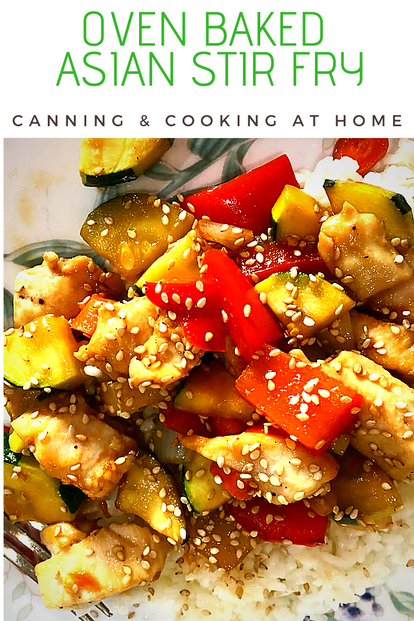
     I love this dish because you don't need a Wok!  You get all the flavors with little hassle.  Yep! It's cooked in the oven, and super easy to prep.  I use whatever vegetables I have on hand - this time around it was zucchini, red bell pepper, carrot and onion.  Much like mushrooms, the zucchini really absorbs the flavors of the sauce.  Just keep in mind for this recipe to chop your vegetables uniformly so they cook at a similar rate. 
     You do not want to add any heavy, long cooking items to this dish as it bakes in about 18 minutes in your oven.  Keep in mind this is a "vegetable stir fry"... snow peas, broccoli florets, asparagus, green beans, mushrooms, and cabbage all work great too.  Enjoy! Diane 

Ingredients: 
  • 2-3 large chicken breasts, cut into chunks.
  • 5 cups of any mix of vegetables that you prefer, cut uniformly *pick list below
  • 2 teaspoons sesame seeds 

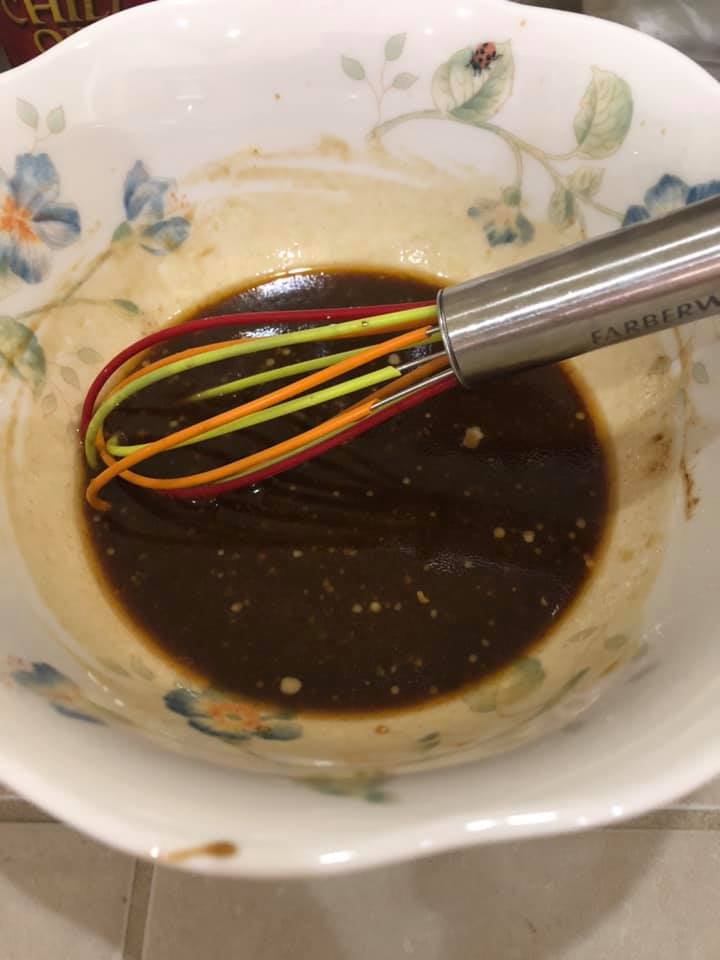
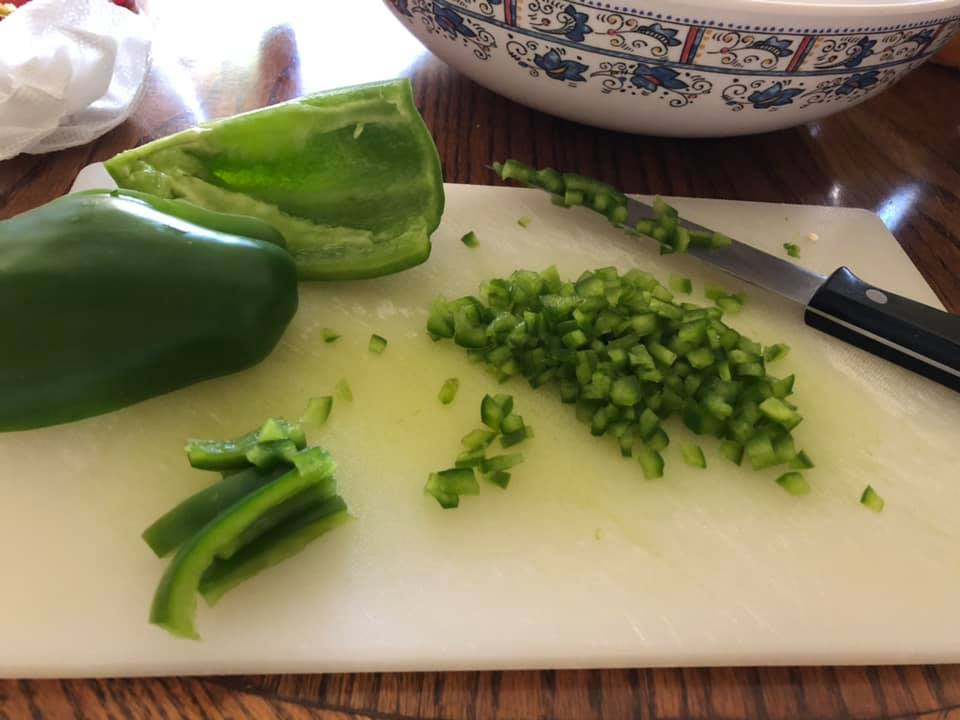
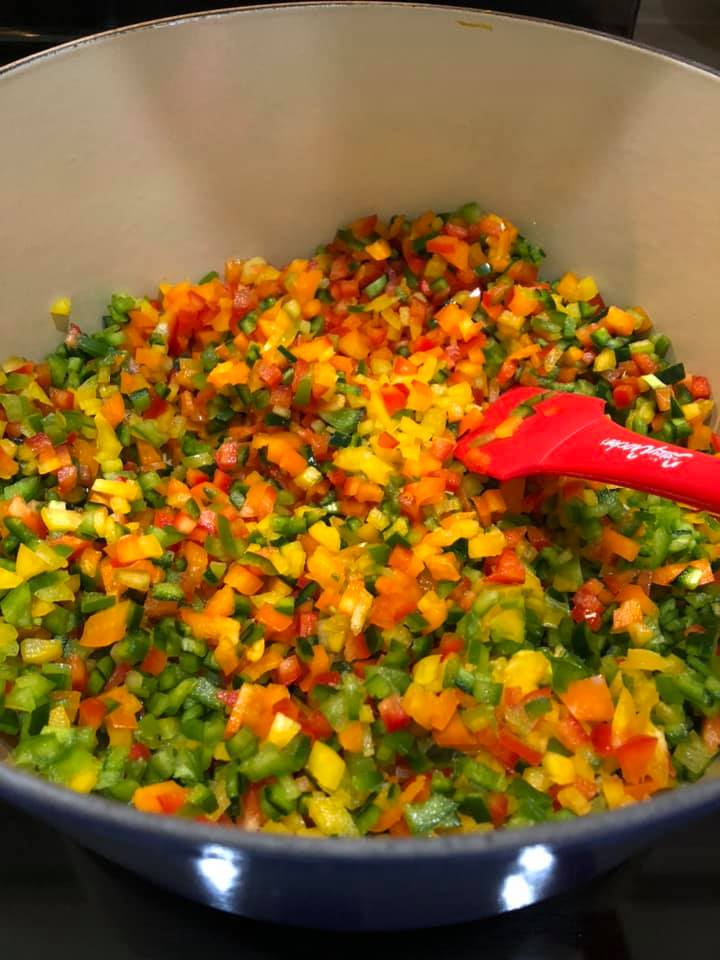
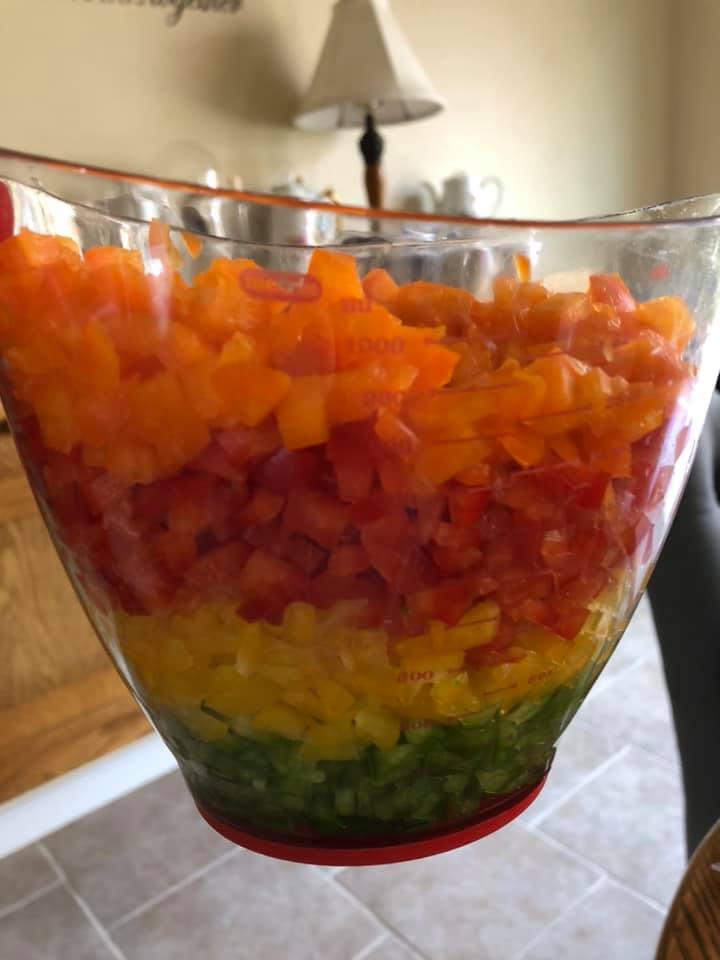
*sweet bell peppers, onions, carrots, zucchini, broccoli florets, mushrooms, snow peas, 
cabbage, water chestnuts, asparagus and green beans. *want it spicy - add in some hot peppers in addition to the hot chili oil in the sauce (cow horn, jalapeno, anaheim.)

Sauce Ingredients: 
  • 1/3 cup soy sauce, you can used reduced sodium version
  • 1/4 cup oyster sauce 
  • 2 Tablespoons rice wine vinegar
  • 2 Tablespoons brown sugar, packed
  • 1/2 teaspoon ginger, dry ground 
  • 3-4 cloves garlic, minced 
  • 2 teaspoons sesame oil
  • 1 Tablespoons cornstarch
  • 2 teaspoons hot chili oil or sriracha, optional

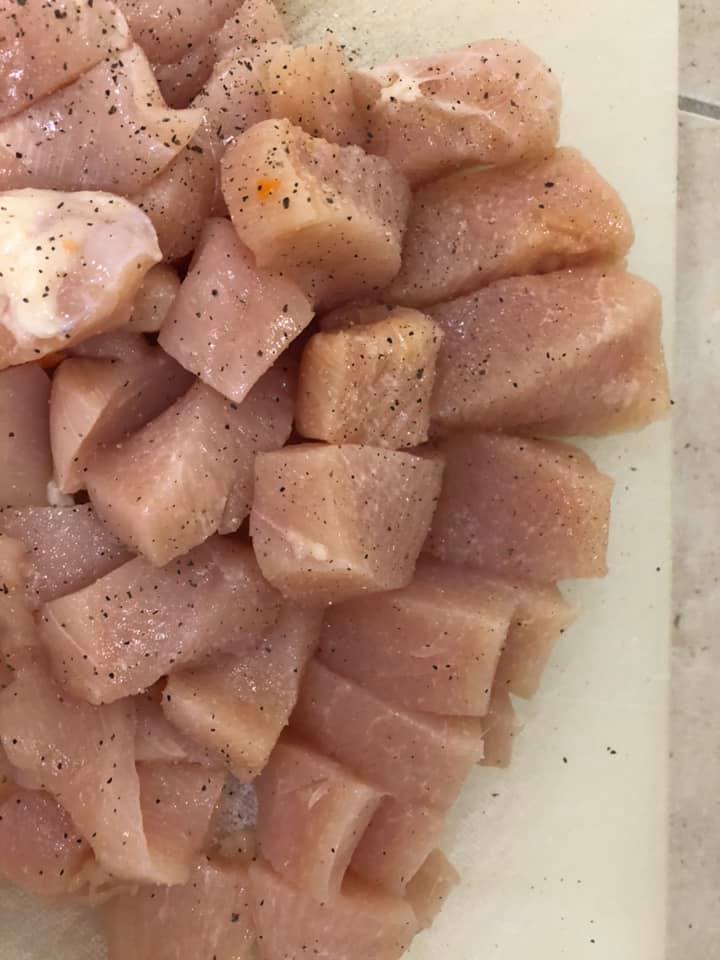
Directions: 
     Preheat oven to 425 F. 
  1.  Lightly oil a rimmed baking sheet or 9x13 baking dish.   
  2.  Whisk together all the sauce ingredients, set aside. 
  3.  Wash, and cut all your vegetables into uniform size. 
  4.  Chicken should be boneless, skinless chicken and diced.
  5.  Lightly salt and pepper the chicken once cut. 
  6.  In a large bowl, combine the chicken with the vegetables and sauce. 
  7.  Spread out the sauce covered chicken and vegetables onto your sheet pan or into your baking dish. 
  8. Bake for a total of 18 minutes *or until chicken is cooked through, stirring once during cook time.  Sprinkle sesame seeds over entire dish once out of the oven.
  9. Serve Hot over cooked Lo Mein Noodles or over prepared Steamed Rice.
​
0 Comments

Oven Baked Chicken & Gravy Casserole

10/18/2020

0 Comments

 
Picture
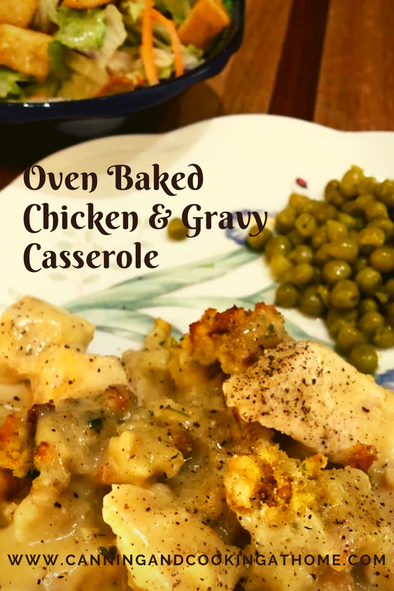
    Ever have an idea for a recipe and you make it - not sure it will turn out how you think it will?  This recipe was exactly that for me!  I wasn't sure if it the stuffing would get all soggy...if I used too much gravy...nope!  This is a SUPER EASY Oven Baked Chicken & Gravy recipe and what's better is you get the homecooked, comfort food taste without all the fuss of roasting a whole chicken.  You can decide if you want to use low-sodium products or homemade stuffing, homemade chicken gravy and chicken broth in this dish...even what kind of skinless chicken you'd like to use.  This is a super basic recipe and the choices are yours!  This dish would taste great using leftover turkey as well.  Enjoy! 

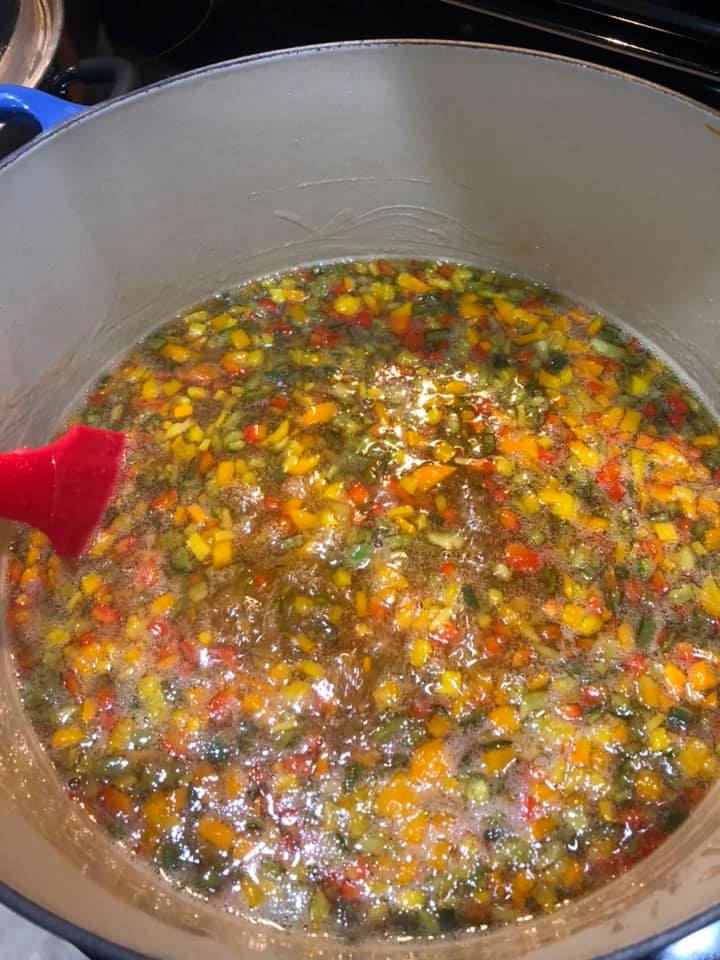
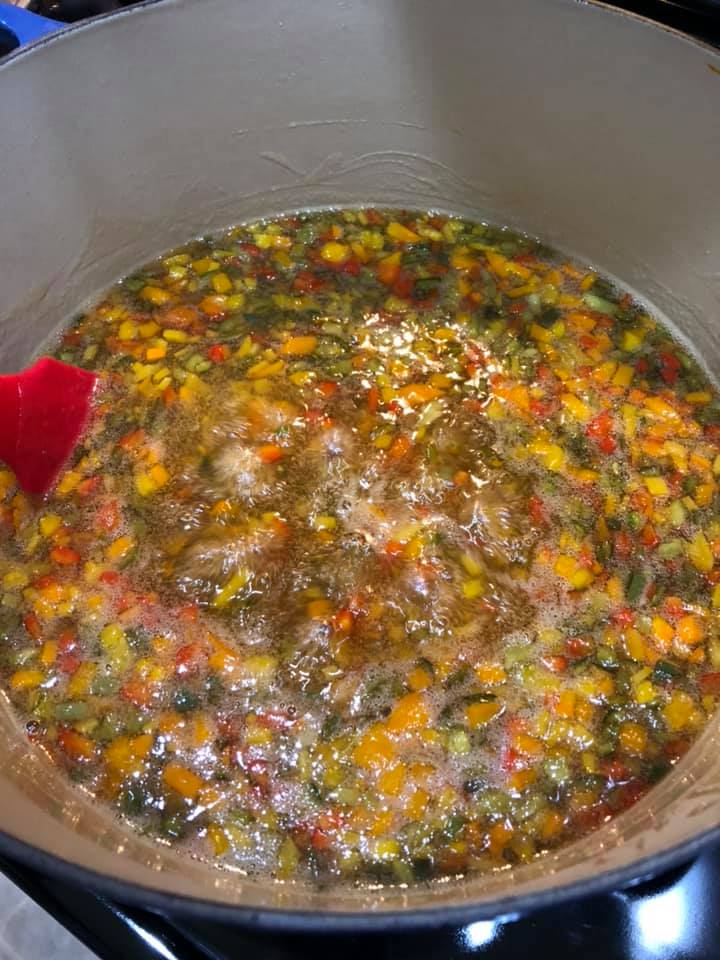
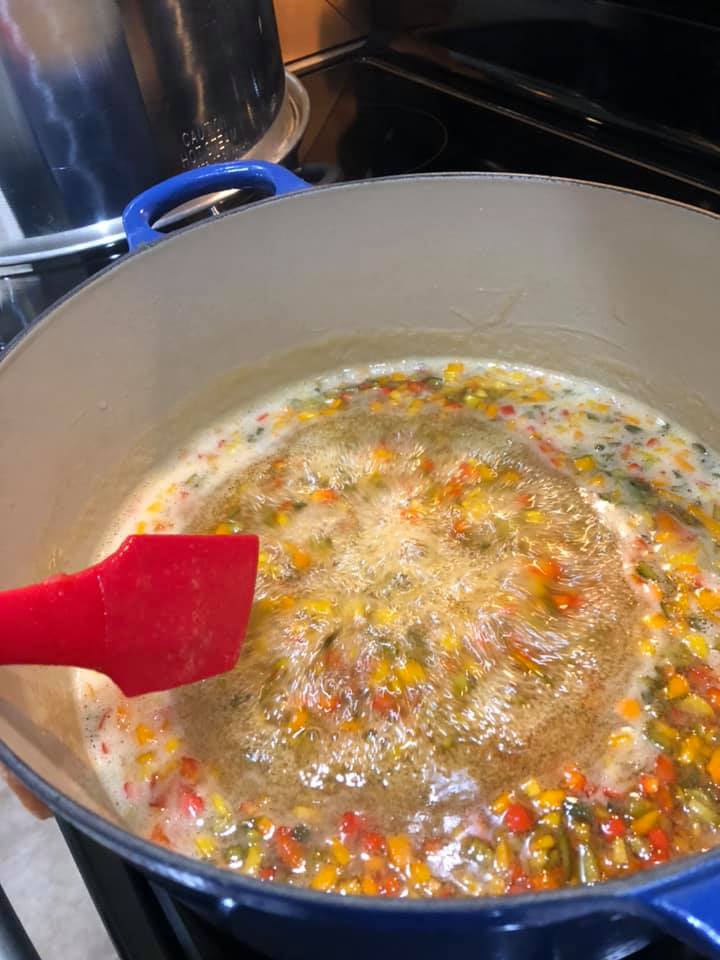
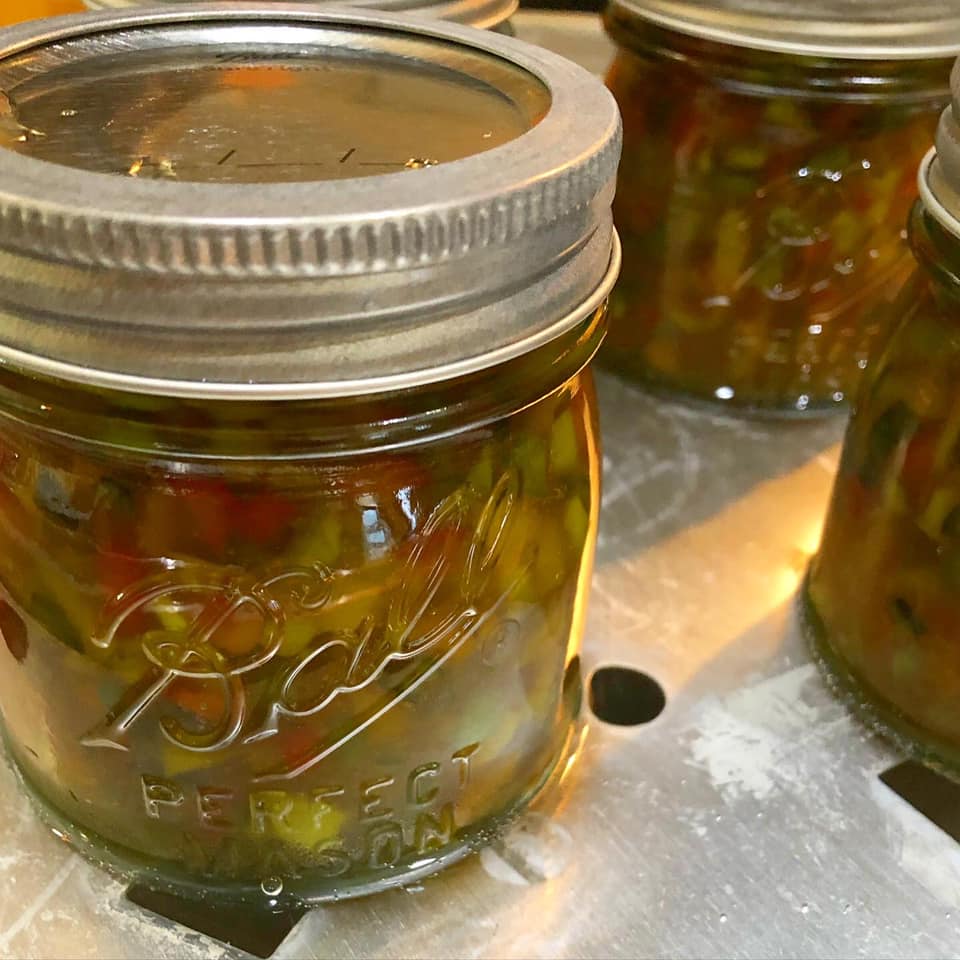
Ingredients: 
2-3 large raw Chicken Breasts; cut into dice or strips.
1 tsp olive oil

2 dry packets Chicken Gravy
1 can condensed cream of chicken soup
1-3/4 Cups Chicken broth or stock 
Dash of Salt & Pepper 


1 box of 'Stove-Top Stuffing' or similar *I replace the water called for with my homemade chicken broth or stock and I use 1 Tablespoon of butter, not the 4 called for in the recipe.  

Directions: 
     Lightly oil a 9x13 baking dish with olive oil, add raw cut up chicken. Lightly salt & pepper chicken. Make stuffing and set aside. Whisk together the gravy packets with soup and chicken broth until well combined. Pour over chicken. Gently spoon prepared stuffing over entire dish and bake uncovered at 400F for 30 minutes or until chicken is cooked through.  Serve Hot.  ((I serve with a vegetable and side salad to round out the meal.)) 

Kitchen Ideas:  If using cooked chicken or turkey, cook about 20 minutes as you are just crisping up the stuffing a bit and letting the gravy cook to thicken.  Some great additions would be frozen peas, or sautéed mushrooms. Try slivered almonds and cranberries if using leftover turkey.  


Recipe: Adapted from a slow-cooker recipe from Magical Slow Cooker. 
0 Comments

Pepper Jelly

10/7/2020

0 Comments

 
Picture
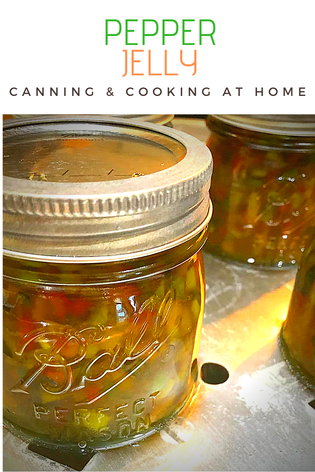
​     I'm using the base of Ball's Pepper Jelly Recipe and adding a bit of variation in hot peppers.  I think this has just the right amount of "kick."  Try this delightful jelly. It's easy to make & even easier to eat.  A great use for all your Summer garden produce.   Enjoy! Diane ​

Pepper Jelly 
yield: about 6 half-pint jars
​
Ingredients
  • 4-1/2 cups finely diced green, red, orange or yellow bell pepper or a combination (about 4 large)
  • 1/2 cup finely diced hot peppers; 1 Anaheim green chile, 1 poblano pepper, 2 jalapeño peppers.
  • 1-1/4 cups cider vinegar (5% acidity)
  • 3 Tablespoons Ball® RealFruit™ Low or No-Sugar Needed Pectin
  • 2 cups sugar
  • 1 cup honey

Directions: 
  1. Prepare boiling water canner or Steam Canner. Heat jars in simmering water until ready for use. Do not boil.  Have clean lids and bands at the ready. 
  2. Combine bell peppers, hot peppers and vinegar in a large saucepan. Gradually stir in pectin. Bring mixture to a full rolling boil that cannot be stirred down over high heat, stirring constantly.
  3. Add sugar and honey. Return mixture to a full rolling boil. Boil hard 3 minutes, stirring constantly. Remove from heat. Skim foam if necessary.
  4. Ladle hot jelly into hot jars, leaving 1/4" headspace. Wipe rim and center lid on jar. Screw band on until fingertip-tight. 
  5. Process jars for 10 minutes, adjusting for altitude. Turn off heat; remove lid and let jars stand 5 minutes. Remove jars and cool. Check seal after 24 hours. Lid should not flex up and down when center is pressed.

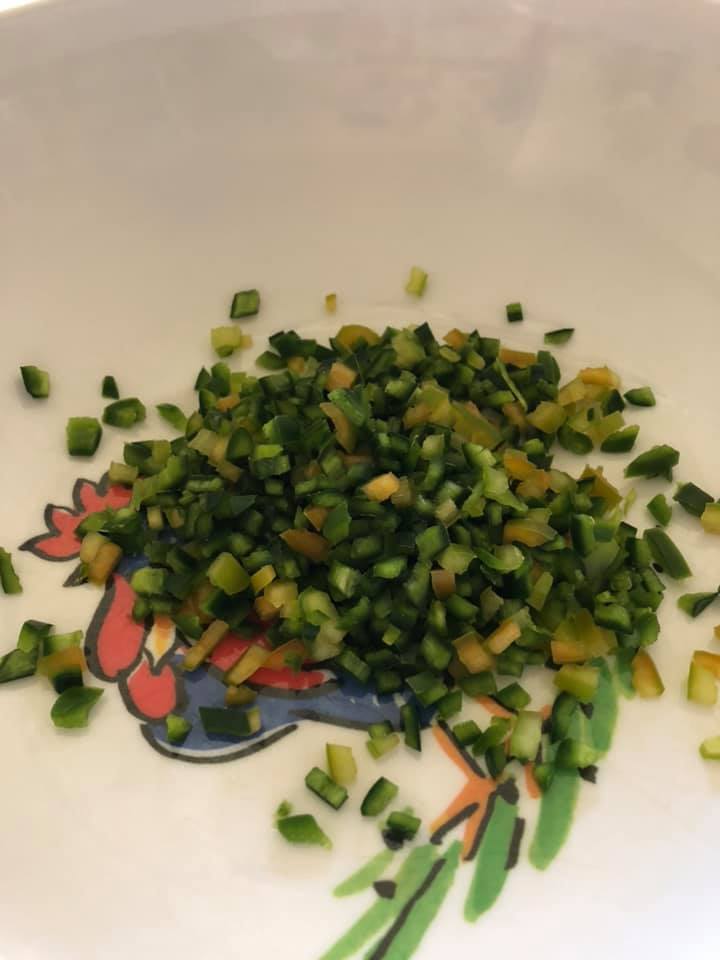
Notes: When cutting or seeding hot peppers, wear rubber gloves to prevent hands from being burned.  
Recipe Adapted from: Ball Fresh Preserving 
Photos by: Canning and Cooking at Home 
0 Comments
    F I N D  A  R E C I P E 

         PRINT OR SAVE TO .PDF 
    Print Friendly and PDF


    RSS Feed

    Archives

    February 2023
    January 2023
    December 2022
    November 2022
    October 2022
    September 2022
    July 2022
    June 2022
    May 2022
    March 2022
    February 2022
    January 2022
    December 2021
    October 2021
    September 2021
    July 2021
    February 2021
    January 2021
    December 2020
    November 2020
    October 2020
    September 2020
    August 2020
    July 2020
    June 2020
    May 2020
    April 2020
    March 2020
    February 2020
    December 2019
    November 2019
    October 2019
    September 2019
    August 2019
    July 2019
    May 2019
    April 2019
    March 2019
    February 2019
    January 2019
    December 2018
    November 2018
    October 2018
    September 2018
    August 2018
    July 2018
    April 2018
    March 2018
    February 2018
    January 2018
    December 2017
    November 2017
    October 2017
    September 2017
    August 2017
    July 2017
    June 2017
    May 2017
    April 2017
    March 2017
    February 2017
    January 2017
    December 2016
    November 2016
    October 2016
    September 2016
    August 2016
    July 2016
    June 2016
    May 2016
    April 2016
    March 2016
    February 2016
    January 2016
    December 2015
    November 2015
    October 2015
    September 2015
    August 2015
    July 2015
    June 2015
    May 2015
    April 2015
    March 2015
    February 2015
    January 2015
    December 2014
    November 2014
    October 2014
    September 2014
    August 2014
    July 2014
    June 2014
    May 2014
    April 2014
    March 2014
    February 2014
    January 2014

Picture
© Copyright 2023, Canning and Cooking at Home.
All images & content are copyright protected. Please do not use my images on your own site/page without prior permission. Sharing, pinning, and tweeting is always appreciated as long as the shares and pins link back to this website and recipe.  Canning and Cooking at Home claims NO liability for the safety of ANY recipe or advice contained within this website.  Always consult with the NCHFP to ensure Canning Safety. 

  • Home
  • Diane's Blog
  • Canning 101
  • Pickling
    • My Pickle Creations
    • Pickle Recipes
  • Recipe Index
    • Canning Recipes >
      • Jams/Jellies/Fillings/Butters/Juices
      • Meats/Other
      • Pressure Canned Soups
      • Tomatoes
    • Cooking Recipes >
      • Breads
      • Breakfast
      • Instant Pot Recipes
      • Main Dishes
      • Soups
      • Sweets
      • Drinks
      • Sauces/Apps/Sides
    • Recipe Collections >
      • The Apple Cart
      • Asian Inspired Recipes
      • Bundts to Bake
      • Cherry Recipes (preserving)
      • Easter Menu Ideas
      • Freezer to SlowCooker
      • Irish Fare
      • Jelly & Jam Recipes
      • Mexican Inspired Recipes
      • Pickle Recipes
      • Soups
      • Summer Grillin' Guide
  • Work with Me
    • Privacy Policy
    • Give Aways
  • Recipes Via Email