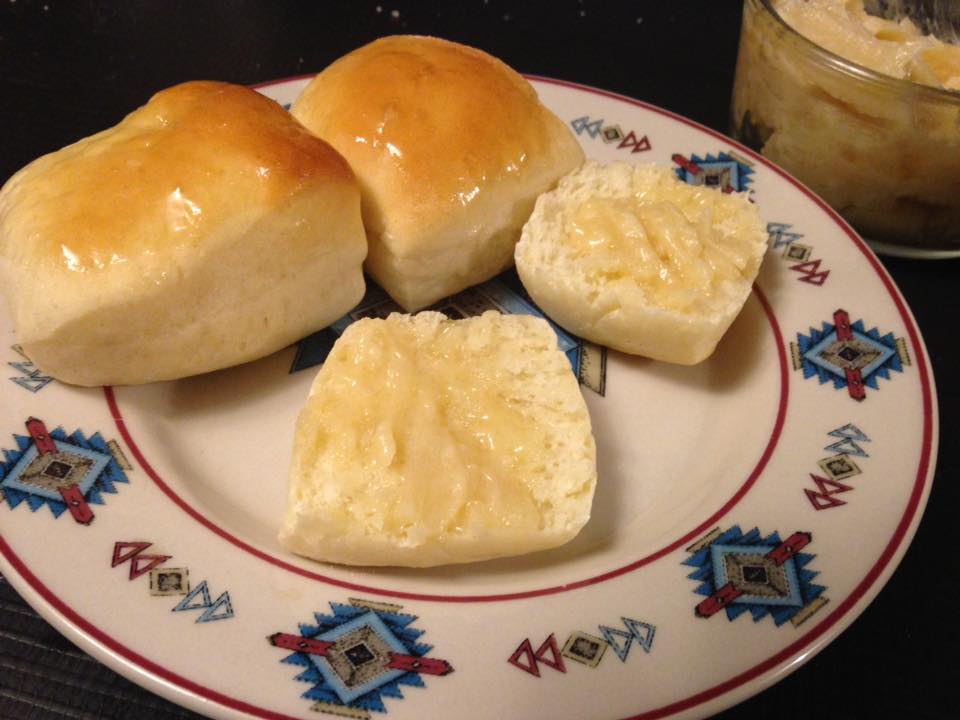
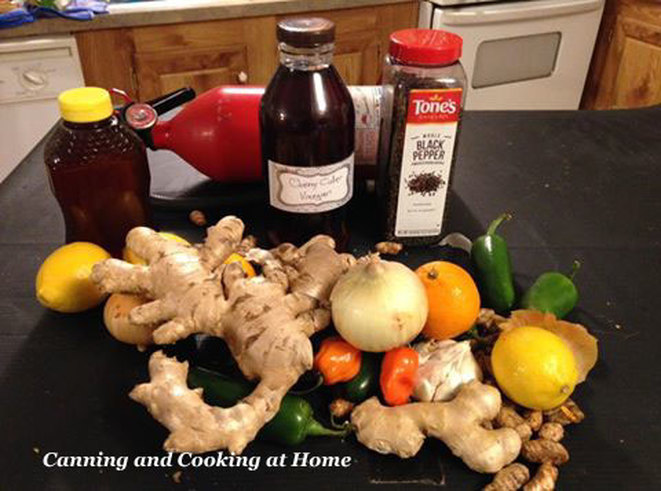
 Fire Cider. Have you ever heard of it? maybe you've tried it? It's an all natural mix of spices with apple cider vinegar and local honey. Some call it the Ancient Miracle: boosting immunity, helping with seasonal allergens. and even a kick start to your metabolism. Some folks stir into drinks or incorporate into cooking recipes. I've tried it and I agree with most that it tastes strong, and powerful (I do drink it down without trying to have it even hit my tongue!! LOL) It's helped me lessen this seasons horrible flu season and hopefully will help me combat upcoming Spring allergies. This guest post is from JD who is always trying something new... he sent me a bottle to try and now its time for me to make more for myself! Enjoy! Diane Fire Cider 1/2 pound fresh, peeled ginger 1/2 pound fresh, cleaned turmeric 1/4 pound fresh, peeled horseradish 1 medium onion 1/8 cup ground black pepper 2 lemons, sliced, seeds remover 2 small oranges, sliced, seeds removed 2 jalapenos 2 habaneros 1 quart Apple cider vinegar Local Honey Add first 9 ingredients to blender, with enough Apple Cider Vinegar to blend well. Add remaining Apple Cider Vinegar, blend well. Add honey to taste, place in jars with plastic lids or cover with plastic wrap before putting on metal lid. Store at room temperature several months, or refrigerate up to a year. Take 1-2 tablespoons 2-3 times daily. Makes 5 pints
0 Comments
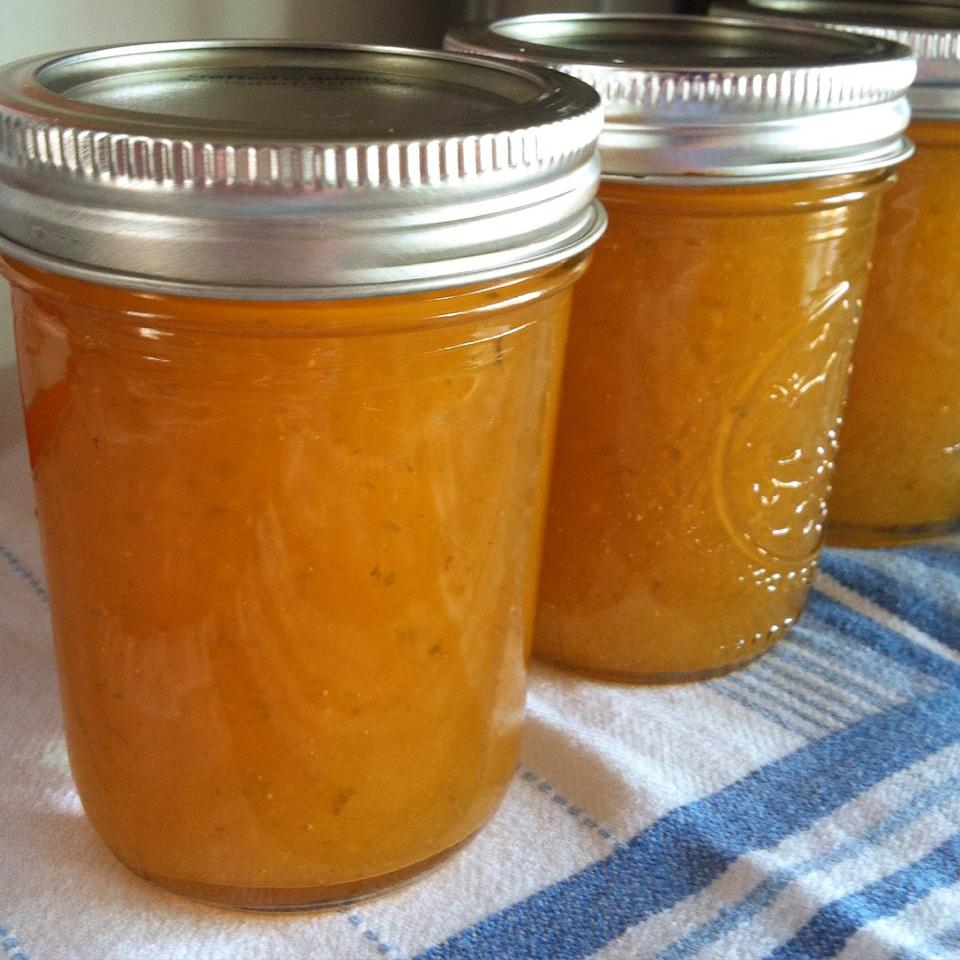
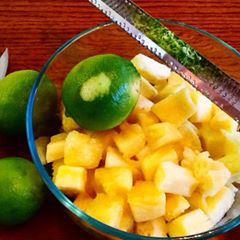
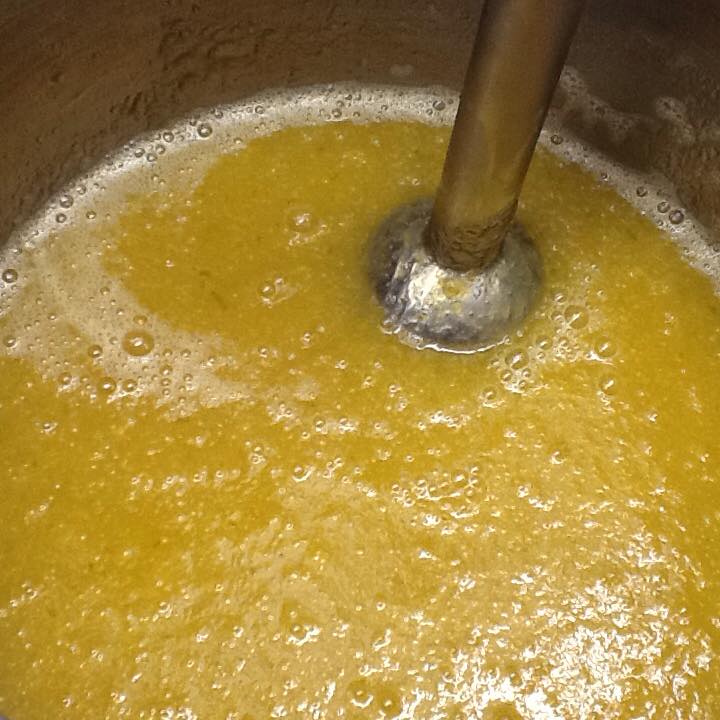
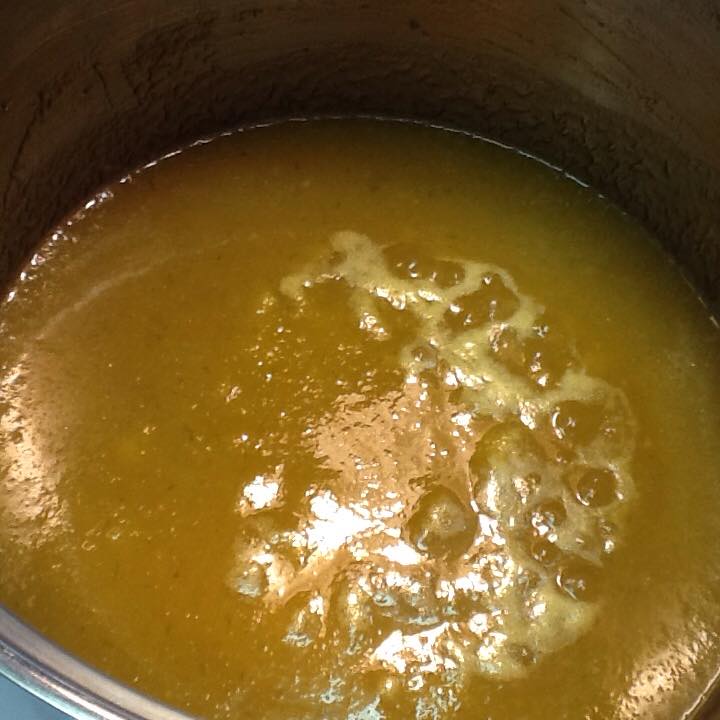
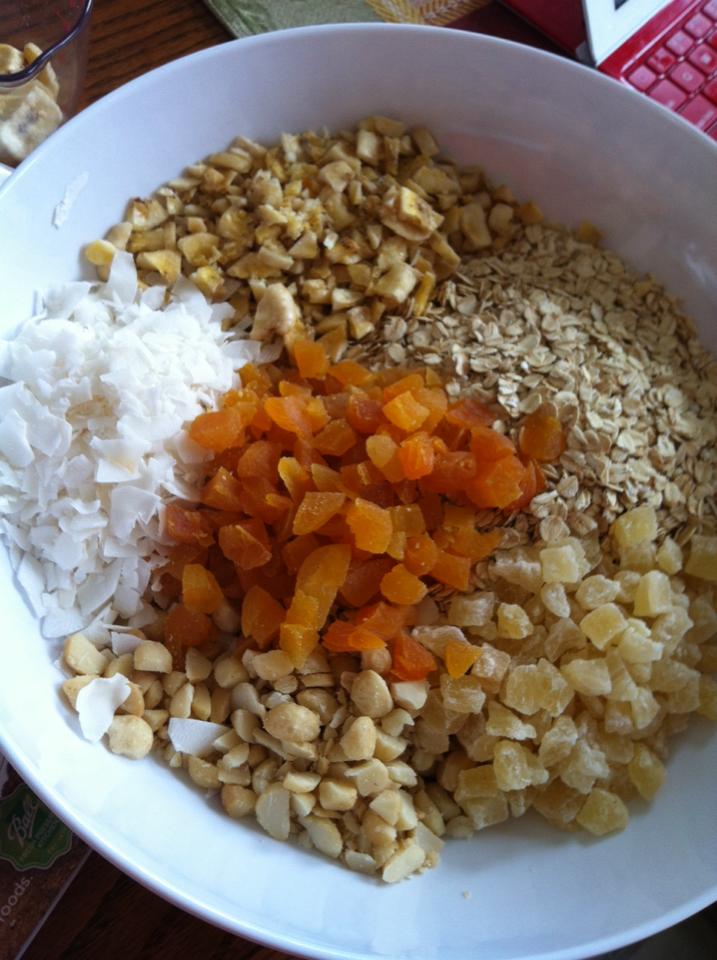
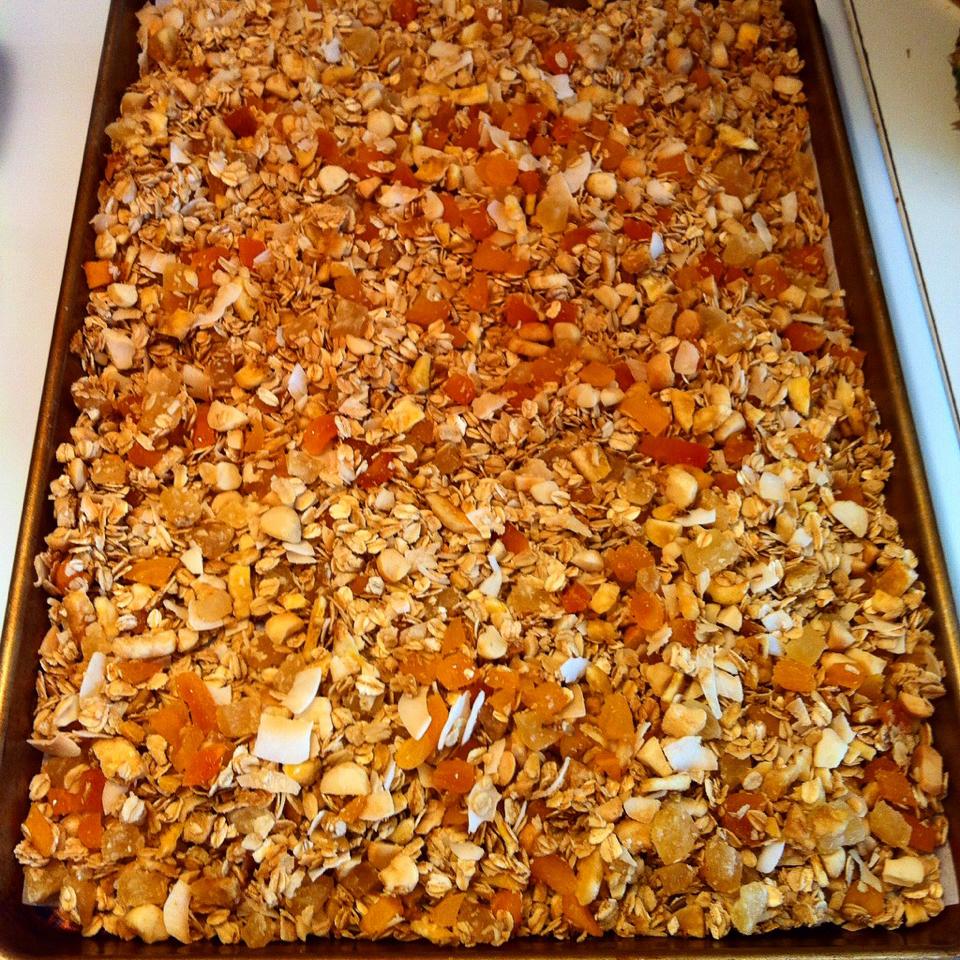
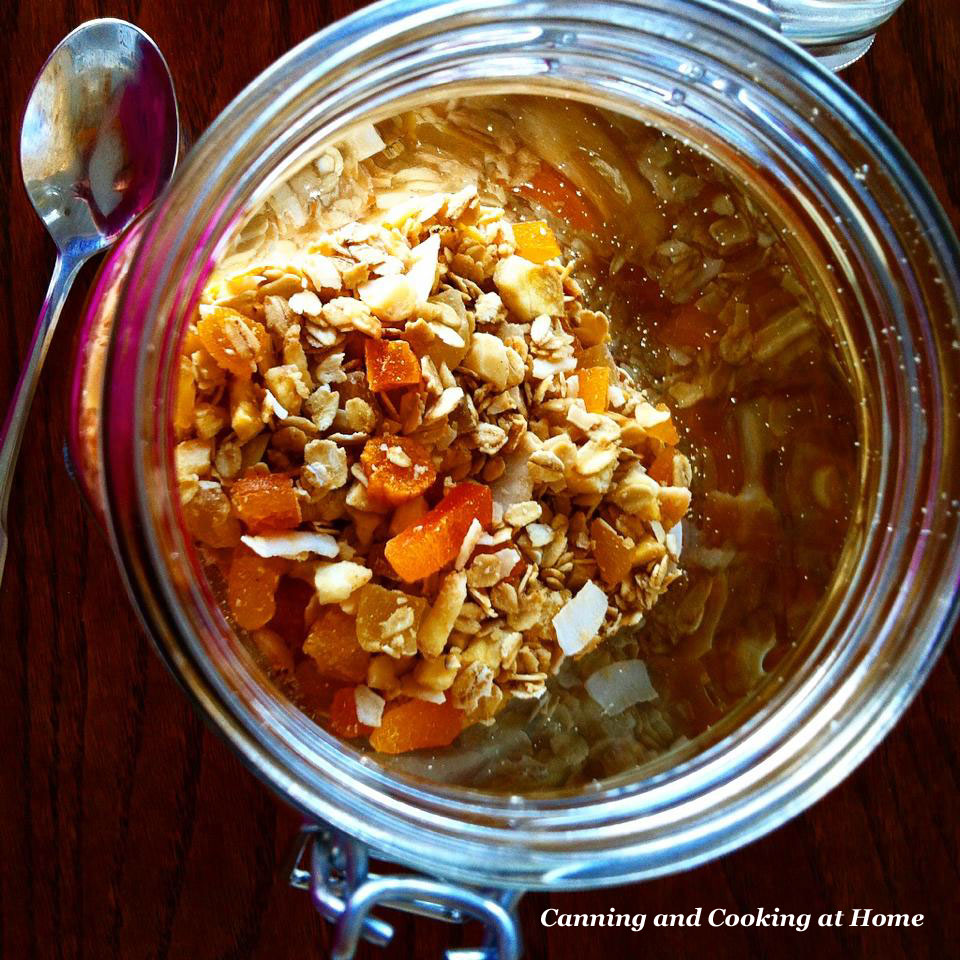
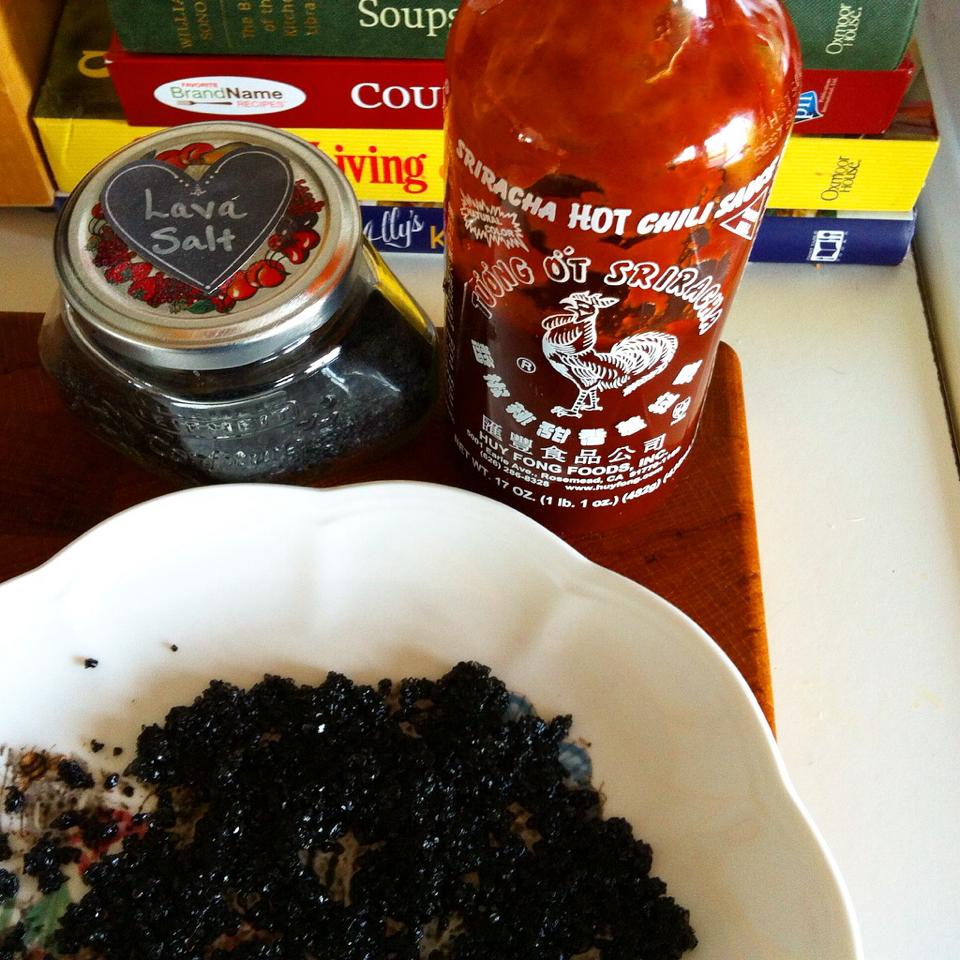
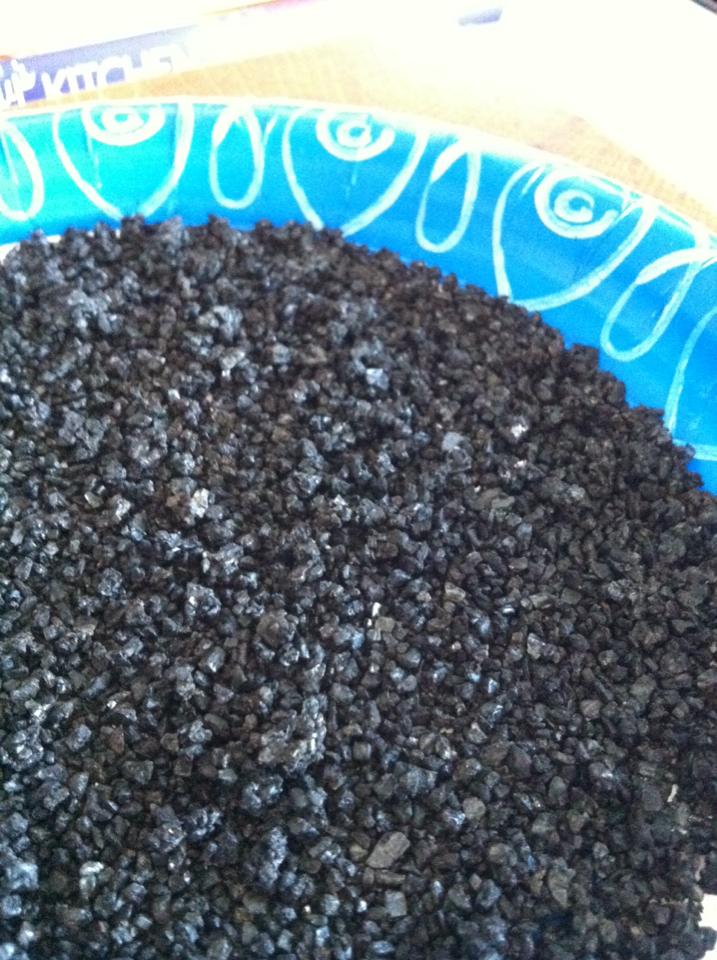
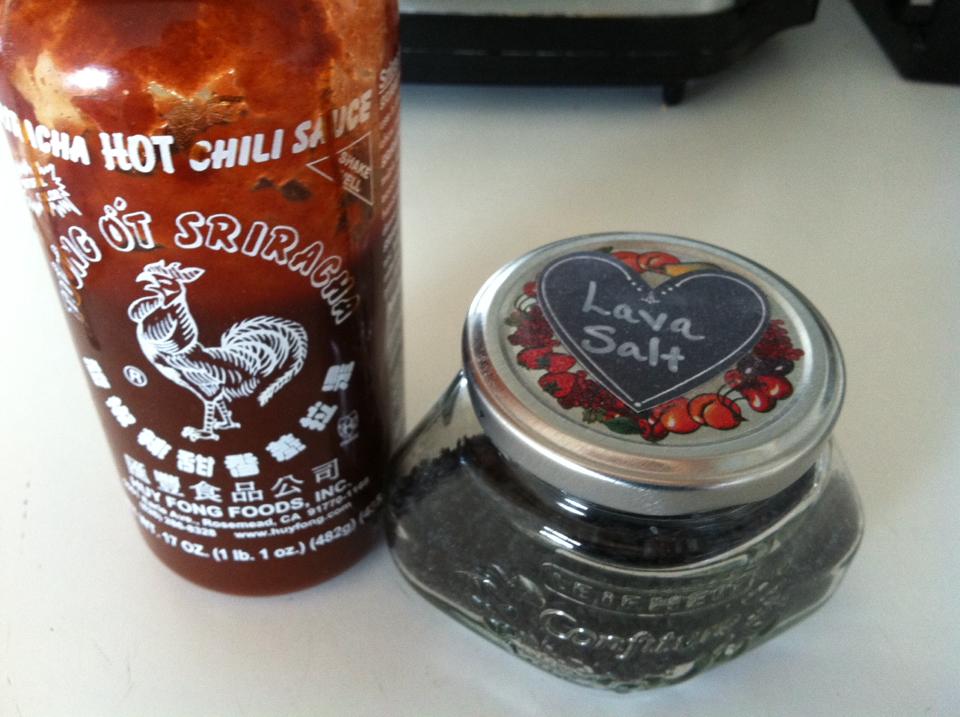
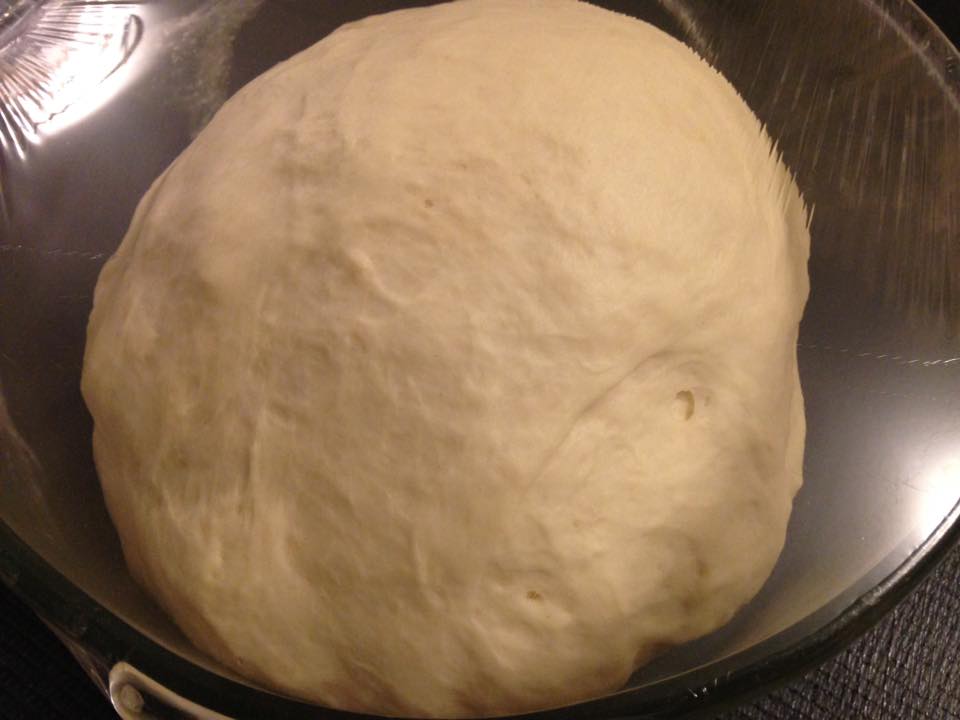
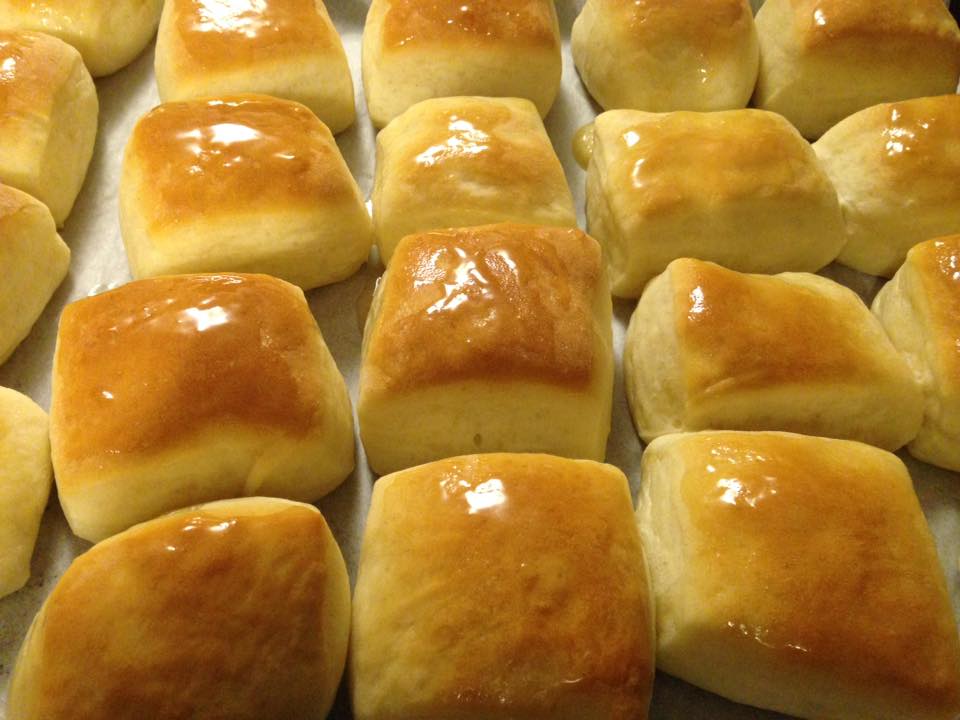
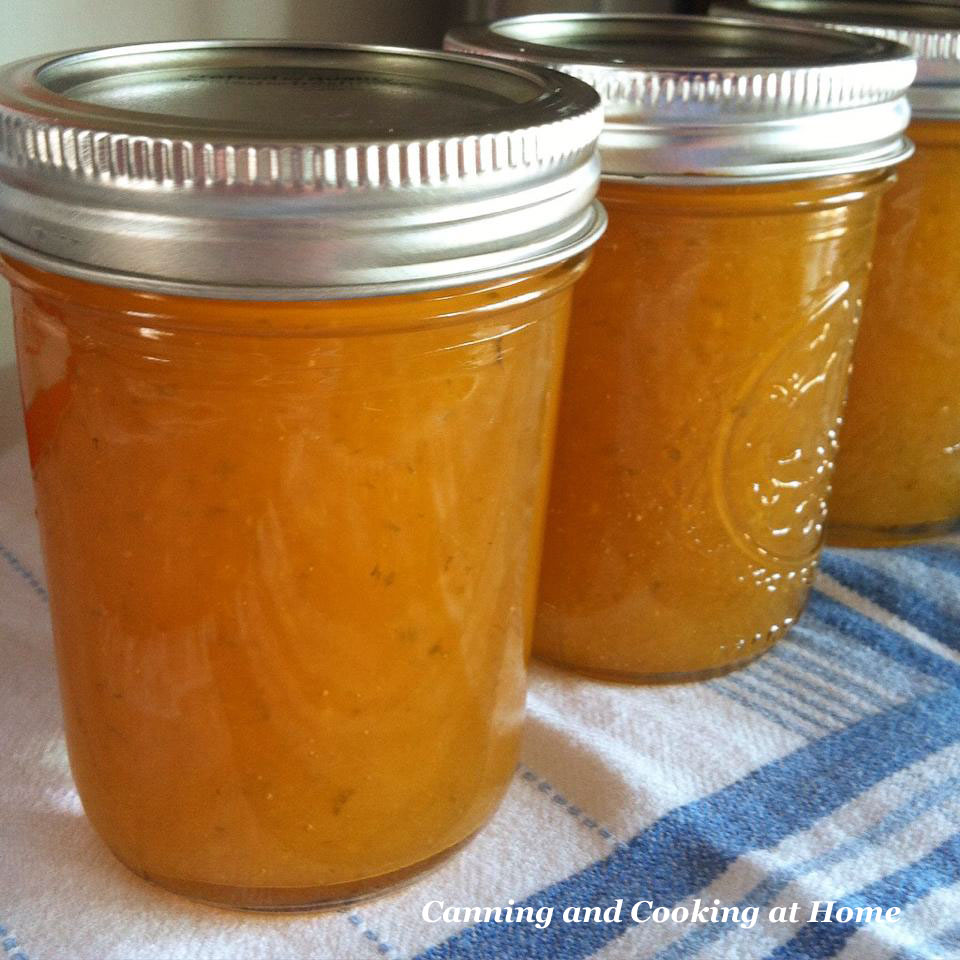 One of my most versatile fruits to can is the pineapple. I prefer using fresh pineapples when they are ripe for the picking and a decent price. Pineapples are great in combination with other fruits and alone with a little lime - like in this jam, they can be very tasty! Use this jam for anything from: adding to yogurt, stirring into a smoothie or homemade ice cream, and as basting sauce for grilled meats and fish. Don't forget baked goods too! This is a great filling for a Spring cake...and always a treat on your morning toast! ~Enjoy! Diane Maui Gold (Pineapple & Lime Jam *with honey) Ingredients: 2 Fresh Pineapples: cored, peeled & diced. (I used Maui Gold Pineapples.) 3 Limes, Zest from all 3 and juice from 1 (about 2 Tbs fresh juice) 1/2 cup Sugar for macerating pineapple and lime overnight 1 cup Sugar to add while cooking down pineapple 1 cup Honey to add while cooking down pineapple 1/4 cup Sugar to add to pectin to reduce clumping Sure Jel pectin - Pink Box 1/8 teaspoon butter, if needed Directions: Mix pectin in a small cup with 1/4 cup of sugar and set aside. Add diced pineapple, lime zest and lime juice to a non-reactive container and add in 1/2 cup of sugar - stir and cover - place in fridge overnight. Place entire contents (juice and all) into canning/cooking pot...bring to medium heat and add in 1 cup sugar and 1 cup honey and cook about 35 minutes until pineapples soften and have cooked down. Remove pot from heat and immersion blend the pineapple until no chunks remain. Return pot to stove-top and add in sugar/pectin mixture - let this cook over medium about 3 minutes, making sure pectin is dissolved and then bring mixture to a rapid boil for one minute, *do the freezer plate test a this time. When jam is ready, fill half pints to 1/4" headpsace and place on new lid. Process in a Boiling Waterbath 5 mins for sterile jars, 10 mins for non-sterilized jars. Adjusting for your altitude. **you can add in 1/8 tsp butter to reduce foaming if needed during cooking time. Yield: 4 half pints Recipe & Photos by: Diane Baker for Canning and Cooking at Home  I love making/baking granola. A healthy snack that satiates hunger. I like to dehydrate all my own fruits and use in granola's. You can certainly buy Organic dried fruits and nuts for this - or hit the 'bulk-bins' are your local store. One of my favorite granola's is dried apple and toasted pecans with cinnamon rolled oats. This time around, I wanted something new - a new flavor that wasn't the "same ole same ole" I came across a great "tropical" recipe from Self Proclaimed Foodie (click here to visit her website) and wanted to give it a try. I made my own variation of her recipe yesterday and we love it. I love the macadamia nuts in this - it brings a warm, toasty, buttery flavor to the mix. All the flavors work so well together. ~Enjoy! Diane Aloha Granola Ingredients: 3 cups old-fashioned cinnamon or plain rolled oats 1 cup macadamia nuts, rough chopped 1/4 cup sunflower seeds 1/2 cup flaked toasted coconut 1/4 cup coconut oil 1/4 cup brown sugar 1/2 cup maple syrup 1/2 teaspoon vanilla bean paste 1/2 teaspoon pink course sea salt 1-1/2 cups chopped dried fruit: tropical (pineapple, papaya or mango) 2 cups banana chips, rough chop Directions: Preheat oven to 300 F . Rough chop the coconut, dried fruit and nuts. Mix all together in large bowl. Melt coconut oil, brown sugar, and maple syrup in a saucepan, stirring in the vanilla bean paste until well combined and sugar is dissolved. Pour over oat mixture. Mix thoroughly and spread evenly on a parchment lined baking sheet. Bake at 300 degrees for 15 minutes. Stir and bake an additional 15 minutes or until golden brown. Make sure not to let granola burn. Once granola is golden, remove granola from oven, stir well. and let cool completely, Store in an air-tight container. Makes approx 2 quarts Recipe Adapted from: Self Proclaimed Foodie "Aloha Granola" Photos by: Diane Baker for Canning and Cooking at Home 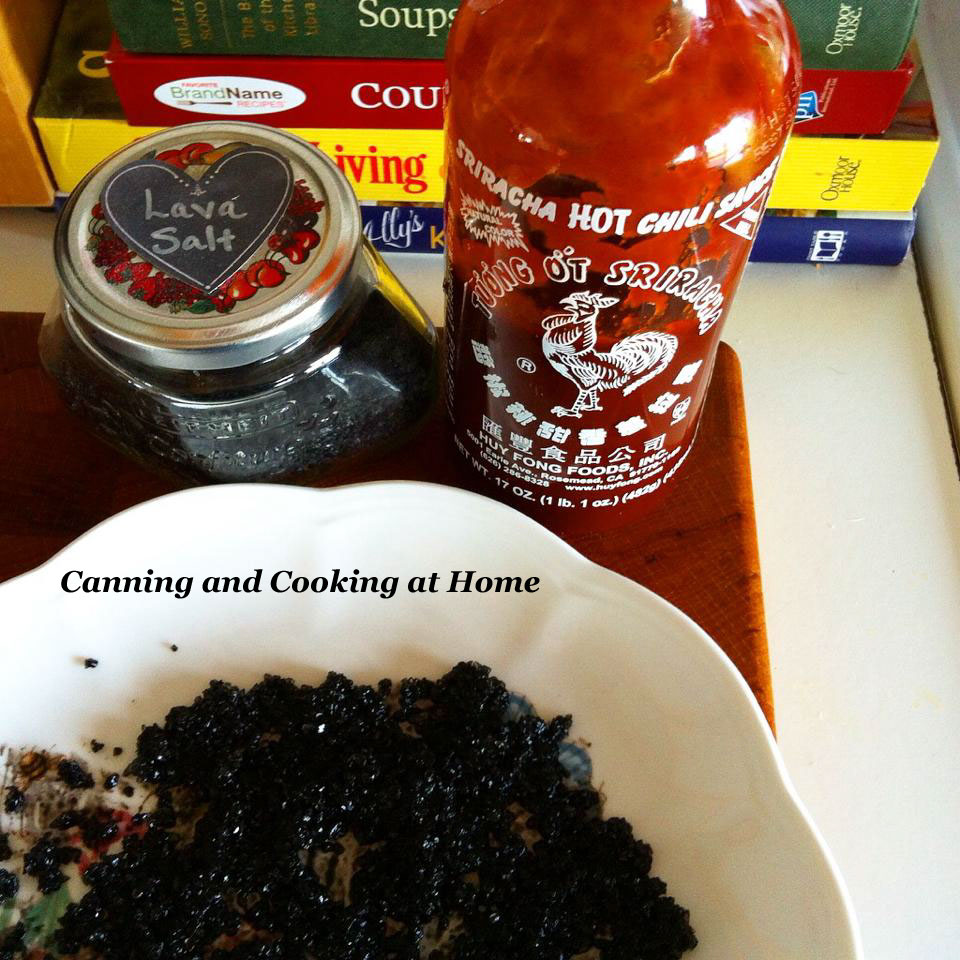 Serendipity happened last week, I received my March, 2017 Cook's Illustrated Magazine right at the time the the next 2017 Food Mastery Monthly Challenge #fijchallenge was kicking off for February. The challenge this month was to learn and try something new with an infused salt or salt preserving. Cook's Magazine had a great little article on creating infused salts quickly and easily with your microwave! How easy could that be!? I decided to take some fancy black lava 'finishing salt' I was gifted and infuse some sriracha sauce into it. This will be great on roasted vegetables, potatoes (even french fries), salting the rims of drinks like margaritas and bloody mary drinks, even on a steak fresh off the grill. This salt adds a little zip to your taste buds. As my husband noted upon the 'taste test' - "its a sloooow burn, but, really great!" The only point I'd like to mention is that I infused black lava salt which does leave a black film on hot foods. (meaning its not something added to a soup unless you want your soup gray/blackened) If using as a salt other then finishing off a dish, then I say to use kosher salt or pink salt (as they won't stain your foods so to speak) You can also use a spice grinder to reduce your large salt crystals into finer salt if that is preferred. I suggest doing that once the infused salt has dried out completely. As well, make sure to cover your salt in the dish/tray that you place into the microwave with a paper towel as there will be a small spray (fine mist) that will expel from salt as its cooking. I'm sure I only noticed this because I was using black lava salt. (at least now my microwave is even cleaner then I started with LOL - was not a pretty sight when opening the door to stir the salt after the first cook time) Enjoy! Diane Sriracha Infused (Flavored) Salt Ingredients: 1/2 Cup Kosher salt 1/3 Cup Sriracha Sauce large microwave safe plate microwave oven Directions: Mix the salt and sauce in a small bowl, then spread out onto large microwave safe plate. Microwave stirring every 60 seconds, until the mixture is only slightly damp. (total cook time approx 6-8 minutes) If the salt gets too hot, let it cool before proceeding so that your don't burn it. Take plate out of microwave and stir, let air dry for at least 1 hour. Place a paper towel over plate and blot salt to ensure it is no longer damp. At this point, I left the paper towel in place used the back of a spoon to crush the salt a bit more, breaking up any clumps. I left my finished infused salt to completely dry out overnight on a clean plate before storing. Recipe by: Cook's Illustrated Photos by: Diane Baker for Canning and Cooking at Home  **Guest Post: Who doesn't love the rolls you are served at Texas Roadhouse? and how about that Cinnamon Honey Butter that goes along with it - so good! JD is sharing how he went about recreating these at home! ~Enjoy! Diane Texas Roadhouse Copycat Rolls and Homemade Cinnamon Honey Butter BREAD 1 packet (2 1/4 teaspoons) instant yeast 1/4 cup warm water 1 cup whole milk, scalded and cooled to lukewarm 1/4 cup granulated sugar 3 tablespoons (1 1/2 ounces) unsalted butter, melted and divided 1 large egg 1 teaspoon salt 3 1/2 cups King Arthur Flour Bread flour BUTTER 1 stick (4 ounces) unsalted butter, at room temperature 1/4 cup powdered sugar 1/4 cup honey 1 teaspoon ground cinnamon Directions: Bread In the bowl of an electric mixer fitted with the dough hook attachment, stir the yeast, water, milk, sugar, 2 tablespoons of the butter, egg, and salt until well combined. Gradually add the flour and knead on medium-low speed until the dough pulls away from the sides of the bowl. Turn off the mixer and let the dough rest for 3 to 5 minutes. Continue to knead the dough on medium-low speed for another 5 minutes, or until the dough is soft and smooth. If it seems too sticky, add more flour, 1 tablespoon at a time. Transfer the dough to a large greased bowl. Cover the bowl with plastic wrap and let the dough rise until doubled in size, about 45 minutes to 1 hour. Punch the dough down and turn it out onto a lightly floured work surface. Roll the dough into a 1-inch thick rectangle. Cut the dough into 2-inch squares. Transfer the squares to a baking sheet and cover with plastic wrap. Let rise until doubled in size, about 45 minutes to 1 hour. Preheat the oven to 350°F. Bake the rolls for about 15 minutes, or until golden brown. Brush the baked rolls with the remaining 1 tablespoon melted butter. Butter In the bowl of an electric mixer fitted with the whisk attachment, beat the butter for 30 seconds, or until pale in color. Add the powdered sugar, honey, and cinnamon and beat until well combined, light, and fluffy, about 1 to 2 minutes. Serve immediately or store, covered, in the fridge for up to 5 days. Serve butter at room temperature, on hot rolls. Recipe Adapted from: various copycat recipes found online. Photos by: JD Provence for Canning and Cooking at Home |