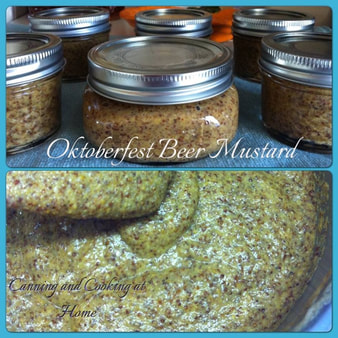
 Oh - okay! "everyone I know was making this" so, I made some too. I found out the hard way that the brown mustard seeds when 'cracked/cooked' emits a bitter flavor!!!! (they SAY that bitterness mellows over time) I tasted the mustard (my mistake!) and almost threw it all out ((super bitter)) until Canning friends said its normal to be bitter and to go ahead and can it - and let it mellow - sometimes up to 3 months. It will be an interesting wait and see! It smelled so wonderful as it was cooking so, that's a plus - right?! You do get a lot of beer foam in your saucepan when first starting to cook this down, after the seeds have soaked. (just an fyi that you aren't doing anything wrong when you see that happen) the foam does fade away and you will let your 'sauce' simmer a good 20 mins or so...it will thicken rather slowly but, when you can stir and get a stiffer sauce that 'plops' when you scoop some up and drop back into pan - it's ready to can...Enjoy! Diane
Oktoberfest Beer Mustard Ingredients: 1-1/2 cups beer *try Redds Apple Ale 1 cup brown mustard seeds *not yellow 1 cup water 1/2 cup malt vinegar 1/2 cup lightly packed brown sugar *a little more if preferred 1/4 cup dry mustard 1 Tbsp onion powder 5-7 (4 oz) glass preserving jars with lids and bands DIRECTIONS: COMBINE beer and brown mustard seeds in a medium saucepan. Bring to a boil. Remove from heat, cover and let stand at room temperature until seeds have absorbed most of the moisture, about 2 hours. PREPARE boiling water canner. Heat jars in simmering water until ready for use. Do not boil. Wash lids in warm soapy water and set bands aside. PLACE mustard seeds and remaining liquid in a food processor or blender. Process until chopped and slightly grainy. TRANSFER mixture to a large saucepan. Whisk in water, vinegar, brown sugar, dry mustard and onion powder. Bring to a boil. Reduce heat and simmer, stirring frequently, until volume is reduced by a third, about 15 minutes. LADLE hot mustard into hot jars leaving 1/4 inch headspace. Remove air bubbles. Wipe rim. Center hot lid on jar. Apply band and adjust until fit is fingertip tight. PROCESS in a boiling water canner for 10 minutes, adjusting for altitude. Remove jars and cool. Check lids for seal after 24 hours. Lid should not flex up and down when center is pressed. Recipe by: Ball Recipes/Fresh Preserving Photos by: Diane Baker for Canning and Cooking at Home
0 Comments
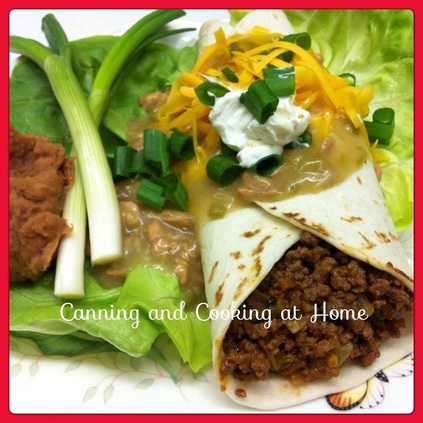 Beef Burritos
1 medium onion, diced 1.5 pounds ground beef 1 cup salsa *more if wanted 1/2 teaspoon ground cumin 1/4 teaspoon chili powder 1/4 teaspoon garlic salt 1 small can green chiles 1 can refried beans 1 can green chile sauce 3/4 cup grated Cheddar, plus extra for sprinkling burrito-size flour tortillas (makes approx 8-10) 1/2 cup fresh parsley 1-2 green onions, diced sour cream *optional 1/4 cup water or beef stock** see below You can control the 'heat' in this dish by using mild to hot salsa, green chiles and green chile sauce... In a large skillet over medium heat, cook the onions until softened. Then add the ground beef and cook until the beef is cooked through. Add the cumin, chili powder and garlic salt and stir to combine. Pour the salsa and green chiles into the meat mixture and simmer over low heat, covered for 10 minutes or until cooked thru. Add a little water or beef stock if the mixture gets too dry. While above mixture is simmering, heat the refried beans and the green chile sauce in saucepans over medium-low heat or microwave in microwave safe containers. When meat is ready, fill center of burrito wrap with meat and fold around (I add shredded cheese to inside of wrap with some green chiles sauce before plating. Drizzle the green chile sauce over all of the burritos and sprinkle with more grated Cheddar. Dollop with sour cream and diced green onion. Recipe and Photo by: Diane Baker for Canning and Cooking at Home 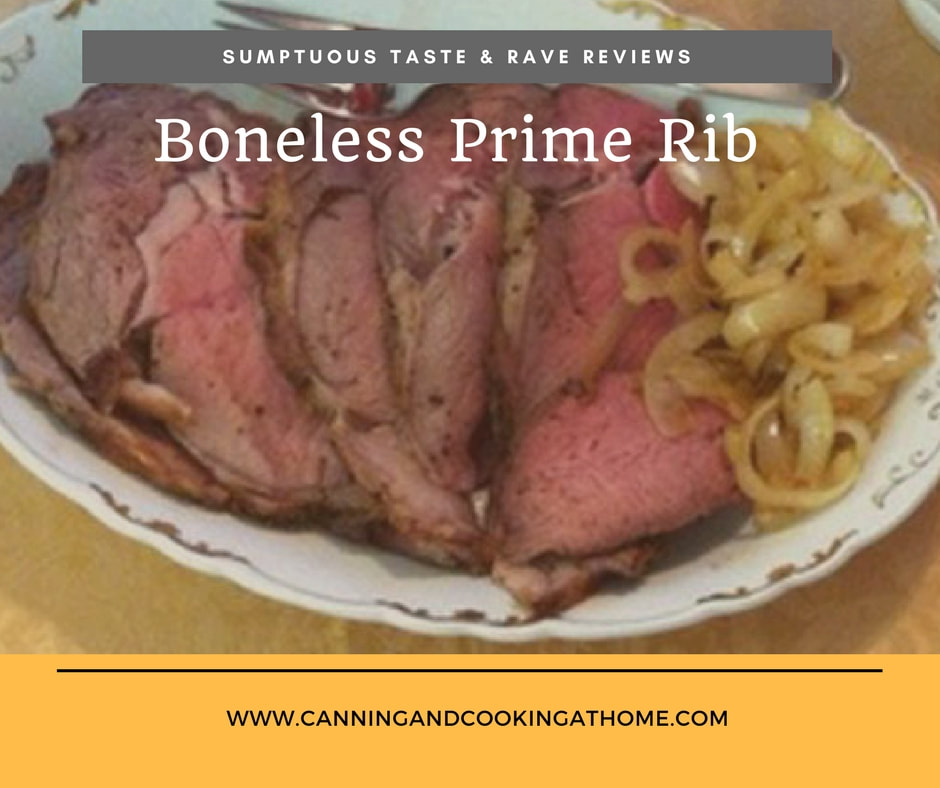 Boneless Prime Rib Roast & Diane's Prime Rib Gravy Place roast on a platter 2 hours before cooking time. Use 2 Tbs Olive Oil or 2 Tbs Melted Butter and brush onto meat, sprinkle all over with preferred *Spice Blend (see below). Cover lightly with Saran Wrap and let sit at room temp. Preheat oven to 450 Use a bit of olive oil to lightly smear all over inside of a high-sided roasting pan (for easy cleanup later) place roasting rack in pan and place roast fat side up on rack in pan. Cook the roast for the first 20 mins at 450, then LOWER the temperature to 325 until your desired 'doneness' is reached *approx 15 minutes per pound. (I use a meat thermometer and pull my roast out of the oven at 120 and after it rests 20 minutes, the internal temp will be 130 a perfect medium rare) My advice, always use a meat thermometer & rest the meat. *Spice Blends:
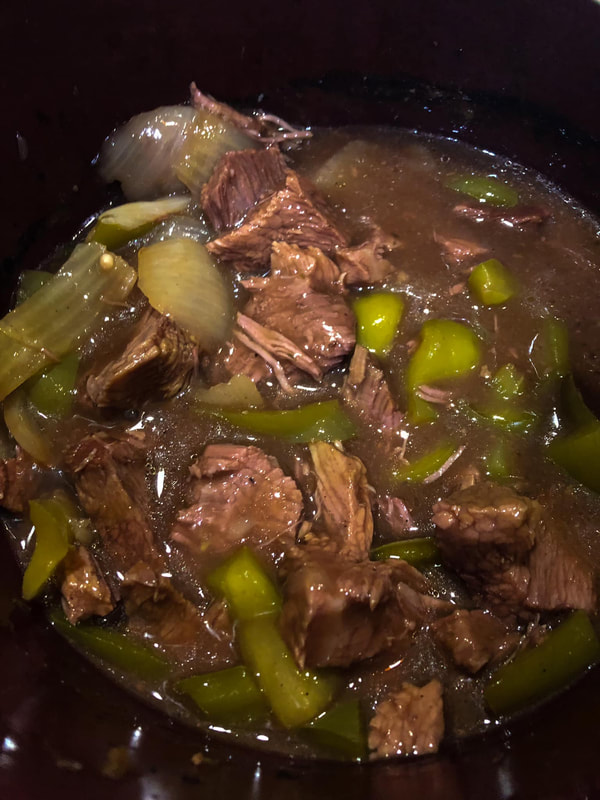
Diane's Prime Rib Gravy: 2 Cups Beef Stock 2 Tbs Flour 3 Tbs Butter, divided 1 Tbs onion powder 1/2 onion (finely minced) 2-3 Tbs mushrooms (finely minced) Melt 1 Tbs butter in sauce pan, add onion and mushrooms - cook approx 10 mins until browned - remove and set aside. Place 2 Tbs butter & flour in sauce pan and stir until the flour browning and 'nutty smelling' then slowly add in 2 cups of warmed beef stock - bring to a medium boil for approx 8 mins. Add onion powder and season with salt & pepper as needed and add back in the onion and mushrooms into sauce pan, Keep on low until ready to serve with meat. 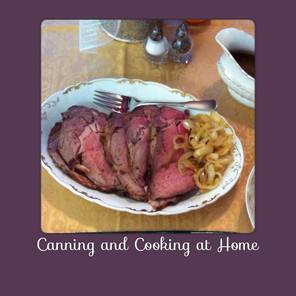 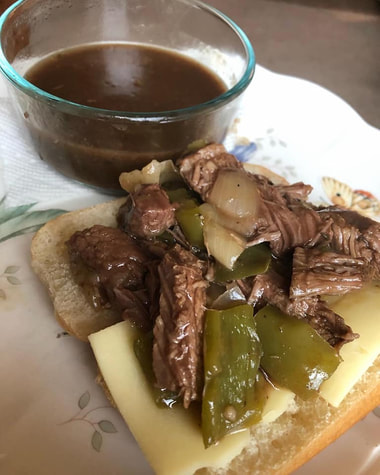 If making this as a Freezer to Crock Pot meal - place the first nine ingredients into ziplock bag and freeze - defrost 24 hours before placing in crock pot to cook & serve. ~Enjoy! Diane FRENCH DIP SANDWICHES {slow-cooker} Ingredients: 2 pounds flank steak , 2 pounds brisket or 2 lbs Tri Tip, trimmed 2 cups low-sodium beef broth/stock 1 large onion, sliced 2 cloves garlic, smashed 2 tablespoons Worcestershire sauce 1/2 teaspoon dried oregano 1/4 teaspoon dried thyme 1/2 teaspoon Kosher salt 1/4 teaspoon pepper (corn starch slurry to thicken sauce) 1-2 Large Sweet Bell Peppers (add during final hour of cook time) 8 slices of cheese, if preferred: we like Provolone, White American or Swiss Cheese One large baguette—cut into 4 pieces, split horizontally, and lightly toasted or French Dip rolls from my NOLA Style Recipe Yield: 2 lbs of meat makes about 4 large sandwiches with 2 slices of cheese each. . Directions: 1. In a 4- to 6-quart slow cooker, combine the broth, onion, garlic, Worcestershire, oregano and thyme. Season the beef with ½ teaspoon salt and ¼ teaspoon pepper and place in the slow cooker. Cover and cook until very tender, on low for 7 to 8 hours or on high for 5 to 6 hours. 2. One hour before serving, transfer the beef to a cutting board and slice beef against the grain or shred using two forks. Return beef to slow-cooker to continue cooking. Place 2 Tbs corn starch in a small cup with a bit of cold water and stir until you get a smooth paste, add to slow-cooker and stir (this will help thicken sauce) . This is when I add my sliced bell peppers too. 3. When ready to serve, dividing evenly, form sandwiches with the baguette, beef, onions. Serve with the cooking liquid, for dipping. *add slices of cheese onto bread and melted under broiler before placing beef onto bread, if preferred Tip: For an even richer broth, brown the brisket in a skillet in 1 tablespoon canola oil for 2 to 3 minutes per side before adding it to the slow cooker. Don't forget to scrape up any browned bits from the pan and add them to the slow-cooker. Recipe and Photo by: Diane Baker for Canning and Cooking at Home 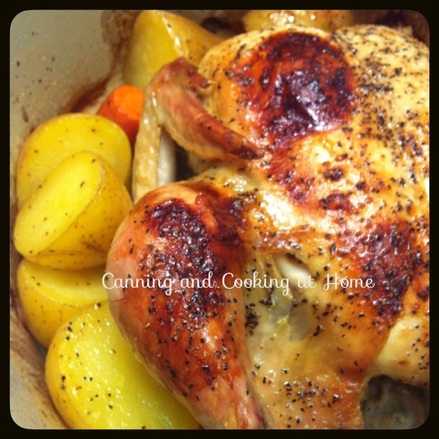 I I love making Roasted Chicken: Sometimes simple just tastes good and left overs - even better! I love my enameled Cast Iron pots - retains moisture, heat and adds to the flavor. Dutch Oven Roasted Chicken I rub olive oil around ecast iron dutch oven with a paper-towel for easy cleanup later - then I quarter a big onion, cut up 2 large carrots, 3 celery stalks, and place chicken on-top of celery with carrots and onion off to the sides. I placed Yukon gold potatoes around the chicken (cut in half) and just put melted butter under breast skin and then brushed all over chicken and sprinkled with salt & pepper... goes covered into oven 365 degrees for 20 mins. per pound. Uncover 30 mins. before cooking time is over. Remove from oven and tent with foil for 5-10 mins while making gravy. I toss the celery and serve the carrots, onion and potatoes on the side. *you want your celery in larger pieces as it will be acting as the 'rack' under the chicken I do baste potatoes and chicken with pan drippings after I remove the cover and then again near the end. I also always use a meat thermometer to test for 'doneness' Recipe & Photo by: Diane Baker for Canning and Cooking at Home |