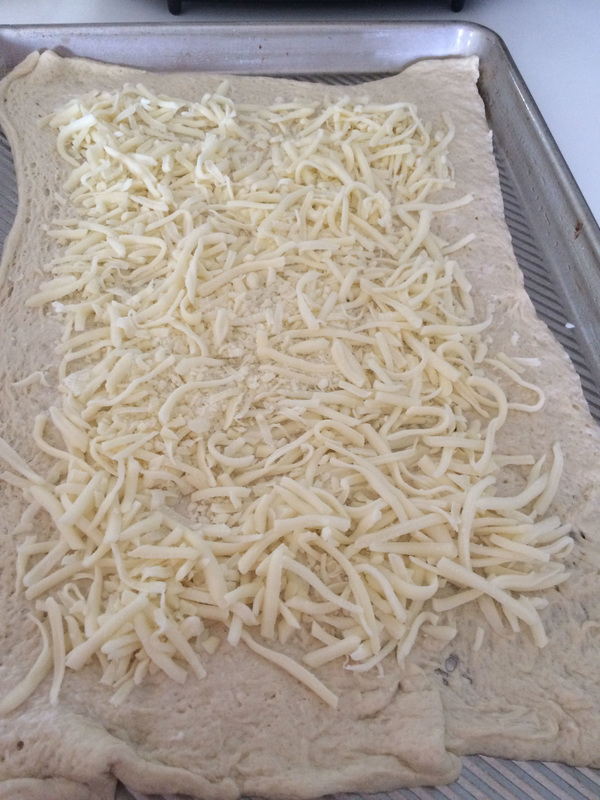
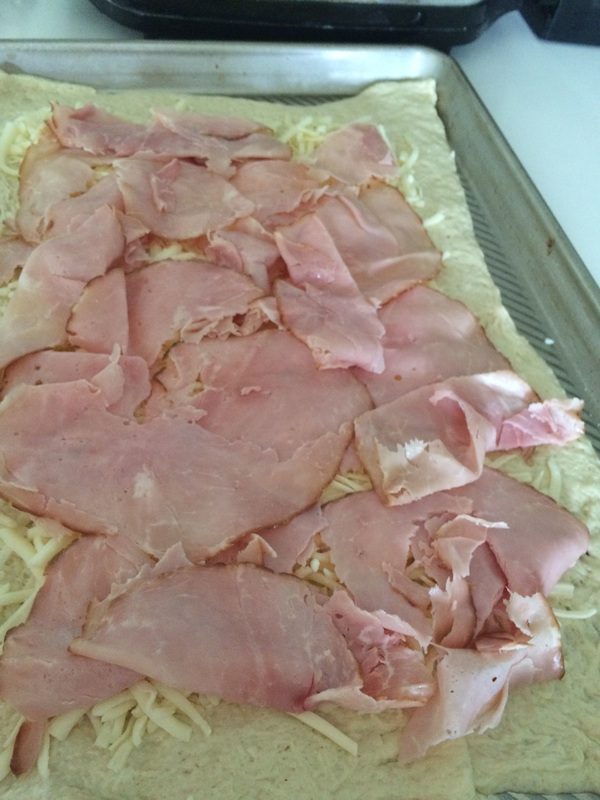
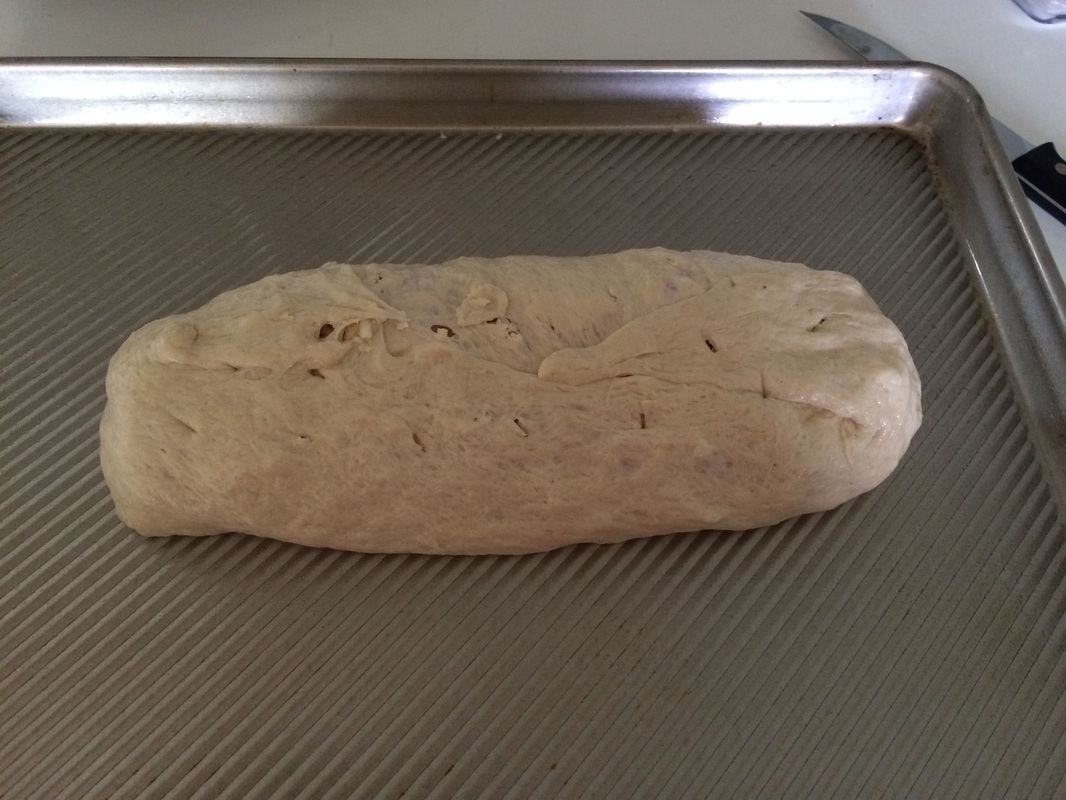
Ham n' Cheese Stromboli with Mustard Sauce Not sure about most folks but, my Mom raised six children and always had a complete dinner on the table every night. I learned a lot from her about organization and cooking. She threw more parties then I could ever imagine. (and at 85, she is still doing so too!) If it was a large party or small get together, she always had the right food, enough of it and everything was always super tasty! I remember when I helped her make these little ham sandwiches as a part of an upcoming cocktail party, and thought it was so odd we were pouring a mustard & butter sauce over the tops of all these little sandwiches we worked on building. (ok, I thought she was crazy!) LOL somehow, the sauce just seeps into the bread and creates a wonderful and tasty "crust" and turned a simple ham sandwich into a cocktail party - treat! I decided to try and turn that into a stromboli for dinner and I will admit, I am glad i did and now I am excited to try all sorts of cheese/meat combos with different sauces too! I have seen similar sandwich recipe all over the internet - I'm sure back in the 1960's my Mom got her recipe she uses from the Chicago Sun Times 'recipe section' as that is where she got most inspired... I don't know who else to credit for this recipe so, the credit goes to my Mom! ~Enjoy! Diane Ham n' Cheese Stromboli with Mustard Sauce Mom's Ham n Cheese Mustard Sauce Ingredients: 5 Tablespoons Butter 1 Tablespoon Yellow Mustard 1 teaspoon Minced Onion 1/2 teaspoon Worcestershire Sauce 1/2 teaspoon Poppy-seeds Combine all sauce ingredients in small saucepan on stove top, let butter melt and stir everything together, turn off burner, set aside to prepare/assemble stromboli. Stromboli Ingredients: 1 package/tube of Pillsbury Thin Crust Pizza Dough or Homemade Pizza Dough (this recipe for the New York Times/Cooking section) 2 ¾ cups bread flour 2 ½ teaspoons active dry yeast (1 packet) 2 teaspoons sea salt ¼ cup extra-virgin olive oil 1 cup warm water 2 or 3 tablespoons medium or coarse cornmeal If making Homemade Dough: Put the flour, yeast and salt in a food processor. With the machine running, pour the oil through the feed tube, then add the water in a slow, steady stream. Continue to process for 2 to 3 minutes (the dough should form a rough ball and ride around in the processor). The finished dough should be soft, slightly sticky and elastic. If too dry, add a bit more water; if too wet, a tablespoon or so more flour. Lay a 12-inch-long piece of plastic wrap on a clean work surface. Work the dough into a rectangle on the plastic, about 8 inches long and 6 inches wide. Press your fingers into the top of the dough all over, making indentations as though it were a focaccia bread. Fold the left third of the dough over (as you would a letter) and repeat the indentations. Fold the right third over and make the indentations again. Cover the folded dough with plastic wrap and let rise for 20 minutes. Cut the dough in half, form each piece into a neat ball, wrap tightly in plastic wrap and transfer to the freezer. The morning before you want to make pizza, transfer the dough to the refrigerator to thaw. Assembly for Stromboli: Preheat oven to 380. Lightly brush olive oil over a non stick cookie sheet. Lay pizza dough (that has been rolled out in a large rectangle) onto cookie sheet. Sprinkle with cheese leaving the edges bare by about 1-2 inches all the way around. Next, lay one single layer of ham over cheese. Starting from bottom (short end) roll away from you (upwards), tucking in edges slightly as you go. Turn the completed, rolled stromboli to center onto cookie sheet, lightly pat down all over to create a flatter (more square) stromboli (((once rolled it will look like a circular log, you want to pat that down a bit))) Check over your dough and pinch together any seams or holes in dough that may have opened up. place three small "airholes" on top of dough with a knife - this will let the bread vent while cooking. Place in oven and bake for 15 mins. Pull cookie sheet out of oven and use a knife to make slits in the top of the stromboli dough (about 2 inches long), at this time you will also baste your bread with the mustard sauce - depending on how large your stromboli is...you may not use ALL the sauce. If needed, use a paper-towel to quickly mop up any sauce that has puddled around stromboli on the cookie sheet and place back in the oven to finish cooking another 15 minutes (keep an eye on the crust for any burning) you want a nice brown crust without any burning of the bottom crust.) Take out of oven and let cool 5 minutes before slicing and serving.
0 Comments
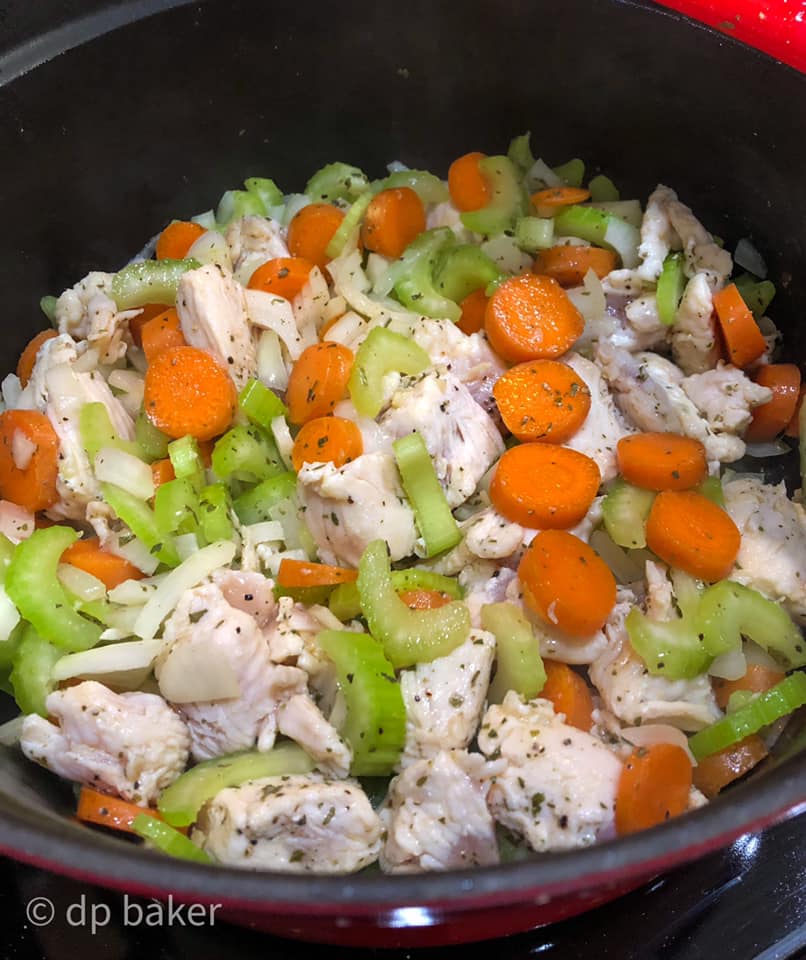
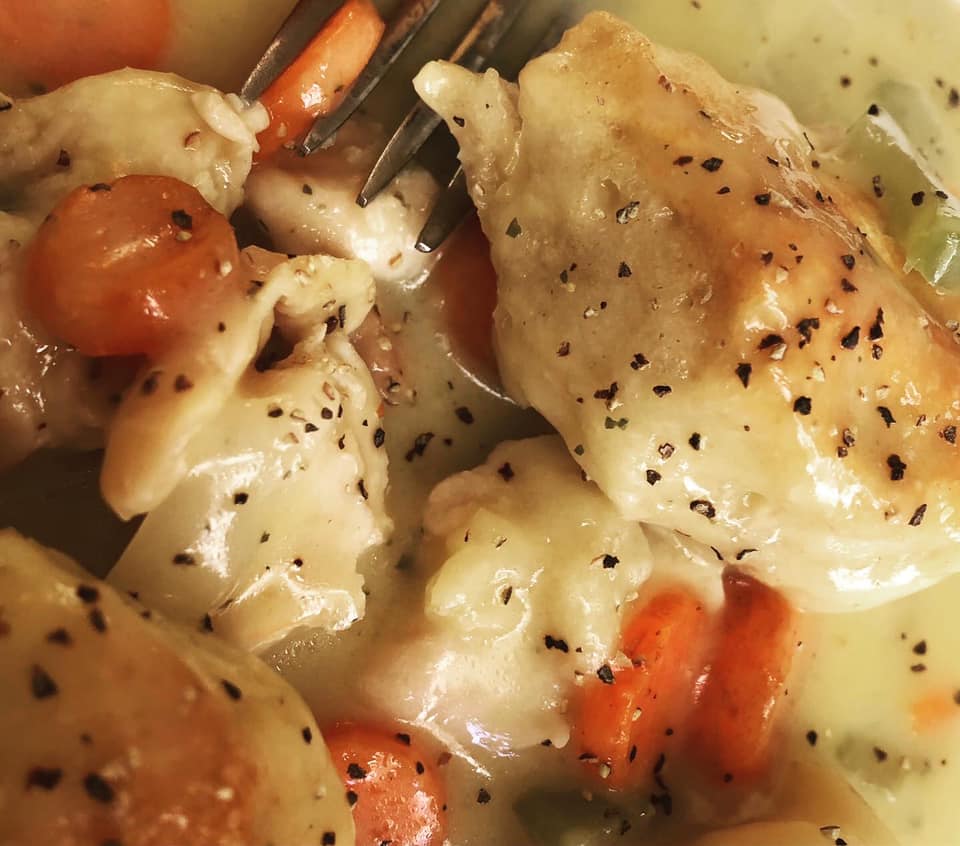
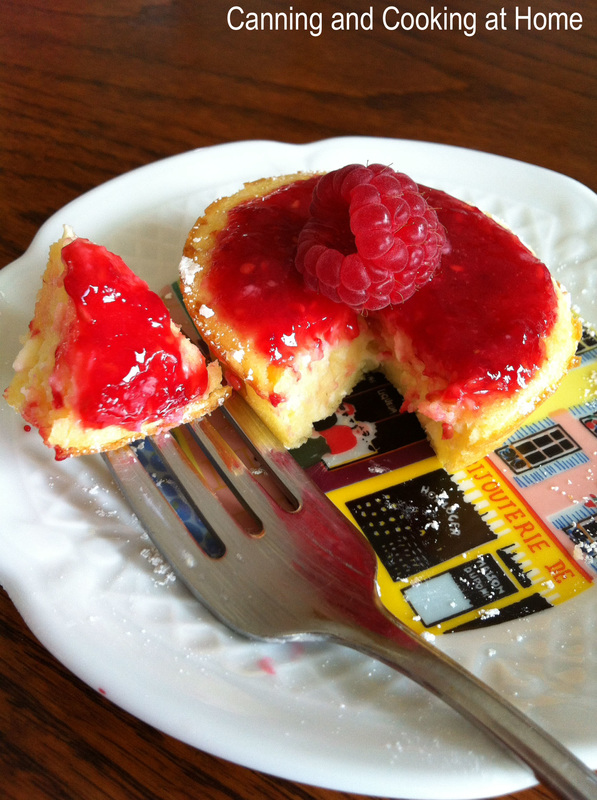 rustic lemon cheesecake cupcakes with fresh raspberry sauce For the love of Raspberries... so, you love Raspberries? and most people decorate desserts with them, some roll into crepes, or even whirl into drinks and ice cream, it's ALL good. Have you ever tried just a simple raspberry sauce to top some of the foods you make, or refine that sauce into a seedless coulis for the 'fancy effect' and when all is done, and if you have leftovers have you ever thought of adding a bit of clear-jel (cook type) and turn into a super quick, easy fridge jam? That's 3 uses from one little bin of raspberries - kinda cool huh? I love layering the fridge jam version in between layers of things like jar puddings - yum factor there! and if thicken enough, you can use as a filling to make my 'homemade newtons' too! The uses are endless! this can be done for ANY fresh berry and a little help from your Cuisinart too... It's simple - for every 8 oz of fresh berries, add about 1/4 cup of sugar and whirl away {puree} into a sauce in your Cuisinart. That's it. Making the coulis is taking that one step further... take 18 oz of fresh berries, 3/4 cups sugar and 1/2 cup of water - place in all in a saucepan and bring to a boil over medium-high heat, reduce to low and let the sugar dissolve {about 5-8 mins} stir and remove from heat, let cool - puree in Cuisinart and run through a fine mesh sieve, cheesecloth or fine mesh colander (removing seeds and solids) All done and have berries left over that have been pureed into a sauce or coulis? No problem, you can either go the commercial pectin route and can it using a waterbath OR since I usually have such a small amount leftover, I make a cold water slurry with clear-jel and get a thickened, tasty fridge jam. {slurry: take 1/2 Tbs COLD water and 1 Tbs Clear-Jel, mix in a cup, set aside.} bring raspberry sauce or coulis to a low boil in saucepan and add half of the slurry, stirring quickly until a slight tightness forms in the sauce/coulis...remove from heat - spoon into clean jars and let cool, store in fridge! that's it! I say to add half the slurry because everything depends on how much 'water' is left in your sauce/coulis...and how thick the sauce/coulis is before wanting to turn into a quick jam...the best part of all of this - you almost don't even need to thicken most times to be able to use as a jam!! I do when making newtons because I don't want the filling running out of my cookies...Clear Jel acts like a thickener - turning fresh runny berries into the consistency of pie fillings... ~Enjoy! Diane 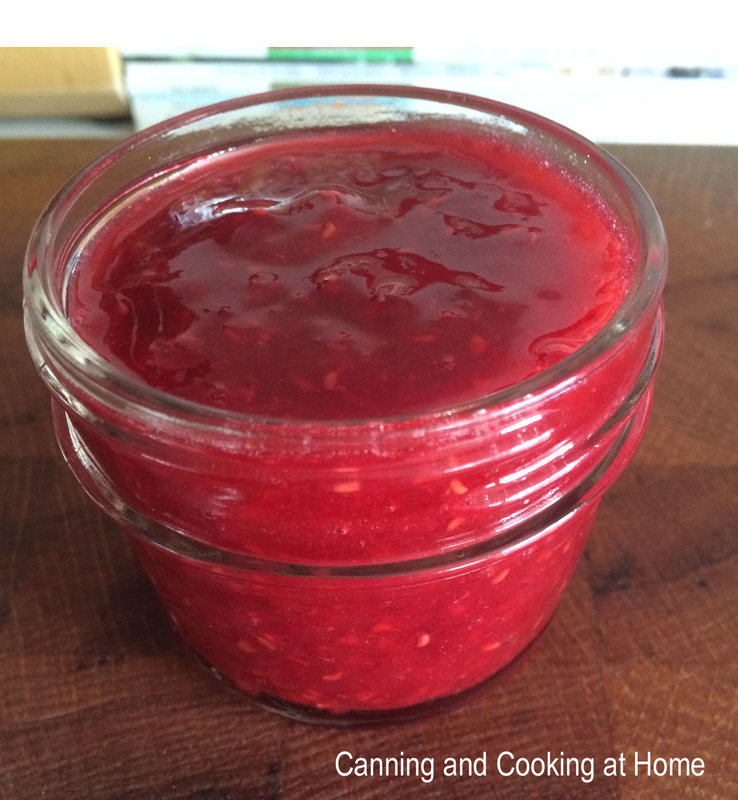 Raspberry Sauce - turned into Fridge Jam 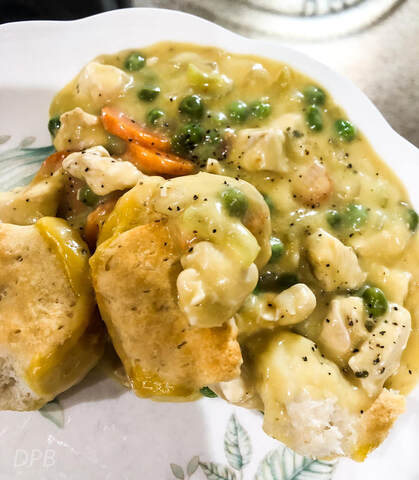 Comfort Food - fresh from the oven! The preparation on this recipe is simple and easy (and who doesn't like that on busy days.) You can make my homemade 'drop type biscuits' or use store bought. Great thing is, you decide what works for you, even changing up the filling works (see my kitchen note at end of the recipe) I've also added the link to my Homemade Condensed Cream of Chicken Soup. It all tastes great! I used my smaller cast iron Dutch oven for this recipe as it has a heavy lid for going into the oven and creating a nice steam for my dumplings to rise but, you can certainly use a cast iron skillet and cover it with foil (just make sure to get a tight seal.) I hope you make and enjoy this as much as we do. ~Enjoy! Diane Dutch Oven Chicken & Dumplings Ingredients: 1/2 Tablespoon olive oil or 1 Tablespoon of butter or ghee 1 cup chopped onion 1 cup chopped celery 1 cup chopped carrot 1/2 cups chicken broth (you can add up to 1 Cup depending on how thin/thick you want your sauce) 2-3 cups cooked chopped chicken; cut into 1" dice. 1 tablespoon dried parsley salt & pepper to taste 2 cans cream of chicken soup 1 small 5 count can Pillsbury "Southern Homestyle" biscuits or my 'drop' biscuits (see recipe below) Instructions Preheat oven to 350 degrees.
If you cannot find Pillsbury Home-style Biscuits, you can substitute my homemade "drop" biscuits in their place. (see recipe below) Homemade "Drop" Biscuits Ingredients: 1 cup all-purpose flour 2 teaspoons baking powder 1 teaspoon white sugar 1/2 teaspoon salt 2 tablespoon butter 1/2 - 3/4 cup milk Directions: Stir together flour, baking powder, sugar, and salt in medium size bowl. Cut in butter with fork, until crumbly. Stir in milk to make a soft dough. Tear dough into 6 pieces, roll slightly into ball, flatted and lay on-top of Chicken mixture. Makes 6 biscuits. Kitchen Note 1: Switch the filling up a bit, you can try adding in some cooked wild rice, different vegetables like green beans or peas - it's a wonderful recipe! Pure comfort food! 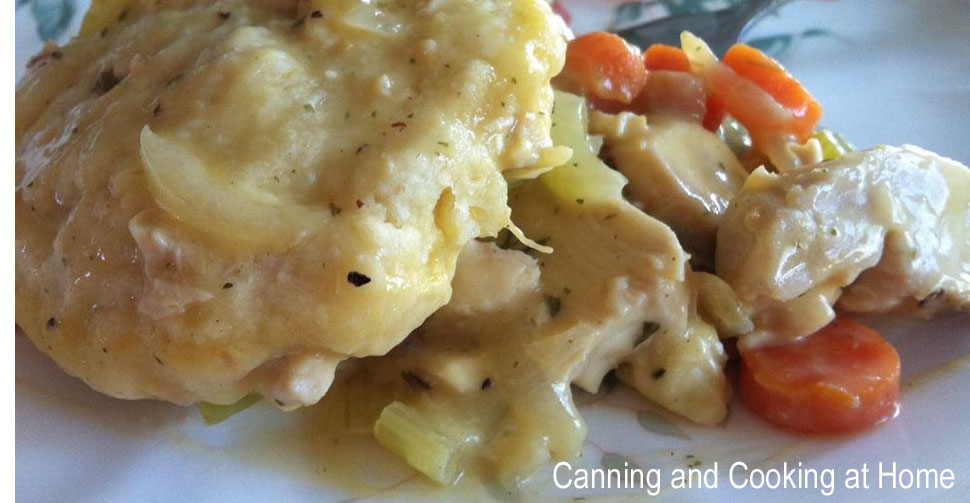 Plated Dutch Oven Chicken & Dumplings 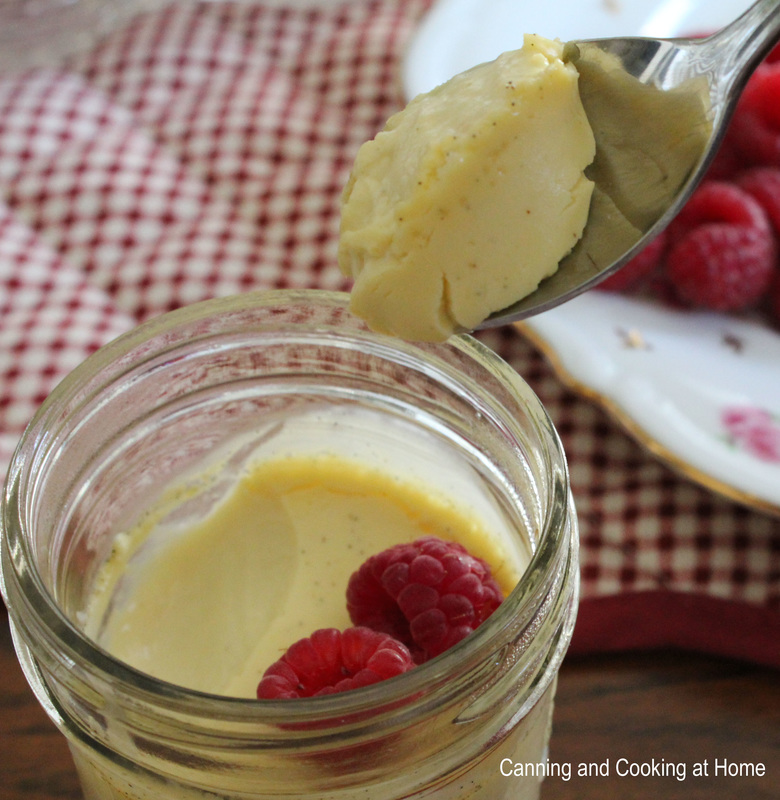 Vanilla Bean Pot De Creme with Raspberries Fresh fruit needs a good dessert! I love making these super easy pots de cremes. Just a fancy (french) name for a light set, super luxurious custard. Baked in the oven, in a 'water bath' so to speak (bain marie style, yep - another fancy french name) You can dress these up and down - use fancy ramekins, or as I did - canning jars. I know - before you start screaming "canning jars are not to be used in an oven" I hear you and disagree when using a low oven temp and bain marie (wet) cooking. If you feel safer using ramekins - go for it. By all means, don't discount this recipe in thinking its too hard...its not - I promise and the end results are astounding. Think of a rich custard that is as smooth as silk with a burst of vanilla bean flavor. There are so many flavor variations too - the traditional is chocolate with a bit of liquer and coffee add in too but, I've seen maple ones and salted caramel and even vanilla/lavender... Enjoy! ~Diane Vanilla Bean Pot de Creme with Raspberries Ingredients:
Instructions:
Recipe Adapted from: Bucheron Photos by: Diane Baker for Canning and Cooking at Home 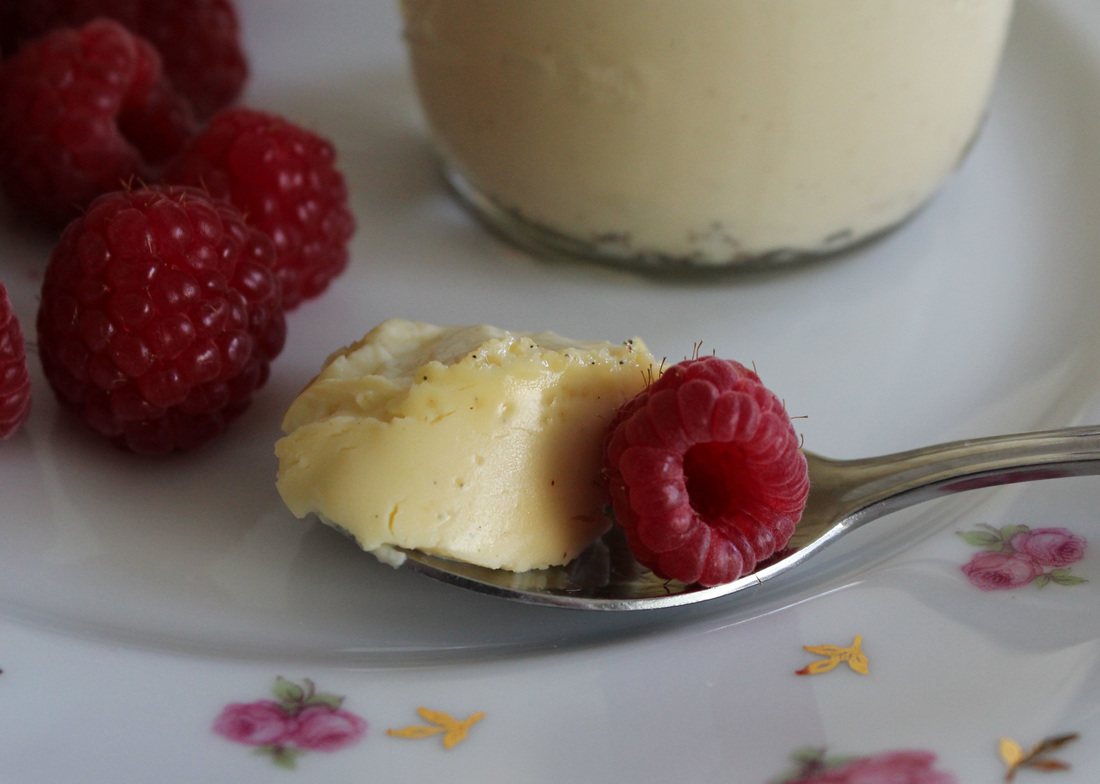 ...pot de creme "little pot of creamy custard" 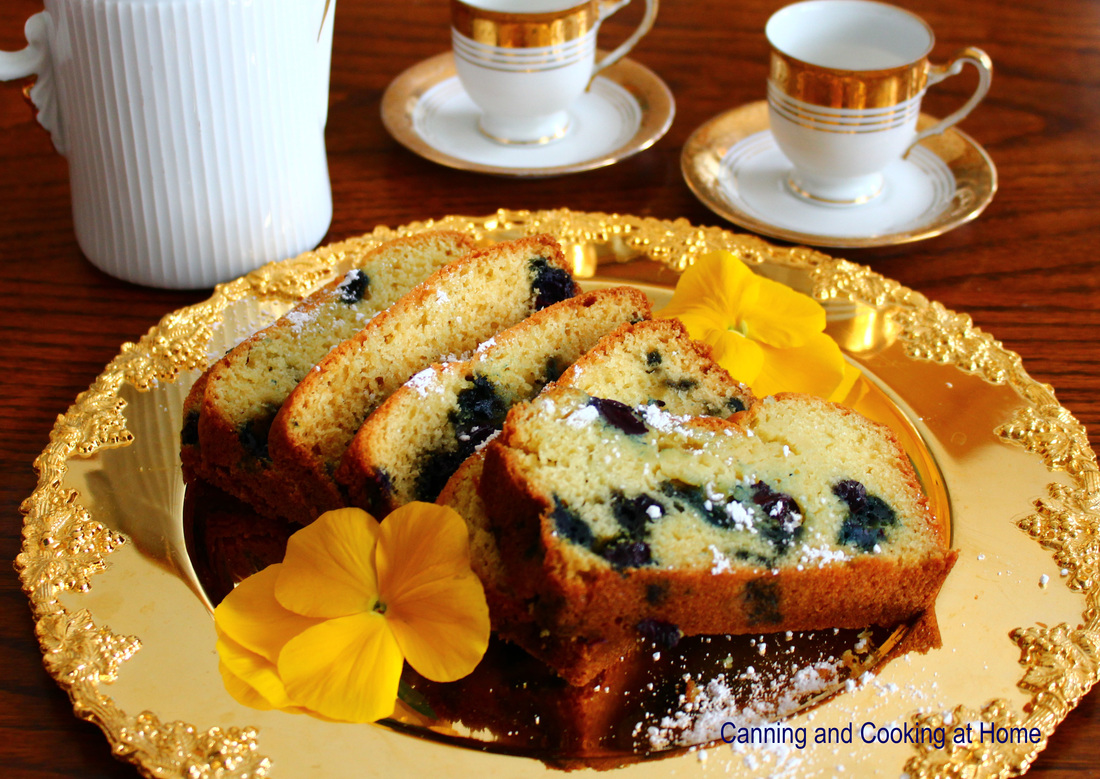 Blueberry & Sour Cream Loaf Blueberry & Sour Cream Loaf
*recipe makes ONE- 9x5 inch loaf Ingredients: 1/2 cup butter, melted 1 cup white sugar 2 eggs 1 teaspoon vanilla extract 1 1/2 cups all-purpose flour 1 teaspoon baking soda 1 teaspoon baking powder 1/2 teaspoon salt 1/2 cup sour cream 1/2 cup chopped walnuts or pecans, *optional 1 cup blueberries (thawed, if frozen) demerara sugar or powdered sugar for sprinkling/topping, *optional Directions: Preheat oven to 350. Grease One 9x5 inch loaf pan. In a large bowl, stir together the melted butter and sugar. Add the eggs and vanilla and mix well. In a separate bowl, sift together the flour, baking soda and salt, stir into the butter mixture until smooth. Finally, fold in the sour cream, *nuts and blueberries. Spread evenly into the prepared pan. Bake at 350 degrees F for 60 minutes, or until a toothpick inserted into the center of the loaf comes out clean. Cool loaf in the pan for 10 minutes before removing to a wire rack to cool completely. Recipe and Photo by: Diane Baker for Canning and Cooking at Home |