Santa Maria Tri Tip with Savory Mexican Rice It's grillin season (ok, we grill year round) butttt - grilling a Tri Tip is one of our favorites. Just leave yours a little on the rare side to it doesn't turn chewy...just sayin'. The best advice I have to offer is to purchase a digital temp reader for your BBQing - it takes the guess work out of 'is this done?" I love grilling a tri tip when its just my husband and I because I know we will have plenty of leftovers and that means making my Savory Mexican Rice the next day with the tri tip and some fresh sweet peppers and onions added, its quite a filling and flavorful dish. ~Enjoy! Diane Santa Maria Tri-Tip with Peppers and Onions Ingredients: (2.5 - 3 pound) Tri-Tip roast Marinade & Basting Sauce: Wishbone Italian Dressing (approx 1.5 Cups) Seasoning Salt Mixture: 1 teaspoon freshly ground black pepper 1 teaspoon cayenne pepper 1 teaspoon smoked paprika 1 teaspoon onion powder 2 teaspoons salt 2 teaspoons granulated garlic 2 teaspoons rosemary Mix together all ingredients in a small bowl Grilled Vegetables: 1 yellow bell pepper 1 orange bell pepper 1 large onion Directions: Brush your Tri-Tip roast with the Marinade and let it sit, covered and refrigerated at least 6 hours, overnight is best. (We used the FoodSaver quick marinade bowl, using the marinate feature on our FoodSaver unit and then placed the airtight bowl into fridge for at least 6 hours) Once done marinating, take roast out of marinade and blot dry (save marinade for basting) Coat both sides of the Tri-Tip roast with the seasoning salt mixture, rubbing it in as you would a dry rub. Let the seasoned tri-tip rest for at least 30 minutes at room temperature. Sear each side of the tri-tip at 650 degrees for 4 minutes each. Remove seared tri-tip from the grill, cover it with foil and let it rest while bringing the grill temperature down to 350 to 400 degrees. (During this cool down period we tossed in a couple of water soaked oak chunks.) Place the tri-tip back in the grill and cook to an internal temperature of 145 degrees for medium rare, basting with the sauce every 5 to 10 minutes. Remove tri-tip from the grill, cover it with foil and let it rest 10 minutes. Cut into slices against the grain. Once vegetables are cooked on grill to your liking, remove from grill and slice into thin strips, mix in with beef and serve over Savory Mexican Rice. Grill Type used: Large Big Green Egg Savory Mexican Rice Ingredients: 2 tablespoons butter 1 1/2 cups long-grain rice 1/2 cup chopped onion 1/4 cup chopped green bell pepper 1/4 cup chopped red bell pepper 2 clove garlic, minced 2 cups water 1 (14 1/2-ounce) can diced tomatoes with green chiles 1 teaspoons chili powder 1 teaspoon salt Directions: In a large saucepan, melt the butter over medium heat. Add the rice, onion, peppers, and garlic. Cook until the rice is browned and vegetables are tender. Stir in the water, tomatoes, chili powder, and salt and bring to a boil. Reduce the heat and simmer, covered, until the rice is tender, about 15 to 17 minutes. Recipe adapted from: Paula Deen 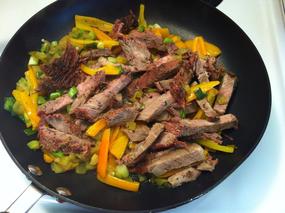
0 Comments
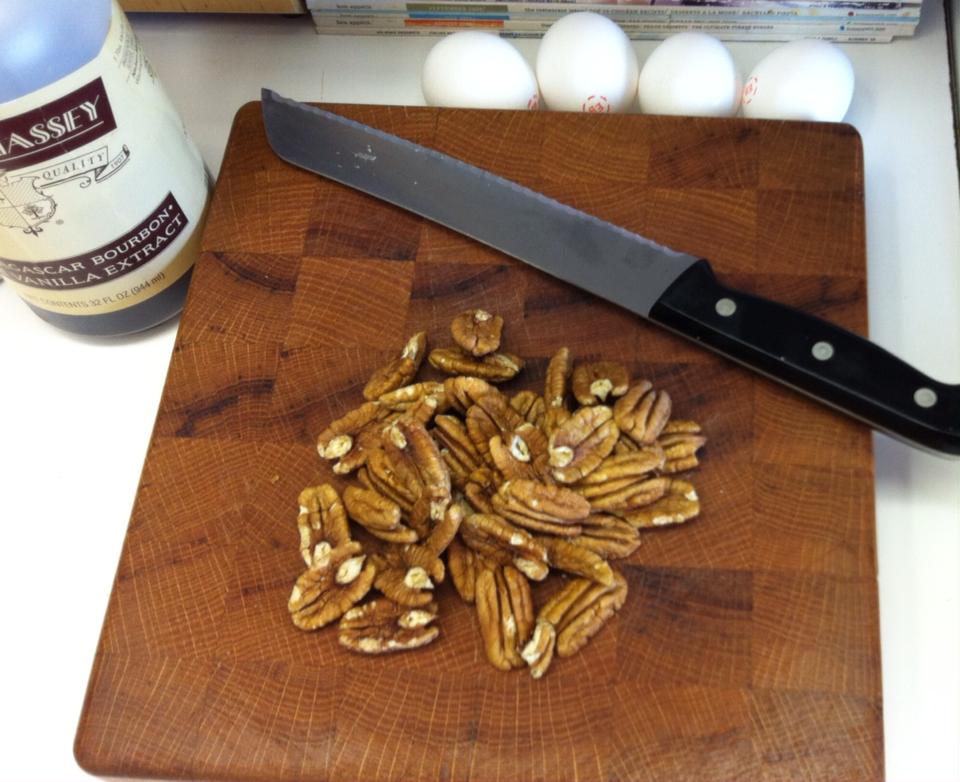
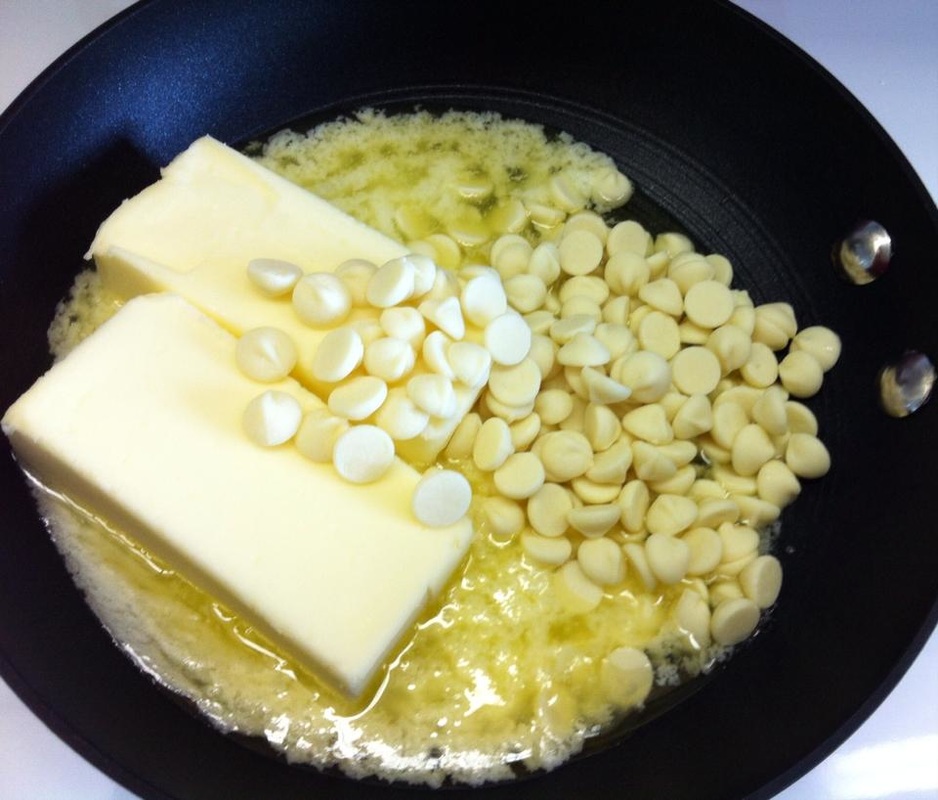
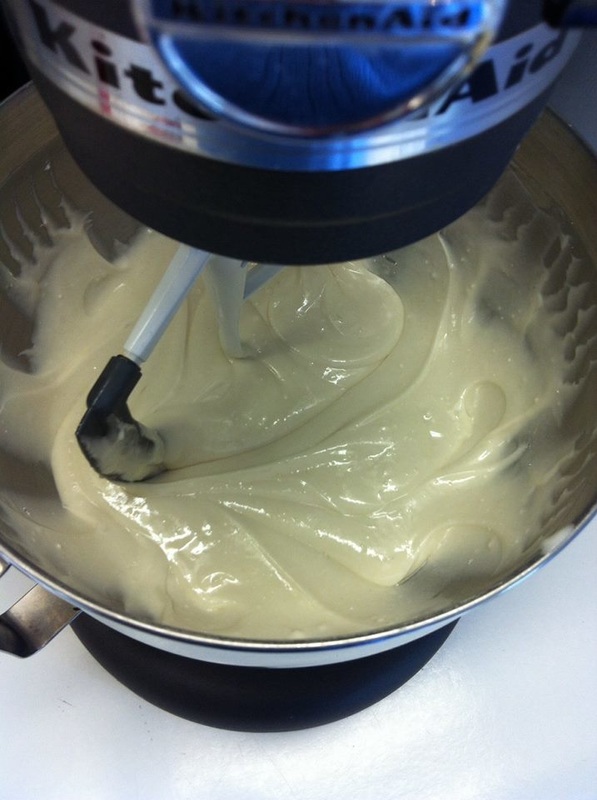
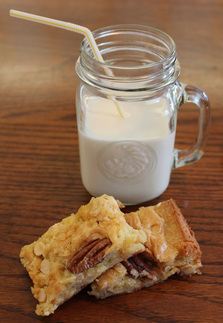
 Pecan & White Chocolate ~ Blonde Brownies Who doesn't love a good brownie? My hubby!! he prefers blondes! LOL well, he doesn't like chocolate all that much but, white chocolate (which really isn't even chocolate but, that's a whole other story) is doable. I am sharing a family recipe that my Mom made quite often. An extra treat is to toss toasted coconut on top too...I just didn't have any on hand and needed to make some of these for a BBQ party we were invited to... Hope you like these as much as we all do! ~Enjoy! Diane Pecan & White Chocolate Blonde Brownies Ingredients:
Directions:
 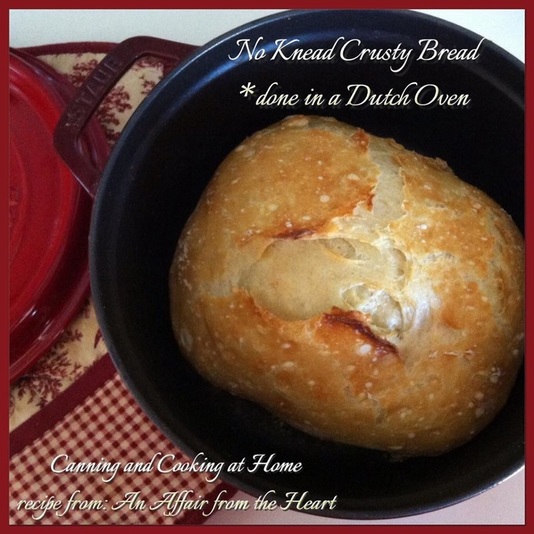 Do you have flour, yeast, water, salt, saran and a dutch oven? that's all you need for this - mixing is by hand, rising on its own (dough needs its time to ferment a good 13-18 hours prior to baking), cooking in dutch oven - your done!! ANYONE can make this! Every once in a while I see a recipe that I just have to try! This was one of them because, well...it sounded too good to be true! and guess what - it IS GOOD and TRULY tasty! While the dough needs to rise for 13-18 hours, it doesn't need your attention during that time so, I made mine the night before and let set overnight - ready to pop in the oven for the morning! It's a truly yummy bread and from a similar/popular recipe from the New York Times that I read a while ago. The recipe I used this time was from Michaela over at An Affair from the Heart. Her bread photo sparked my interest in giving this recipe a try. I am so glad I did, it is a wonderful bread and I cannot wait to make some with roasted garlic and rosemary! My additional bread recipe hints: make sure your water matches what your yeast needs (my water needs to be between 90-110 to activate the yeast I use (RedStar Active Dry Yeast) so, I use a digital thermometer to read water temp before adding into mix. Also, try to make this on days or nights when your house is 'warmer'...the dough rising - likes to be kept around 70 degrees - no worries though - mine turned out great - even with our house at 67 overnight. If you want to add shredded cheeses or herbs, you want to mix that in when you first mix the dough. In the NY Times recipe, they coated their dough 30 mins before baking time with cornmeal (they used a cotton (not terrycloth) kitchen towel, sprinkled with cornmeal all over and placed dough ball in the towel and let the dough ball sit lightly wrapped in the cornmeal and cotton towel 30 minutes before removing towel to bake (gave a nice addition 'presentation' to the crust.) Worried about sticking: Some have suggested placing a round piece of parchment paper on the bottom of the dutch oven to prevent sticking. My dough did not stick but, I made sure the bottom of the dough ball had a bit of flour on it to help (and the additional cornmeal coating will prevent sticking too - if you decide to use that, I did not) Words about the Pot (Dutch Oven): I used my smaller 3 Quart Staub Cast Iron Enameled Coquette. You want to preheat your Dutch Oven IN your oven when you are preheating the oven for baking the bread. Advice says you want "a screaming hot vessel" to add your dough to...as well, a dutch oven is used because the weight of the heavy pot and lid traps steam into the pot and creates the crunchy, crusty, bread outer layer. After baking, when tapped on the bottom of loaf you should hear a hollow thump (meaning the bread is done cooking inside as well - mine was nice and thumpy! lol) Enjoy! Diane 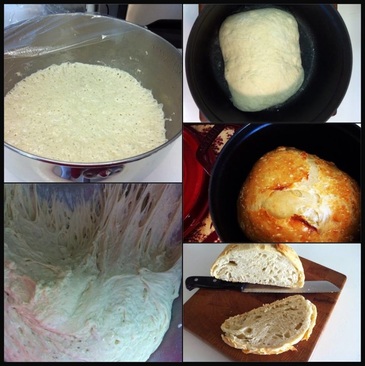 Two left side photos: tiny bubbles all over top of dough indicate its ready to bake, when removing dough from bowl, stretchy threads indicate gluten strands have formed (that's a good thing) No Knead Crusty Bread *made in dutch oven
Ingredients:
Directions:
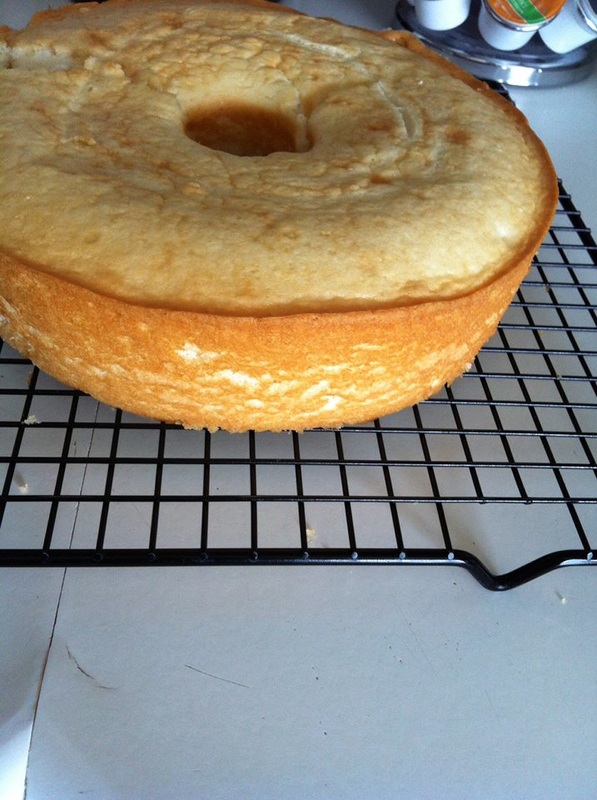
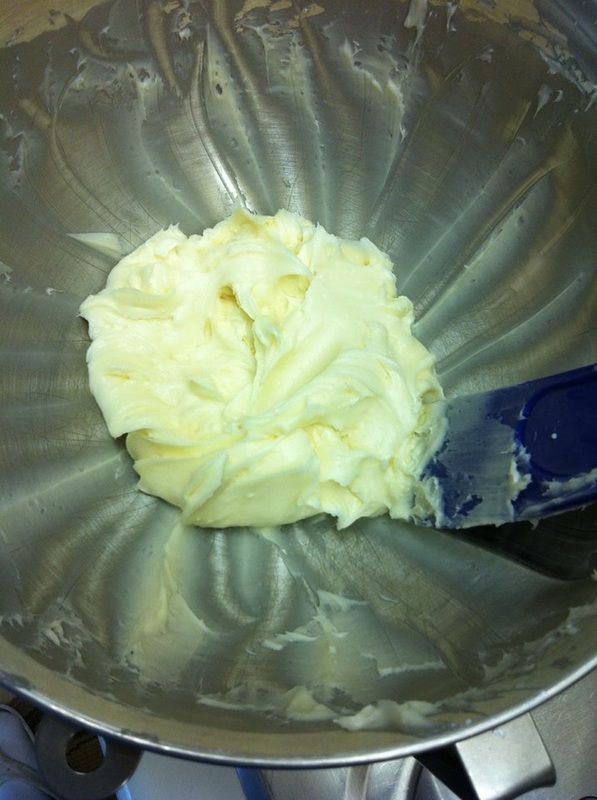
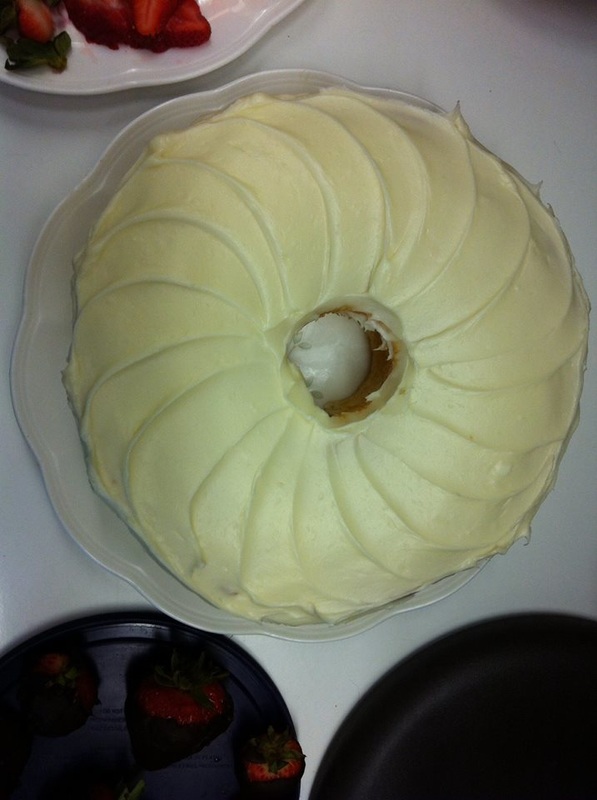
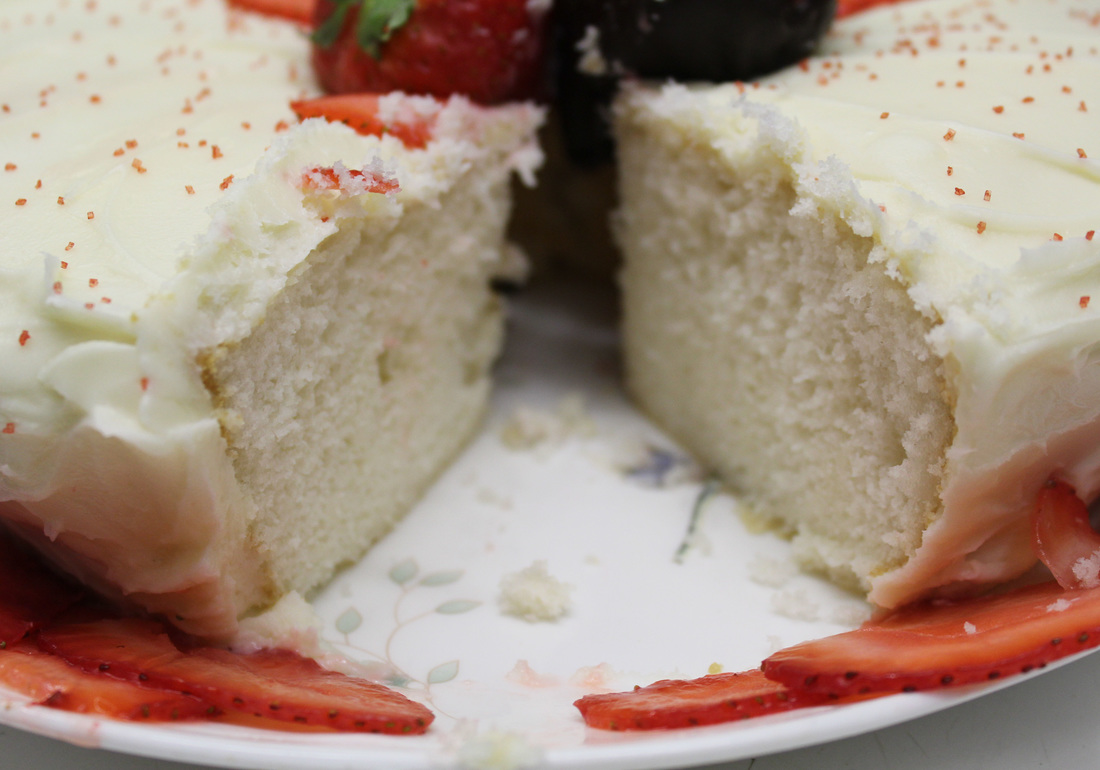
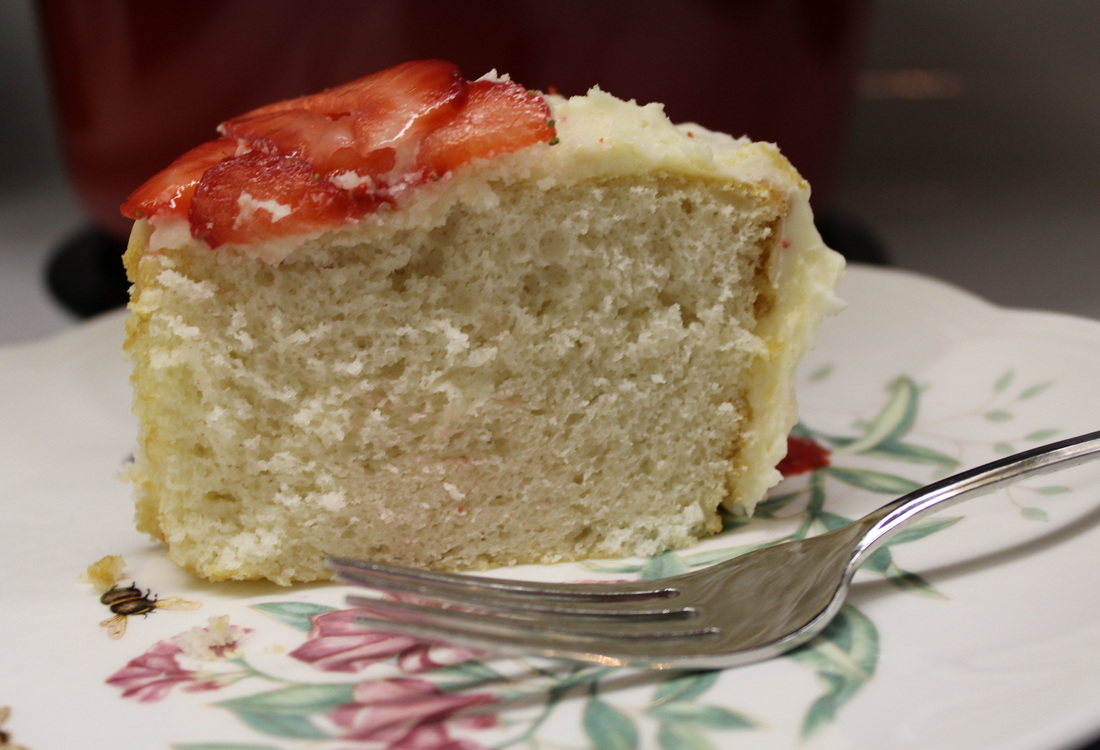
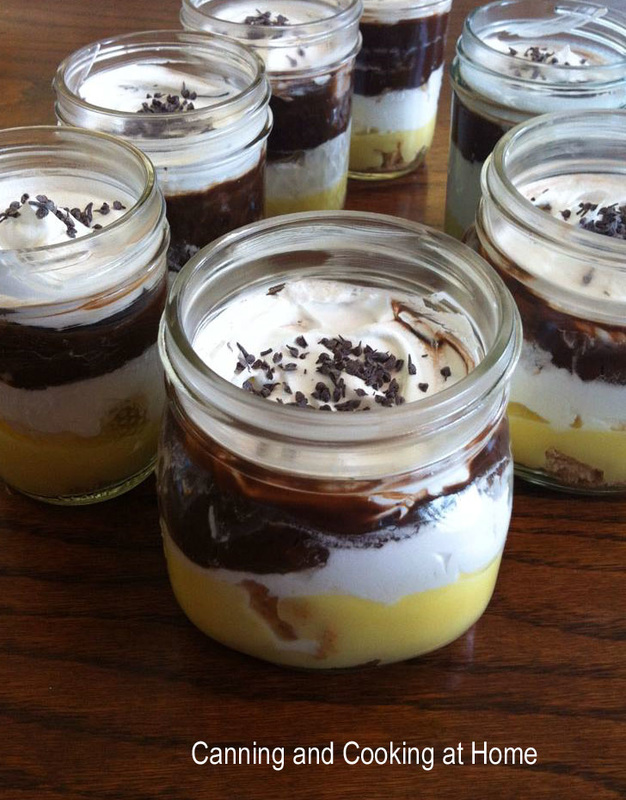 Boston Cream Pie "To-Go" 1 3.9oz Pkg Instant or Cook Type Vanilla Pudding 1 3.9oz Pkg Instant or Cook Type Chocolate Pudding 3 Cups of Milk *divided, to make pudding 1-2 Sleeves of Graham Crackers 1 Tub Cool Whip sprinkles if desired I keep seeing "to-go" parfait jars...kept in fridge and just grab and go. I decided to make my own. I made both puddings and then layered crushed graham crackers, vanilla pudding, cool whip, then repeated the same layering on that with the chocolate pudding ending with sprinkles of chocolate curls...so easy peasy. you can use cook type pudding or instant. I will let the ones I made set in the fridge to soften the grahams for a few hours at minimum. I'm sure in the future I will make ones with berries and maybe banana pudding with sliced bananas etc...the combinations are endless Makes 7 Half Pints Enjoy! Diane Photo by: Diane for Canning and Cooking at Home #followme #summertime #desserts 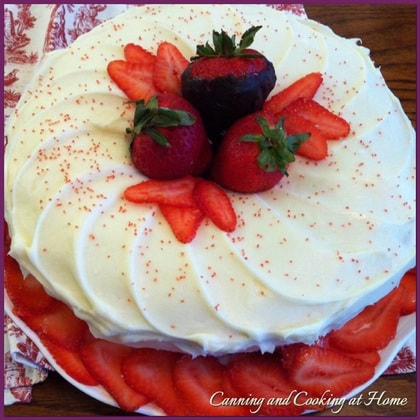 White {bundt} Cake with Fresh Strawberries and Homemade Cream Cheese Frosting Ingredients 12 tablespoons (1 1/2 sticks) unsalted butter, softened 1 1/2 cups sugar 2 cups all-purpose flour 2 teaspoons baking powder 1/4 teaspoon salt 6 large egg whites (3/4 cup) 3/4 cup milk 2 teaspoons vanilla extract Directions: Preheat oven to 350. In a large mixing bowl, beat butter and sugar for about 5 minutes, until light and fluffy. Stir together flour, baking powder and salt. Set aside. Combine egg whites, milk and vanilla extract. Add 1/3 of the flour mixture to butter mixture then add half the milk mixture. Continue to alternate beginning and ending with flour mixture. Scrape bowl and beater often. Pour batter into prepared (greased and lightly floured) bundt pan and smooth top with a metal spatula. Bake cake about 30 to 35 minutes, or until a toothpick inserted in the center emerges clean. Cool in pan on a rack for 5 minutes, then turn out onto a rack, and let cool completely. Frosting: 8 oz cream cheese, brought to room temp 1/2 cup butter, brought to room temp 2 cups powdered sugar 1 tsp vanilla extract Directions: Once the cake has cooled, I place cake in freezer to chill while I make the frosting. cube cream cheese and butter and add to mixer with 1/2 cup of the sugar. Mix on low until everything starts to combine, add in more sugar slowly and the vanilla extract until fully combined - increase speed on mixer to med-high for 2 mins until frosting is light and fluffy. Remove cake from freezer and frost right away Thinly slice strawberries for garnish if preferred. White Cake Recipe Adapted from: N. Malgieri Photos by: Diane Baker for Canning and Cooking at Home |