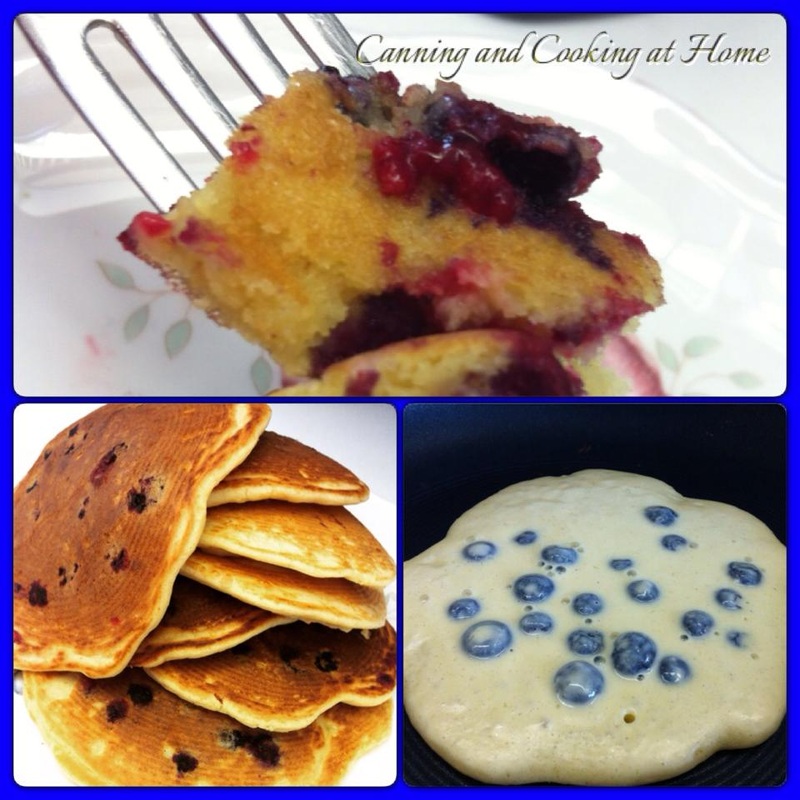
 Blueberry Pancakes
Pancakes: 1 cup flour 1 teaspoon salt 1 teaspoon baking soda 1 egg 1 1/8 cups buttermilk 1/4 tsp vanilla bean paste or 1/2 tsp vanilla extract 2 tablespoons butter, melted 1/2 small carton of blueberries, fresh Beat egg and milk together in bowl, add remaining ingredients and mix well but, leave a bit lumpy & spongy, fold in blueberries. Heat pan or griddle with a light coating of oil, until a drop of water dances when added to surface. I use a ladle to drop batter onto pan/griddle. When bubbles form and start to pop on the surface of the pancake batter, flip and cook other side. I keep my pancakes warm in a 170 oven using an oven-proof dish while other pancakes are being made. When the last pancakes are being finished up - place syrup into a microwave safe container and warm . Serve over pancakes.... ***Diane Tips: *Tip: Microwave your maple syrup in a serving cup (25 seconds or so) and serve warm syrup with your pancakes. *Tip: Warm serving dishes in the oven while pancakes are being made. Keeps your food hotter - longer. Recipe Adapted from: Stonewall Kitchen Photos by: Diane Baker for Canning and Cooking at Home
0 Comments
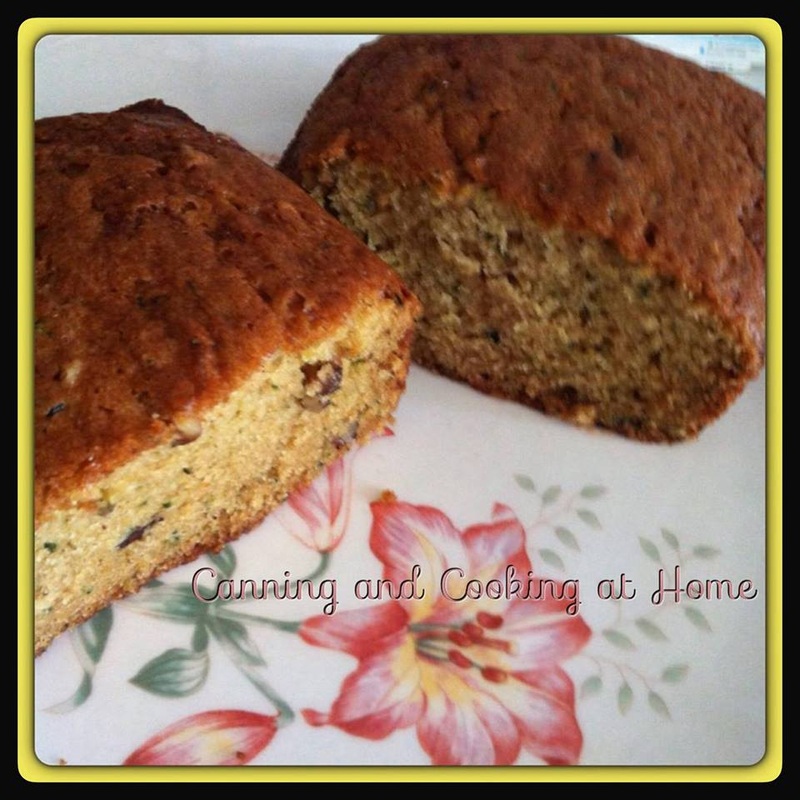 I honestly get phone calls and emails about this recipe all the time, its my most requested. I had stored this recipe in my files on my website and realized I never blogged about it. Well, there is no mincing words, this is simply tasty. Super moist and flavorful. Everything you want in a quick bread. Enjoy! - Diane My Best Banana Bread *recipe makes ONE- 9x5 inch loaf Ingredients: 1/2 cup butter, melted 1 cup white sugar 2 eggs 1 teaspoon vanilla extract 1 1/2 cups all-purpose flour 1 teaspoon baking soda 1/2 teaspoon salt 1/2 cup sour cream 1/2 cup chopped walnuts or pecans 2 medium bananas, mashed with fork. *demerara sugar for sprinkling/topping Directions: Preheat oven to 350. Grease One 9x5 inch loaf pan. In a large bowl, stir together the melted butter and sugar. Add the eggs and vanilla, mix well. Combine the flour, baking soda and salt, stir into the butter mixture until smooth. Finally, fold in the sour cream, walnuts and bananas. Spread evenly into the prepared pan. Bake at 350 degrees F for 60 minutes, or until a toothpick inserted into the center of the loaf comes out clean. Cool loaf in the pan for 10 minutes before removing to a wire rack to cool completely. Recipe and Photo by: Diane Baker for Canning and Cooking at Home 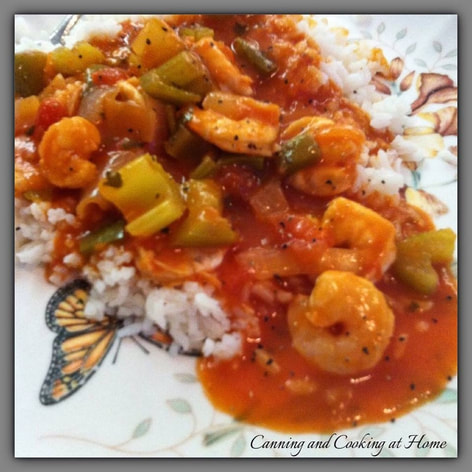 One of our favorite dishes that I don't make often enough. It reminds me of when I was younger. There are just "those dishes" that bring memories and this one is the recipe my Mom loved to make, and she served with a side spinach salad. I made it for dinner tonight. I did use a pint of my own pressure canned stewed tomatoes and homemade tomato paste but, you can use store bought and still enjoy all the great flavors of this dish. Enjoy! Diane Shrimp Creole - Louisiana Style Ingredients: 2 1/2 pounds Shrimp; fresh, uncooked, peeled and de-veined large count 1 Tablespoon creole seasoning; such as 'Tony Chachere's' ***** 4 cups cooked long-grain white rice ***** 8 Tablespoons butter 8 Tablespoons flour 2 cups chopped onions or shallots 1 cup chopped green or red bell pepper 1 cup chopped celery 1 teaspoon salt 1/2 teaspoon cayenne pepper 2 Tablespoons chopped garlic 5 cups water one large 32 oz can stewed tomatoes two cans of tomato paste 1 cup shrimp stock 1 teaspoon hot sauce, or to taste 2 Tablespoons apple cider vinegar, or to taste 1/2 cup chopped green onions (optional) 2 Tablespoons fresh chopped parsley Directions: Prepare your rice according to package directions; and keep warm. Toss your cleaned shrimp with the creole seasonings in a bowl and set aside. In a large dutch oven, over medium heat, melt the butter and stir in flour until flour browned and nutty smelling. Add the onions, peppers, and celery to the pan. Season the vegetables with salt and cayenne. Saute the vegetables until they are wilted, about 6 minutes. Add in the garlic and saute an additional 2 minutes. Stir in the water and tomatoes. Bring the entire mixture to a boil and reduce to a simmer; continue to cook for 20 minutes. Add the shrimp stock, hot sauce, apple cider vinegar (2 Tbs or to taste) and continue to cook for 10 minutes longer. Taste for any additional seasonings. Add in fresh shrimp to the pot. Cook the shrimp until they are pink and cooked through,about 6 to 7 minutes, do not over-cook shrimp. Stir in green onions and parsley. Serve over cooked white rice. Recipe adapted from: Phyllis's Kitchen Photos by: Diane Baker for Canning and Cooking at Home Pinterest Pin: https://www.pinterest.com/pin/530510031081195854/ 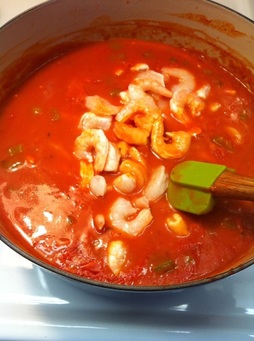 The shrimp ready to go into the pot for final prep 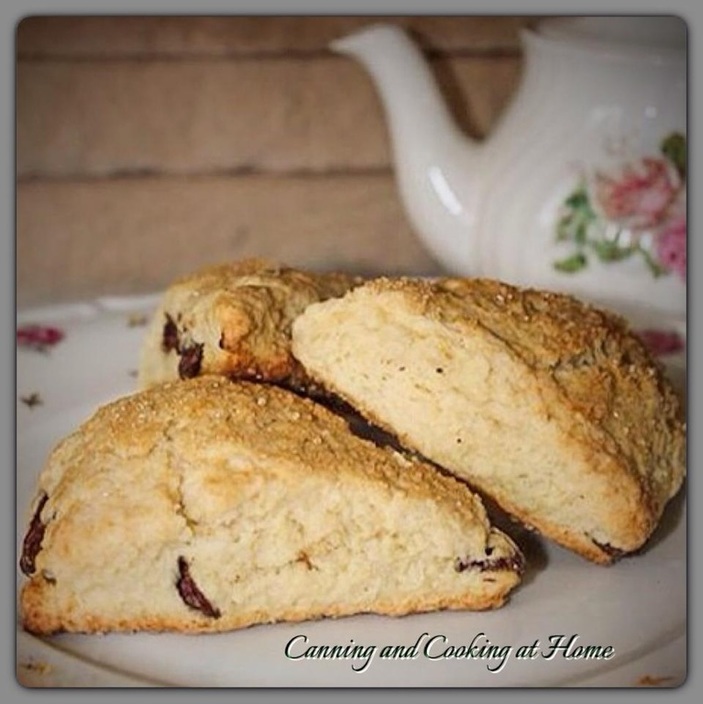 I'll be the first to admit - I am a lousy baker...but, I am a decent cook. Baking often seems to allude me but, with the helpful folks over at King Arthur Flour and their great recipes, I am catching on! This morning my mission was to make Traditional Scones that would do my Scottish Grandmother proud. I admit that I would have added fruits and nuts if it weren't for the new cherry filled chocolate chips that were staring me down. The chips were the perfect compliment to this light, flaky biscuit-type treat. Perfect with my morning cup of coffee. I will say that of everything I've ever baked, this was the easiest by far. Really! You have to give it a try! Enjoy ~ Diane Scones Ingredients: 2 3/4 cups King Arthur Unbleached All-Purpose Flour 1/3 cup sugar 3/4 teaspoon salt 1 tablespoon baking powder 1/2 cup cold butter 1 cup to 2 cups chopped dried fruit, chocolate or other flavored chips, nuts, or a combination, optional 2 large eggs 2 teaspoons vanilla extract or the flavoring of your choice 1/2 cup to 2/3 cup half and half or milk topping 2 teaspoons milk 2 tablespoons sparkling white sugar or cinnamon sugar, optional Directions: 1) In a large mixing bowl, whisk together the flour, sugar, salt, and baking powder. 2) Work in the butter just until the mixture is unevenly crumbly; it's OK for some larger chunks of butter to remain unincorporated. 3) Stir in the fruit, chips, and/or nuts, if you're using them. 4) In a separate mixing bowl, whisk together the eggs, vanilla or other flavor, and half and half or milk. 5) Add the liquid ingredients to the dry ingredients and stir until all is moistened and holds together. 6) Line a baking sheet with parchment; if you don't have parchment, just use it without greasing it. Sprinkle a bit of flour atop the parchment or pan. 7) Scrape the dough onto the floured parchment or pan, and divide it in half. Round each half into a 5" circle (if you haven't incorporated any add-ins); or a 6" circle (if you've added fruit, nuts, etc.). The circles should be about 3/4" thick. 8) Brush each circle with milk, and sprinkle with coarse white sparkling sugar or cinnamon sugar, if desired. 9) Using a knife or bench knife that you've run under cold water, slice each circle into 6 wedges. 10) Carefully pull the wedges away from the center to separate them just a bit; there should be about 1/2" space between them, at their outer edges. 11) For best texture and highest rise, place the pan of scones in the freezer for 30 minutes, uncovered. While the scones are chilling, preheat the oven to 425°F. 12) Bake the scones for 20 to 25 minutes, or until they're golden brown. When you pull one away from the others, it should look baked all the way through; the edge shouldn't look wet or unbaked. 13) Remove the scones from the oven, and cool briefly on the pan. Serve warm. When they're completely cool, wrap in plastic and store at room temperature for up to several days. Recipe by: King Arthur Flour **make sure to check out their complete recipe and "Bakers Notes" which are so helpful too!! King Arthur Flour Scone Recipe Photos by: Diane Baker for Canning and Cooking at Home 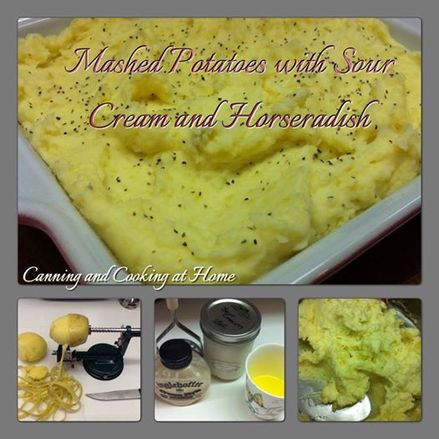 Mashed Potatoes with Sour Cream and Horseradish
Ingredients 3 pounds boiling potatoes, peeled Kosher salt 1 1/2 cups milk 6 tablespoons butter, melted 1/2 cup sour cream 1/2 teaspoon freshly ground black pepper *more on top if preferred 2-3 Tbs creamed horseradish Directions Cut the potatoes into 1-inch cubes and place them in a large pot. Cover the potatoes with cold water and add enough salt so the water tastes quite salty. Bring to a boil, then lower the heat and simmer, uncovered, for about 10 to 12 minutes, until the potatoes fall apart easily when pierced with a fork. Meanwhile, warm the milk and butter in a small saucepan, making sure it doesn't boil. Set aside until the potatoes are done. Microwave/melt butter and set aside. When the potatoes are tender, drain them in a colander. Mash with potato masher or run thru food mill. As soon as the potatoes are mashed, slowly whisk in enough of the hot milk/butter mixture to make the potatoes very creamy. Add 2 teaspoons of salt and the sour cream and pepper and whisk to combine. Add creamed horseradish to taste. Sprinkle top with black pepper if preferred. Taste for seasoning and serve hot. Recipe partially Adapted from: Ina Garten Photos by: Diane Baker for Canning and Cooking at Home |


