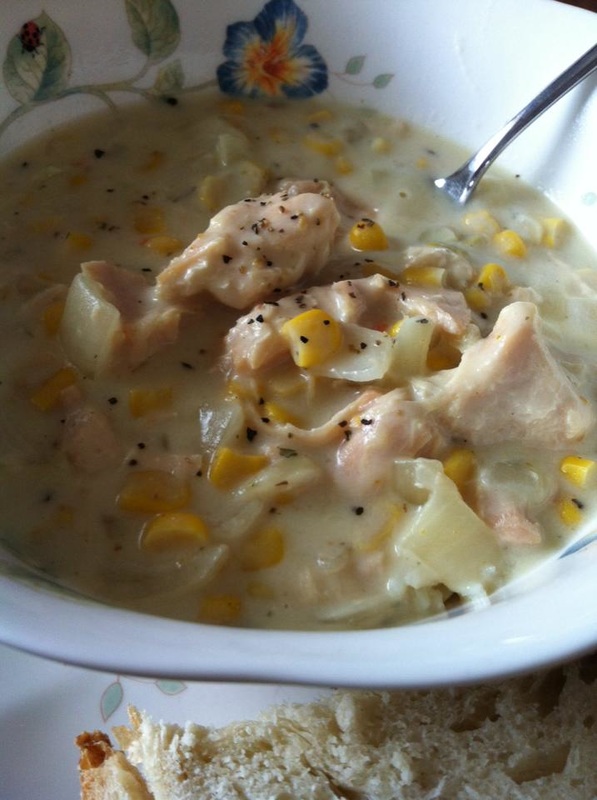
Chicken Corn Chowder with Rice *and homemade No Knead Bread Ingredients: 4 tbs butter 4 tbs all purpose flour 4 cups of milk 2 boneless, skinless cooked chicken breasts, cubed *or 1 pint pressure canned boneless chicken 1-2 cups cooked rice *wild rice or brown rice works if you are going to freeze 1 can of corn, *or 1 half pint of pressure canned corn 1 large onion, chopped 1 small red bell pepper, diced seasonings to taste: salt & pepper 1 Tbs sweet basil 1-2 Tbs chives 1/2 Tbs parsley *hot sauce, optional *1-2 Tbs Better then Bullion Chicken paste, optional Instructions: Start by making a roux in a large stock pot. Melt butter over medium heat. Once melted, add chopped onions & diced bell pepper and cook until onions are translucent (approx 10 mins) Add flour and stir vigorously using a whisk. Cook the flour/onion/peppers mixture for about 1 minute. The flour will start to brown. Slowly begin to add your milk *warmed in a microwave to get the chill off milk, this will speed up incorporating it into soup without lumps. Whisk in milk, 2 cups at a time. Making sure you eliminate any lumps. Add your seasonings and taste as you go. Bring soup up to a boil, then reduce to low simmer (stirring constantly) Add in corn and chicken. Adjust any seasonings. Simmer on low until hot and ready, usually about 15 minutes. Recipe Note: I cook 2 cups of rice in chicken broth - this ensures I've made more then enough rice for eveyrones' tastes but, won't take over and thicken up the soup in its pot...I serve the rice on the side with this soup, people can add in as much or as little rice as they like. Any leftover rice and be used to make fried rice the next day too - BONUS! I also cut my no knead bread (click here for recipe) up into manageable pieces so everyone can dunk into the soup. ~Enjoy! Recipe & Photos by: Diane Baker for Canning and Cooking at Home
0 Comments
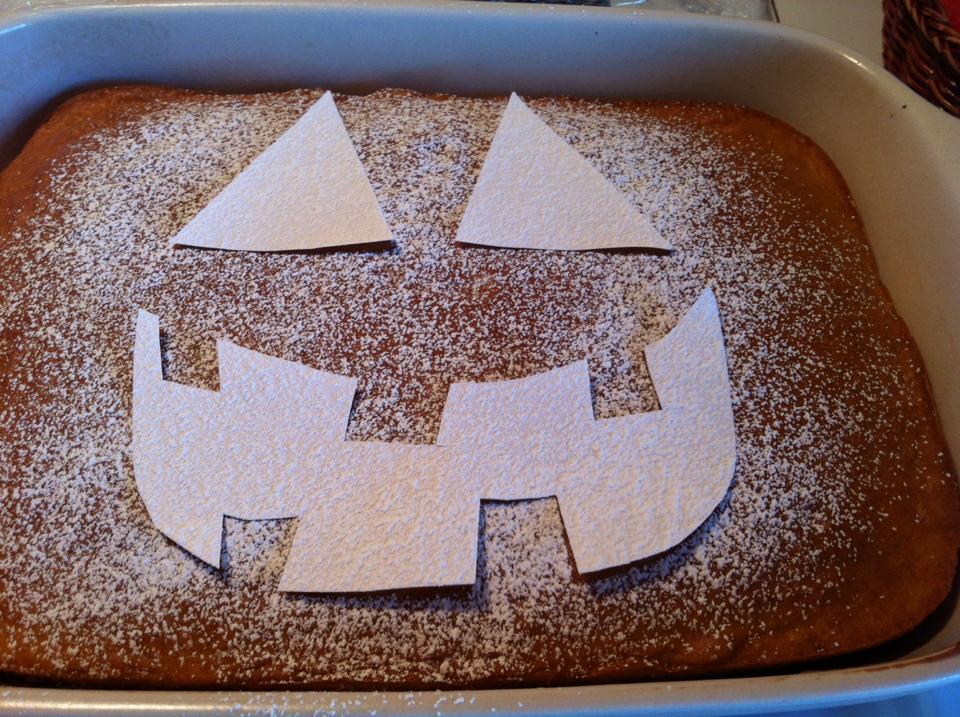
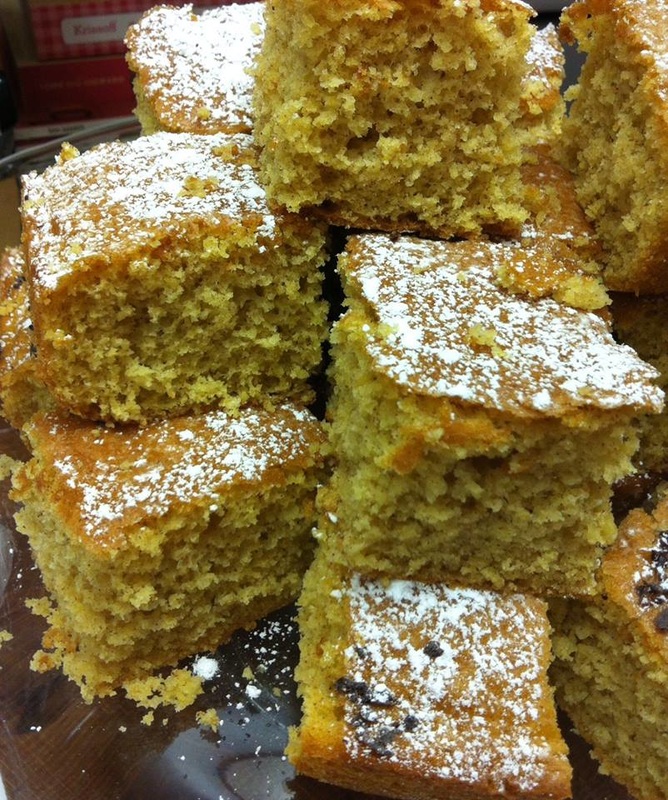
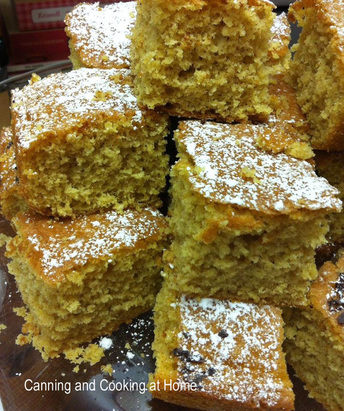 I bought and thought I'd try some baking emulsion...the taste withstands the heat of baking better then an extract. I am fully impressed! I can't wait to try the buttery emulsion in my regular baked goods! I can only imagine how this will enhance my jams and jellies too!! This is a simple recipe and I dusted with powdered sugar before serving...a nice cinnamon/vanilla frosting would have been just as good but, these bars were being served in the morning with coffee so, I went with a simple dusting and it lets the spiced cake shine through... Enjoy! ~Diane Pumpkin Spice Bars Ingredients 1 box vanilla cake mix 1 cup sugar 1 cup flour 1 cup pureed pumpkin ( not pureed pumpkin pie filling) 1 1/2 teaspoon pumpkin pie spice 1 teaspoon spiced pumpkin pie emulsion or pure vanilla extract 3 eggs, room temperature Instructions Preheat oven to 350. Spray 9x13 cake pan with baking spray made with flour. Set aside. In a mixing bowl, sift together dry ingredients. In another bowl, combine wet ingredients. Add wet ingredients to dry ingredients and beat in electric mixer for 2 minutes. Be sure to scrape down sides of bowl after 1 minute. Add batter into prepared pan and bake for 35 minutes or until toothpick inserted into middle comes out clean. Remove from oven and let pans cool on cookie rack for 10 minutes. Once cooled, sprinkle with powdered sugar and cut cake into squares from pan and serve. This cake can be prepared in two 8" cake pans too (frosting for a full cake below) ********************************** If you want to Frost: Cinnamon vanilla frosting 4 sticks unsalted butter, softened 4 cups powdered sugar 1 teaspoon pumpkin pie emulsion or pure vanilla extract 1/2 teaspoon cinnamon To prepare frosting; In an electric mixer, beat butter for 5 minutes on high speed until light and fluffy and double in volume. Add powdered sugar 1/2 cup at a time on low speed until combined and then increasing to high speed for one minute after each addition. Repeat until all sugar in incorporated making sure to scrape down bowl. Stir in pumpkin pie emulsion or vanilla and cinnamon on low speed until fully combined Recipe adapted from: Buttercream Bakehouse Photos by: Diane Baker for Canning and Cooking at Home 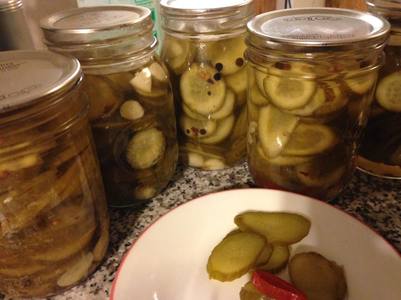 JD's Burger Pickles
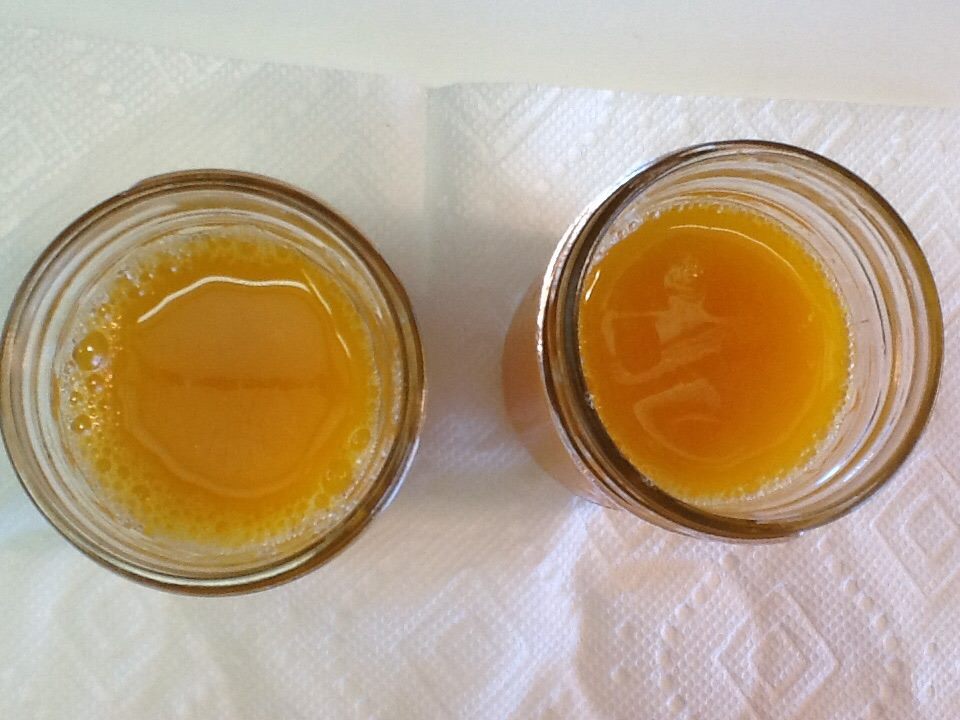
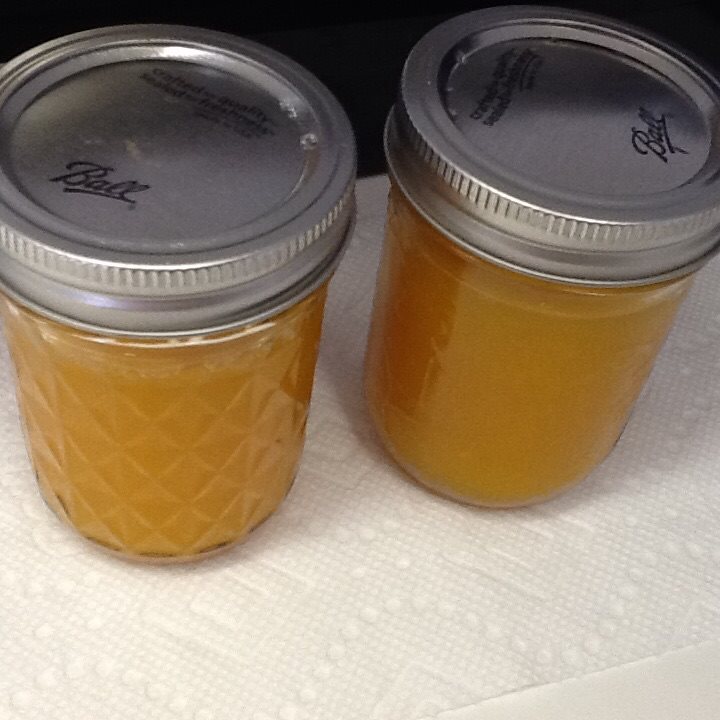
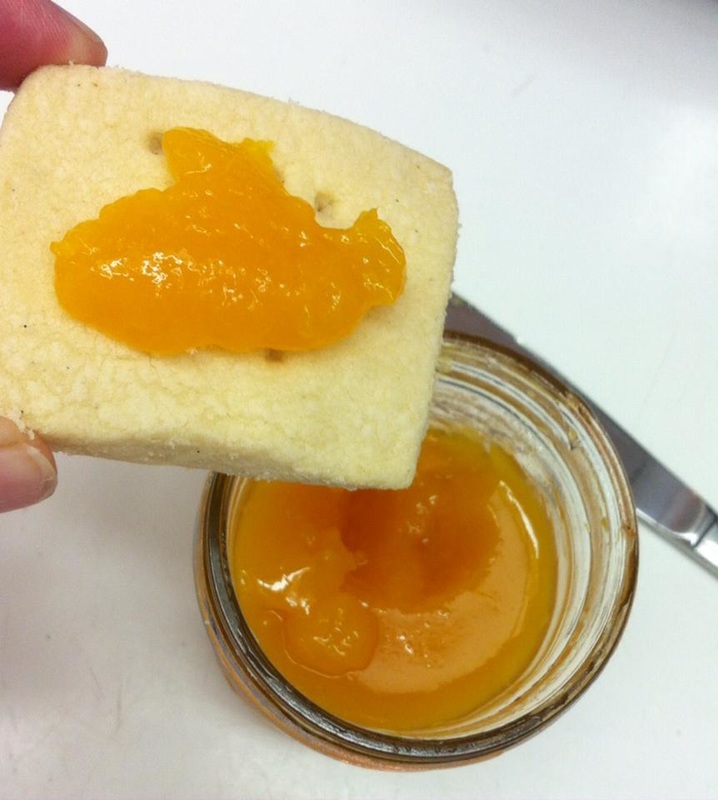
4 pounds pickling cucumbers, sliced (approx. 1 heaping gallon of slices) Brine: 5 cups water 5 cups vinegar 4 Tbs pickling/canning salt 6 cloves, fresh garlic, peeled and sliced 2 Tbs Peppercorns Add to Each Pint Jar along with cucumber slices: 1/2 tsp Ball Pickling Spice Mix 2-4 cloves, fresh garlic, peeled and scored 2 Jalapeno slices/rings 1/8 tsp Pickle Crisp Directions: Add water, vinegar, pickling/canning salt, garlic, and peppercorns to large pot and bring to full rolling boil. To each prepared, sanitized pint jar, add 1/2 tsp. Ball Pickling Spice Mix , 2 - 4 cloves garlic, and 2 jalapeno rings (optional). Divide cucumber slices between approx. 8 pint jars, add 1/8 tsp. Pickle Crisp, top off with hot brine to 1/2" head-space, wipe rims of jars, secure lids and bands and process in a boiling bath for 10 minutes/pints 15 minutes/quarts or as required for your altitude/elevation. Makes approx 8 pints Recipe and Photos by: JD Provence for Canning and Cooking at Home 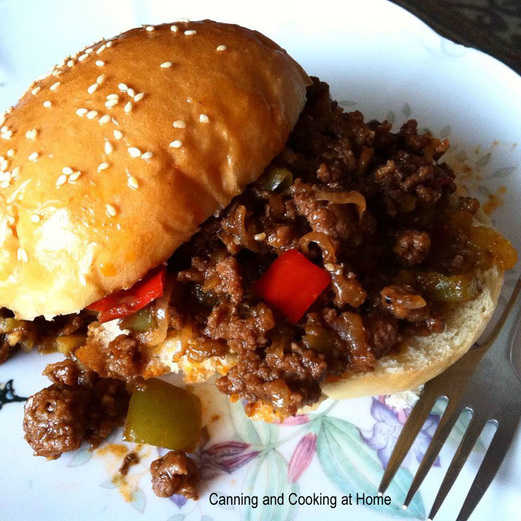 Sloppy Joes 4 buns/Sandwiches Ingredients: 1 1/4 lbs ground beef 1 small onion, diced 1 small sweet bell pepper, diced 1 stalk celery, diced 2 cloves garlic, minced 1 can (15 oz) tomato sauce 1/4 cup ketchup 1 Tbs brown sugar 1 tsp chili powder 1/2 tsp dry mustard 1/4 tsp red pepper flake (optional) Worcestershire sauce, hot sauce, salt & pepper, to taste 4 buns and 1 Tbs butter, softened (my Homemade Bun Recipe, click here) Directions: In a large skillet, heat oil over medium-high heat. Add onion, bell pepper and celery; season with salt and pepper. Cook, stirring frequently, until vegetables are softened, 5 to 7 minutes. Add ground beef and garlic to skillet. Cook, breaking up meat with a spoon, until beef is no longer pink, 5 to 7 minutes. Stir tomato sauce, ketchup, brown sugar, chili powder, dry mustard and red pepper flakes into beef mixture in skillet. Simmer until thickened, stirring occasionally, 5 minutes. Season the mixture with any Worcestershire sauce, hot sauce, more salt and pepper, as desired. To serve, spread the bun/rolls with butter and brown them on a griddle or skillet. Spoon a good amount of the meat mixture onto the bottom roll, and then top with the other half. Double this entire recipe for 8 buns/Sandwiches. Recipe & Photos by: Diane Baker for Canning and Cooking at Home Link to my Homemade Buns, click here 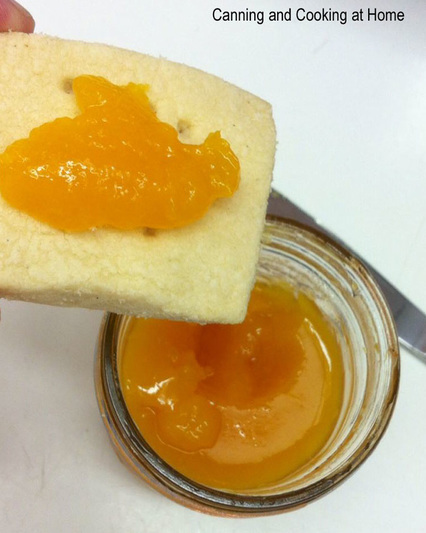 Remember: Replacing Sugar with Honey: you can replace up to 1/2 the sugar in a recipe - up to 2 cups limit. I tried this recipe as a small batch just to make sure we liked the taste and that the jelly set up properly...while my initial idea was to use honey and sugar, I thought I'd try Splenda for a no sugar jelly... I have also included my favorite sugar/honey spiced orange jelly recipe that we love...~Enjoy! Diane Orange Jelly {Sugar Free} *I used Splenda in mine Ingredients: 4 cups prepared orange juice 3 Tbsp Ball® RealFruit Low or Sure Jel Low/No-Sugar Needed Fruit Pectin 1/2 tsp. butter or margarine, optional Up to 3 cups sugar, 1-1/2 cups SPLENDA® No Calorie Sweetener: Granular, 3/4 to 1 cup honey, or desired amount of other artificial sweeteners (optional) 3 to 5 half pint glass preserving jars with lids and bands Directions: Please read Using Boiling Water Canners before beginning. If this is your first time canning, it is recommended that you read Principles of Home Canning. Procedure: Sterilize canning jars and prepare two-piece canning lids according to manufacturer's directions. To make jelly. Place orange juice, in a large saucepan. Stir in half of your sugar choice (mix the other half with pectin, set aside) . Place on high heat and, stirring constantly, bring quickly to a full rolling boil that cannot be stirred down. Add remaining sugar with pectin, continue stirring, and heat again to a full rolling boil. Boil hard for 1 minute. Remove from heat. skim off any foam quickly. Pour hot jelly immediately into hot, sterile jars, leaving ¼ inch headspace. Wipe rims of jars with a dampened clean paper towel; adjust two-piece metal canning lids. Process in a Boiling Water Canner 10 minutes or according to your altitude. Recipe Adapted from: Ball Fresh Preserving **********************Alternate recipe**************************************** Spiced Orange Jelly {Not Sugar Free} Ingredients: 2 cups orange juice (about 5 medium oranges) 1/3 cup lemon juice (about 2 medium lemons) 2/3 cup water 1 package powdered pectin 2 tablespoons orange peel, finely chopped 1 teaspoon whole allspice ½ teaspoon whole cloves 4 sticks cinnamon, 2 inches long 3½ cups sugar (you can replace sugar: using 1 3/4 cups sugar and 1 3/4 cups of honey in this recipe) 3 to 5 half pint glass preserving jars with lids and bands Directions: Please read Using Boiling Water Canners before beginning. If this is your first time canning, it is recommended that you read Principles of Home Canning. Procedure: Sterilize canning jars and prepare two-piece canning lids according to manufacturer's directions. To make jelly. Mix orange juice, lemon juice, and water in a large saucepan. Stir in pectin. Place orange peel, allspice, loves, and cinnamon sticks loosely in a clean white cloth; tie with a string and add to fruit mixture. Place on high heat and, stirring constantly, bring quickly to a full rolling boil that cannot be stirred down. Add sugar, continue stirring, and heat again to a full rolling boil. Boil hard for 1 minute. Remove from heat. Remove spice bag and skim off foam quickly. Pour hot jelly immediately into hot, sterile jars, leaving ¼ inch headspace. Wipe rims of jars with a dampened clean paper towel; adjust two-piece metal canning lids. Process in a Boiling Water Canner 10 minutes or according to your altitude. Recipe Adapted from: NCHFP All Photos by: Diane Baker for Canning and Cooking at Home |