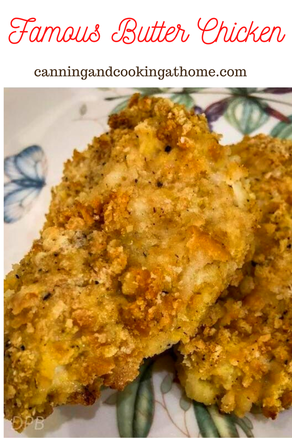
 Famous Butter Chicken Ingredients: 2 eggs, beaten 1 cup crushed buttery round cracker crumbs 1/2 teaspoon garlic salt 1/8 teaspoon cayenne powder ground black pepper, to taste 3-4 skinless, boneless chicken breast halves 1/2 cup butter, cut into pieces Directions: Preheat oven to 375 degrees. Place eggs and cracker crumbs in two separate shallow bowls. Mix cracker crumbs with garlic salt, cayenne and pepper. Dip chicken in the eggs, then dredge in the crumb mixture to coat. Arrange coated chicken in a large baking dish. Place pieces of butter on and around the chicken. Bake in the preheated oven for 40 minutes, or until chicken is no longer pink and juices run clear.
2 Comments
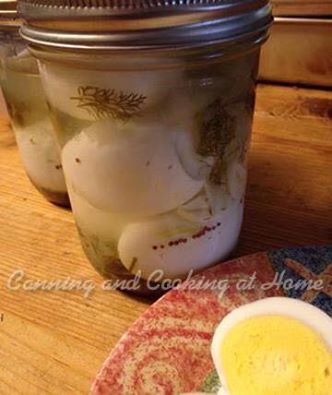 Pickled Eggs
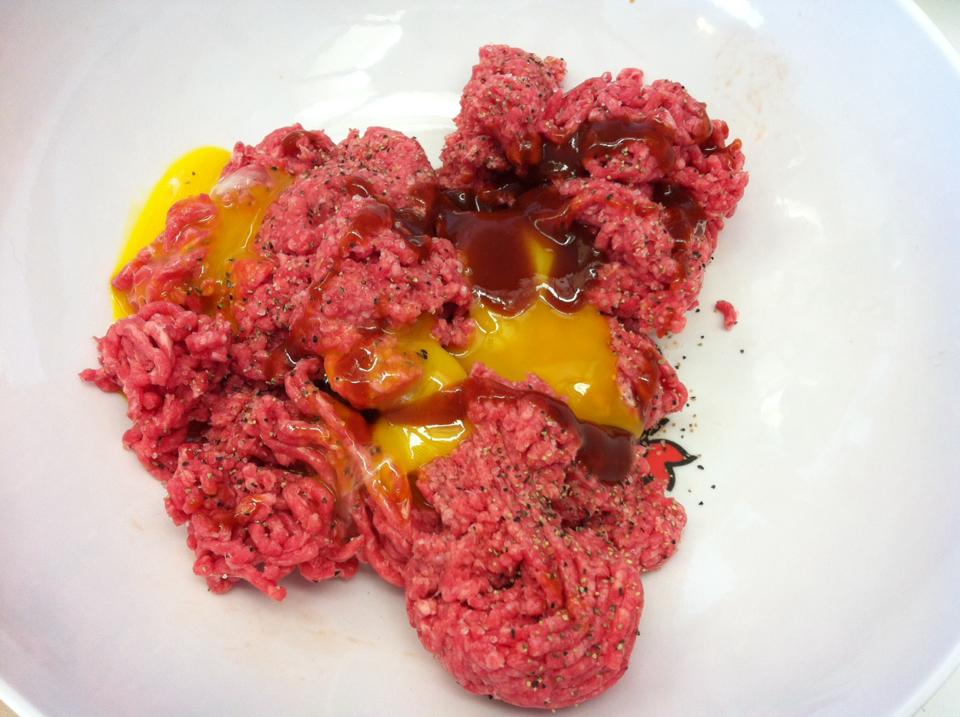
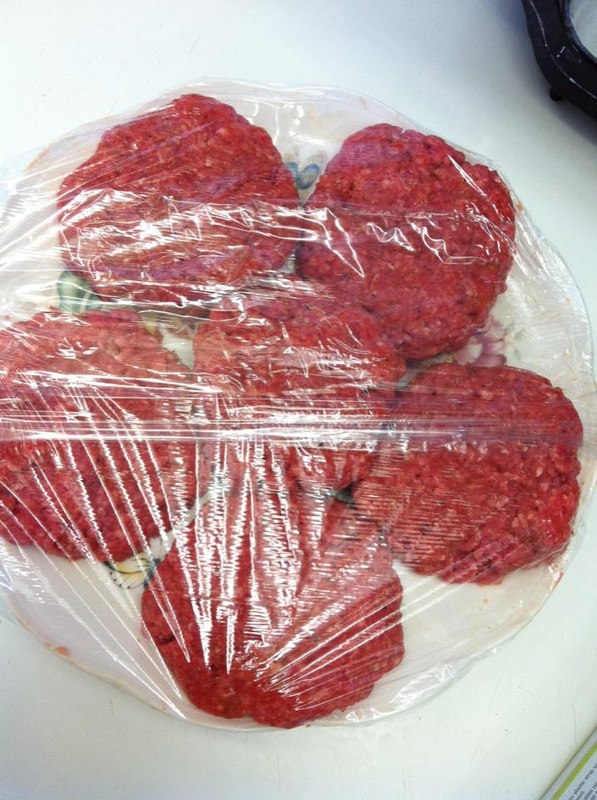
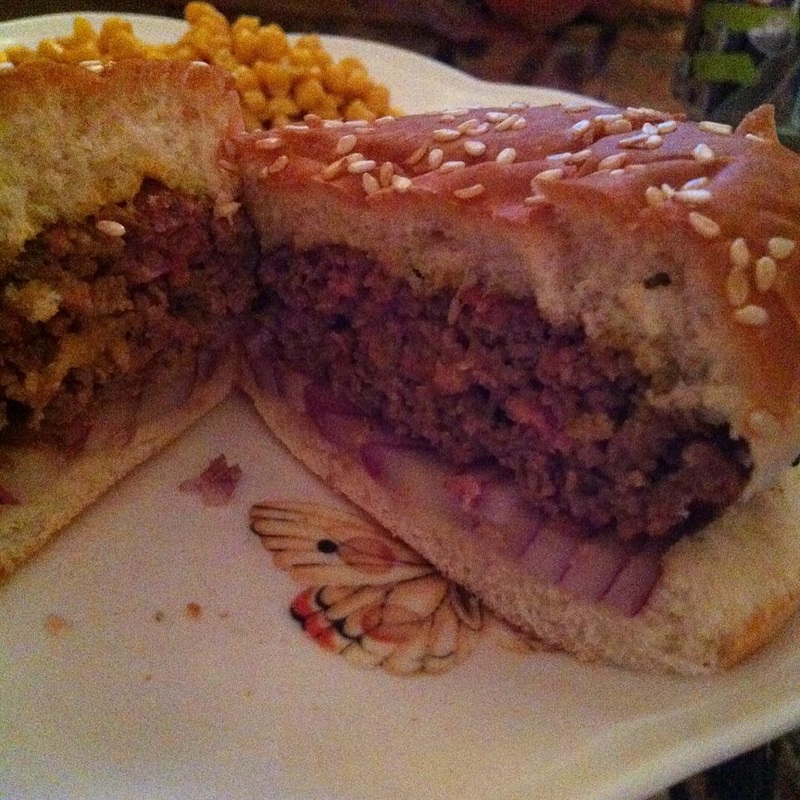
*a guest post by JD Ingredients: 18 eggs 4 cups vinegar 1 cup water 2 Tbsp salt 1 bunch fresh dill 4 cloves garlic, sliced 1 Tbsp mustard seed Directions: Boil and peel eggs and place in sanitized jars, with enough room to cover with liquid. Add all ingredients except eggs to sauce pan, bring to full rolling boil, reduce heat and boil 5 minutes. Pour over eggs in jars, and put lids on. Refrigerate as soon as jars cool, allow eggs to marinate in brine 1 - 2 weeks. Keep refrigerated. Recipe & Photo by: JD Provence for Canning and Cooking at Home 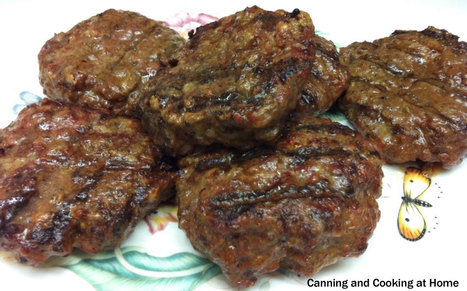 Always in search of the best burger to make at home - I thought I'd give Ina Garten's recipe a try. I used Angus Beef as it was on sale, and does add a bit more flavor. We grilled the burgers on our Big Green Egg and all I can say is that something magical happened and turned this simple recipe into a great tasting, restaurant quality $12 burger!! My husband and I both agree that this is excellent. I'm so happy that the snow is on its way out over here and we can get back to some serious grilling! ~Enjoy! Diane Ina's Real Hamburgers Recipe Ingredients: 1 pound ground chuck ** (80/20) **this is the key to a great burger, the fat content 1/2 pound ground sirloin ** (85/15) 3/4 tsp kosher salt 1/4 tsp ground black pepper 1 1/2 Tbs steak sauce 3 egg yolks 2 Tbs unsalted butter, cut into 6 pieces. 6 burger buns Directions: Place ground beef in a large bowl. Sprinkle salt & pepper, steak sauce over ground beef. Add egg yolks and with tines of a fork, lightly blend the ingredients without mashing. Using your hands, divide mixture into 6 equal parts. Take one part and shape into circle/patty. make a slight indentation and add 1/6th of the butter, encasing it entirely with meat and forming your final hamburger patty. Repeat with remaining 5 parts of meat mixture. Makes 6 Burgers Recipe Notes: I used Angus Chuck 80/20 & Angus Sirloin 85/15 I used A-1 Thick & Hearty Steak Sauce Try serving with Caramelized Onions, or Grilled Hatch Green Chiles and Cheese. Anyway you serve this - it's sure to be a HIT! Recipe Adapted from: Ina Garten "Real Hamburgers" Photos by: Diane Baker for Canning and Cooking at Home  My husband was hoping to grill hamburgers when I had informed him that I made Shredded BBQ Chicken Sandwiches for dinner. He was skeptical that anything could rival his burgers...but, he said that this was one of the best BBQ Chicken Sandwiches he's had (he had two!)
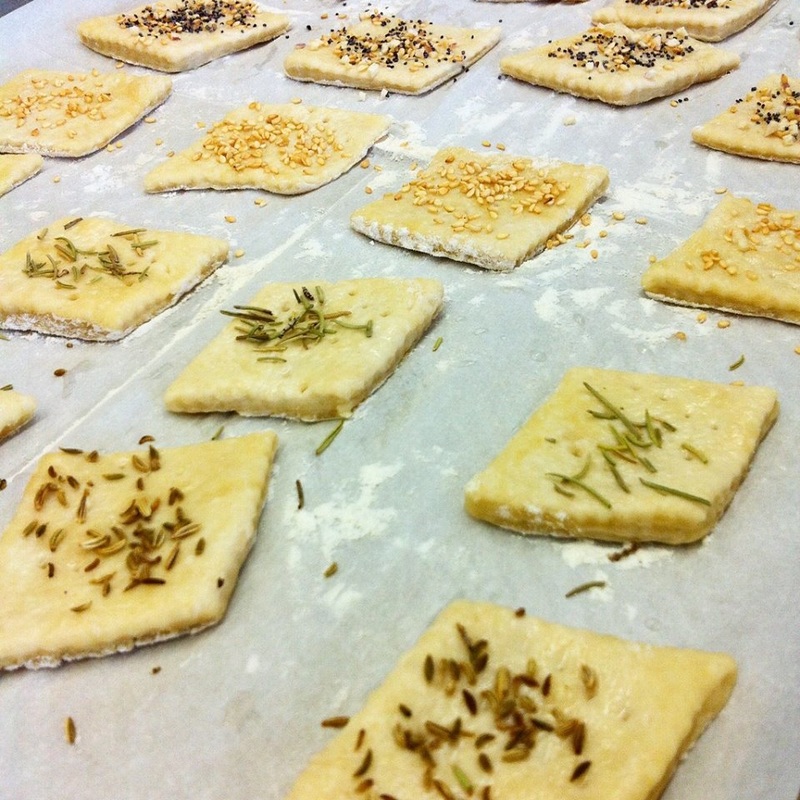
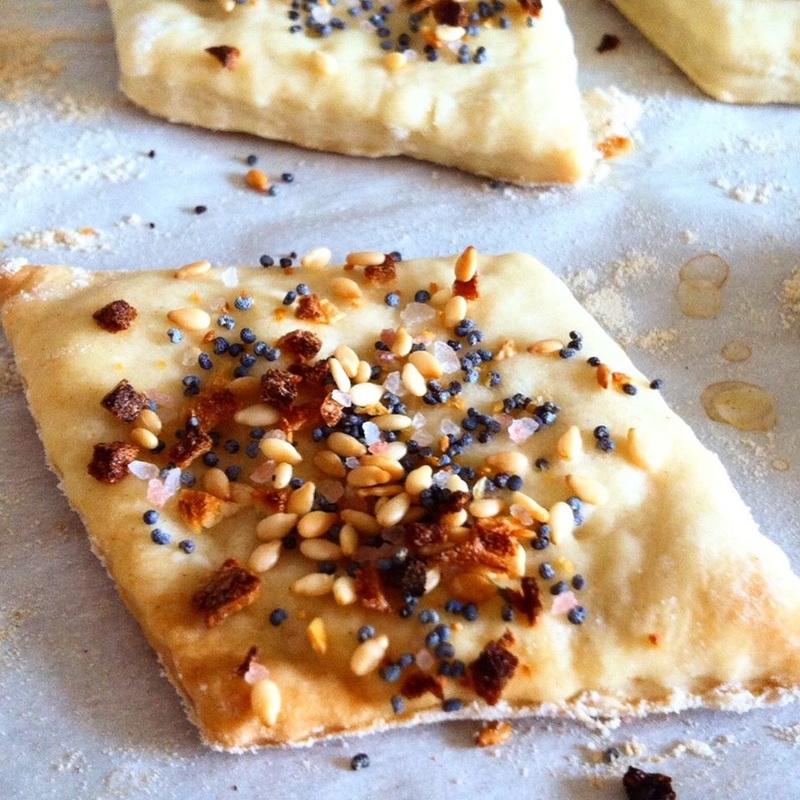
I agree - it's better then most I've tasted and even better then ones I've made in the past. I wonder if the applesauce is the secret? LOL ~Enjoy! Diane Applesauce BBQ Chicken Sandwiches Ingredients 4 boneless skinless chicken breasts 1/2 t ground pepper 3/4 cup chunky applesauce, 3/4 cup BBQ sauce, your choice more if preferred 2 T brown sugar 2 tsp chili powder cornstarch/water Hamburger Buns Directions: Place chicken breasts and all the seasonings into a freezer gallon bag, seal bag and message all the ingredients together, freeze until ready for cooking. Thaw out overnight OR thaw for 15 mins on defrost cycle of microwave in the morning (mine doesn't fully defrost, it just gets all the ingredients to the point that it will slide out of bag and into Slow-cooker. Cook on High for 6-8 hours, from frozen or 6-8 hours on low/medium, if the recipe is being cooked from 'fresh.' (always use a meat thermometer to ensure chicken is cooked thoroughly/properly) Shred the chicken in the sauce and served on fresh hamburger buns. Recipe Adapted from: Applesauce BBQ Chicken Photo by: Diane Baker for Canning and Cooking at Home 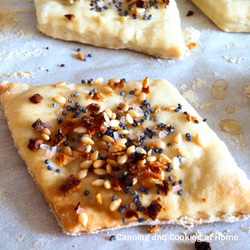 Homemade Crackers Ingredients 3 cups all-purpose flour, or a mix of all-purpose and whole grain flours 2 teaspoons sugar 2 teaspoons salt 4 tablespoons extra-virgin olive oil 1 cup water Optional toppings: sesame seeds, fennel seeds, poppy seeds, sea salt, rosemary photo has my "everything topping mix" Directions: Heat the oven to 450°F: Place a rack in the lower third of the oven. Sprinkle a baking sheet or parchment paper lightly with flour and set aside. Mix together the dry ingredients: the flour, sugar, and salt. Add in the oil and water to the flour mixture. Stir until a soft, sticky dough is formed. If a lot of loose flour remains in the bottom of the bowl and the surface of the dough, add more water (a tablespoon at a time) until all the flour is incorporated. Divide the dough into two and shape each section into a square on a lightly floured work surface. Roll out each section of the dough: Working from the center of the dough out, roll the dough into a rectangle roughly 1/8-inch thick or thinner. If the dough starts to shrink back as you roll it, let it rest, uncovered, for 5 minutes and then continue rolling. Cut the dough into cracker-sized rectangles: Using a pizza cutter or a sharp knife, cut the dough into individual crackers roughly 1-inch by 2-inches. Alternatively, cut the crackers into squares, diamonds, or use cookie cutters. Prick each cracker with fork to prevent dough from puffing during baking.Lightly brush the surface of the cracker dough very lightly with water. Combine your toppings in a small bowl and sprinkle evenly over the surface of the dough. Transfer dough to baking sheet. Bake the crackers in the oven for 12-15 minutes, until the edges are browned. Thinner crackers will bake more quickly than thicker ones; you can remove the crackers as they brown to your liking and continue baking the rest. While the first batch of crackers is baking, roll out and cut the remaining dough. Transfer the baked crackers to a wire rack to cool completely. The crackers will crisp further as they cool. Store the crackers in an airtight container on the counter for 3-5 days. If you're crackers are a little old and less-than-crispy, lay them on a baking sheet and put them in a 350°F oven for a few minutes to re-crisp. Additional Notes: Other Ideas for Toppings: dried herbs, chili powder, za'atar seasoning, dukkah Cheese Crackers: Add 1 1/2 cups shredded cheese to the flour mixture. Pulse in a food processor until the mixture resembles course cornmeal. Proceed with adding the oil and water as directed. Photos by: Diane Baker for Canning and Cooking at Home |