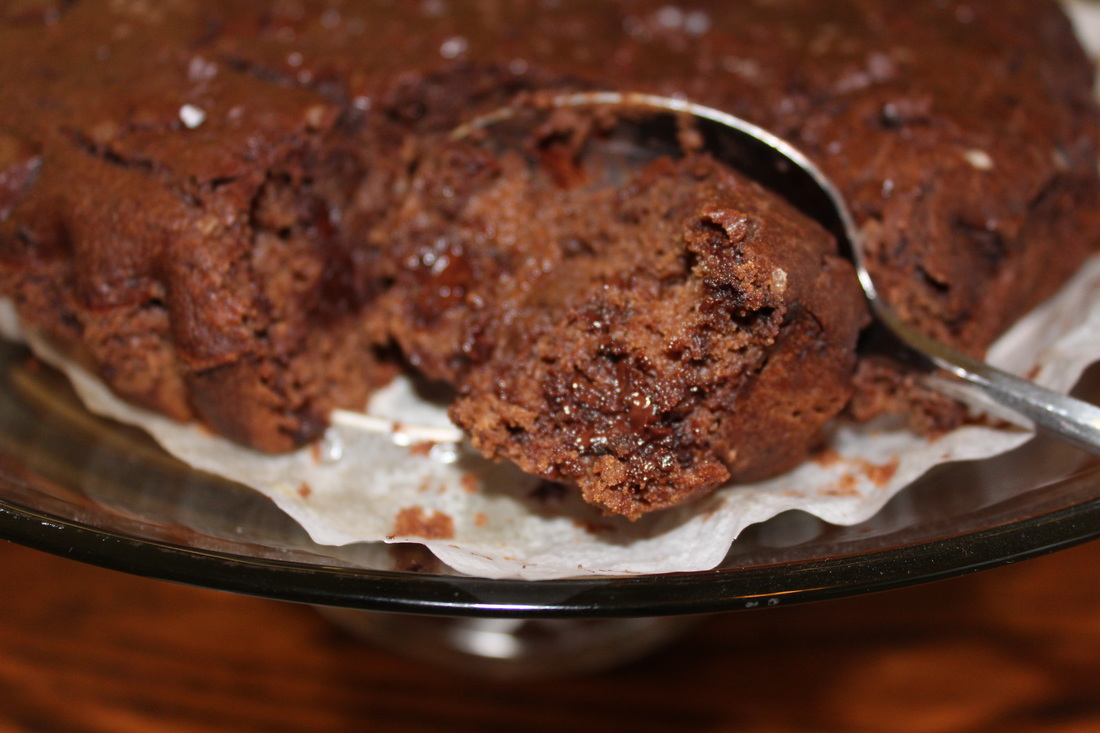
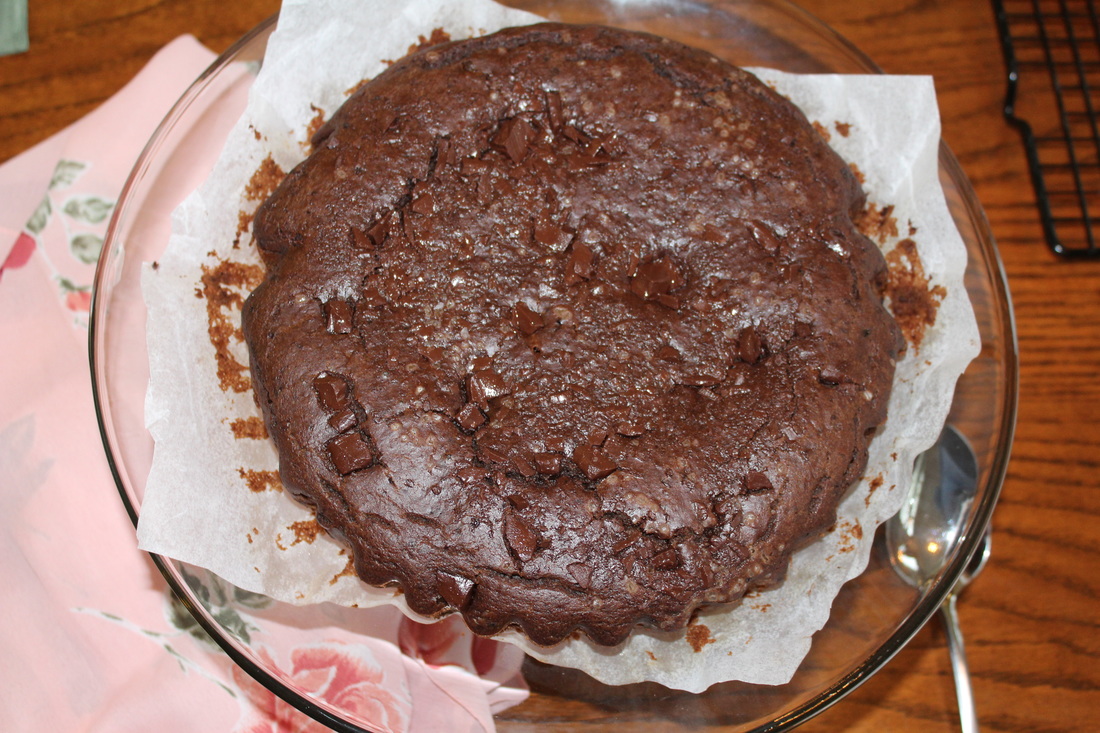
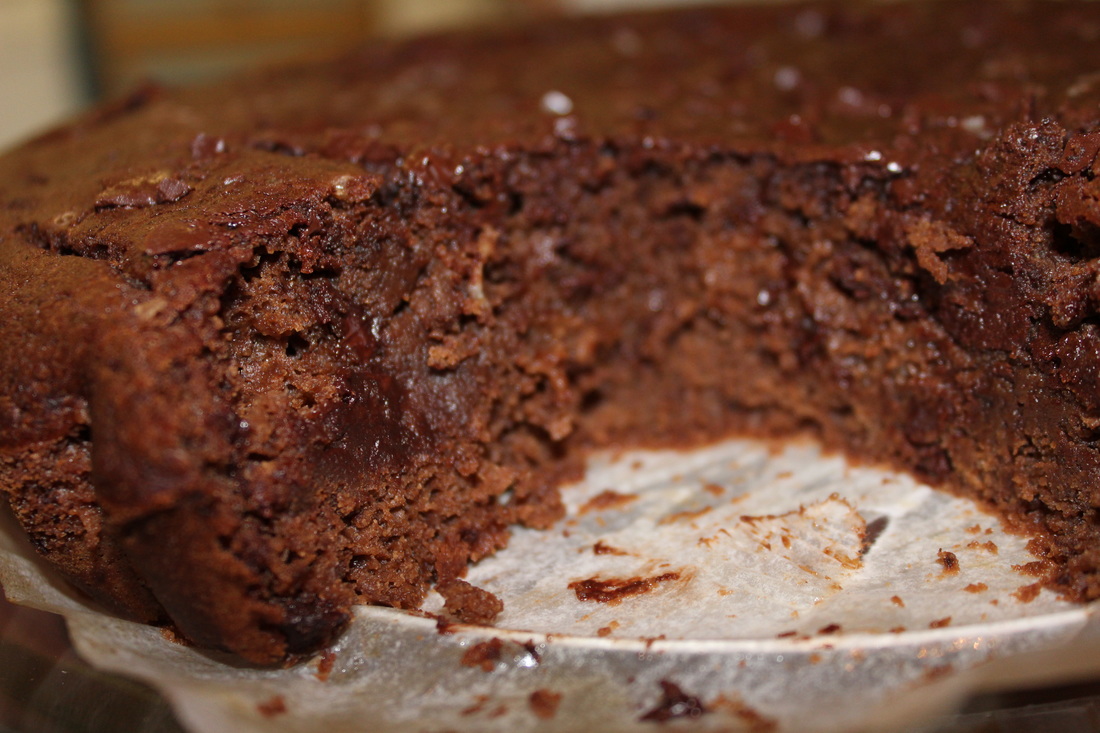
Celebrating #Choctoberfest 2016 in style by baking up my ooey gooey sinful chocolate skillet cake. I love making this for parties, it does disappear fast! Perfect for the Holidays!! Thanks to Barlean's - one of the sponsors of #Choctoberfest 2016 for letting me test some of their products! I love the Organic Coconut Oil that is Butter Flavor, it bakes one for one like real butter - great in this skillet cake and also great for cooking and frying! Barlean's Organic Coconut Oil is Dairy Free, Gluten Free, Soy Free and No Trans Fat! ~Enjoy! Diane Ooey Gooey Chocolate Skillet Cake Ingredients:
Directions 1. Preheat the oven to 350°F. Lightly grease a 9-inch, oven-safe skillet. 2. In a large bowl, whisk the sugar with the brown sugar, flour, cocoa powder, baking powder and salt to combine. In a medium bowl, whisk the half-and-half with the melted butter. Sprinkle in the chocolate pieces and vanilla extract, stir to combine. 3. Add the half-and-half mixture to the flour mixture and mix just until fully combined. Pour the batter into the prepared skillet and smooth into an even layer. 4. Drizzle the coffee over the batter but, do not stir, then place the skillet to the oven. 5. Bake until the cake is set at the edges but still looks jiggly in the center when you move the skillet, 25 to 30 minutes. Let cool 10 minutes before serving. Recipe/Photos/Review of Product by: Diane Baker for Canning and Cooking at Home
0 Comments
 Today is one of my favorite days of the year... because it is the first day of #Choctoberfest 2016! #Choctoberfest is a virtual event put together by The PinterTest Kitchen. Bloggers from around the World will be posting their favorite chocolate recipes, and you’ll get a chance to win some awesome prizes. What’s not to love? Thank you to the sponsors who make #Choctoberfest possible! This year, Imperial Sugar is back as our Gold Sponsor. They have been a trusted name in kitchens since 1843, and their website is home to thousands of sweet recipes tested in the Imperial Sugar Kitchen. You can find Imperial Sugar on Pinterest, Facebook, Instagram, Twitter, and Youtube, or join their Sweet Community so you can share your own recipes, save recipes to a virtual inbox, print Imperial Sugar coupons, and connect with other sugar lovers. Imperial Sugar and our silver sponsors have banded together to offer a huge #Choctoberfest prize pack, which you can enter to win below! One lucky winner will be chosen at random to receive the following: Today is one of my favorite days of the year... because it is the first day of #Choctoberfest 2016! #Choctoberfest is a virtual event put together by The PinterTest Kitchen. Bloggers from around the World will be posting their favorite chocolate recipes, and you’ll get a chance to win some awesome prizes. What’s not to love? Thank you to the sponsors who make #Choctoberfest possible! This year, Imperial Sugar is back as our Gold Sponsor. They have been a trusted name in kitchens since 1843, and their website is home to thousands of sweet recipes tested in the Imperial Sugar Kitchen. You can find Imperial Sugar on Pinterest, Facebook, Instagram, Twitter, and Youtube, or join their Sweet Community so you can share your own recipes, save recipes to a virtual inbox, print Imperial Sugar coupons, and connect with other sugar lovers. Imperial Sugar and our silver sponsors have banded together to offer a huge #Choctoberfest prize pack, which you can enter to win below! One lucky winner will be chosen at random to receive the following:

My "ooey gooey sinful chocolate skillet cake" will be shared during #Choctoberfest 2016! ~Diane (Canning and Cooking at Home)
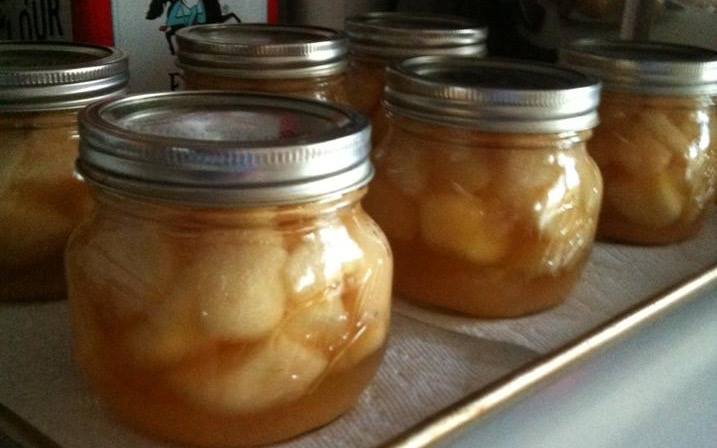
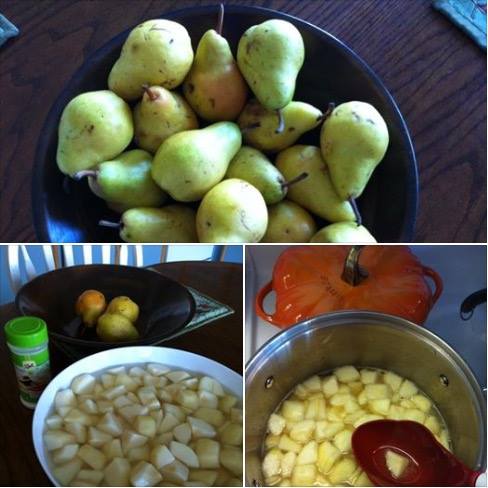
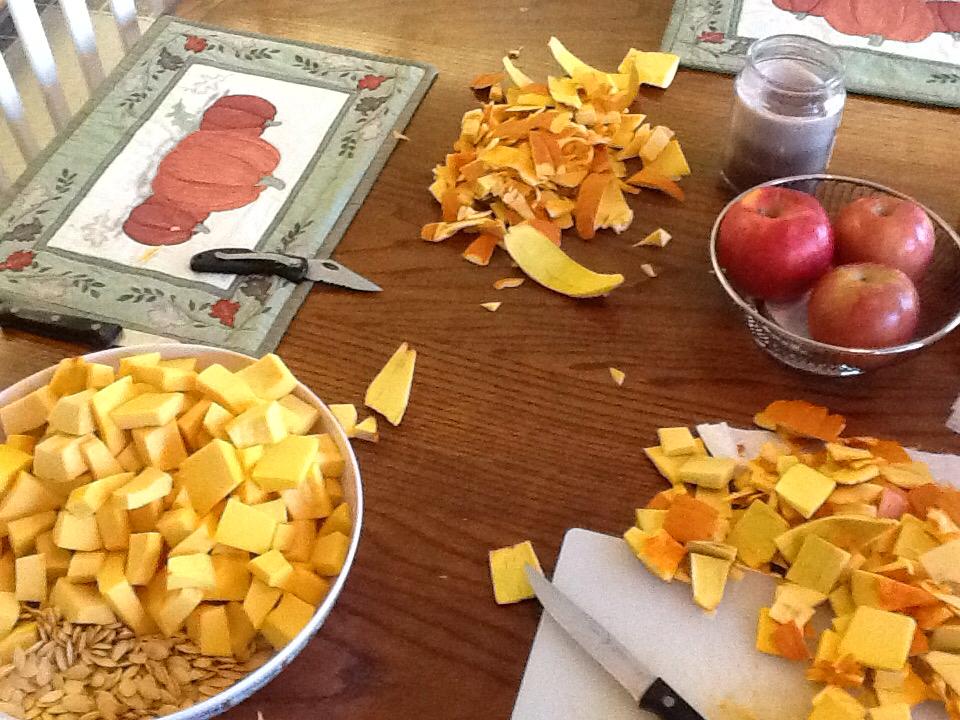
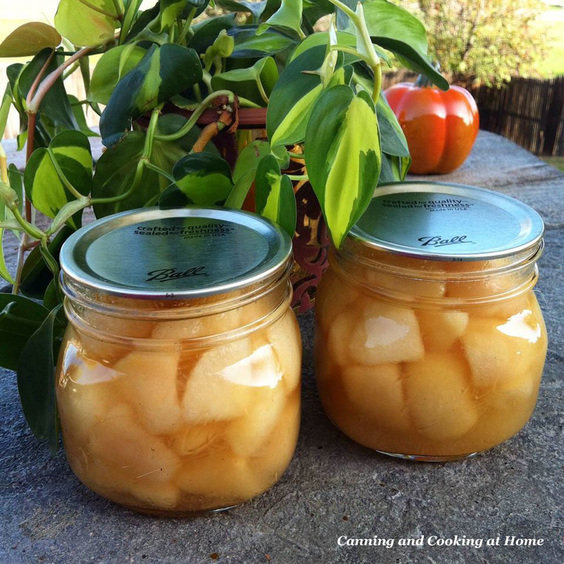 Canning fruit that is in season for Wintertime is such a treat. Knowing that I control the ingredients and the flavor profile is even better! I like when fruit has a hint of vanilla taste to it. I switched over to adding vanilla bean paste to my canning items this past year . I love seeing the vanilla bean flecks in the syrup and the bean paste withstands canning so much better then vanilla extract. When canning fruit - its always best to boil the fruit in the syrup so that you release any air trapped within the fruit, this also expands the fruit for jarring so that you don't have siphoning during canning, I believe that all fruits canned in syrup need to have what I call a "fat 1/2" of head-space" While its always best to follow the NCHFP Guidelines of 1/2" head-space, I do use 3/4" head-space when canning any fruit and have had much success in doing so, My de-bubbling tool has a 3/4" head space step on it - I use that - don't just "eye" your head-space. You need to use the tool and measure! Pears can also be canned in any syrup - from very light to heavy. You can use apple juice to water as well. I find that a mixture of sugar and honey with vanilla bean paste produces the best flavor without masking the fruit flavor. I will share my fruit syrup recipe below. I also probably go 'against the norm" by pressure canning most of my fruits when allowed by the NCHFP - I find it makes for a better product overall (personal opinion.) ~Enjoy! Diane Honey & Vanilla Pears {Pressure Canned} Six Pounds Ripe Pears, Peeled and sliced or cubed Fruit Fresh & Cold Water in a large bowl Syrup: 5 Cups Water 1 -1/4 Cup Sugar 1 Cup Light Honey 1 Tablespoon Vanilla Bean Paste Yield: Six Pint Jars **can be Pressure Canned OR Waterbath Canned Wash and peel pears, cutting into cubes, Place pears into cold water sprinkled with Fruit Fresh to preserve the fruit as you spend time peeling and cutting the remaining fruit. Once all the pears are cubed and added to the fruit fresh in water - start your syrup on the stove top and at this time prepare your canner for canning. Once your syrup is at a medium boil, drain your pears from the fruit fresh/water and add into pot with syrup. Bring mixture up to a boil. Once at a high boil, cook pears in syrup for 5 minutes, Distribute pears evenly into six pint jars and fill with syrup from pot up to 3/4" head-space. Process according to the NCHFP Guidelines for the Canning process of your choice. (see below for link) Recipe Note: I use a whisk and whisk in the vanilla bean paste into the syrup, it is the best way to get this type of vanilla product incorporated. Syrup Recipe: Diane Baker for Canning and Cooking at Home Pear Process: NCHFP Pears (CLICK HERE for processing) 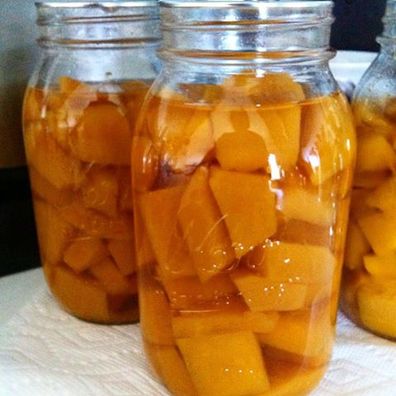 Since Pumpkins are all about Fall and the upcoming Fall Harvest, Halloween, Thanksgiving and the Holidays in General - I thought I would share Pumpkin information DIRECT from NCHFP! Enjoy! Diane Home Preserving Pumpkins - National Center for Home Food Preservation September 2015 Pumpkins offer far more than a door-stop at Halloween. This season is also the prime time to find and use sugar or pie pumpkins, the best for cooking and baking. Pumpkin seeds from any pumpkin can also be dried and roasted. Canning pumpkin butter or mashed or pureed pumpkin is NOT recommended. Home canning is not recommended for pumpkin butter or any mashed or pureed pumpkin or winter squash. In 1989, the USDA's Extension Service first published the Complete Guide to Home Canning that remains the basis of Extension recommendations today, found in the December 2009 revision. The only directions for canning pumpkin and winter squash are for cubed flesh. In fact, the directions for preparing the product include the statement, "Caution: Do not mash or puree." Canning Cubed Pumpkin Only pressure canning methods are recommended for canning cubed pumpkin. We have no properly researched directions to recommend for canning mashed or pureed pumpkin or winter squash, or pumpkin butter. To be safe, all low acid foods, including pumpkin, must be canned using tested pressure canning processes (Ensuring Safe Canned Foods). Older methods, such as boiling water canning for vegetables, oven canning and open-kettle canning, have been discredited and can be hazardous (Equipment and Methods Not Recommended from the USDAComplete Guide to Canning, 2009). An average of 16 pounds is needed per canner load of 7 quarts; an average of 10 pounds is needed per canner load of 9 pints – an average of 2¼ pounds per quart. Pumpkins and squash should have a hard rind and stringless, mature pulp of ideal quality for cooking fresh. Small size pumpkins (sugar or pie varieties) make better products. Wash; remove seeds, cut into 1-inch-wide slices, and peel. Cut flesh into 1-inch cubes. Boil 2 minutes in water. Caution: Do not mash or puree. Fill jars with cubes and cover cooking liquid, leaving 1-inch headspace. USDA recommendations: http://www.homefoodpreservation.com/how/can_04/pumpkin_winter_squash.html. Freezing Pumpkins Freezing is the easiest way to preserve pumpkin, and it yields the best quality product. Select full-colored mature pumpkin with fine texture (not stringy or dry). Wash, cut into cooking-size sections and remove seeds. Cook until soft in boiling water, in steam, in a pressure cooker, or in an oven. Remove pulp from rind and mash. To cool, place pan containing pumpkin in cold water and stir occasionally (So Easy to Preserve, 2006). Pack into rigid containers leaving headspace, and freeze. Drying Pumpkin and Pumpkin Seeds Wash, peel, and remove fibers and seeds from pumpkin (or Hubbard squash) flesh. Cut into small, thin strips no more than one-inch wide by 1/8-inch thick. Blanch strips over steam for 3 minutes and dip briefly in cold water to stop the blanching action. There is no need to cool to room temperature prior to drying. Drain excess moisture. Dry the strips in an electric dehydrator until brittle. Pumpkin also makes excellent dried vegetable leather. Purée cooked pumpkin and strain. Addhoneyandspicesandthendrynahomefooddehydrator tray.http://www.homefoodpreservation.com/how/dry/veg_leathers.html. Drying seeds and roasting seeds are two different processes. To dry, carefully wash pumpkin seeds to remove the clinging fibrous pumpkin tissue. Pumpkin seeds can be dried in the sun, in an electric dehydrator at 115-120°F for 1 to 2 hours, or in an oven on a very low, warm temperature only, for 3 to 4 hours. Stir them frequently to avoid scorching. Dried seeds should not be stored with any moisture left in them. For more on storing dried vegetables, see recommendations here: http://www.uga.edu/nchfp/how/dry/pack_store.html . To roast the seeds, take dried pumpkin seeds, toss with oil and/or salt and roast in a preheated oven at 250°F for 10 to 15 minutes. Pickling Pumpkin Pumpkin can be used in pickled recipes such as salsas, chutneys, and relishes; however, your recipes for these must be treated as fresh prepared foods and kept refrigerated. We do not have tested recipes and procedures to recommend for safely canning these types of products by either the boiling water or pressure canning method. Pumpkin Preserves Gelled preserves rely on the natural acidity present in most fruits for safe food preservation. Most fruits have natural acids so resulting jams or jellies can be safely canned in a boiling water bath process. Pumpkin, however, is a low acid vegetable and cannot be safely canned in the boiling water bath process. A jam or sweetened preserve would have to have enough sugar and/or added acid to be treated safely without concerns about botulism. A certain acidity level is also required to cause the pectin molecule to form a gel structure. The USDA and Georgia Cooperative Extension currently do not have any tested recipes to recommend for safely canning pumpkin preserves (jams, jellies, conserves, or pumpkin butter) and storing them at room temperature. These pumpkin products must be stored in the refrigerator or freezer and treated the same as fresh pumpkin. Think Safety Think safety when planning to preserve pumpkins. Pumpkin is a low acid vegetable and requires special attention to preparation and processing. Use excellent sanitation in handling the fresh or preserved pumpkin. Do not let cut pumpkin sit out at room temperature for more than 2 hours during preparation prior to preserving. We have no properly researched procedures to recommend for home canning of pumpkin butters or pickled pumpkin products such as salsas, chutneys and relishes; recipes you try should be served immediately or stored under refrigeration at all times. |