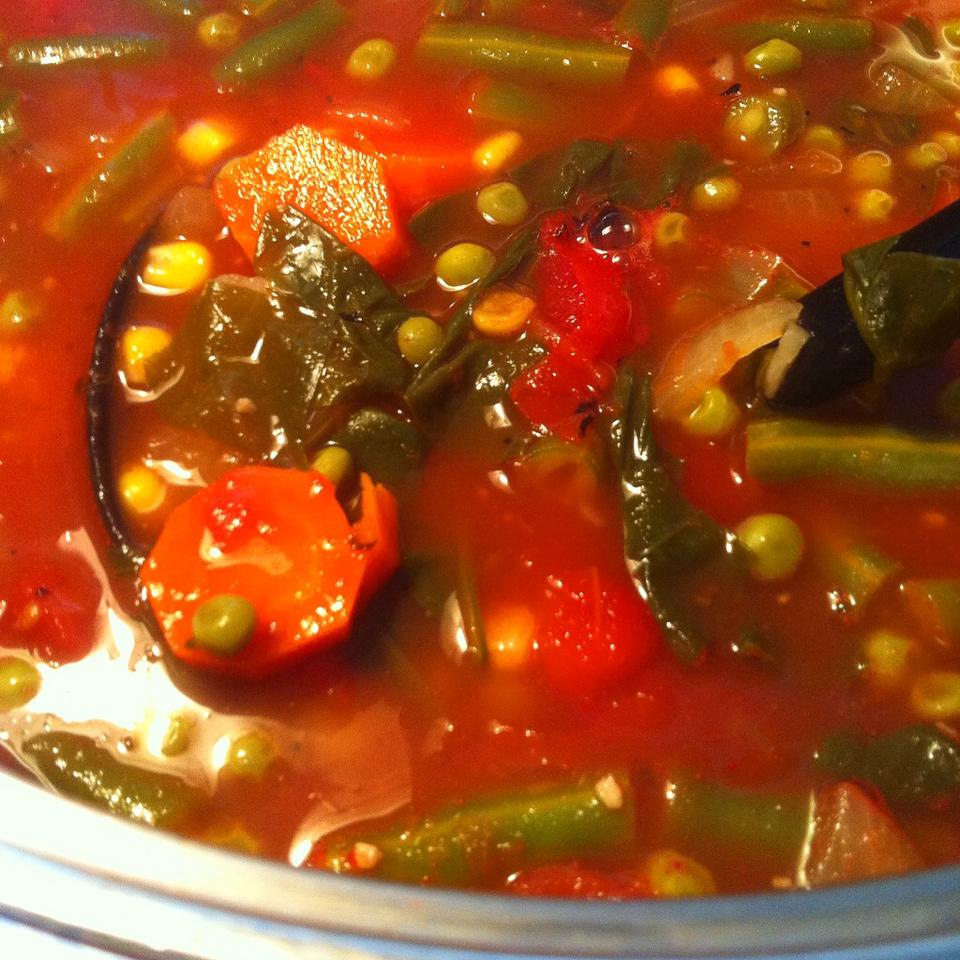
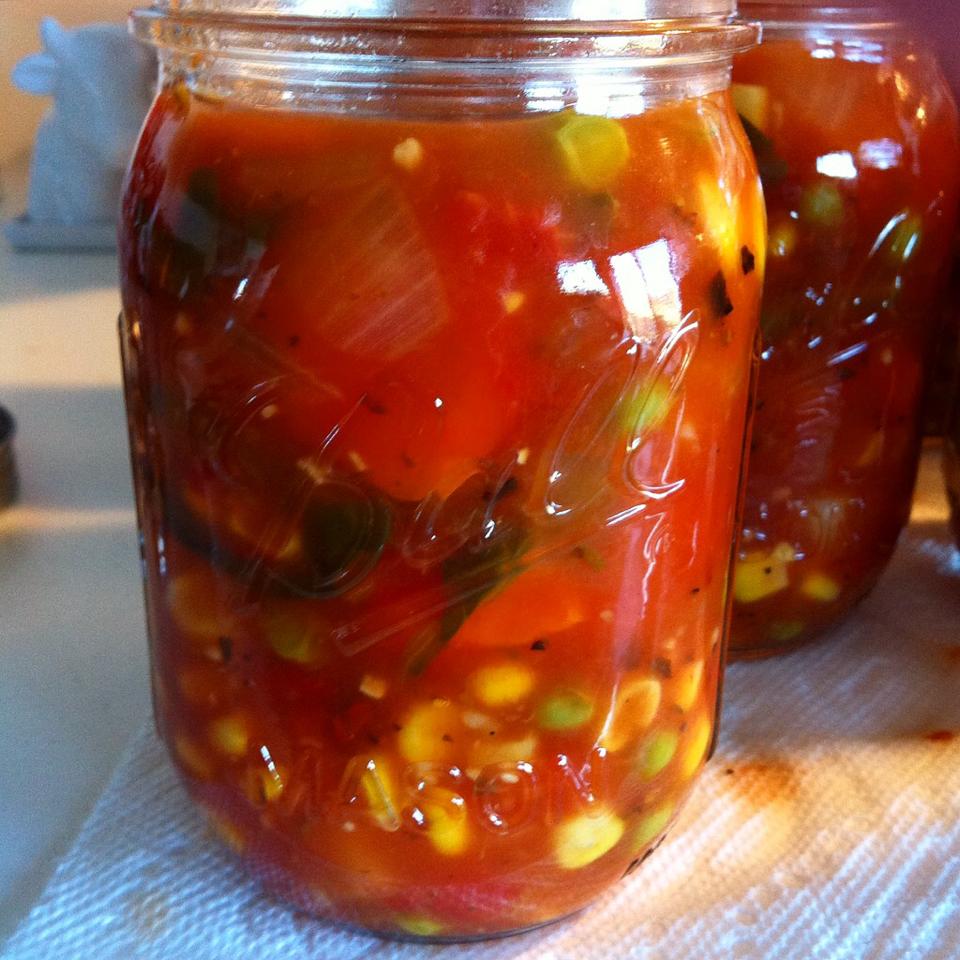
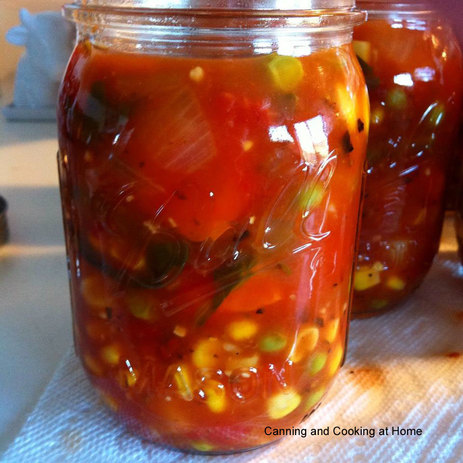
 ...at the end of my 'can-o-rama' I had vegetables to use up...what a better way then to can up 7 pints of hearty pints of soup. **Update: this soup is amazing! My husband says this his favorite so far and he also refers to it as 'his, Minestrone" (it just has no noodles, which you could add when heating to eat.) I agree that this is a fantastic soup! Many disagreed on my putting fresh spinach in this for canning but, the spinach held up and held its taste! I can't wait to make some more (my husband ate the last pint jar last night) I am glad I took the time to adapt Alton Brown's Garden Vegetable Soup so that I could 'Can it' safely using the NCHFP Soup Guidelines. I hope you enjoy this as much as we do! ~Enjoy! Diane Alton's Garden Vegetable Soup *for pressure canning Ingredients: 1 teaspoon olive oil 2 cups chopped yellow onion 2 tablespoons finely minced garlic a pinch of Kosher salt 2 cups carrots, peeled and chopped into rounds 2 cups peeled and diced potatoes 2 cups fresh green beans, cut into 3/4-inch pieces 2 quarts chicken or vegetable; broth or stock 4 cups diced tomatoes; cored, peeled & seeded 1 Tablespoon tomato concentrate 2 cups fresh baby spinach 2 ears corn, kernels removed 1/2 teaspoon freshly ground black pepper 1/4 cup packed, chopped fresh parsley leaves 2 teaspoons freshly squeezed lemon juice Directions Heat the olive oil in large, heavy-bottomed stockpot over medium-low heat. Once hot, add the onion, garlic, and a pinch of salt and sweat until they begin to soften, approximately 7 to 8 minutes. Add the carrots, potatoes, and green beans and continue to cook for 4 to 5 more minutes, stirring occasionally. Add the stock, increase the heat to high, and bring to a simmer. Once simmering, add the tomatoes, spinach, corn kernels, and pepper. Reduce the heat to low, cover, and cook until the vegetables are fork tender, approximately 25 to 30 minutes. Remove from heat and add the parsley and lemon juice. Season, to taste, with Kosher salt. If wanting to Can: Prepare jars and Canner for Pressure Canning. Using the NCHFP Soup Guidelines, use a slotted spoon, fill hot jars half-full with solids, topping off with hot broth, de-bubble jars and fill to 1 inch head space. Process pints 70 mins/quarts 90 mins. (my timing is adjusted to account for the spinach being added) 11 pounds pressure (dial gauge) or according to your canner type and altitude. Recipe Adapted from: Alton Brown "Garden Vegetable Soup" Photos by: Diane Baker for Canning and Cooking at Home Yield: Approx: 7-8 Pints UPDATE: I now add 1 pint red kidney beans to the soup *same process timing Pinterest Pin: http://www.pinterest.com/pin/530510031080806043/ 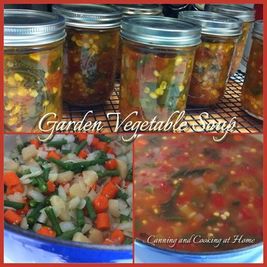
2 Comments
Recipes/ Final Made Product in Pints: Beef Stew with Veggies: 14 Pints (7 Quarts) Petite Sirloin: 3 Pints White Potatoes: 10 Pints (3 Quarts 4 Pints) Chili without Beans: 8 pints Chili Beans: 4 pints **UPDATE: Garden Vegetable Soup - 7 pints. I was able to take all the leftover vegetables and make a nice hearty Garden Vegetable Soup (recipe posted today 1/10/15) all I needed was the can of large tomatoes from my pantry @$2.99 - new total $80.66 for 46 Pints (aka 23 Quarts) Shopping Day 1/3/2015 Chili Powder $5.19 Stew Meat *not on sale 5.13 lbs $21.08 Petite Sirloin Steaks 3.57 lbs $15.95 Celery 2 lbs $1.58 Carrots 3 lbs $2.98 Potatoes (Russets) 20 lbs $1.98 Diced Tomatoes 6 Cups $5.98 Ground Beef 5.15 lbs 93/7 $20.15 Onions 3 lbs $1.99 Dry Beans 3 Cups $.79 Tomatoes $2.99 ** Total = $80.66  It all started with a “why can?” comment. I started out canning mostly jams and jellies, which are water-bath canned and high acid. I was happy adding pickled items into that mix too. This summer however, with a ‘bumper crop’ of tomatoes and green beans, I decided I wanted a Pressure Canner so that I can get some tomato sauces and canned green beans ‘under my canning belt’ so to speak. That was my venture into Pressure Canning. I like it – it gives me the confidence to grow a larger garden next year in hopes I can make more of the items we have now fallen in love with. It’s only January and we are down to one last Pint of green beans and 4 pints of tomato sauce! *gasp! I decided this Winter to sit down and pick an array of recipes that I could Pressure Can and see if we indeed enjoy them. Pressure Canning meat is very easy but, let’s face it – the jars that come out of the canner are very unattractive! You can look around the Internet and I bet you won’t find a bunch of “Hey! Look at this Gross looking meat in a jar” photos… that is, until I post mine! I’m not ashamed! The Chicken was FABULOUS! The old “making a silk purse out of a sow’s ear” applies here!! Since the chicken went so well, I PC’d (Pressure Canned) chicken stock, then after Thanksgiving I PC’d turkey soup and the resulting “bone broth” from the leftovers. I felt like I was ‘getting things done.” Then I decided to sit down and do a quick shopping trip, armed with 4 recipes that all shared common ingredients: Beef, Potatoes, Tomatoes, Carrots, Celery and Onion. If I could make it all work out, I’d be happy. I knew I couldn’t do ALL the recipes in one day but the only truly ‘time consuming’ recipe was the beef stew. I like to cut everything by hand so I tackled that recipe first. Making Beef Stew during a white out blizzard and cold – why not! It’s either that or shoveling…below is a list of the recipes and their cost... I did take photos as things progressed...for a while I felt a bit overwhelmed, like I was indeed "cooking for an army!!" but I quickly got into the swing of it all...I still think every 'canner' needs a personal sous chef and dishwasher/helper as washing and sterilizing are of big importance in my kitchen (and should be the same for all that 'can') While reviewing recipes - I read that filling out the canner load with beans is a great way to get extra bonus from all that hardwork and energy your canner will be doing...since my last recipe was only going to be 3 pints, I went ahead and made up 4 pints of "chili beans" and SO HAPPY that I did - they are wonderful!! I already posted that recipe on here last night...I didn't originally shop for the dry beans (I had them in my pantry) but, I threw a nominal cost associated with how much I used into the totals above. Beef Stew with Vegetables 1 Tbs. vegetable oil (I used a non-stick pan, and no oil) 4 to 5 lbs. stewing beef, cut into 1 1/2 inch cubes 12 cups cubed peeled potatoes 8 cups sliced peeled carrots 3 cups chopped celery 3 cups chopped onions 4 1/2 tsp. salt 1 t. dried thyme 1/2 tsp. freshly ground black pepper Boiling water Prepare weighted or dial gauge pressure canner, jars, and lids. In a large non-stick skillet, heat oil over medium high heat. Working in batches, brown beef adding oil if absolutely needed. Transfer beef to large stainless steel saucepan. (I used my 8 qt stock pot). Add potatoes, carrots, celery, onions, salt, thyme, pepper, and boiling water to cover the ingredients. Bring to a boil, stirring frequently. Ladle hot stew into hot jars leaving 1 inch headspace. Remove air bubbles and adjust headspace by adding more stew if needed. Wipe rim with paper towel moistened with vinegar. (The vinegar helps to remove any fat that may be on the rim) Center lid on jar. Screw band on fingertip tight. Place jars in pressure canner. Lock lid and bring to a boil over medium heat. Vent steam for 10 minutes. Process in canner for pints for 75 minutes at 10lbs at sea level to 1,000 ft. for weighted gauge and 90 minutes for quarts. For dial gauge process at 11lbs of pressure at sea level to 2,000 ft. **adjusting for your altitude. Once the time has elapsed turn off heat. Let the pressure return to zero naturally. Wait two minutes longer, then open vent. Remove canner lid. Wait 10 minutes, then remove jars, clean, cool and store. Recipe by: Ball complete book of home preserving CANNED PETITE SIRLOIN CUT-UP MEAT (strips, cubes, or chunks) Bear, Beef, Pork, Lamb, Veal, and Venison Remove excess fat. Raw Pack—Fill jars with raw meat pieces, leaving 1-inch headspace. Pack down lightly, DO NOT ADD LIQUID. Adjust jar lids. I added a pound of cubed meat to each pint jar along with 1/2 tsp salt *canning salt and 1/2 tsp minced garlic (optional) Place jars in pressure canner. Lock lid and bring to a boil over medium heat. Vent steam for 10 minutes. Process in canner for pints for 75 minutes at 10lbs at sea level to 1,000 ft. for weighted gauge and 90 minutes for quarts. For dial gauge process at 11lbs of pressure at sea level to 2,000 ft. **adjusting for your altitude. Once the time has elapsed turn off heat. Let the pressure return to zero naturally. Wait two minutes longer, then open vent. Remove canner lid. Wait 10 minutes, then remove jars, clean, cool and store. Recipe by: Presto WHITE POTATOES Potatoes, White - Cubed or Whole Quantity: An average of 20 pounds is needed per canner load of 7 quarts; an average of 13 pounds is needed per canner load of 9 pints. A bag weighs 50 pounds and yields 18 to 22 quarts – an average of 2½ to 3 pounds per quart. Quality: Select small to medium-size mature potatoes of ideal quality for cooking. Tubers stored below 45ºF may discolor when canned. Choose potatoes 1 to 2 inches in diameter if they are to be packed whole. Procedure: Wash and peel potatoes. Place in asorbic acid mix to prevent darkening. If desired, cut into 1/2-inch cubes. Drain. Cook 2 minutes in boiling water and drain again. For whole potatoes, boil 10 minutes and drain. Add 1 teaspoon of salt per quart to the jar, if desired. Fill jars with hot prepared potatoes, leaving no more than 1-inch headspace. Cover hot potatoes with FRESH boiling water, leaving 1-inch headspace and covering all pieces of potato. (Caution:Do not use the water you cooked the potatoes in; it contains too much starch.) Process Pints 35 Mins and Quarts 40 mins. at 10 lbs pressure for Dial Gauge *adjusting for your altitude. Recipe by: National Center for Home Food Preservation Chili Con Carne Makes 6-8 pints Ingredients: 5 lbs. ground beef (I used 93/7) 2 cups chopped onions 2 cloves garlic, minced 6 cups quarts crushed or diced tomatoes spice mix: 1/3 cup chili powder 2 tsp ground cumin 2 tsp salt 1 tsp dried oregano 1/2 tsp red chili flakes 1/2 tsp ground black pepper Directions: Brown ground beef in a large stock pot, drain off all fat, add in onions & garlic, cook 2-3 mins Drain off fat - I use a colander in the sink. Shake out the excess fat and I blotted lightly with a paper towel. Pour back into large pot and tomatoes and spice mix. Simmer chili for 20 minutes. Skim off any excess fat. Using hot, sterilized jars fill jars with chili leaving 1" headspace. Remove air bubbles and adjust headspace if needed. Wipe rims of jars with dampened clean paper towel that has been dipped in white vinegar. This will help remove any fat that may have been dripped on rims of jar and ensure a better seal. Adjust lids with bands to finger tip tight and process in pressure canner. Process at 10 pounds pressure - Pints 75 minutes and Quarts 90 minutes (adjusting pressure/lbs to your altitude, as needed.) Recipe from: Ball Complete Book of Home Preserving CHILI BEANS *a great way to fill out a canner load! Ingredients: to each pint jar add: 1/2 tsp salt 1/2 tsp minced garlic 1/4 tsp cumin 1/2 tsp chili powder 1/2 tsp dried, minced onion Quantity: An average of 5 pounds is needed per canner load of 7 quarts; an average of 3¼ pounds is needed per canner load of 9 pints--an average of ¾ pounds per quart. Quality: Select mature, dry seeds. Sort out and discard discolored seeds. Procedure: Place dried beans in a large pot and cover with water. Soak 12 to 18 hours in a cool place. Drain water. To quickly hydrate beans, you may cover sorted and washed beans with boiling water in a saucepan. Boil 2 minutes, remove from heat, soak 1 hour and drain. Cover beans soaked by either method with fresh water and boil 30 minutes. Fill jars 3/4 full with beans, add spices and cooking water, to 1-inch headspace. Process Pints 75 mins at 10 lbs. Quarts 90 mins at 10lbs pressure or according to your altitude. Bean Process by: NCHFP Spice Recipe by: Jennifer Shambrook "I Can Can Beef!" All photos by: Diane Baker for Canning and Cooking at Home Canning - chili con carne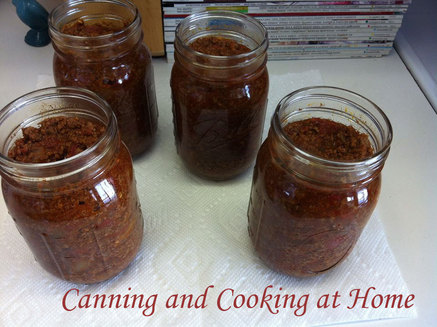 Why make one dinner, serve and save the leftovers *if there are any? Why not buy increase your ingredients and make enough to be able to stock your pantry - then on a cold Winter day when you don't have time or want to cook... grab a jar off the pantry shelf and reheat! Since there are density issues when adding beans, I leave mine out and add when ready to cook my chili. Chili Con Carne *Pressure Canned Makes 6 pints Ingredients: 5 lbs. ground beef (I used 93/7) 2 cups chopped onions 2 cloves garlic, minced 6 cups crushed or diced tomatoes spice mix: 1/3 cup chili powder 2 tsp ground cumin 2 tsp salt 1 tsp dried oregano 1/2 tsp red chili flakes 1/2 tsp ground black pepper Directions: Brown ground beef in a large stock pot, drain off all fat, add in onions & garlic, cook 2-3 mins Drain off fat - I use a colander in the sink. Shake out the excess fat and I blotted lightly with a paper towel. Pour back into large pot and tomatoes and spice mix. Simmer chili for 20 minutes. Skim off any excess fat. Using hot, sterilized jars fill jars with chili leaving 1" headspace. Remove air bubbles and adjust headspace if needed. Wipe rims of jars with dampened clean paper towel that has been dipped in white vinegar. This will help remove any fat that may have been dripped on rims of jar and ensure a better seal. Adjust lids with bands to finger tip tight and process in pressure canner. Process at 10 pounds pressure - Pints 75 minutes and Quarts 90 minutes (adjusting pressure/lbs to your altitude, as needed.) Recipe from: Ball Complete Book of Home Preserving Photos by: Diane Baker for Canning and Cooking at Home Pinterest Pin: http://www.pinterest.com/pin/530510031080480106/ **Important Reminder: All canned foods need to be boiled for at least 10 minutes (add one minute for each 1000 ft rise in elevation - *I add 5 extra to my time, I am 5280) this ensures any dangerous spores are killed off. As a rule - never eat any low acid home canned foods right out of the jar. (remember - high acid items like jams/jellies/pickles that have been water-bathed are ok eaten directly from jar assuming seals were intact and no off smells are emitted upon opening jars) 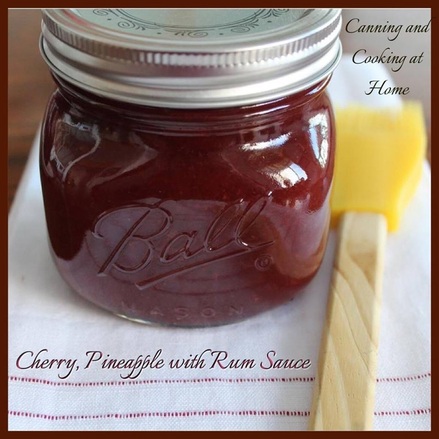 What do you do with a bag of Summers frozen pineapple and sweet cherries in the middle of Winter? You create a sauce! Simple. Why a sauce and not go for a jam? Mostly, because I want to be able to use this in many recipes from baked goods, desserts, main dishes...drizzle on oatmeal, stir into yogurt, spread onto sandwiches, and always can be used as a humbly sweet BBQ sauce. Enjoy! ~ Diane Cherry & Pineapple with Rum Sauce Ingredients: 2 Cups Sweet Cherries, whole and pitted 3 Cups Pineapple, sliced 3/4 Cups Brown Sugar 1 Tablespoon Clear Jel, Cook Type 1 teaspoon water 3 Tablespoons Spice Rum* optional Directions: Place fruit in a large stock pot and let simmer on low for 20 mins, use an immersion blender to break up large fruit pieces into a smoother sauce (I left mine semi-chunky) add in sugar and stir until bubbly (you could substitute honey instead - to your taste) and cooked down, about 10-15 minutes. In a separate cup, add the clear jel and water and stir together until smooth, add clear jel mix to fruit sauce mixture, stirring constantly and bring to a medium boil - until sauce thickens. Stir in Rum, cook additional 2-3 minutes. I like the sauce to stay on the spoon as I tip the spoon, it shouldn't just run off...its almost 'jam-like' but, not as set/thick. Jar sauce and refrigerate. Use within one week or freeze for future use *defrost in refrigerator to maintain the same consistency before freezing, do not defrost in microwave. Pinterest: http://www.pinterest.com/pin/530510031080439249/ Recipe & Photos by: Diane Baker for Canning and Cooking at Home 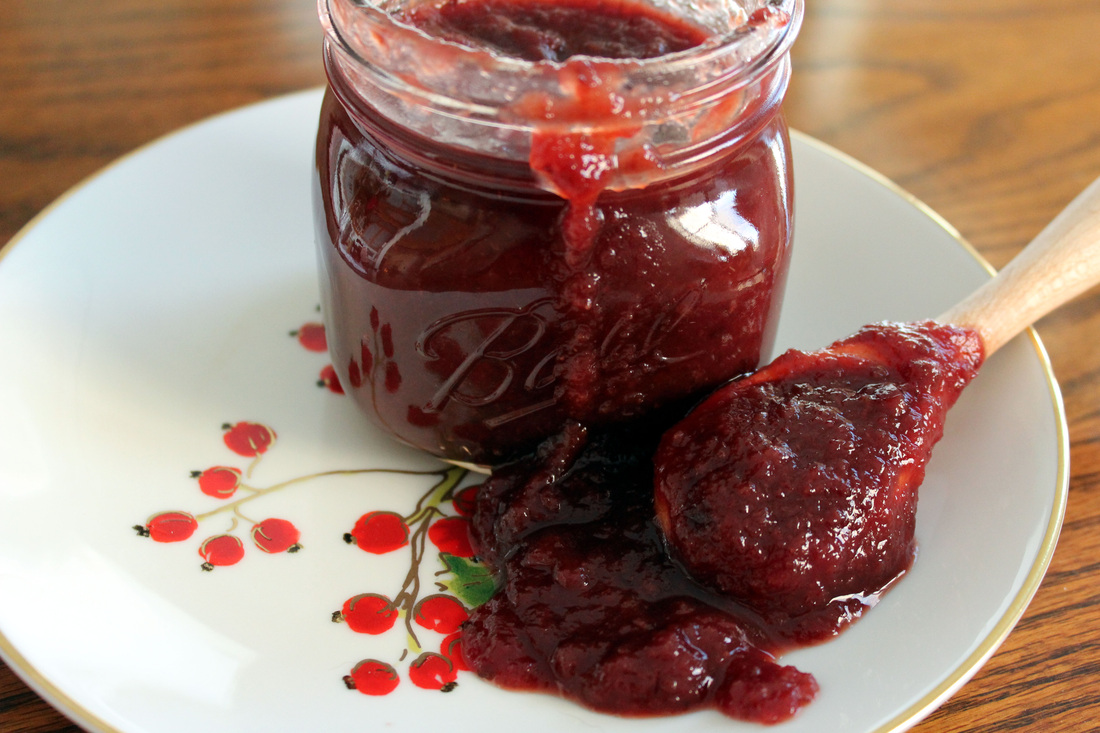 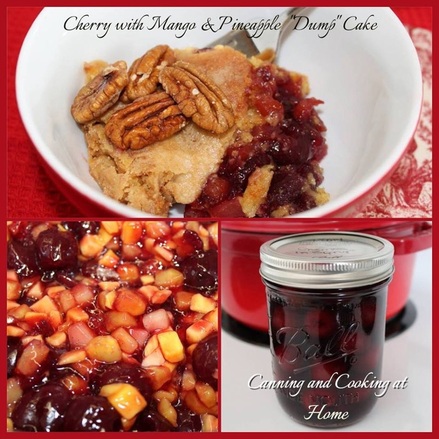 Cherry with Mango & Pineapple "Dump" Cake
topped with Pecans Ingredients: 1 Pint of Whole, Pitted Cherries (pie filling/or thickened from canning) ** 2 cups diced pineapple (I had some diced pineapple mixed with mango in the freezer so, used that) 1 cup of butter, stick (you will reserve 1/4 cup for later in baking) 1 cups pecans (crushed or whole, I serve warmed and over the cake.) 1 box of white or yellow cake mix OR make you own as I did *will add link to making from scratch below** Preheat oven to 350. Lightly grease/spray a 9x13 baking dish. Add Cherry Pie filling along with pineapple and mango chunks to the bottom of dish and mix. Next, lightly sprinkle the cake mix over the entire fruit mixture. Now slice up 3/4 cup of butter into pats and lay on top of cake mixture. Bake in over 30 mins. (melt remaining 1/4 cup of butter in micro) Remove cake and brush on remaining butter making sure to fill in any gaps that the pats of butter missed, place back in oven for final cook time between 20-30 mins (watch for browning on top) Let cool slightly and serve warm or room temperature. *you can sprinkle with pecans if preferred **NOTES for the filling: you can either buy a large can of cherry pie filling or I used my canned cherries from the Summer and thickened with a bit of Cook Type Clear Gel. Recipe for Canning Cherries here --> http://www.canningandcookingathome.com/dianes-food-blog/sweet-syrup-cherries-with-vanilla Recipe for Cake Mix from Scratch here --> http://iambaker.net/homemade-yellow-cake-mix/ Photos by: Diane Baker for Canning and Cooking at Home Pinterest: http://www.pinterest.com/pin/530510031080424877/ |