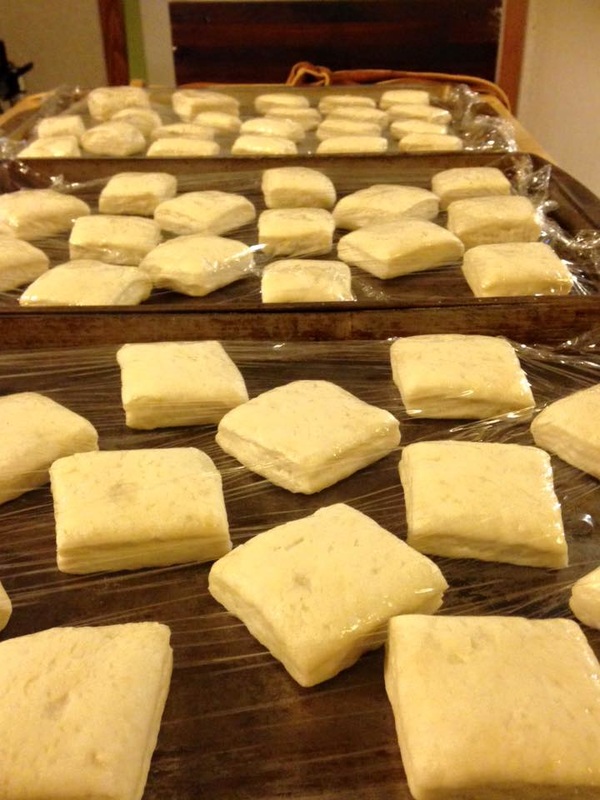
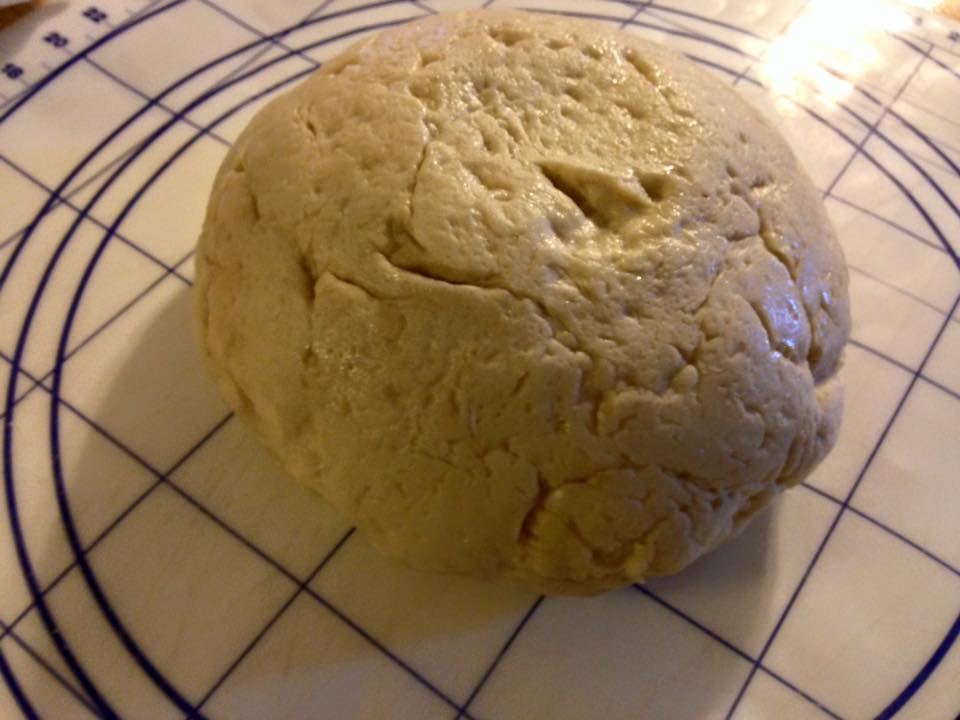
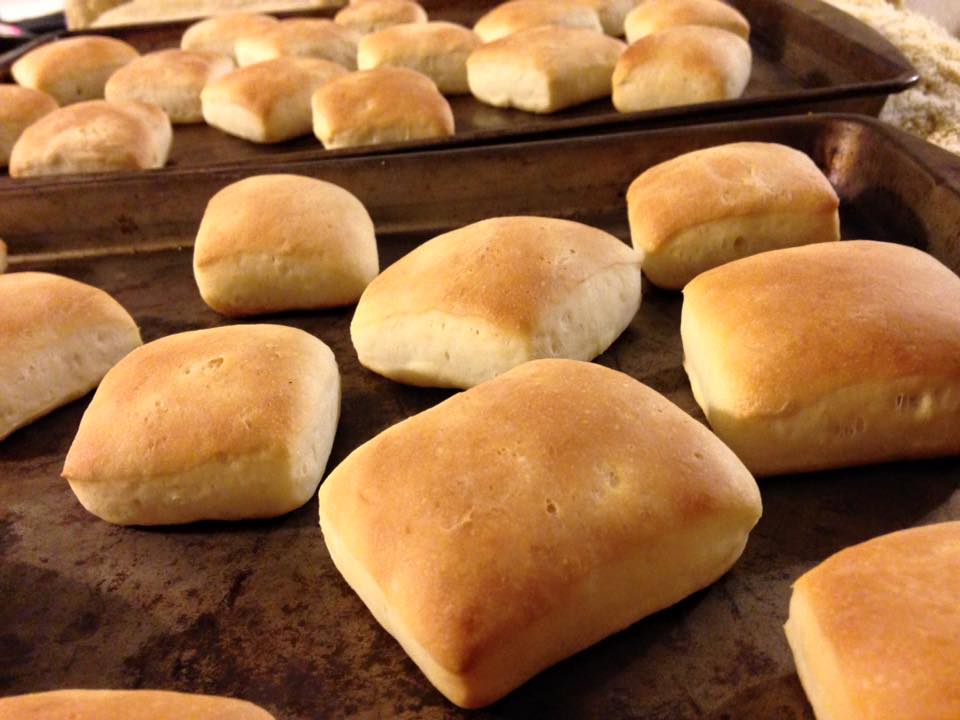
 Granny's Snow Biscuits {a family recipe & a guest post} Ingredients: 1 1/2 cups Warm Water *temp your yeast needs to activate 1/2 cup Sugar 2 Tbsp Yeast 4 cups All Purpose Flour 1 tsp Salt 3 Tbsp Oil *your choice Directions: Combine water, sugar and yeast in large mixing bowl, and let sit 5 minutes. Mix flour and salt together, in separate bowl. Add oil to yeast/water mix and stir. Add in the flour/salt mixture to the water mixture, until dough ball forms. Place dough ball in oiled bowl and cover for about 1 hour, until it doubles in size. Place dough ball on floured work surface and pat down and roll out, to about 3/8" thick, and cut biscuits. I usually cut mine into squares, because there is less trimmed dough left, that has to be reworked, rolled, and re-cut. Place cut biscuits on sheet pans, cover to prevent drying, and let rise 45 minutes to 1 hour. Preheat oven to 350. Cook biscuits about 15 minutes, or until golden brown. Remove from pans and let cool. This recipe makes about 35 - 3" square biscuits, but recipe can easily be halved. Recipe and Photos shared by: JD Provence for Canning and Cooking at Home Adapted from old family (Granny's) recipe
1 Comment
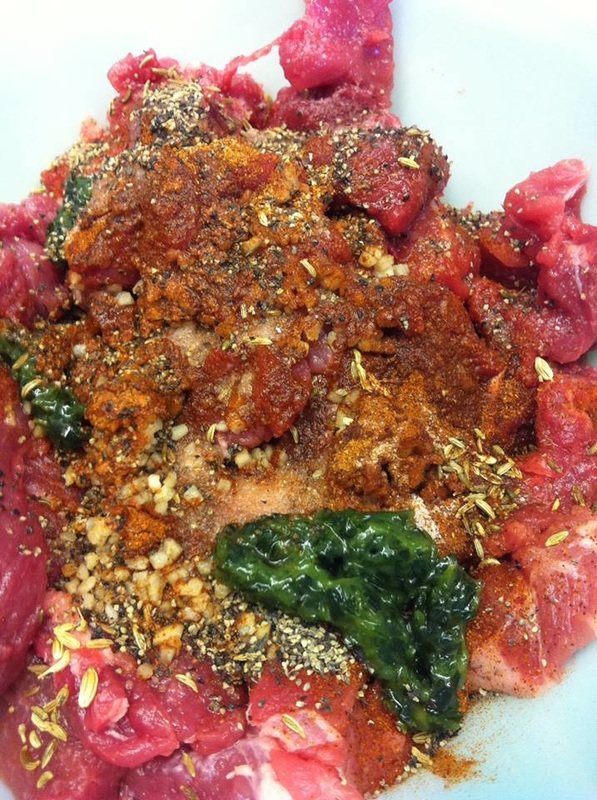
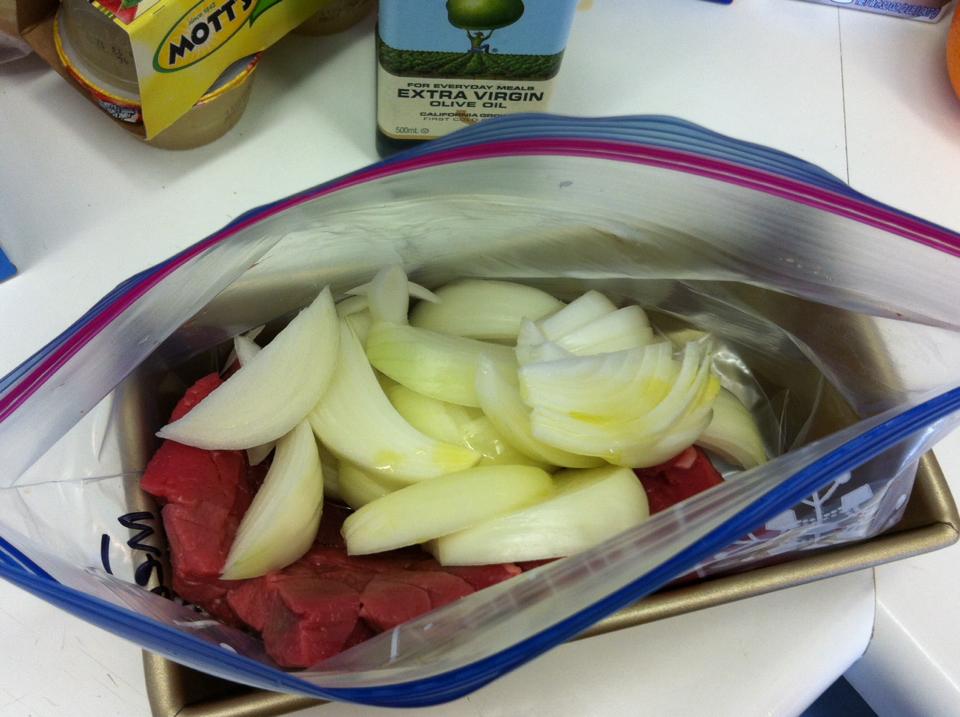
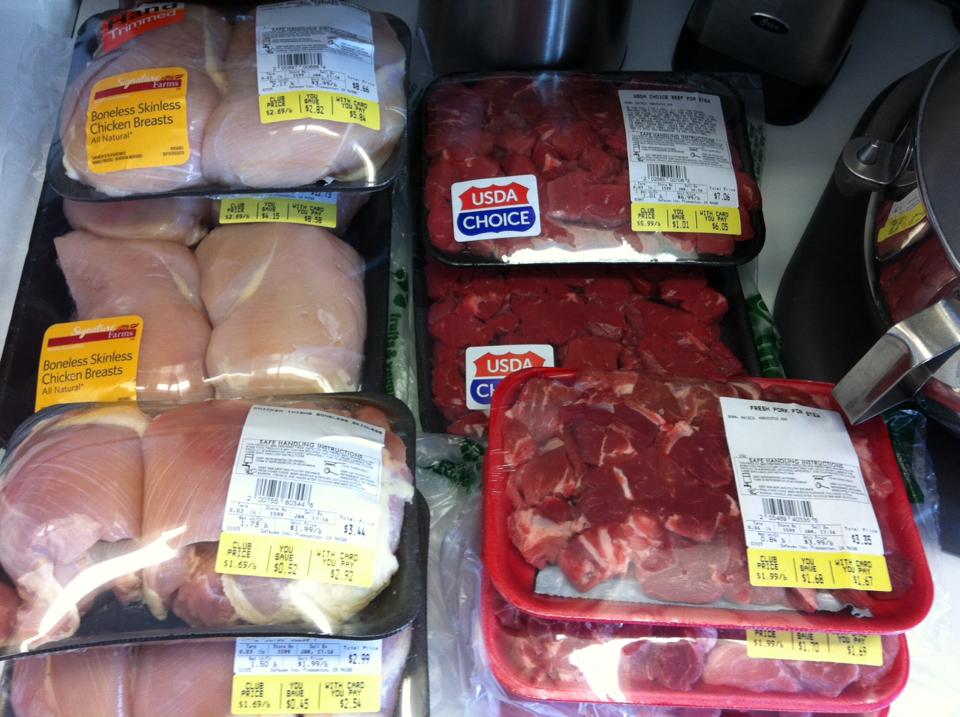
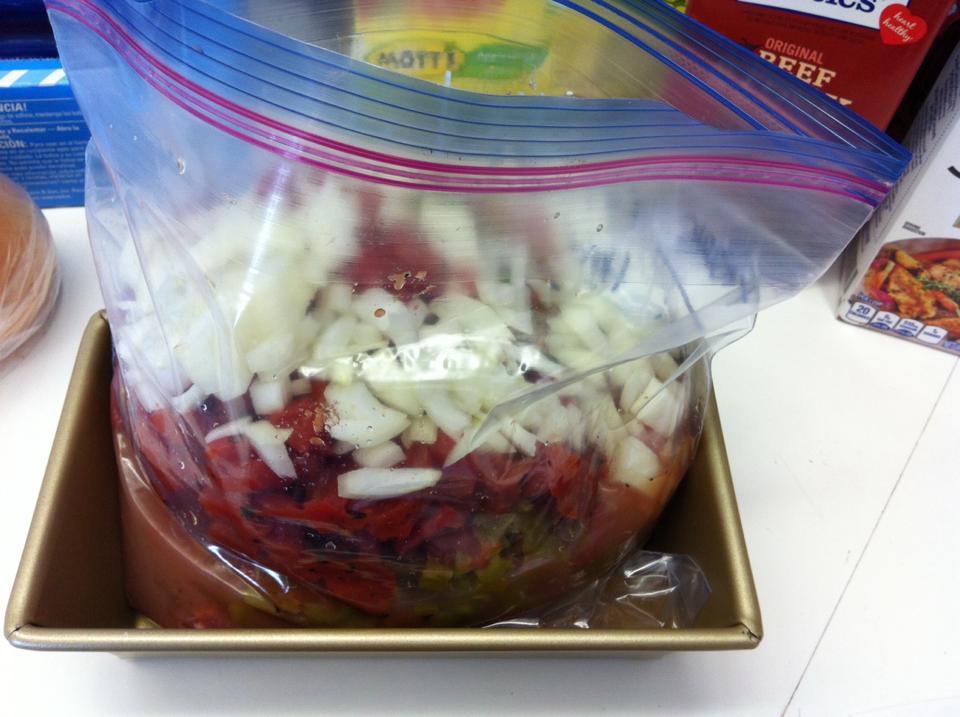
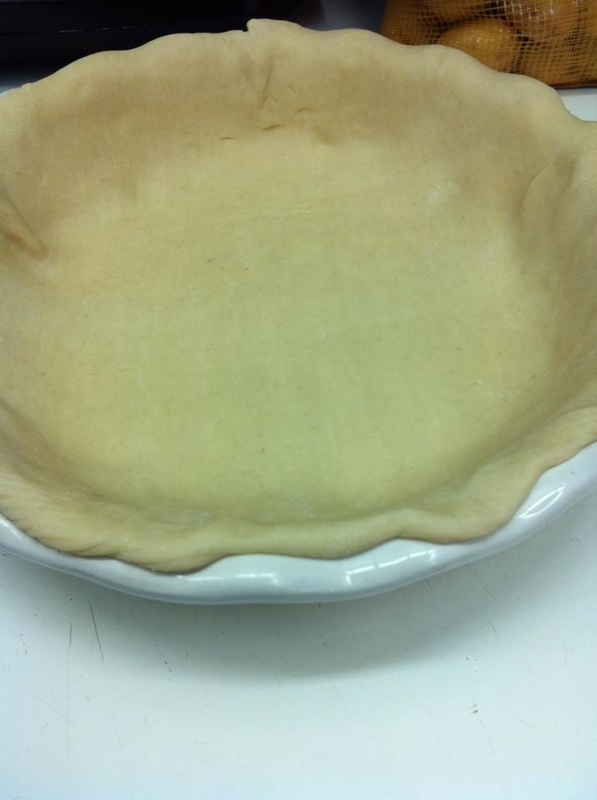
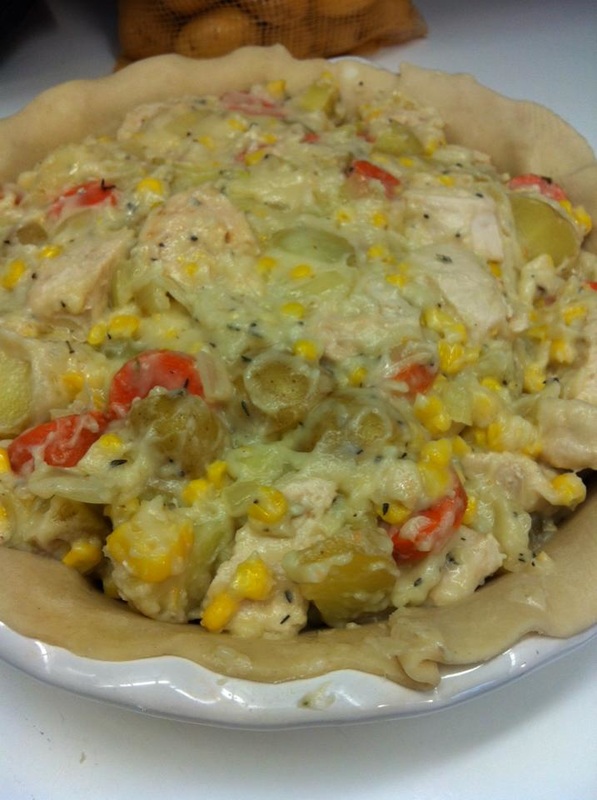
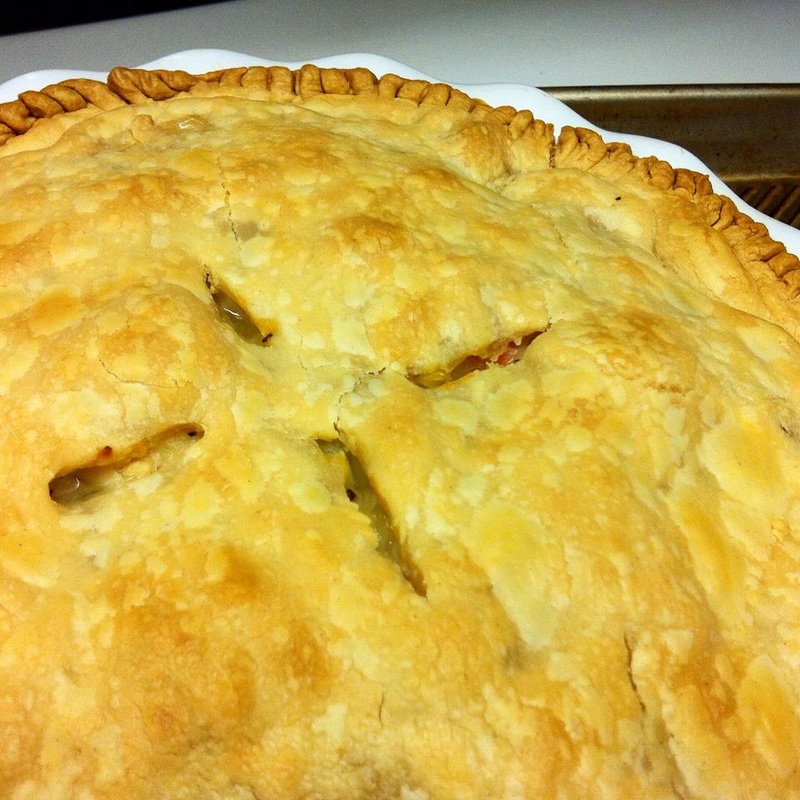
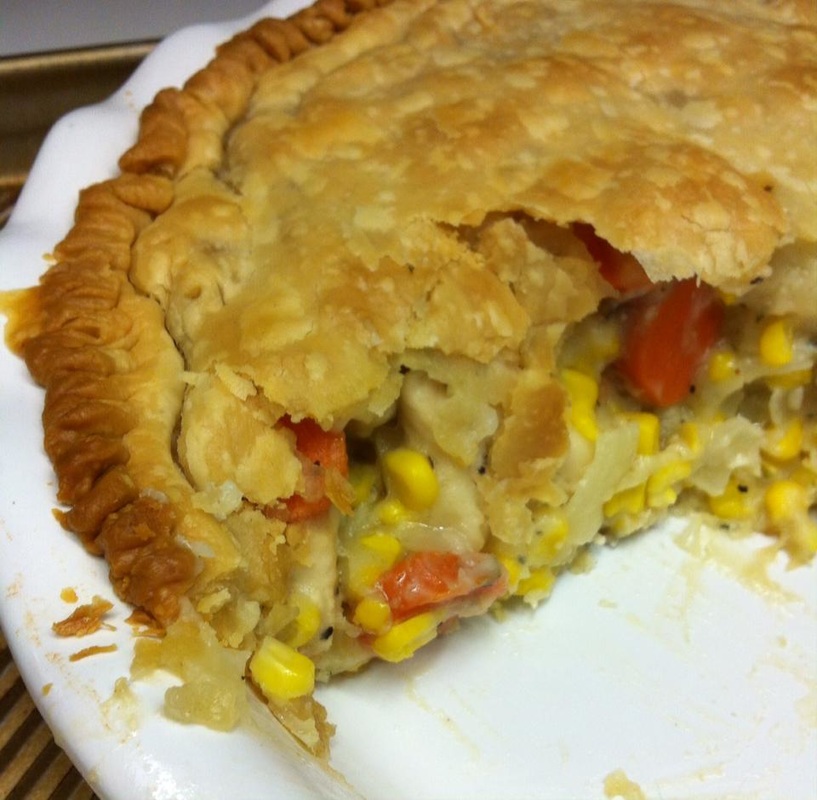
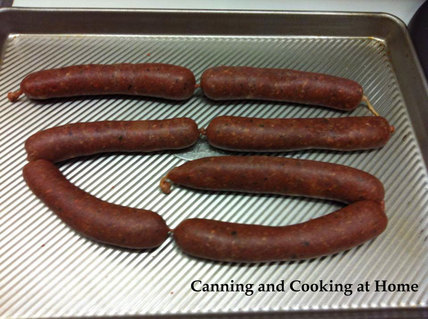 Ever decide to take on something totally new to you? Ya, I did that with Canning and look where that got me (tee-hee.) I decided that my Kitchen Aide Mixer was being under utilized. The solution to that was to look into grinding my own meats and making sausages. I ordered the sausage casings and a "How-To" book from Amazon and got started. Feeling brave I decided to make fresh, homemade Italian sausage using Emeril's recipe. I admit that YouTube helped immensely in giving me ideas right in front of my eyes on how best to use my new Kitchen Aide attachment. I was thrilled with the results for my first time out!! and the taste - oh wow!! I cannot wait to make MORE and spice things up a bit - with perhaps ground chicken, apples and all sorts of different spices. I also have to tip my hat to my friend who was a butcher and explained to me how to roll the links (twist the casings) as I made the sausages...You can even make this sausage recipe without casings!! just form into sausage patties and cook up! It's all good!! ~Enjoy! Diane Homemade Italian Sausage Ingredients: 3 pounds well-marbled pork butt, cut into 1/2-inch pieces 2 tablespoons minced garlic 1 tablespoon plus 1 1/2 teaspoons paprika 1 1/2 teaspoons toasted fennel seeds 1 tablespoon salt 1 tablespoon freshly cracked black pepper 1 teaspoon cayenne 1/2 teaspoon ground anise 2 tablespoons freshly chopped Italian parsley leaves 3 tablespoons dry red wine Pork casings, optional Directions: Combine the cubed pork butt, garlic, paprika, fennel seeds, salt, pepper, cayenne, anise, parsley, and red wine in a large bowl and toss well to coat. Refrigerate/marinate covered overnight or up to 24 hours. Pass the mixture through a meat grinder fitted with a medium die. (Alternately, transfer to a food processor in 2 batches and process until finely ground.) To test the seasoning, heat 1 teaspoon oil in a small skillet, and cook about 2 teaspoons of the mixture. Adjust seasonings, to taste. (Don't skip this step, it's your only chance to have your sausage taste like you want!) Using the sausage attachment on a mixer, stuff the meat into the casings, if being used. Twist and tie off to make your individual sausages. If not casing into sausages - shape into patties. Cook sausage in usual manner, making sure the internal temperature of the sausage links reaches at least 150 degrees F. Uncooked sausage can be stored in the refrigerator up to 3 days or freeze and use within 3 months. Recipe by: Emeril Lagasse Photos by: Diane Baker for Canning and Cooking at Home 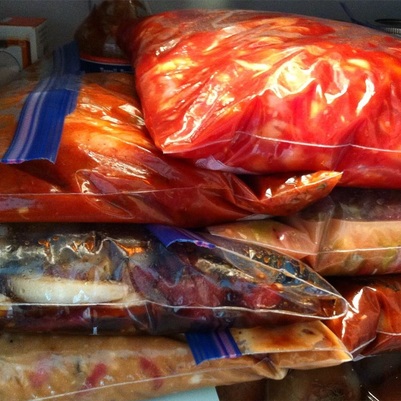 An Old Trend is New Again?" -or did it just never go away- Back when we had a youngster in the house (15+ years ago) weekends were meant for hiking, canoeing, fishing and exploring in our camper, I often made meals ahead of time and used my fancy 'seal-a-meal' to package up healthy and tasty dinners in advance that we could reheat in our camper. It's been a LONG time since I've shopped and made 'pre-cooked' meals but, with the trend I've seen popping up everywhere lately, I thought I'd give it a try once more. Our household is down to just us two adults and often, dinner is the last thought on our minds throughout the day. I think having a few freezer ready meals on hand will help alleviate the panic of "what should we have for dinner" that we face about twice a week... I went ahead and tried a few meals that go from freezer to slow-cooker (crock pot). I chose 7 meals that encompassed beef, chicken and pork for variation. I took the time to log how much 'actual hands on time' it took to organize, prep, bag and clean up after all these meals, I would say - with certainty (and I am pretty well organized) it took me $70 in items that I didn't have on hand ($40 for all the meats involved plus, $30 in produce or spices). Shopping aside, it took 90 mins to Label, Prep and Bag everything and another 20 mins to cleanup. There are some meals that had less ingredients and were easier to just plop and seal...Keep in mind too that I did this all alone, extra help would definitely speed things up! My advice to you - find meals your family will actually enjoy. I've seen posts touting "so many meals in so many minutes" and right now, I am not sure where they came up with their timing. I found it much, much easier to collect the various recipes that I wanted to try, and compile my shopping list. I say, start with 5-7 crock-pot/slow-cooker recipes and see how it all goes. Figure out if it's worth the time and effort in advance for your family. I lucked out and there were sales at my local Safeway on every meat item I needed to purchase! I had a tidy savings in sales alone of $25 overall for my seven meals (that included hand-trimmed chicken breasts, cubed and packaged pork and beef as well as boneless, skinless chicken thighs that were well trimmed.) If I had to trim and cube those meats, the timing on these recipes would have grown - adding at least another 20-30 minutes to the overall prep time. Some Hints: have lots of measuring cups and measuring spoons ready to go. I had a set for dry measuring and a set for liquid measuring which sped things up. I had a nice big trash can at my side too - you will appreciate this advice because, once you get going you will quickly realize how much you toss away, in scraps, peels and packaging. I also wrote down on the face of each freezer gallon bag in sharpie permanent marker - the date, the contents and cooking instructions. All my meals will work best of taken from the freezer the night before and placed in the fridge overnight to 'thaw'. The Best hint/tip I can offer is to use a meatloaf pan in the packaging process!! I placed my gallon baggies IN the pan which then supported the contents going in without tipping over the bag - worked like a charm! and of course, slow cooker liners make for easy cleanup when you are ready to cook your meals - if you don't want to use those - make sure to coat your slow-cooker with olive oil - which will also aide in quick cleanup. Here are the Recipes I assembled: Seven (Freezer to Slow-Cooker) Meals in 90 minutes prep time: Beef Tips in Gravy from Family Fresh Meals Orange Chicken from Frugal Girls Green Chile Pork Stew from Who Needs a Cape? Ranch Chicken Tacos from Who Needs a Cape? Chicken Cacciatore from Southern Living Mongolian Beef from Recipe Critic Applesauce BBQ Chicken from Taste of Home I will update this post as we cook and eat each meal listed above. I hope this post gives you a little insight into what you can expect when preparing meals ahead of time. I know, I look forward to tasting all these recipes and finding or creating new ones to share! ~Enjoy! Diane Photos by: Diane Baker for Canning and Cooking at Home 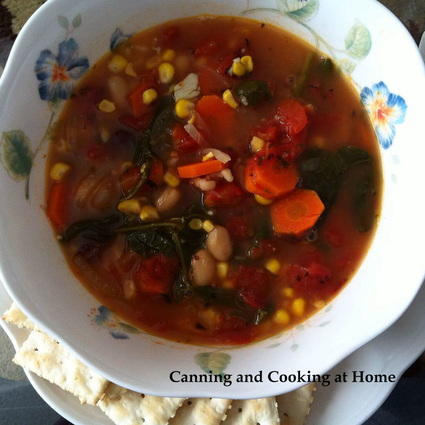 It's Winter and the days have been cold. I needed some soup! I had a nice bag of spinach staring at me in the fridge along with some fresh garlic and Summer corn that I used in another recipe earlier in the week. I decided to make a vegetable soup with Beans and Spinach as the base. To make this a complete vegetarian soup just substitute Vegetable Broth/Stock in place of the Chicken Broth/Stock. If you want the soup a bit creamier - consider blending up an extra can of beans in your blender and adding to the soup. This is a great tasting and nutritious soup - I used 3 fat cloves of garlic which gave this soup a nice garlic kick/flavor! This soup can be pressure canned (instructions below) ~Enjoy! Diane Winter Vegetable Soup {Spinach & Bean} Ingredients: 1 tablespoon olive oil 1 tablespoon butter 1 onion, sliced thin 3 big cloves minced garlic 3 large diced carrots 1 cup corn 2 (14.5 ounce cans) fire roasted tomatoes 6 1/2 cups chicken broth/stock 1 can great northern beans, drained 1 can kidney beans, drained 2 teaspoons oregano 2 teaspoons parsley 2 teaspoons garlic powder 1 bag 10 ounce fresh spinach ground black pepper, to taste salt, to taste Directions: Place the butter and oil in the bottom of a large soup pot, and saute the onion until tender, then add the minced garlic for another 2 min. and cook until fragrant. Add all remaining ingredients to the pot and simmer until vegetables are tender. If you would like to add cooked rice or pasta, prepare according to the package instructions and serve on the side. I like leaving the pasta or rice out of the soup pot so that people can control how much of that they want in their bowl, and the starch from those items don't soak up all the liquid/broth. I also leave out the pasta and rice in case I want to continue on and pressure can any leftovers as you cannot can rices/pastas. Want to Pressure Can this Soup? Fill jars halfway with solids and the other half broth, process in a Pressure Canner: Quarts 90 mins and Pints 70 mins. at 10 pounds psi weighted gauge canner/11 pounds dial gauge canner (or the psi according to your altitude) *I increase NCHFP "Soup Timing" for the addition of corn & spinach in this recipe. http://nchfp.uga.edu/how/can_04/soups.html Yield: approx 3 & 1/2 quarts (7 pints) Recipe & Photos by: Diane Baker for Canning and Cooking at Home 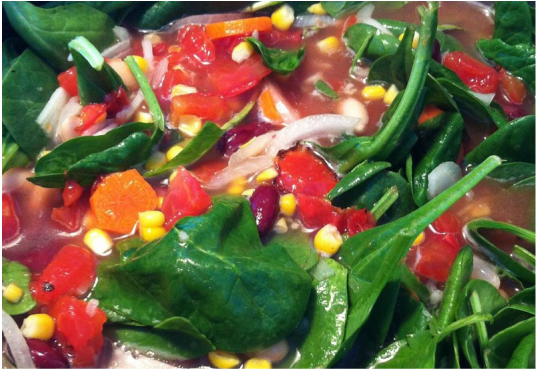  Chicken Pot Pie Ingredients: 1 cups diced peeled potatoes 3/4 cup sliced carrots 1/2 cup butter, cubed 1/2 cup chopped onion 1/2 cup all-purpose flour 1 tsp salt 1/2 tsp dried thyme 1/2 tsp pepper 1 1/2 to 2 cups chicken broth ** 3/4 cup milk 2 cups cubed cooked chicken 1/2 cup frozen peas 1/2 cup frozen corn 1 package (refrigerated pie pastry for 9" pie) or homemade crust for one 9" pie. Directions: Preheat oven to 425°. Place cut up potatoes and carrots in a large saucepan, add water to cover and bring to a boil. Reduce heat to medium-high and cook, covered, 8-10 minutes or until potatoes are slightly tender; not mushy, drain & set aside. In a large skillet, heat butter over medium-high heat. Add onion; cook and stir until tender. Stir in flour and seasonings until blended. Gradually stir in broth and milk. Bring to a boil, stirring constantly; cook and stir until thickened. Make sure to add enough chicken broth ** so that you have a slightly thick 'gravy' and not a firm or gooey 'paste" and not an extra runny gravy/filling. Stir in chicken, peas, corn and potato mixture; remove from heat. Unroll a pastry sheet into a 9-in. pie plate; trim even with rims. Add chicken mixture. Unroll remaining pastry; place over filling. Trim, seal and flute edges. Cut slits in tops. Bake on a cookie sheet - 35-40 minutes or until crust is lightly browned. Let stand 15 minutes before cutting. Recipe Adapted from: Taste of Home Photos by: Diane Baker for Canning and Cooking at Home |