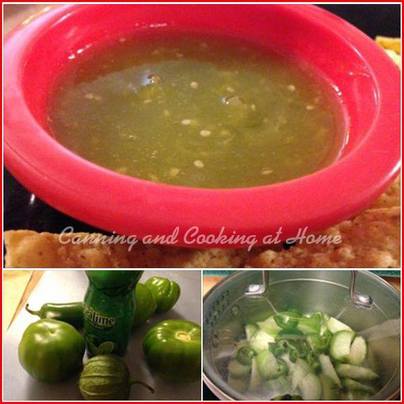
 El Cucui's Tomatillo Salsa
*a guest post by JD Provence Ingredients: 8 Tomatillos, blanch to remove skin if desired, but not necessary 1 - 2 Jalapenos 1/4 cup Vinegar 1/3 cup Lime Juice 1 - 2 Tbsp Honey or Sugar, to taste 1/4 - 1/2 tsp salt, to taste Directions: Remove husk and core from tomatillos, and inside from jalapenos. Cut tomatillos into wedges and dice jalapenos (wear gloves when working with hot peppers) Add to medium saucepan with vinegar and lime juice. Bring to boil, cook about 10 minutes, over medium heat, until vegetables are tender. Grind with stick blender, or cool enough for blender, blend to smooth consistency. Simmer about 15 minutes, until desired consistency is reached. Add chosen sweetener and salt, to taste. Serve with tortilla chips. Also makes a great citrus topping for enchiladas, tacos, chicken, beef or pork dishes. To Make 5 Pints/Waterbath Canning: Ingredients: 24 Tomatillos, blanch to remove skin if desired, but not necessary 3-6 Jalapenos 3/4 cup Vinegar 1 cup Lime Juice 3-6 Tbsp Honey or Sugar, to taste 1 Tbs salt Remove husk and core from tomatillos, and inside from jalapenos. Cut tomatillos into wedges and dice jalapenos (wear gloves when working with hot peppers) Add to medium saucepan with vinegar and lime juice. Boil until vegetables are tender. Grind with stick blender, or cool enough for blender, blend to smooth consistency. Simmer until desired consistency is reached. Add chosen sweetener and salt, to taste. Hot pack to 1/2" headspace and Waterbath Can 15 mins or according to your local regulations and altitude. Photo and Recipe by: JD Provence for Canning and Cooking at Home
0 Comments
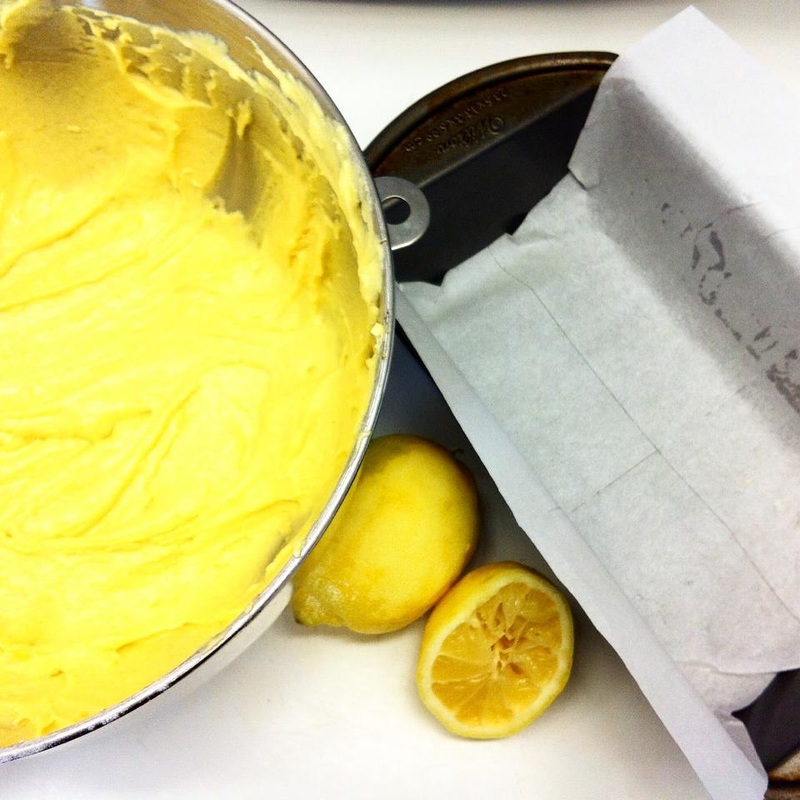
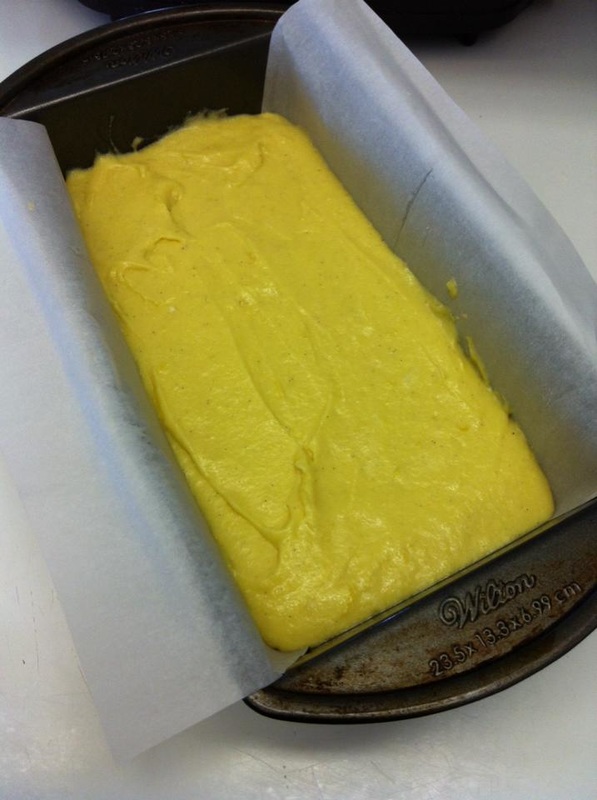
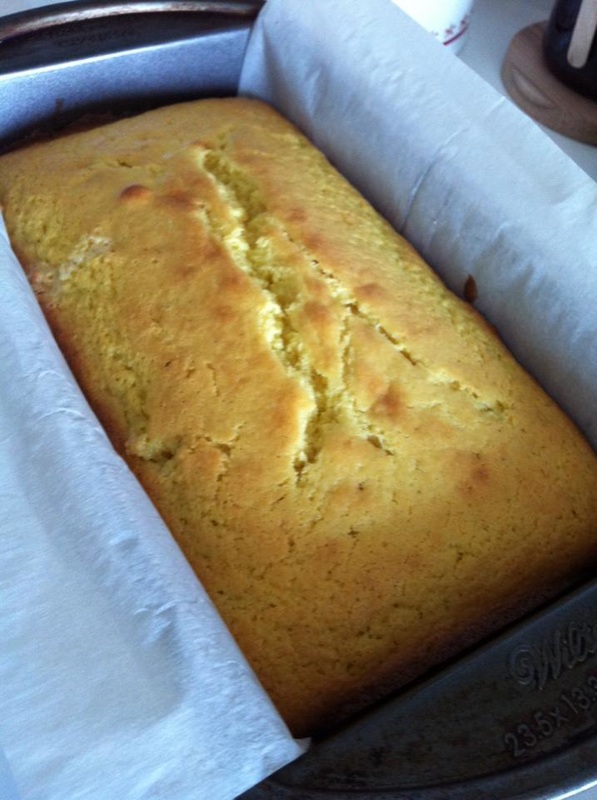
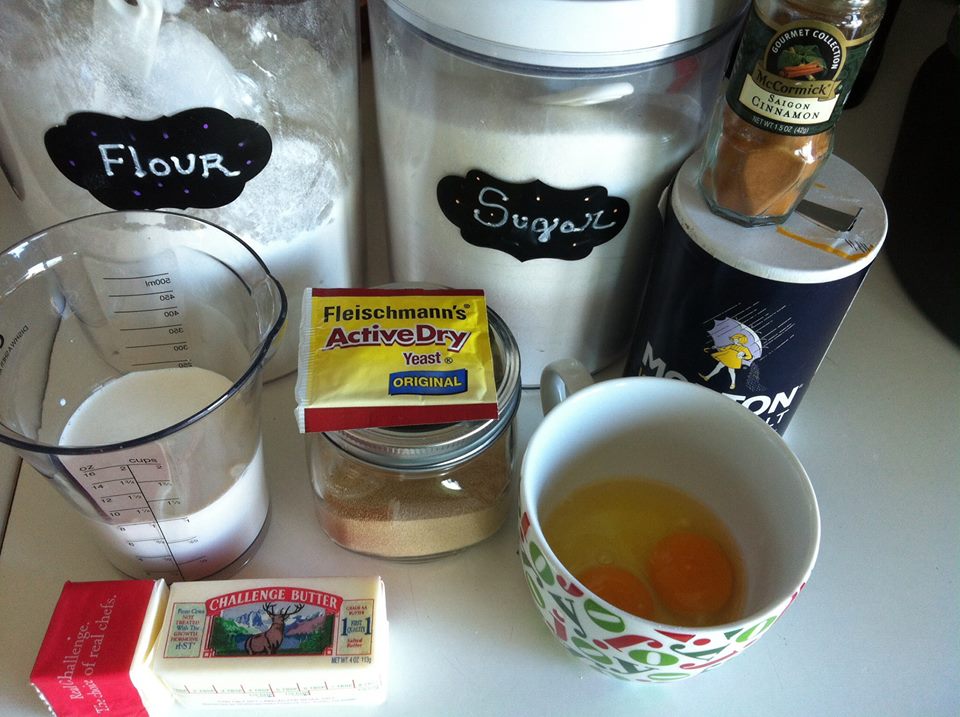
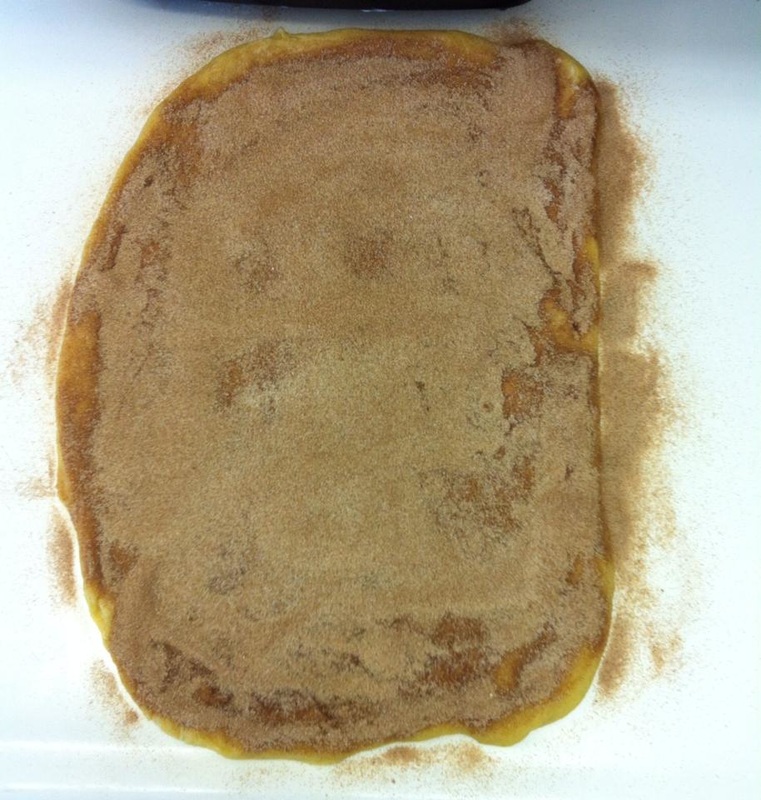
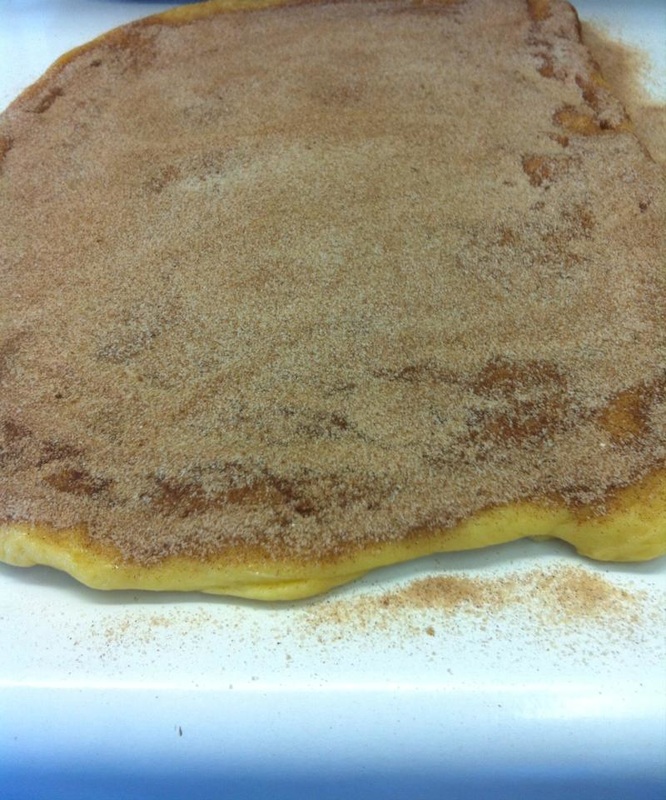
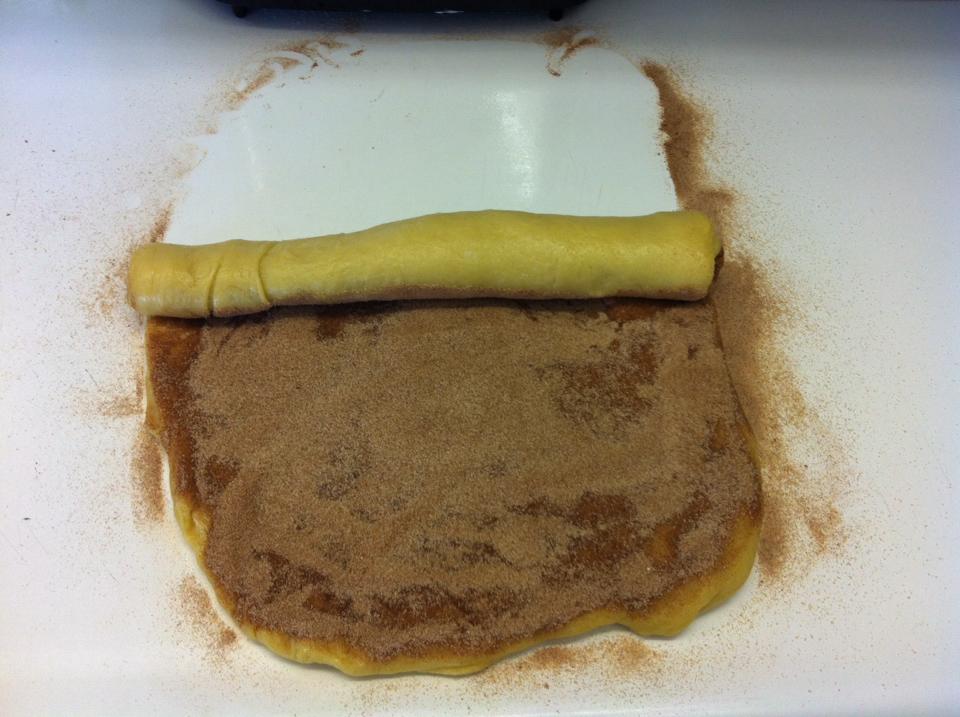
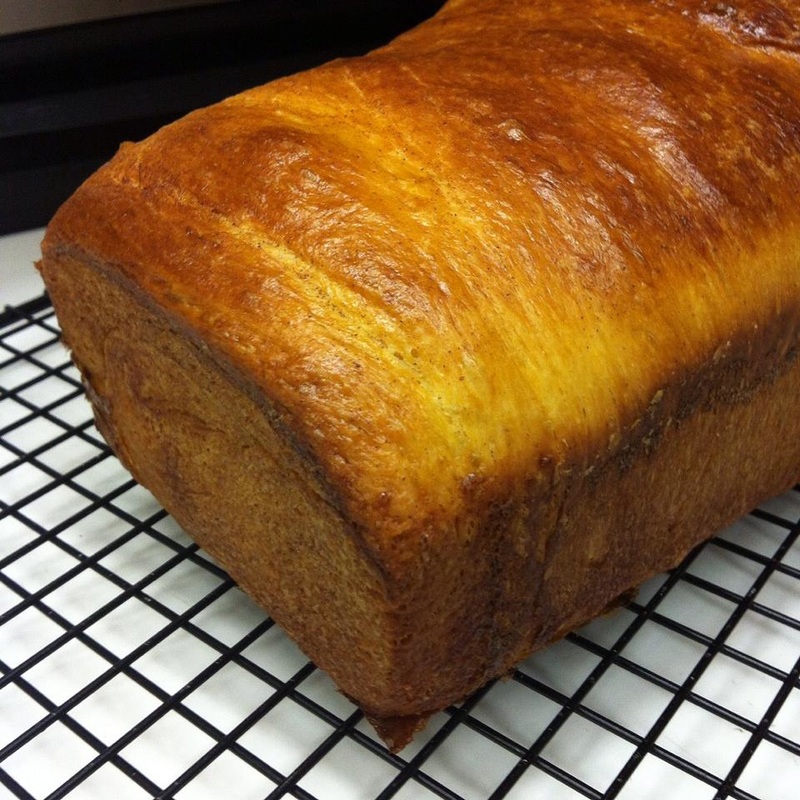
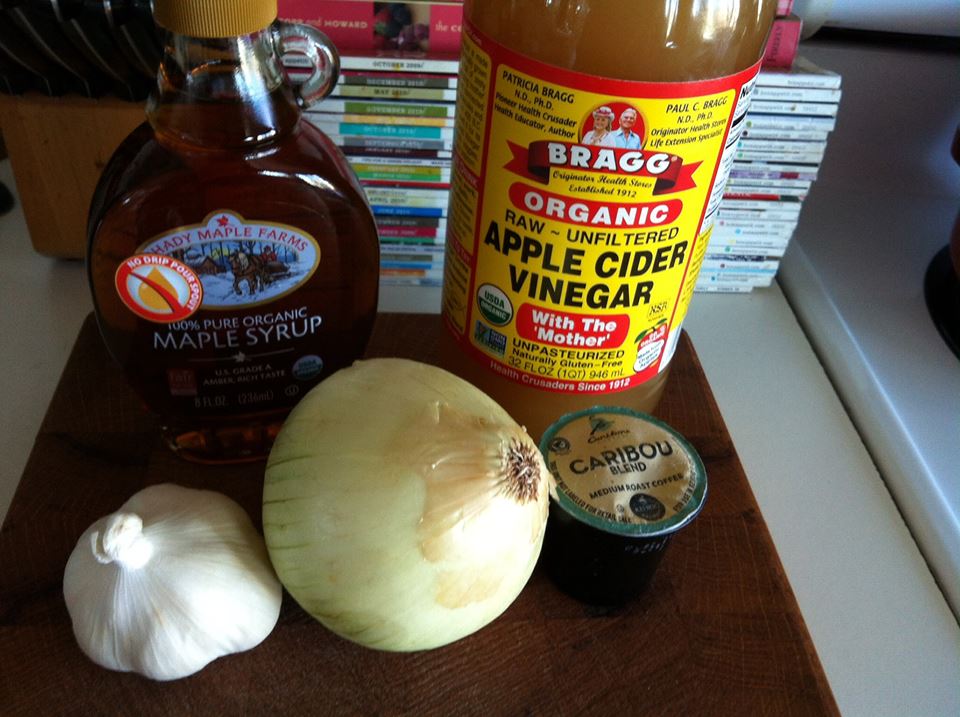
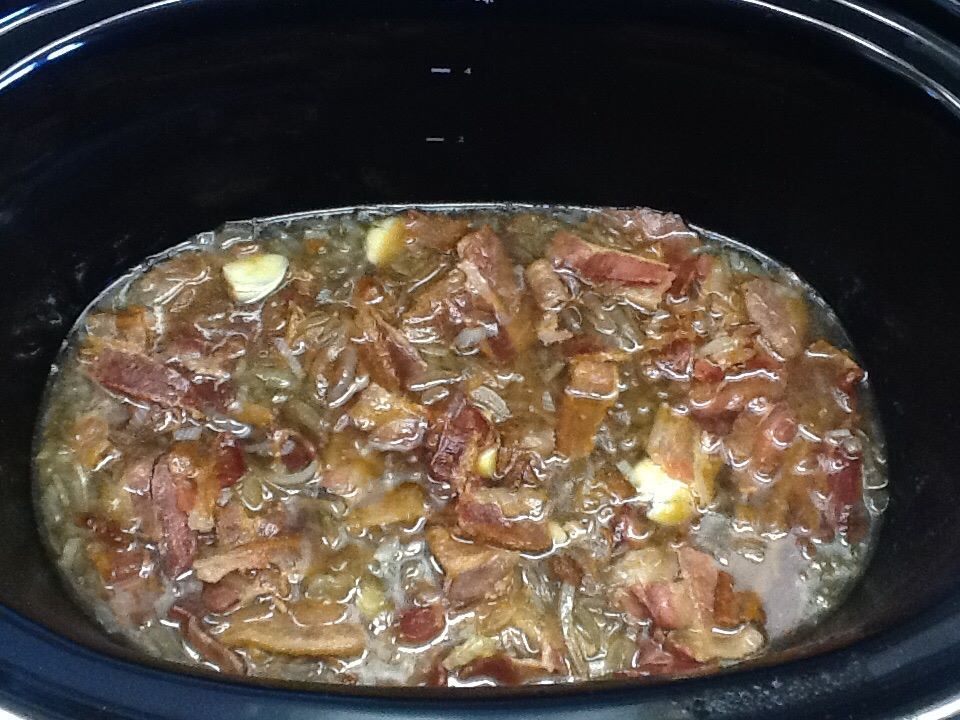
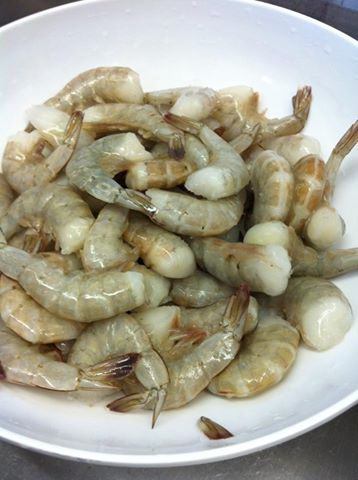
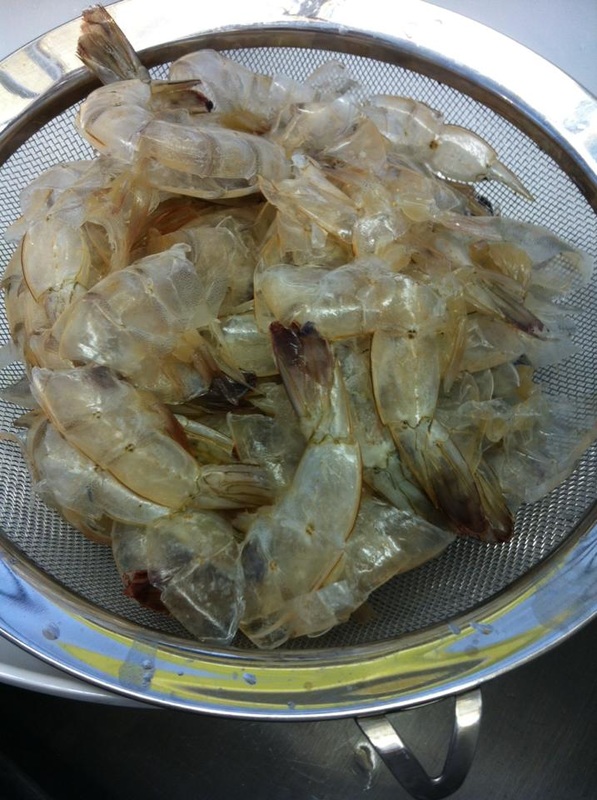
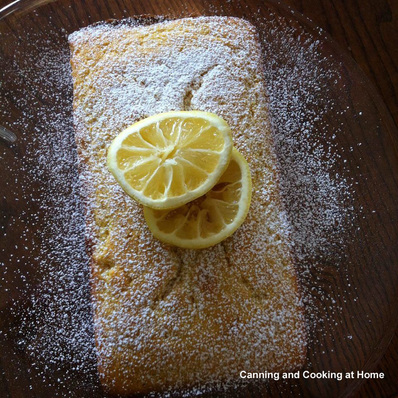 I found this awesome recipe over at Kristine's Kitchen. This is a bright and bursting full of flavor cake made with lemon and ricotta - such a perfect match! You can use her glaze or just simply dust with powdered sugar - either way, this cake is so moist and delicious. ~Enjoy! Diane Lemon Ricotta Cake Ingredients: 1½ cups cake flour 2 tsp. baking powder ½ tsp. salt 2 tbsp. lemon zest, from about 2 medium lemons ½ cup (1 stick) unsalted butter, at room temperature 1 cup granulated sugar 3 eggs, at room temperature 1 cup ricotta cheese ¼ cup freshly squeezed lemon juice 1 tsp. vanilla extract ½ tsp. almond extract Optional: almond glaze/topping: 1 cup powdered sugar, sifted 3 tbsp. lemon juice ½ tsp. almond extract ½ tsp. lemon zest 2 tbsp. sliced almonds, for topping Directions Preheat oven to 350 degrees F. Spray a loaf pan with cooking spray. Place a piece of parchment paper on the bottom of the pan, letting it hang up and over the sides on the two ends. In a medium bowl whisk together the cake flour, baking powder, salt, and lemon zest. Set aside. In the bowl of a stand mixer fitted with the paddle attachment, cream together the butter and sugar on medium speed until light and fluffy, about 3 minutes. Add the eggs and beat until incorporated, about 1 minute. Add the ricotta, lemon juice, vanilla, and almond extract and beat on medium speed, scraping down the sides of the bowl as needed, about 2 minutes. With the mixer on low speed, add the flour mixture and beat until combined, 1-2 minutes. Pour the batter into the prepared cake pan. Bake for 50-60 minutes, until a tester inserted into the center of the cake comes out clean. Be sure to insert the tester all the way down to the bottom of the cake, as the top may be done but the bottom might still be wet/gooey. Let cake cool in the pan on a wire rack for 10 minutes and then remove from pan to cool completely before glazing or dusting with powdered sugar. Optional Glaze: Whisk together the powdered sugar, lemon juice, almond extract, and lemon zest in a medium bowl. Spoon glaze over the top of the cooled cake. Sprinkle with sliced almonds. Let glaze set for a few minutes before serving. Recipe by: Kristine's Kitchen Photos by: Diane Baker for Canning and Cooking at Home 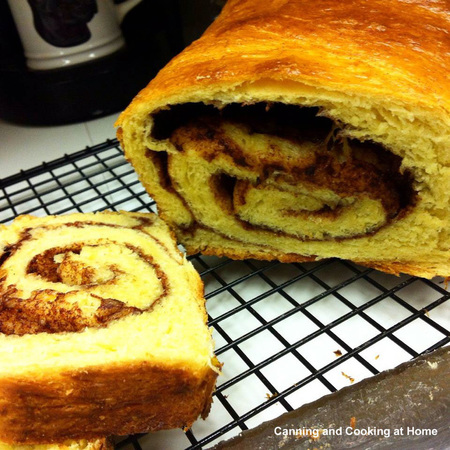 Cinnamon Swirl BreadIngredients: Bread: 1 cup Milk 6 Tablespoons Butter 2-1/2 teaspoons Active Dry Yeast 2 whole Eggs, room temp if possible 1/3 cup Sugar 3-1/2 cups All-purpose Flour 1 teaspoon Salt Filling: 1/3 cup Sugar 2 Tablespoons Cinnamon Egg, for Smearing Topping: Egg And Milk, Mixed Together, For Brushing Softened Butter, for Greasing Directions: Melt butter with milk. Heat until very warm, but don't boil. Allow to cool until still warm to the touch, but not hot. Check what temperature your yeast needs to activate and thrive (my yeast says 90-110 degrees) Sprinkle yeast over the top, stir gently, and allow to sit for 10 minutes. In a large bowl, Combine flour and salt - set aside. In the bowl of an electric mixer, mix sugar and eggs with the paddle attachment until combined. Pour in milk/butter/yeast mixture and stir to combine. Add in half the flour/salt mixture and beat on medium speed until combined. Add the other half and beat until combined. Switch paddle attachment over to the dough hook attachment and beat/knead dough on medium speed for 8-10 minutes. If dough is overly sticky, add 1/4 cup flour and beat until incorporated into dough. Cover dough in bowl with plastic wrap and set it in a warm, place for at least 2 hours for the first rise. On really cool or cold days here - I heat my oven to 170 when starting this recipe - as soon as it hits 170 I turn my oven OFF and crack the oven door open for about 2 minutes - this creates a warm environment that my yeast loves without "cooking" the bread. The oven should be warm but, not HOT - you are just creating a warm spot for the dough to rise, After first rise, punch down dough and turn dough out onto the work surface. Roll into a neat rectangle no wider than the loaf pan you're going to use, and about 18 inches long. Smear the surface of the dough with beaten egg. Mix sugar and cinnamon together, then sprinkle evenly over the egg-brushed dough. Starting at the far end, roll dough toward you, keeping it tight and contained. Pinch seam to seal. Prepare loaf pan by smearing with softened butter. Place dough, seam down, in the pan. Cover with plastic wrap and allow to rise for 2 hours. Preheat oven to 350 degrees. Mix a little egg with milk, and brush over the top. Bake for 40 minutes on a middle/lower rack in the oven. Remove from the pan and allow bread to cool. Slice and serve, or make cinnamon toast or French toast. Recipe Adapted from: The Pioneer Woman Photos by: Diane Baker for Canning and Cooking at Home 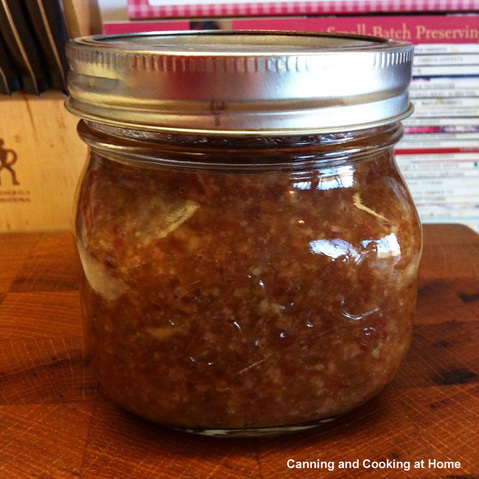 Maple Bacon Jam This recipe packs a powerful flavor 'punch.' This is a savory jam that works great on so many levels. You can smear it on grilled chicken, spoon over seared scallops, roll into grilled asparagus, ladle onto smoked brisket sandwiches, cover some baked brie (you get the idea!) Think of this more as a sweet/savory condiment then a 'traditional' jam. Worth the making! ~Enjoy! Diane Ingredients: 1 pound sliced bacon, cut into 1-inch pieces 2 medium yellow onions, diced small 3 garlic cloves, peeled and smashed 1/2 cup cider vinegar 1/2 cup packed brown sugar 1/4 cup pure maple syrup 3/4 cup brewed coffee Directions: In a large skillet, cook bacon over medium-high, stirring occasionally, until fat is rendered and bacon is lightly browned, about 20 minutes. With a slotted spoon, transfer bacon to paper towels to drain. Pour off all but 1 tablespoon fat from skillet (reserve for another use); add onions and garlic, and cook until onions are translucent, about 6 minutes. Add vinegar, brown sugar, maple syrup, and coffee and bring to a boil, stirring and scraping up browned bits from skillet with a wooden spoon, about 2 minutes. Add bacon and stir to combine. Two Ways to Finish: StoveTop: cook over medium heat for half an hour, or until deep golden and thickened to the consistency of jam. Transfer to a food processor; pulse until coarsely chopped. Let cool, then refrigerate in airtight containers, up to 4 weeks. Slow-Cooker: Transfer mixture to a 6-quart slow cooker and cook on high, uncovered, until liquid is syrupy, 3 1/2 to 4 hours. Transfer to a food processor; pulse until coarsely chopped. Let cool, then refrigerate in airtight containers, up to 4 weeks. Note: **If you are having issues cooking off liquids - at the end of the cooking time, you can add a cornstarch slurry (2 Tbs cornstarch to just enough cold water to make a smooth paste) and add to jam mixture to thicken. Since this recipe CANNOT be canned. (Bacon is unsafe to can due to its extreme fat content) using cornstarch is permissible here. Makes Approx: One Pint REMINDER: THIS RECIPE IS FOR REFRIGERATION ONLY AND NOT TO BE CANNED. Recipe Adapted from: Martha Stewart Photos by: Diane Baker for Canning and Cooking at Home 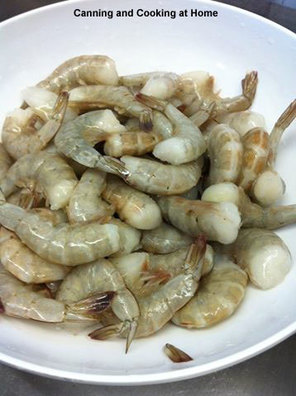 Shrimp Stock Ingredients: 2 1/2 pounds shrimp shells 2 1/2 quarts plus 1 cup cold water 1 cup coarsely chopped onion 1/2 cup chopped carrots 1/2 cup chopped celery 1 tablespoon garlic, roughly chopped 1/2 cup mushroom trimmings Sachet consisting of the following: 1 bay leaf, 1/4 teaspoon dried thyme, 1/4 teaspoon crushed black peppercorns and 4 parsley stems Directions: Rinse the shrimp shells under cold running water and place them in a 1-gallon stockpot with the remaining ingredients. Bring the pot to a boil and then lower the temperature to a simmer. Skim the impurities that rise to the surface with a ladle, spoon or a skimmer. Simmer the stock for 45 minutes to 1 hour. When the stock is completed, strain the stockpot and immediately cool the stock using an ice bath of water and ice. Use the amount of stock you need, and pressure can, refrigerate or freeze the rest. Pressure Canning instructions: Pressure Can Seafood Soups and Stocks = 100 minutes at your altitudes psi http://nchfp.uga.edu/how/can_04/soups.html Great Information here on Canning Seafood: http://extension.oregonstate.edu/fch/sites/default/files/documents/pnw_194_canningseafood.pdf Recipe by: Emeril Lagasse & NCHFP Photos by: Diane Baker for Canning and Cooking at Home |