|
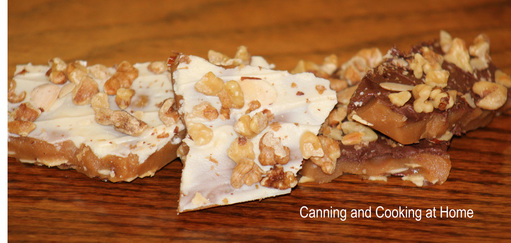
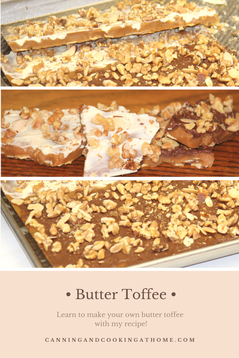
Canning has taught me the BEST Life Lesson, without me seeing it happening... I think the main lesson I learned is Patience. In my working career, everything was rush-rush, deadlines and auditors requiring strict adherence to Government and Commercial rules. I wore so many hats at work that I often felt like a clown juggling everything in the air just to keep the balls in motion... when I started Canning I was frustrated at how long every step could take: growing or buying the produce, cleaning and preparing all the items for canning and making sure to remember that Canning is a Science, not COOKING and CANNOT BE RUSHED. I always considered myself a horrible baker too! Why? because all these things need precise and quiet hands. Something I wasn't used to. I am one of "those" people that hates taking vacation because of all the work I knew I'd face upon my return, I very rarely un-clench my jaw. To this day, I detest talking on a phone. Yes, an 'Super Type A' that had earned her Masters Certs and was on my way adding another facet to my burgeoning career... and then - 'Continuing Resolution' happened. Basically, my work and the work of so many came to a screeching halt. I knew it was coming and felt lucky to have - at least - a super supportive family and husband. I remember the call, 6pm when out for dinner, it came from my Boss/President and dear friend of my company (an ex-Naval Commander) telling me no one will be returning to work the next morning. The company could not survive the 'CR' that President Obama invoked. All those years of hard work by 35 employees - flushed down the drain and left to the wind. WHO would have guessed that this horrible moment would bring calm to my life a few years later (yes, it has taken me that long to un-clench my jaw!) LOL Which brings me to in a HUGE roundabout way to making toffee!! I know, you are tired of reading this and just want the recipe but, I am making you wait and read this first to see if you have the patience to make candy? Toffee making takes time, and a watchful eye and of course, patience!! so, if you want to attempt to create the most beautiful butter toffee - you are ready for the recipe! ~Enjoy, Diane Ingredients: 2 1/3 cups sugar 2 cups Butter 1/4 cup plus 2 tablespoons water 2 tablespoons light corn syrup 1 tsp vanilla or almond extract 1 cup almond slices, toasted 1 1/2 cups chopped walnuts, toasted 1 cup semi-sweet or milk real chocolate chips 1 cup white chocolate chips *made best using a Candy thermometer Directions: Butter 15x10x1-inch baking pan; set aside. If your pan is larger, use tin foil to create a foil 'damn' to shrink the pan to the proper size so that your toffee doesn't spread too thin... Spread nuts in a single layer on a baking sheet lined with parchment paper and toast for 13-15 minutes at 350. Once toasted, remove from oven and set aside. Combine all ingredients except nuts and chocolate chips in heavy 3-quart saucepan, I used my enameled cast iron pot. Cook over medium heat, stirring constantly, until butter is melted. Reduce heat to medium-low. Cook 25-40 minutes, stirring occasionally, until candy thermometer reaches 300F or small amount of mixture dropped into cold water forms hard brittle strands. Keep in mind that your altitude will change what temperature you will need to cook to (called the Hard Crack Stage for Candy making) I am at 5250Ft. above sea level, thus my temp needs to cook to 290F. ((basic rule is to subtract 1 degree for every 500 feet above sea level that you are)) Spread toasted almonds in a single layer over your buttered, prepared baking pan. Pour mixture into prepared pan; spread to desired thickness. Sprinkle chocolate chips over hot candy, I used one side dark chocolate and one side white chocolate; let stand 5 minutes. Spread melted chocolate evenly over candy. Sprinkle with nuts. Cool at least 3 hours. Break into pieces. Store in container with tight-fitting lid, in cool dry place, up to 3 weeks. NOTE: If your toffee separates during cooking, carefully and slowly add 1/4 to 1/2 cup hot water, 1 tablespoon at a time. Stir constantly until mixture goes back together. Recipe Adapted from: LandOLakes Photos by: Diane Baker for Canning and Cooking at Home
0 Comments
Your comment will be posted after it is approved.
Leave a Reply. |


